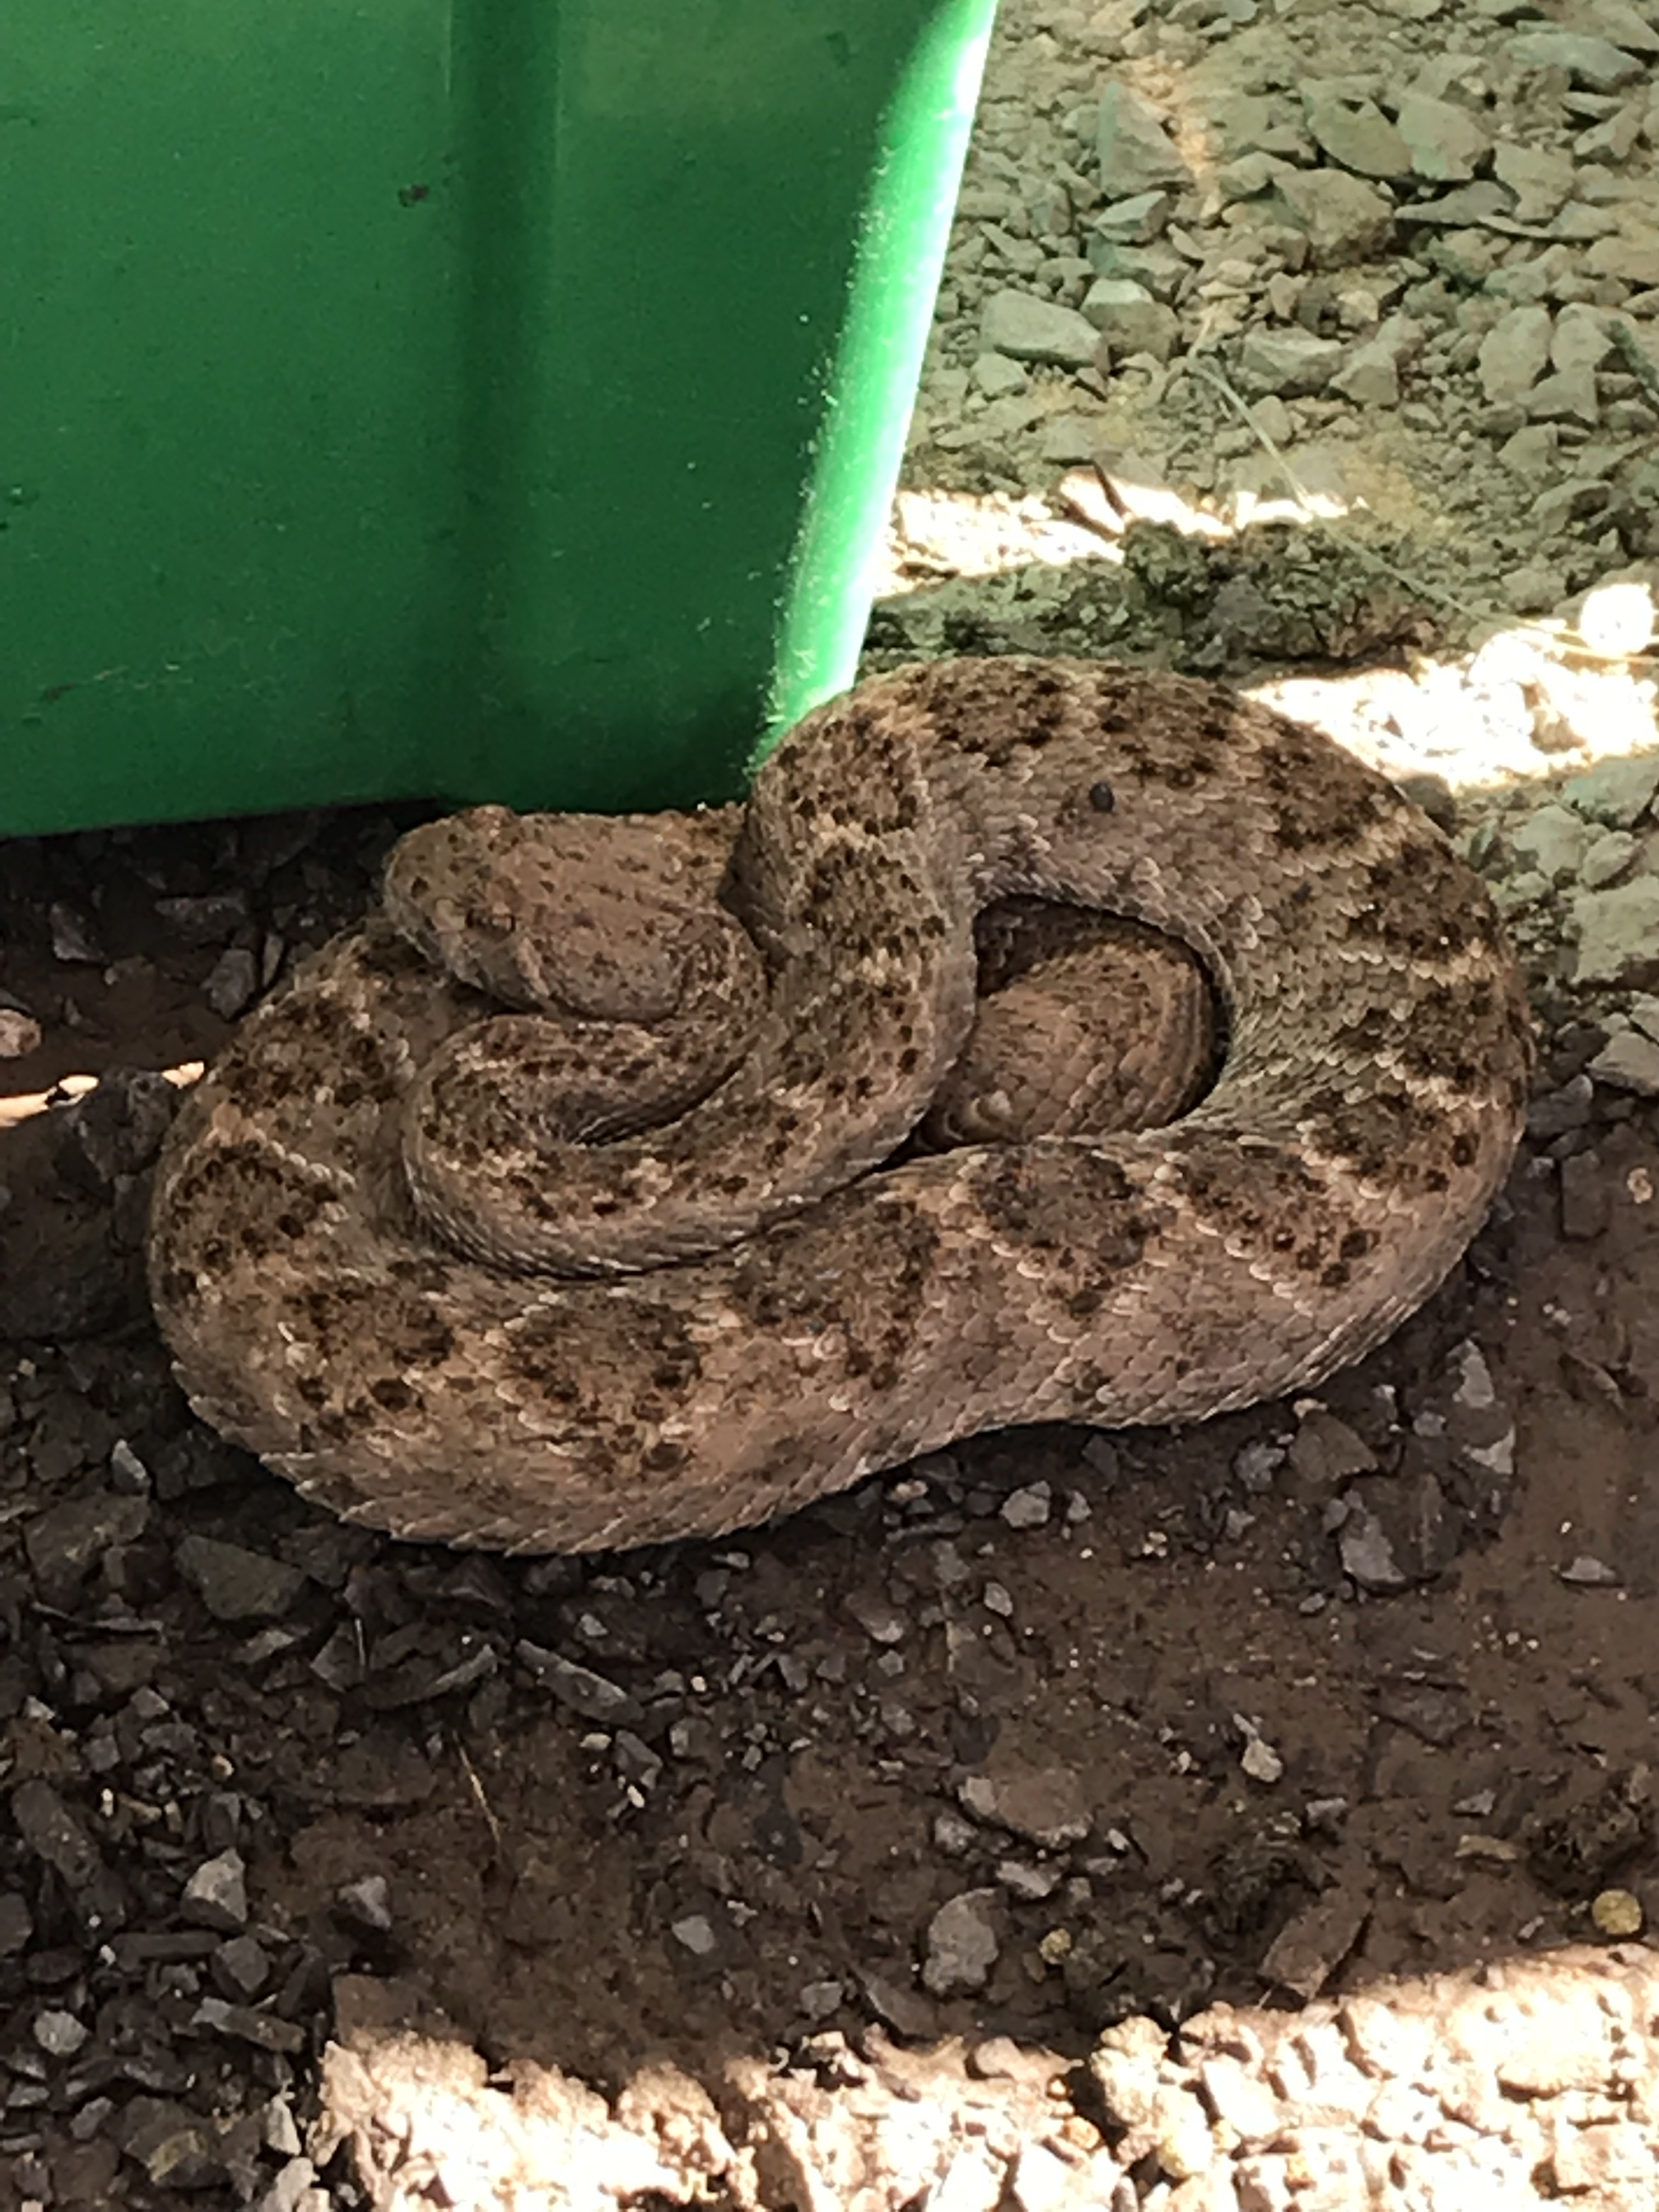
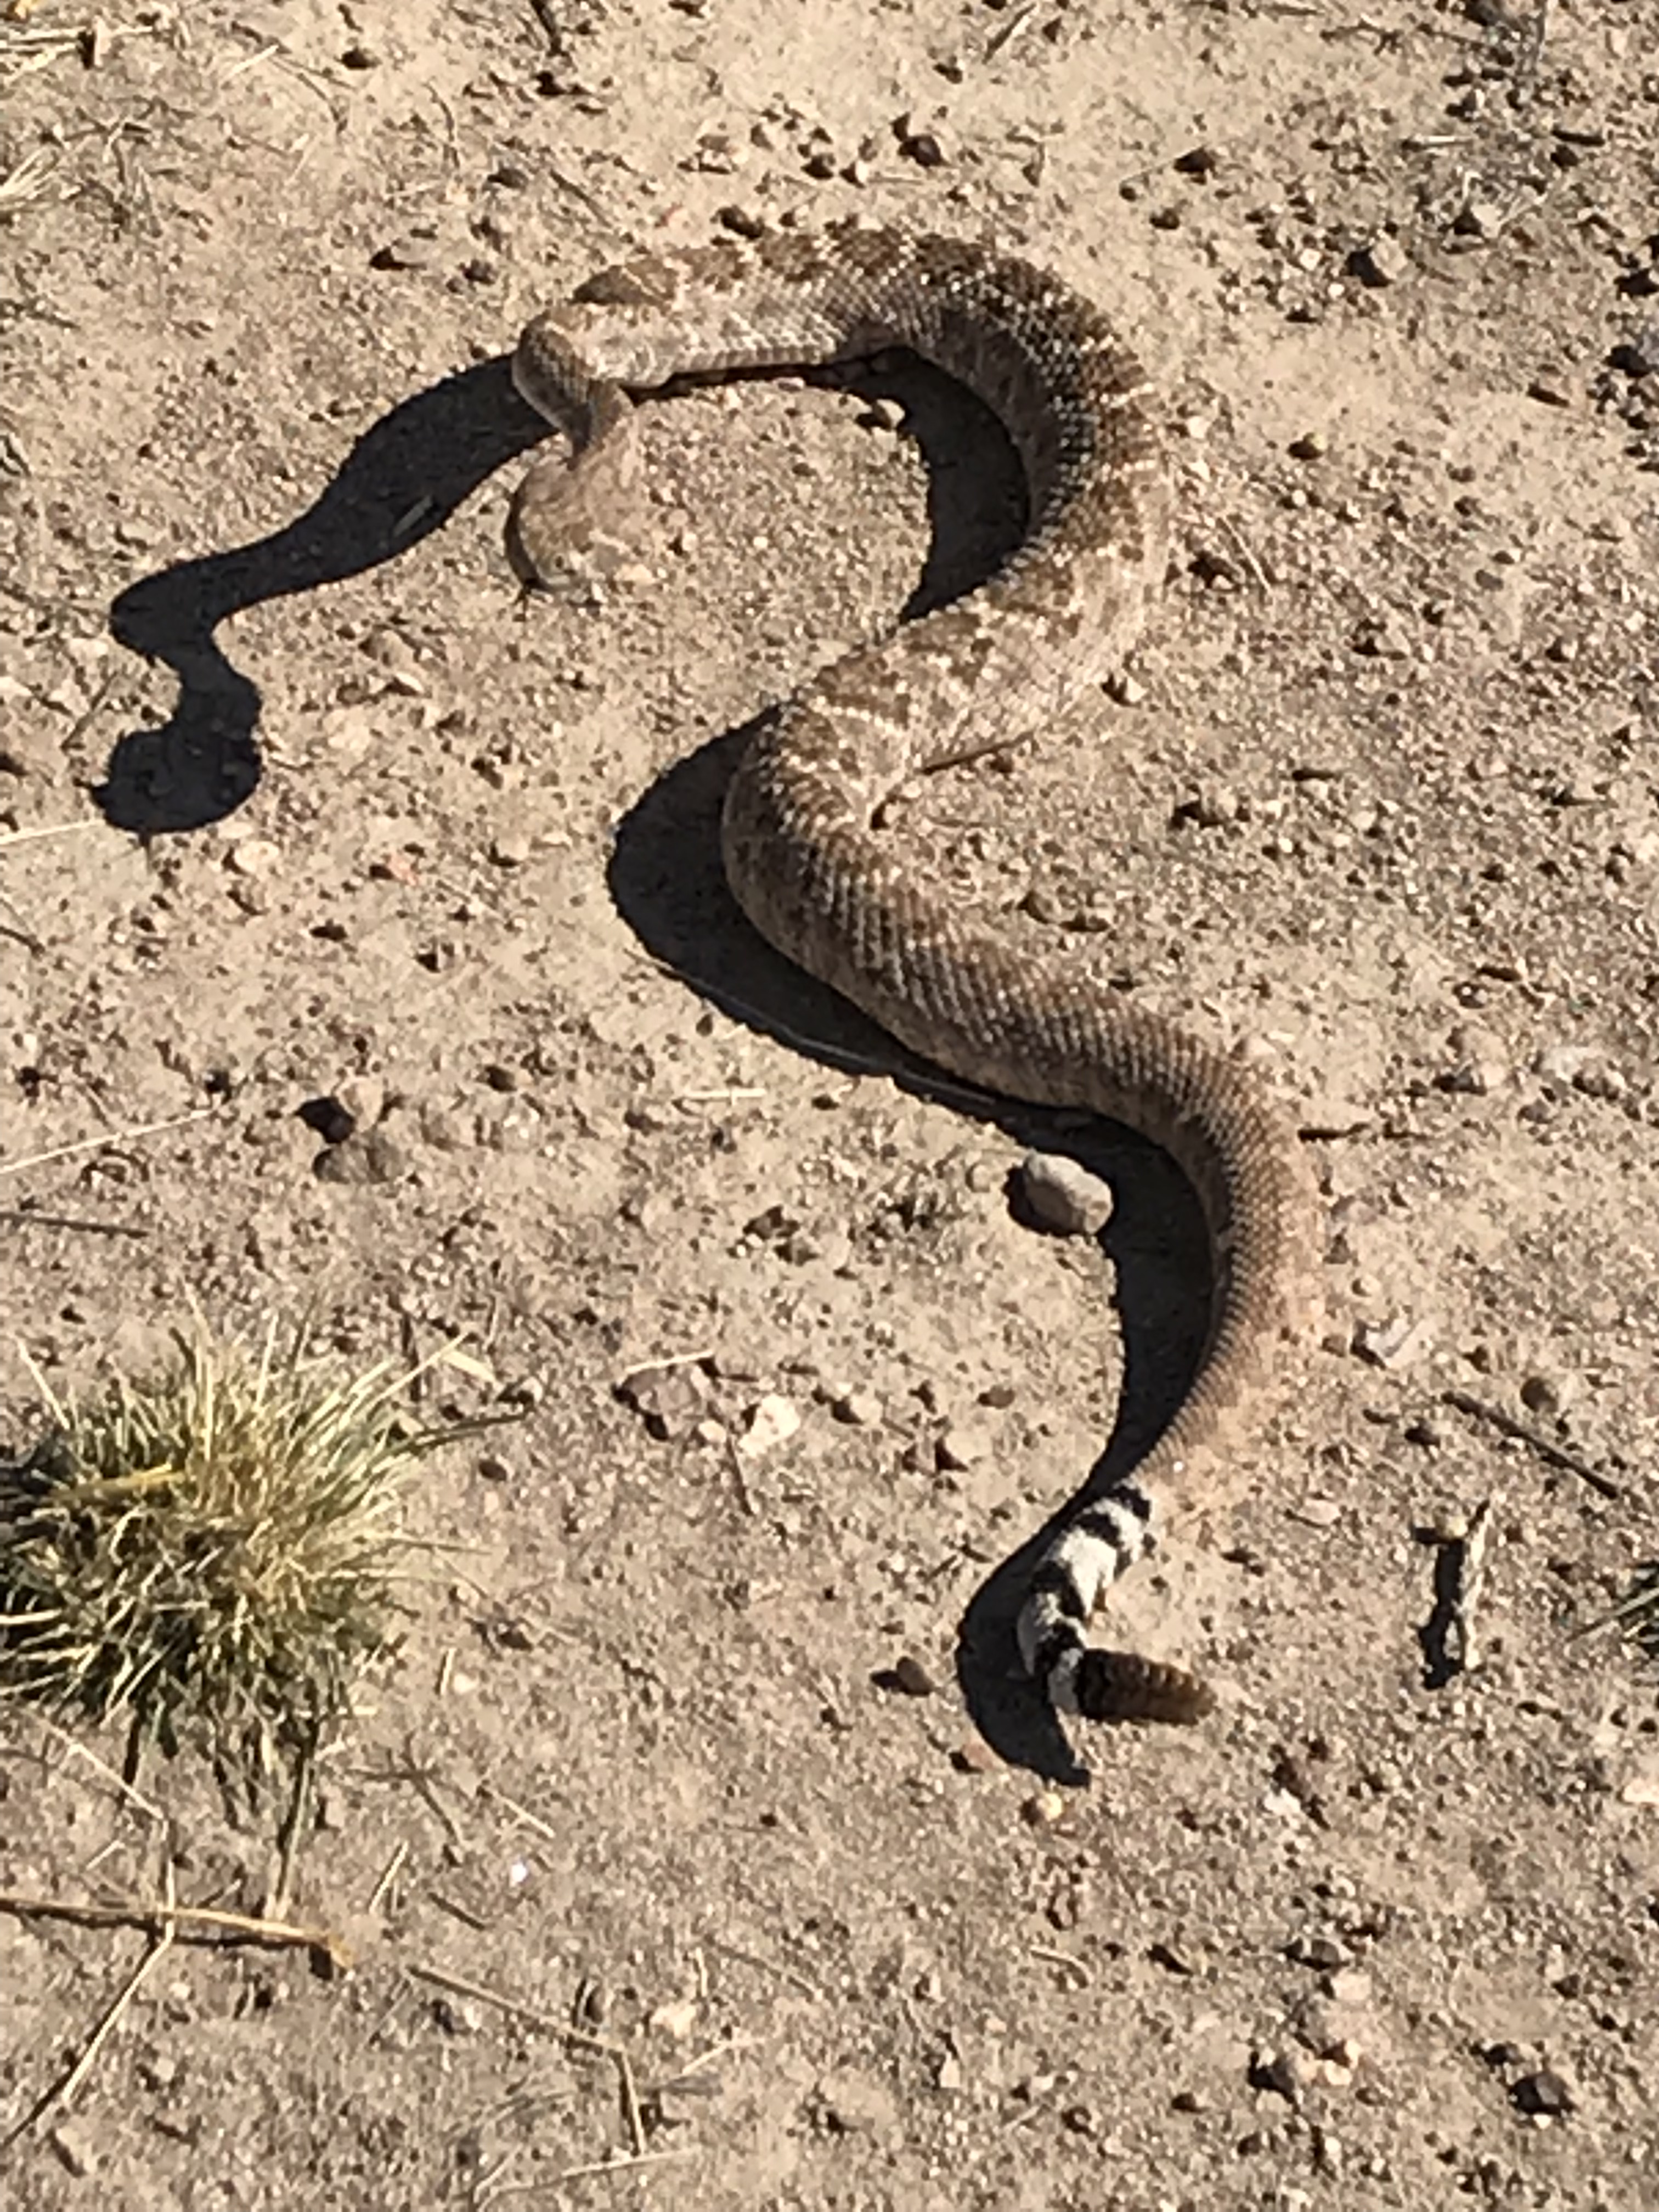
Shadow, our trusty nitwit Pomsky, has alerted on two snakes within the past month or so. It is early in the season so there will be more. The first is a Sonoran Gopher Snake, hiding under our shipping container. The second is a Western Diamondback Rattlesnake.
I know it’s been a minute, but we’re still here. I’m taking over the blog, though Cary will be providing input and chiming in from time to time. Thanks for stopping by – Cheryl
As promised, a second blog entry in quick succession.
Anyone notice the new title?
Yep, time to finally start putting dirt in bags.
Before I get into the pictures taken of the build process and associated commentary, let me share that during my visit to Michigan, by brother introduced me to Amazon’s echo line and using Alexa to control them via voice commands. As Amazon Prime Days where were soon to follow, I did some research and decided to jump in with both feet. I got an echo, echo dot, and a firestick for the TV. I also got a package of 4 individual outlets that can be controlled via a cloud based app and can be integrated with Amazon’s Alexa. Setup of the Echo devices was pretty easy as was the setup of the outlets. Even the integration between the outlets and Alexa was generally well documented and easy to perform. So, in short order, I have smart speakers that I can control from my phone that takes voice commands. I can issue verbal commands to turn on and off various fans located around the trailer. I can schedule the fans to turn on/off based on time of day or simply set a timer some time in the future to turn the fan (outlet) on or off. If I’m not home, I can use my phone to control the outlets. Pretty cool setup. I’m using fans at the moment, but the possibilities numerous. Rather than continuing to buy outlets, I will likely try to do an Arduino, RaspberryPi, or Pycomm project to control outlets and integrate that with Alexa. Put that on my to-do list for evenings this winter. The purpose of all this is I want to automate the house as much as I can. From being able to turn fans on and off, control the speed of fans, open and close windows, turn lights on and off, and any number of other things I can think of. Think of it. I can automate the operation of fans and windows based on time of day, temperature inside, temperature outside, whether rain is being blown in an open window, and how much battery power we have available. Of course we would be able to override the automation should we wish. Naturally, Alexa would be integrated to provide status and execute any over rides desired via verbal commands and the Alexa phone application. Nerdy I know. Guess where I’m going to test these idea’s out. Yep, the utility building. 🙂
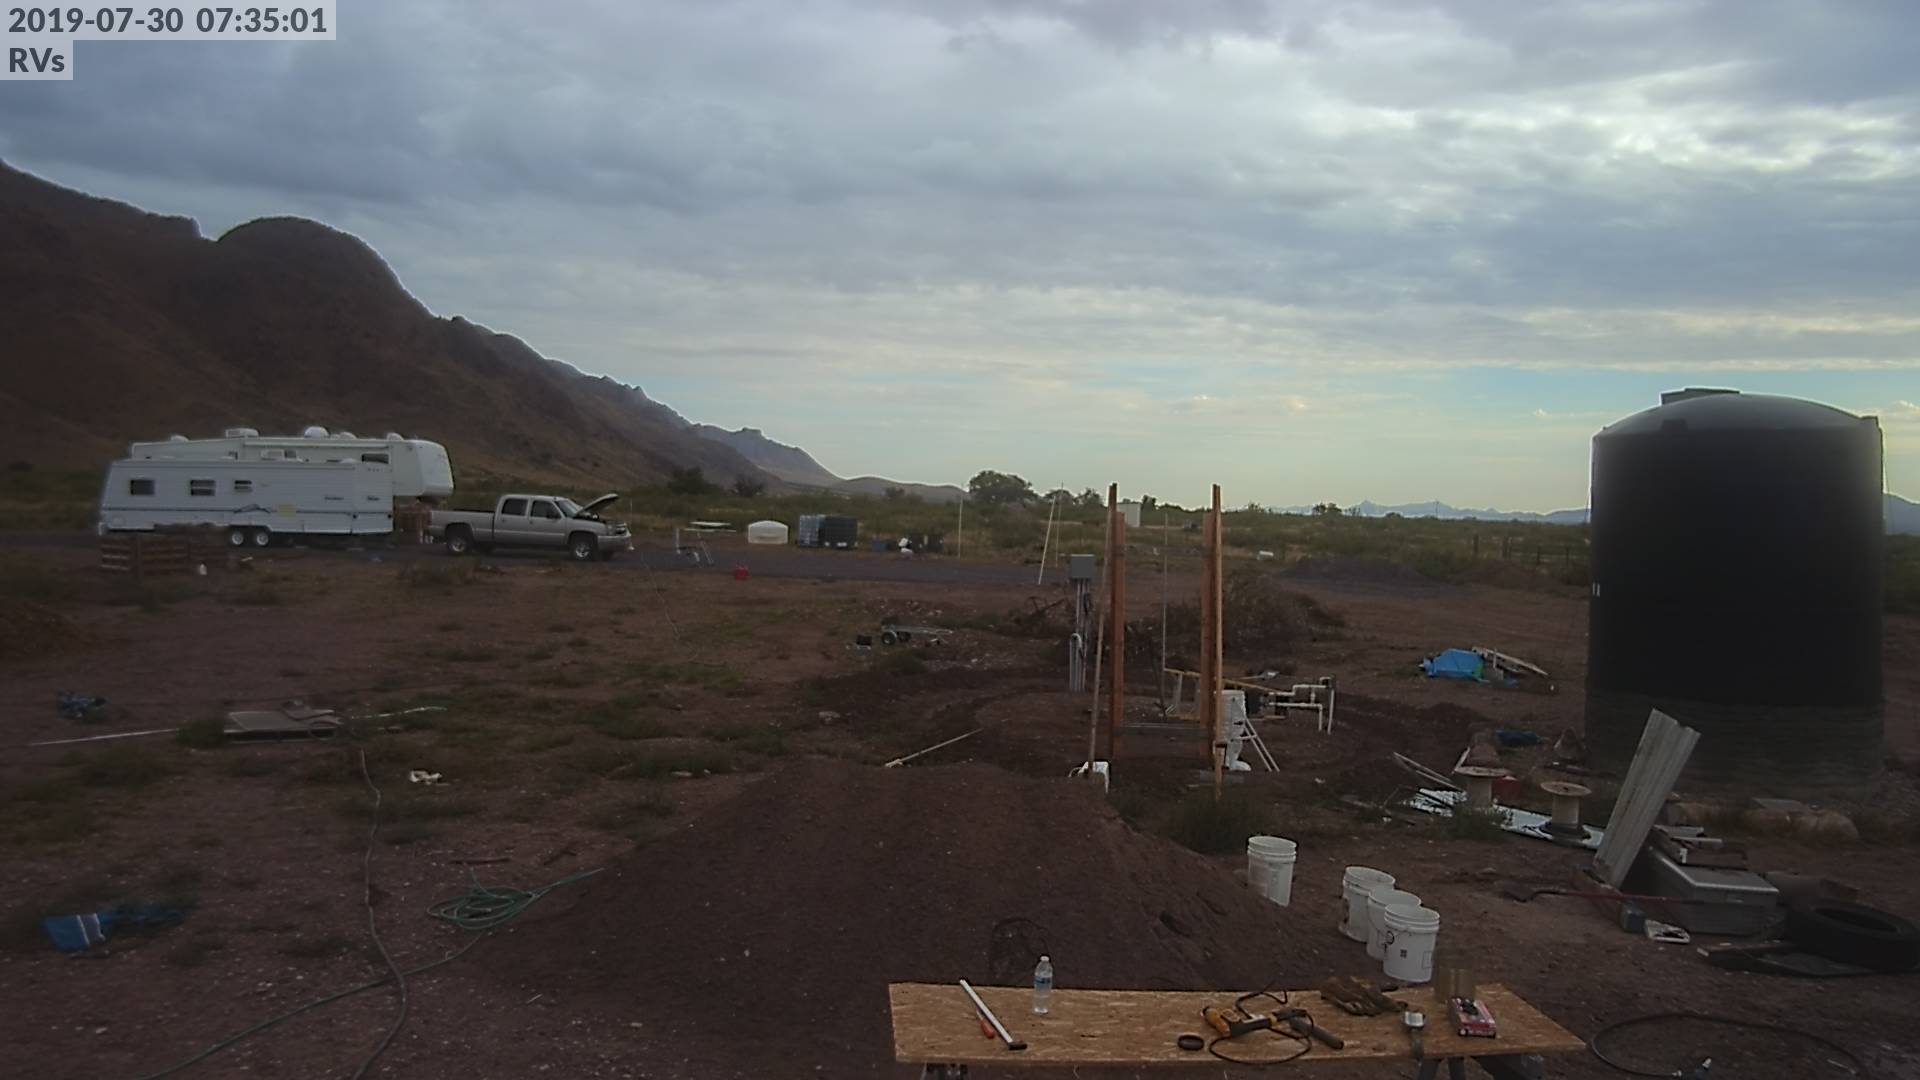
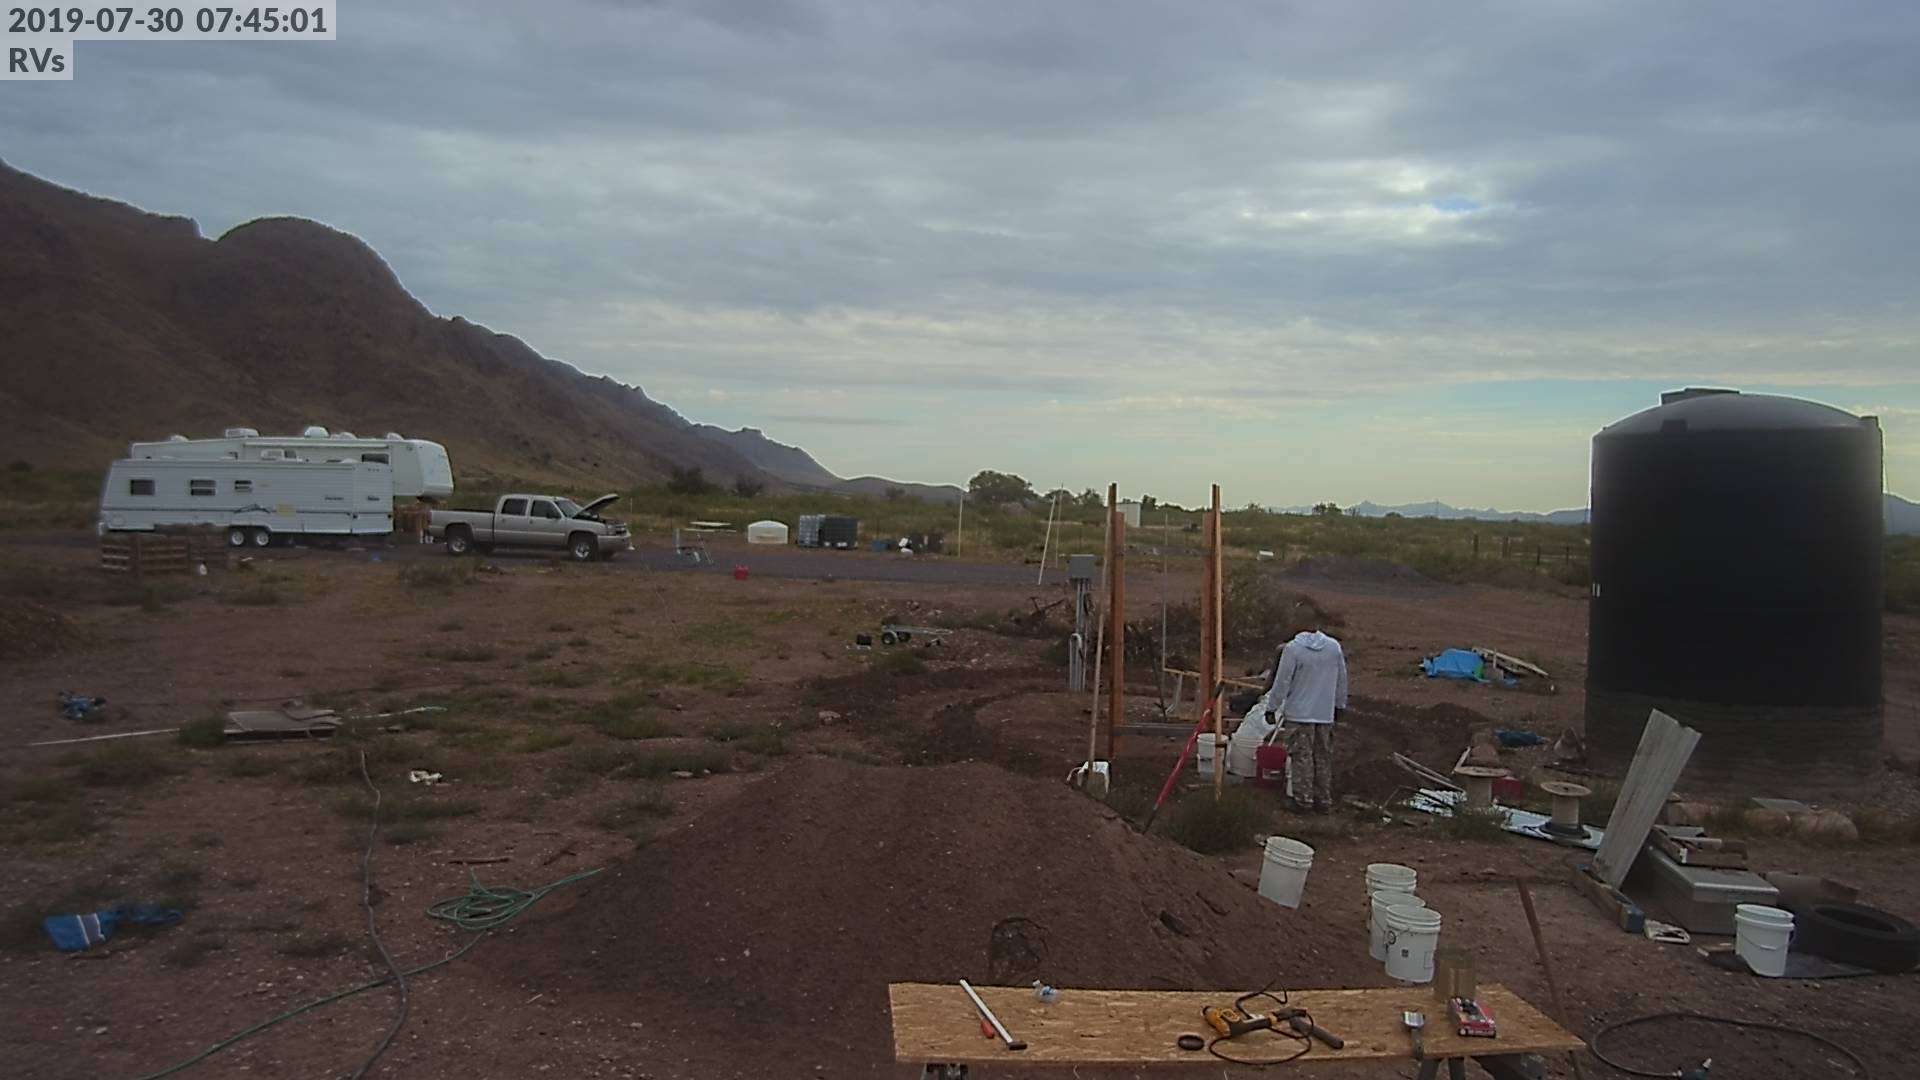
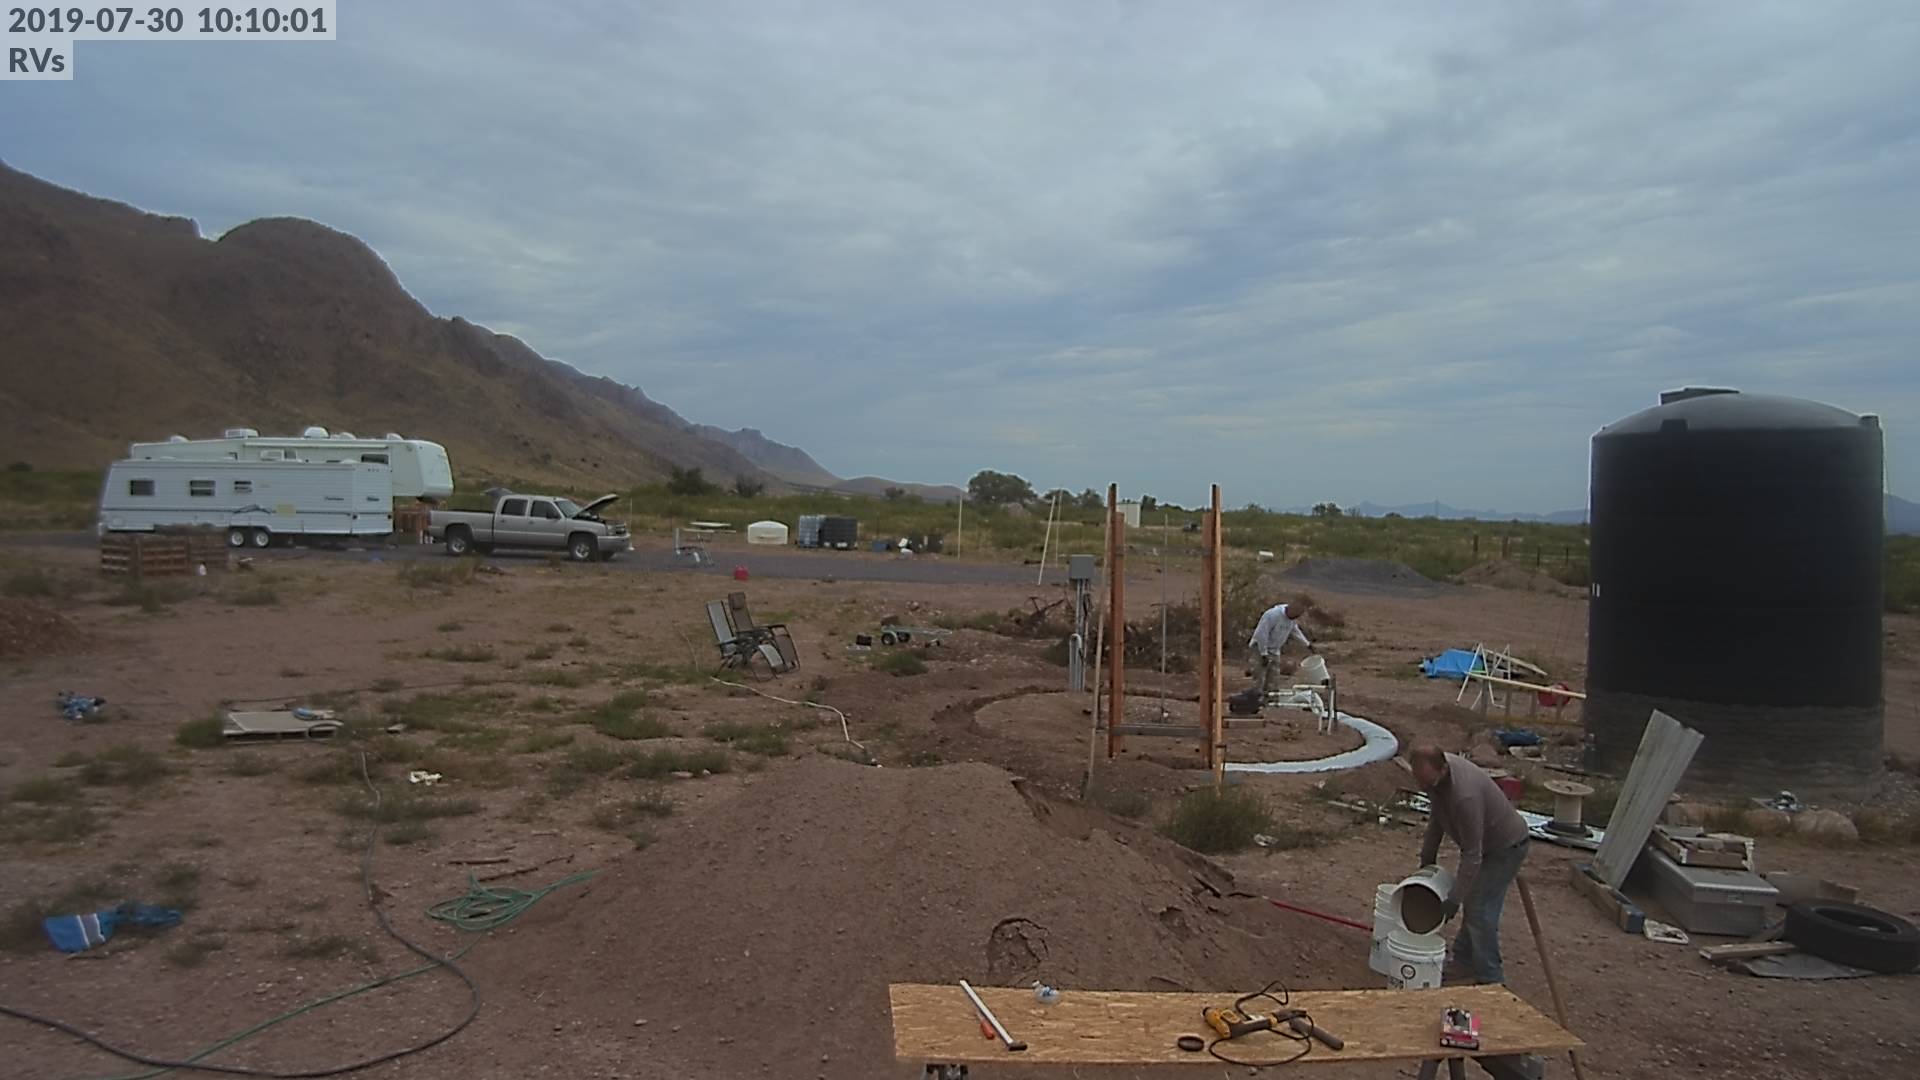
And now, what we’ve been all waiting two years for: shoveling dirt!
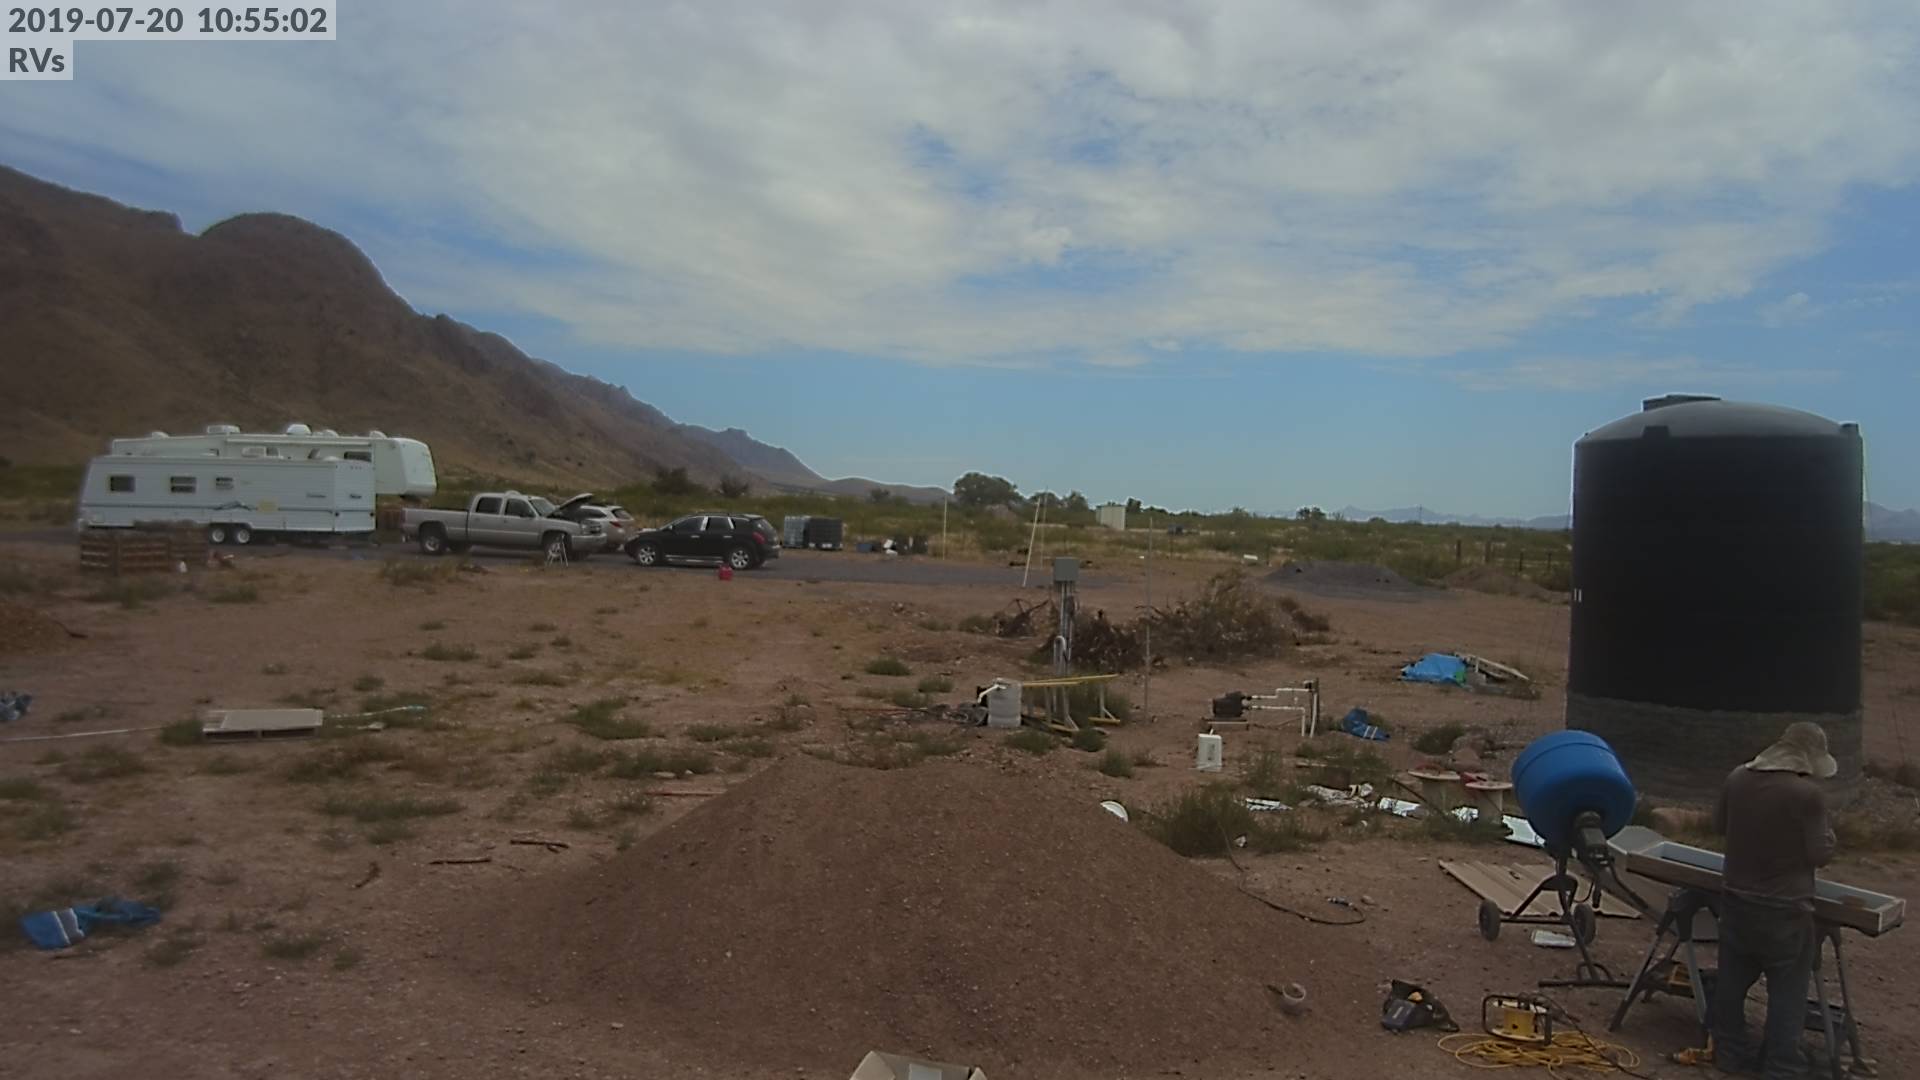
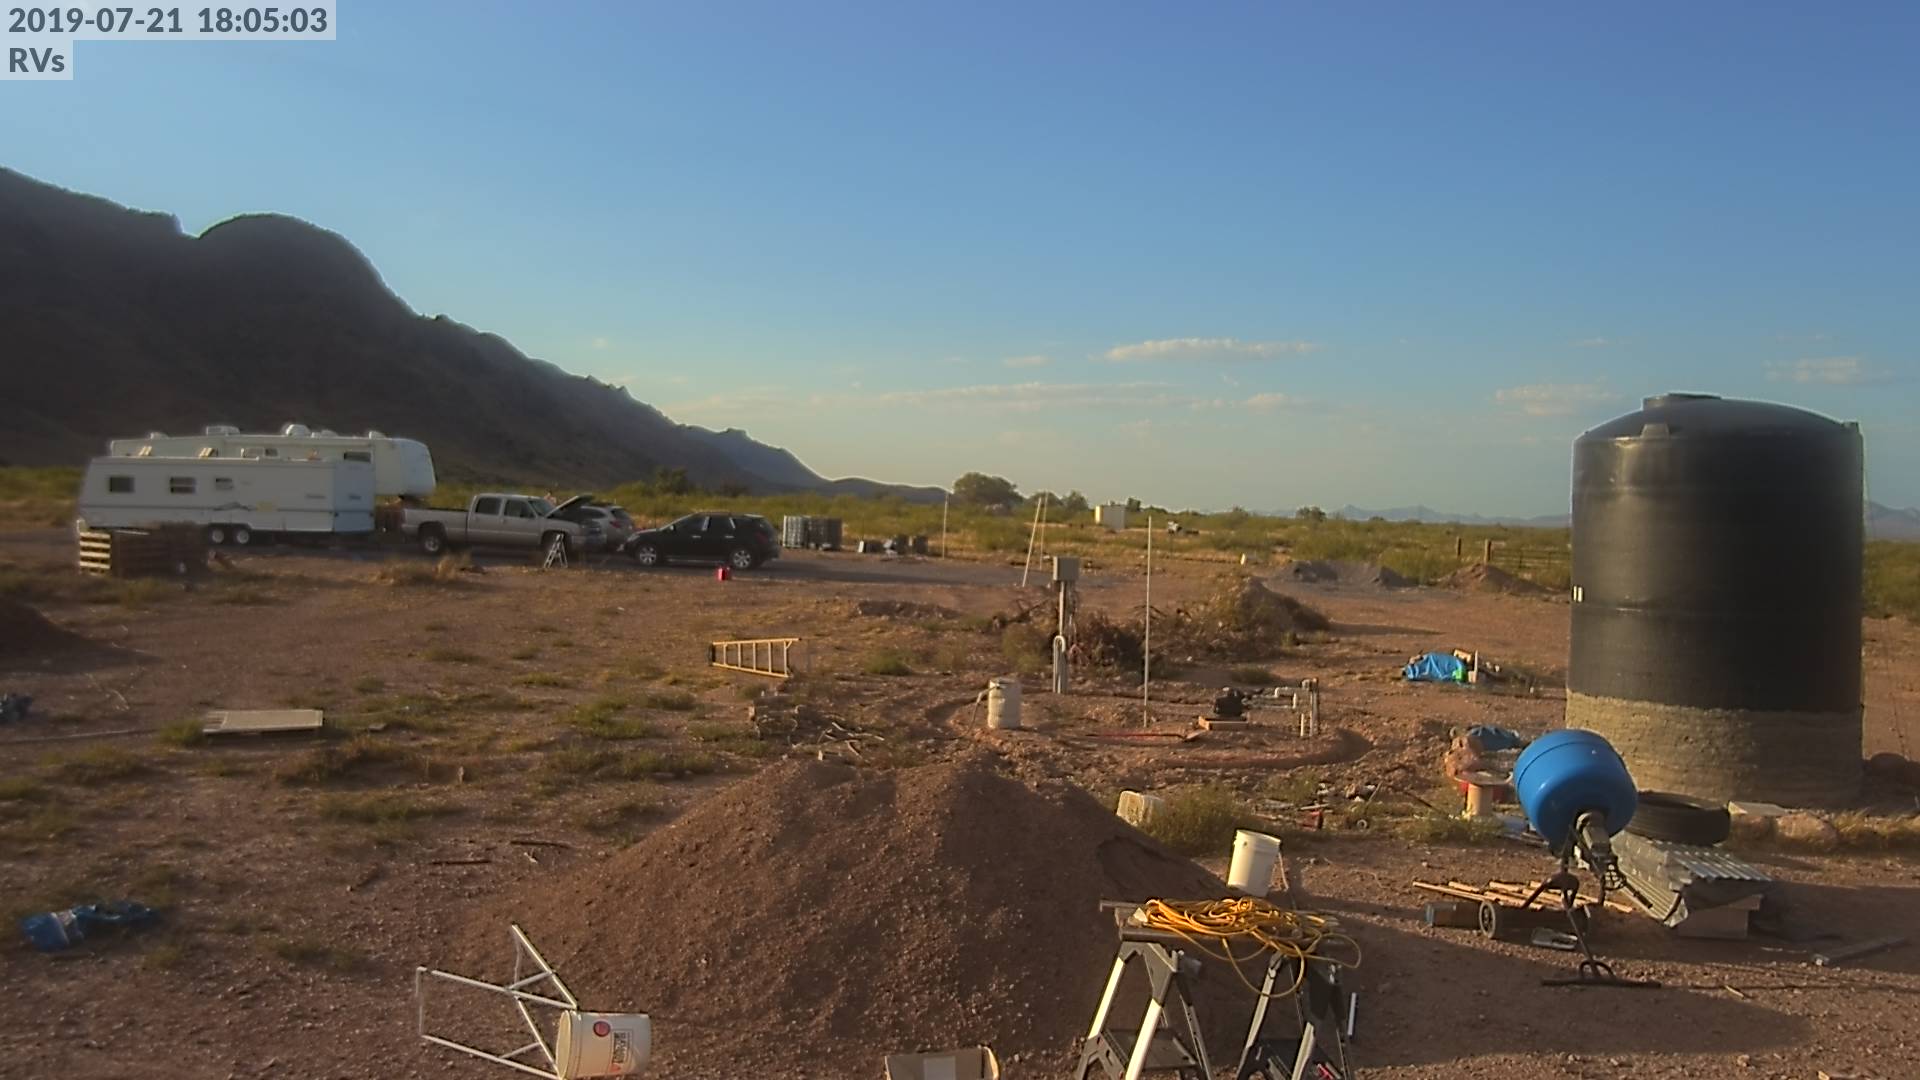
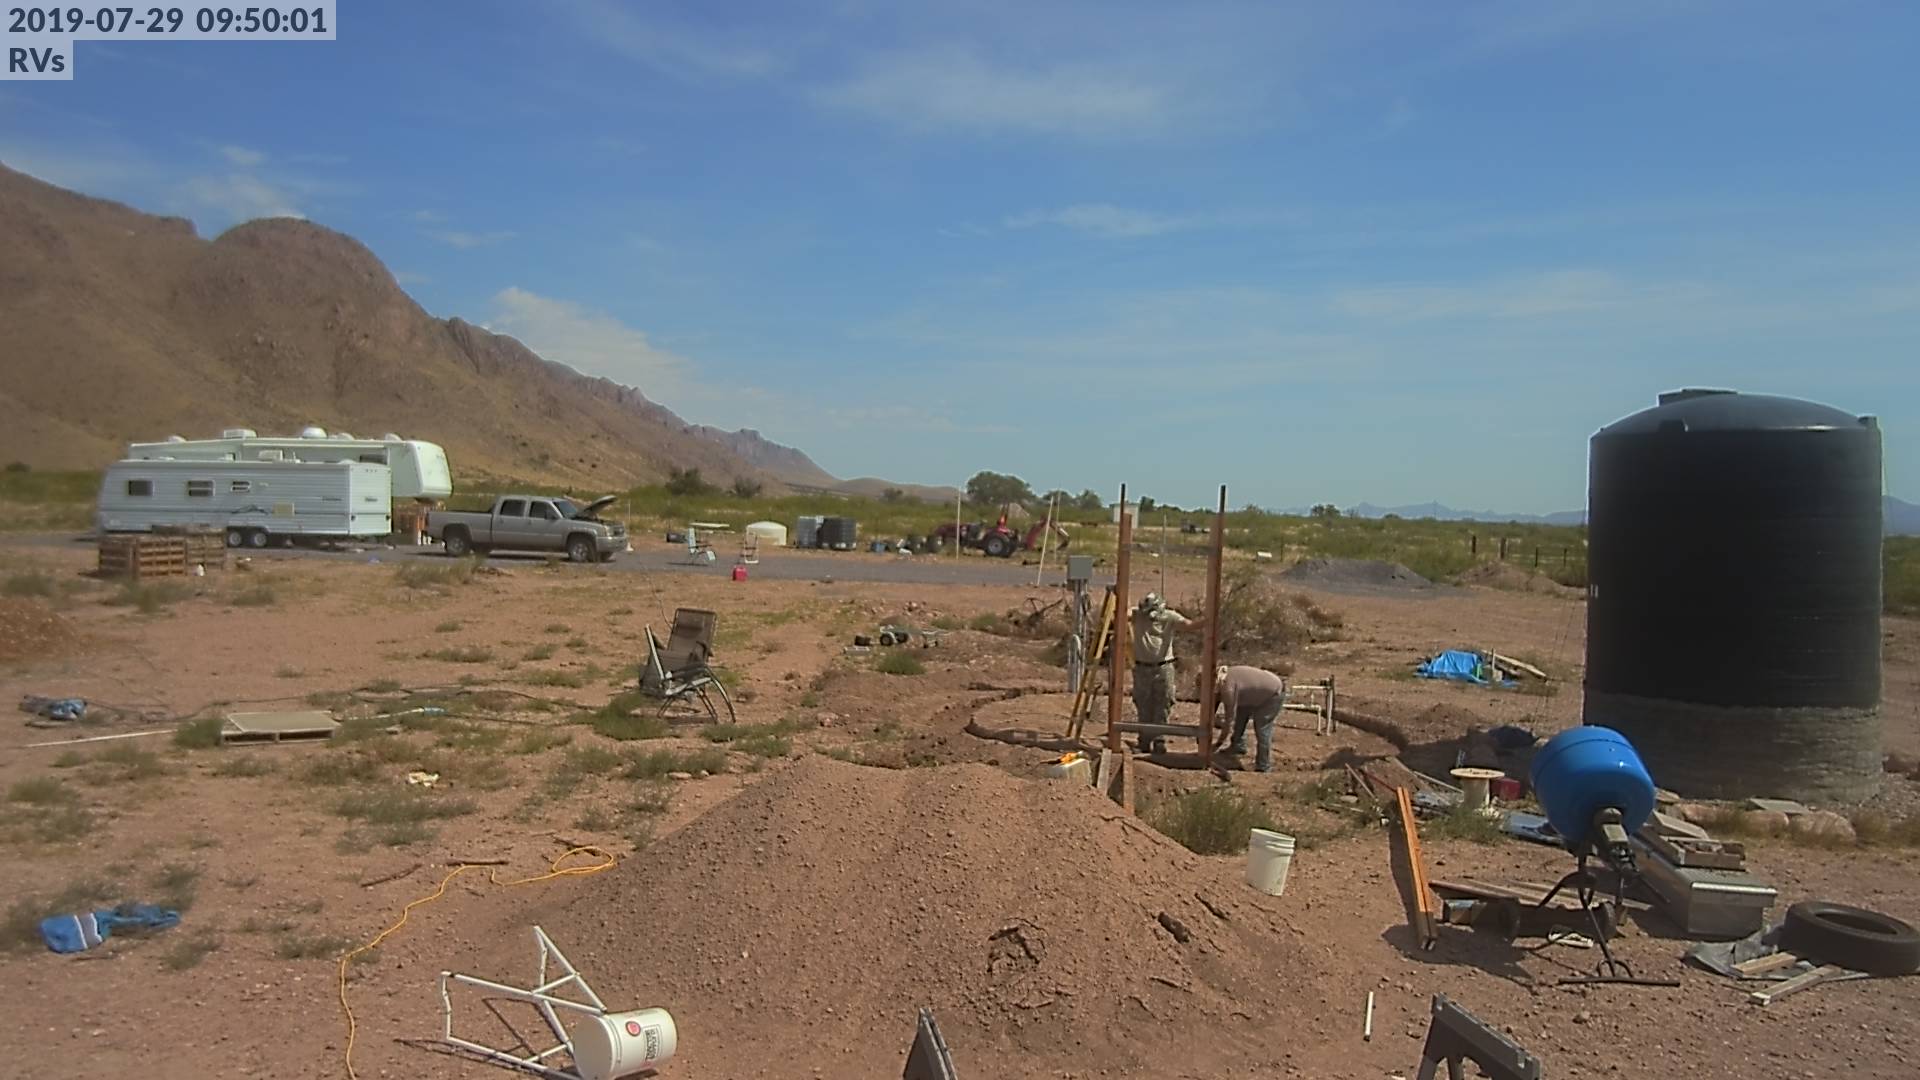
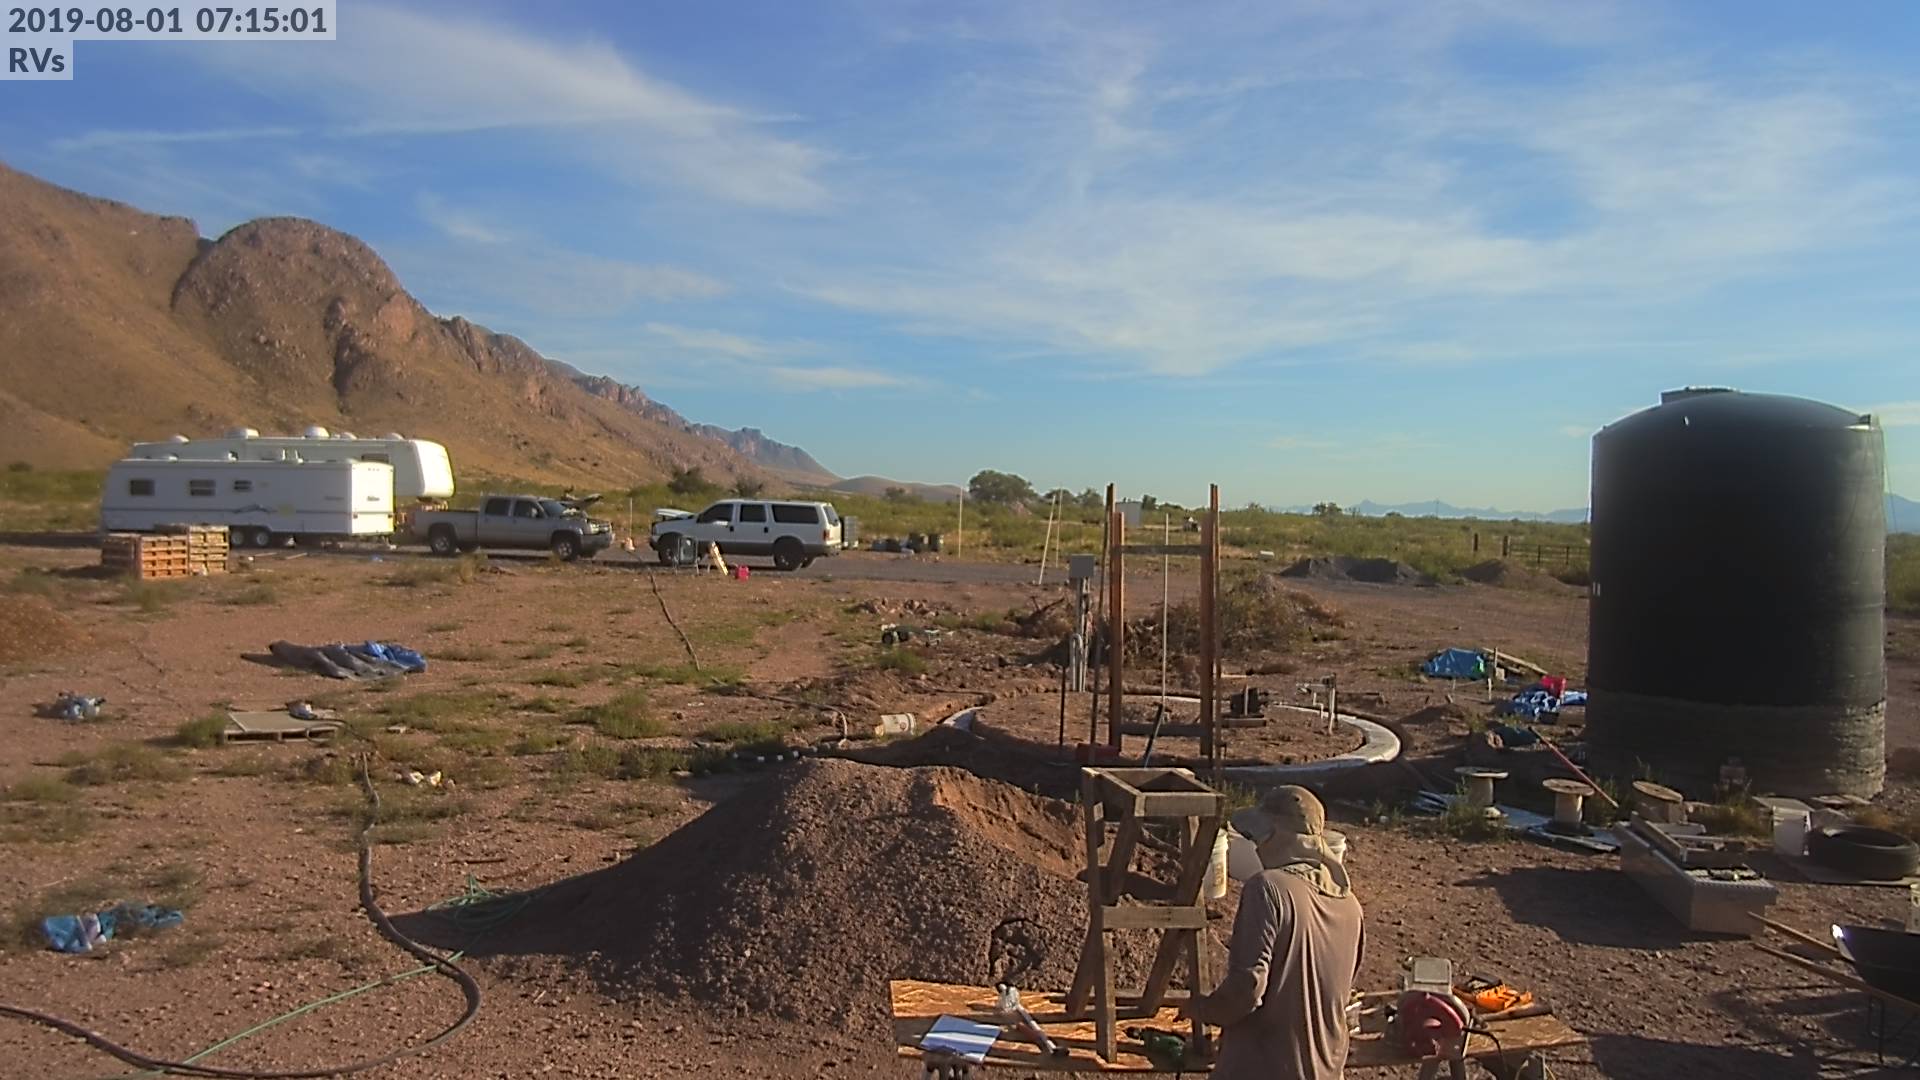
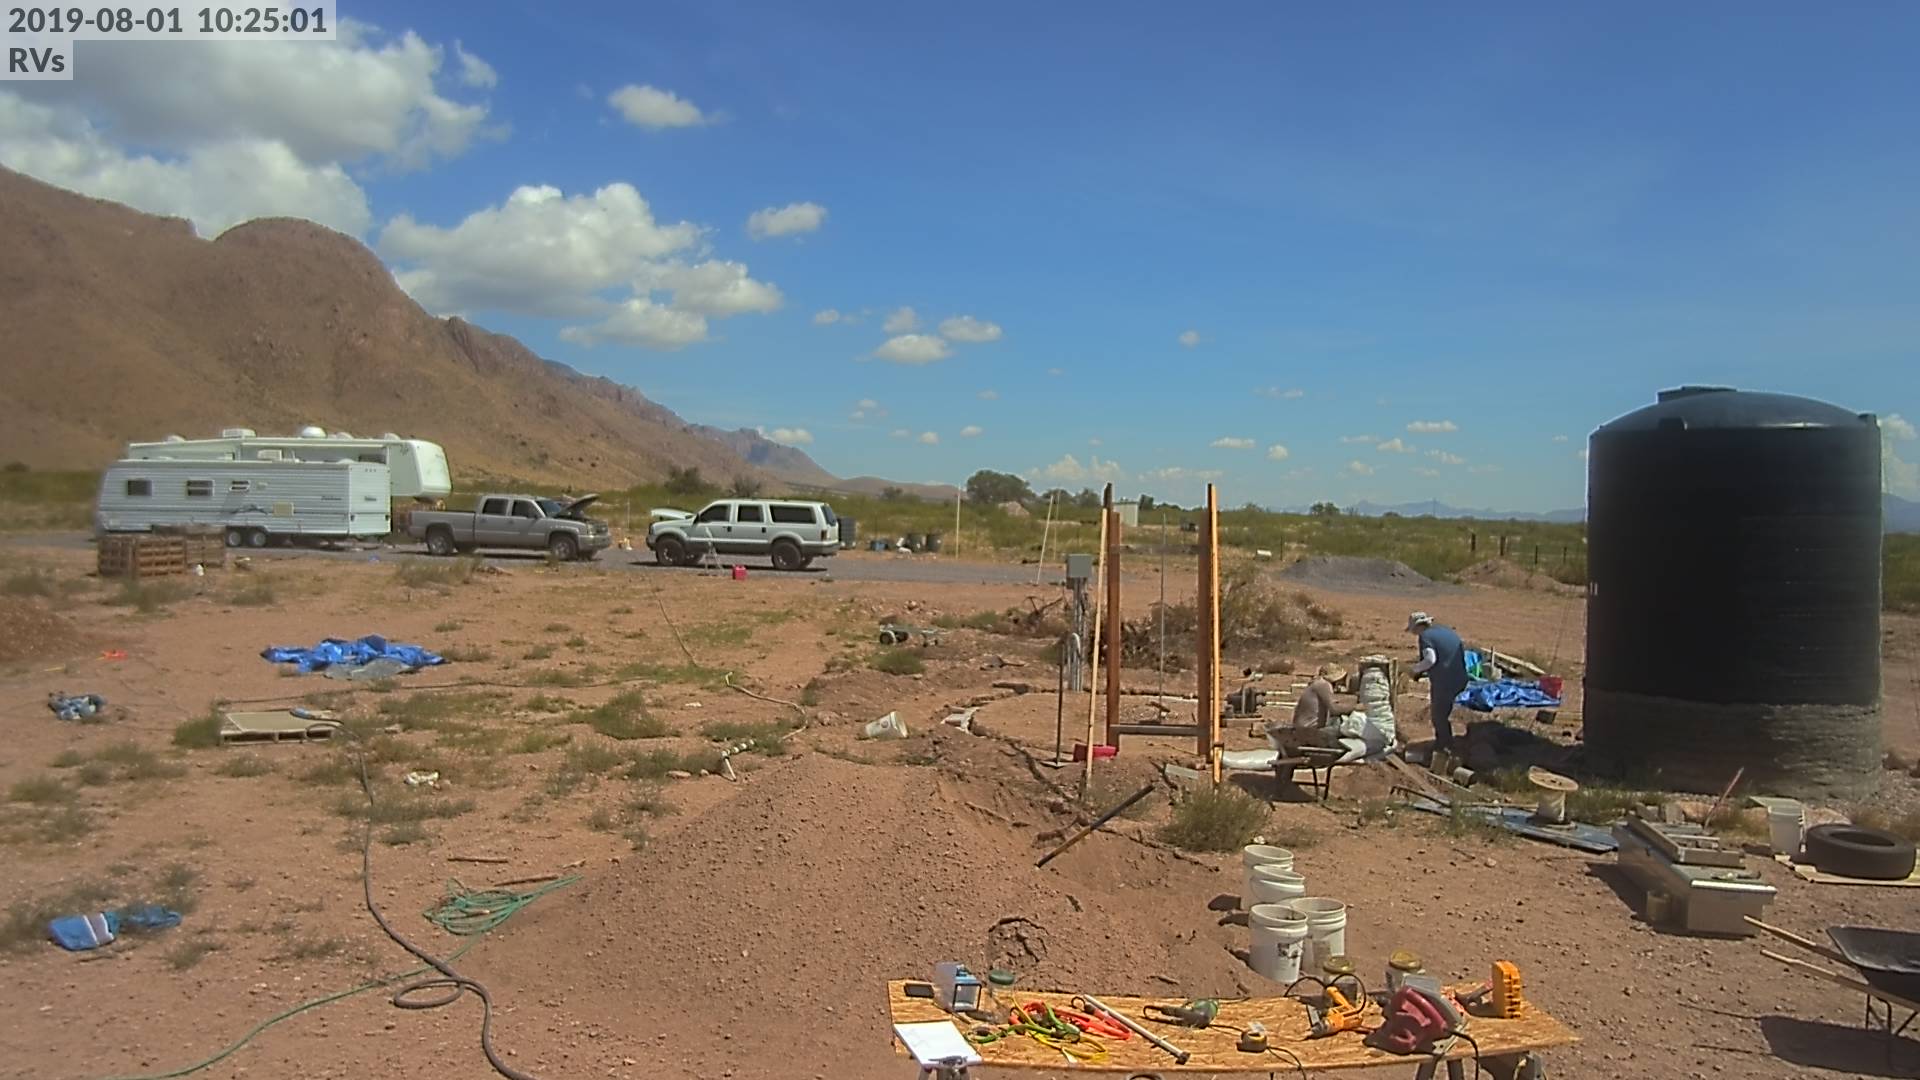
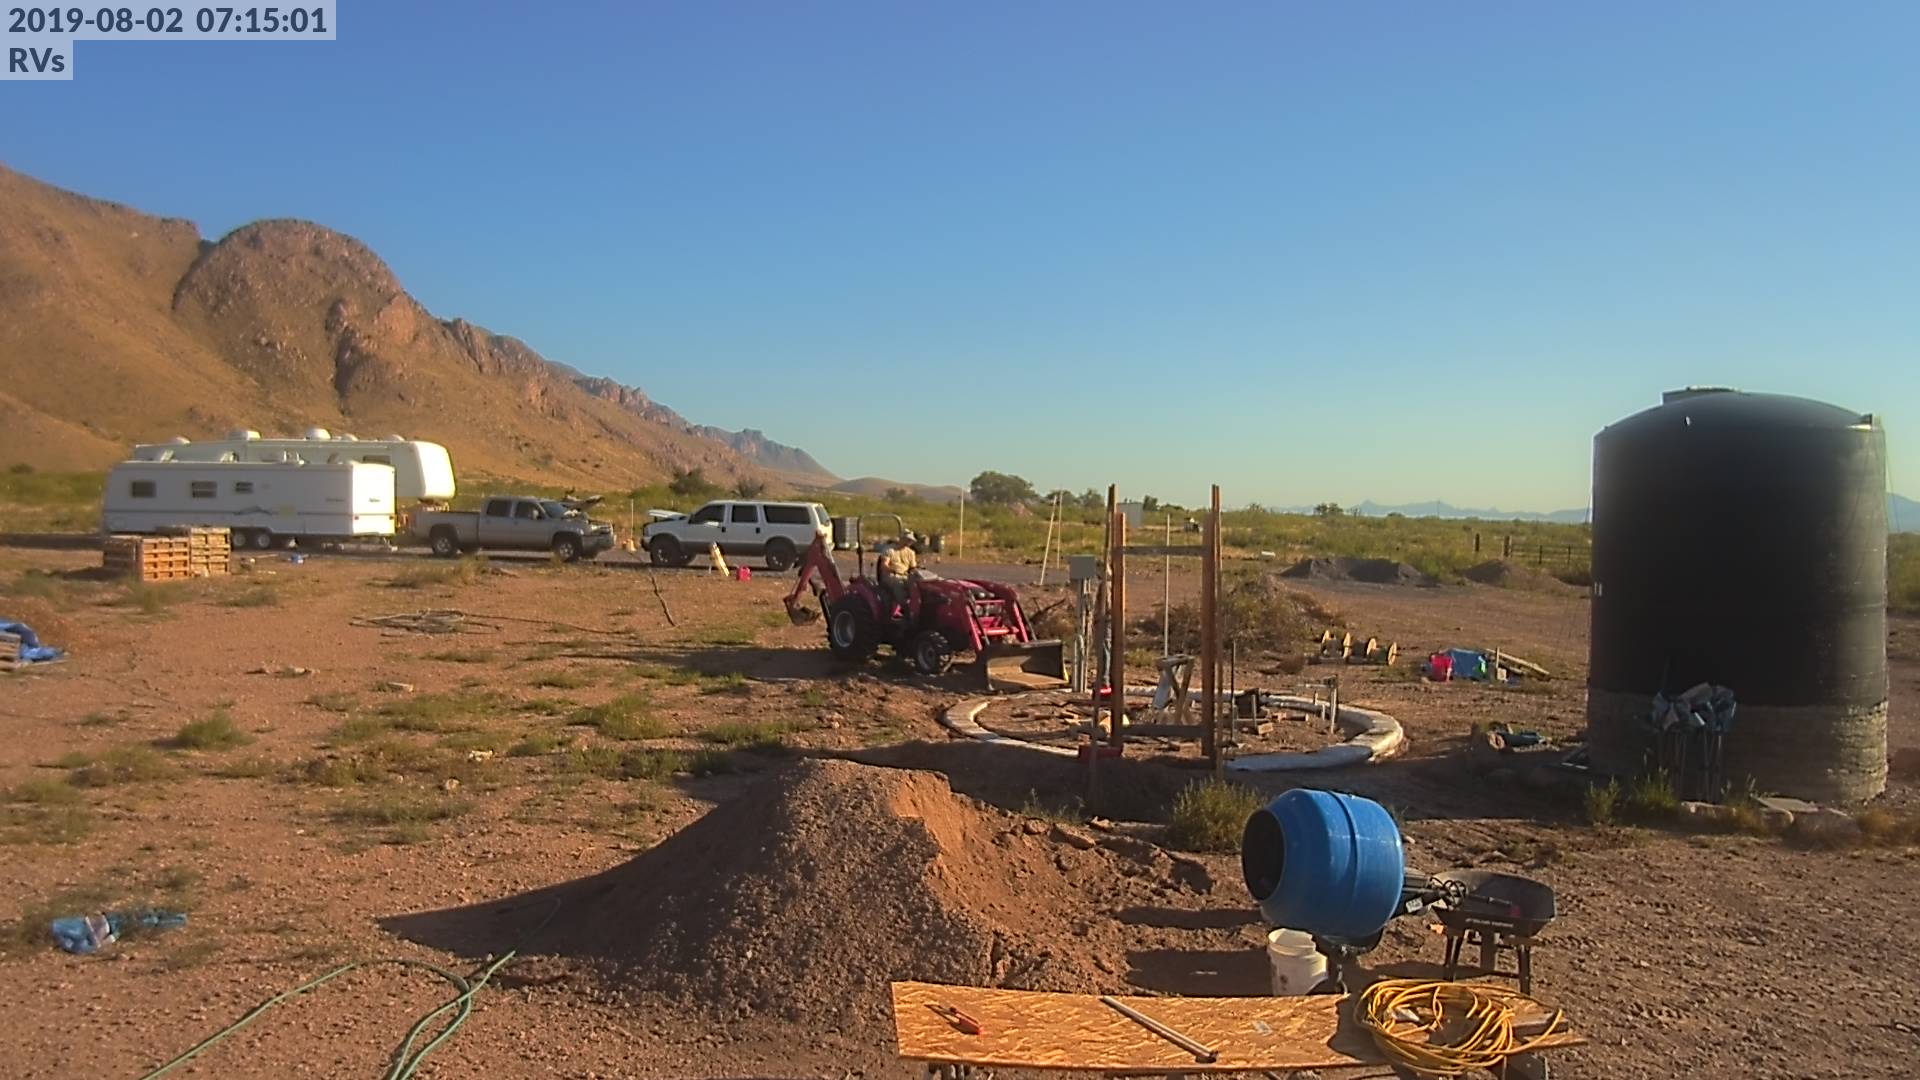
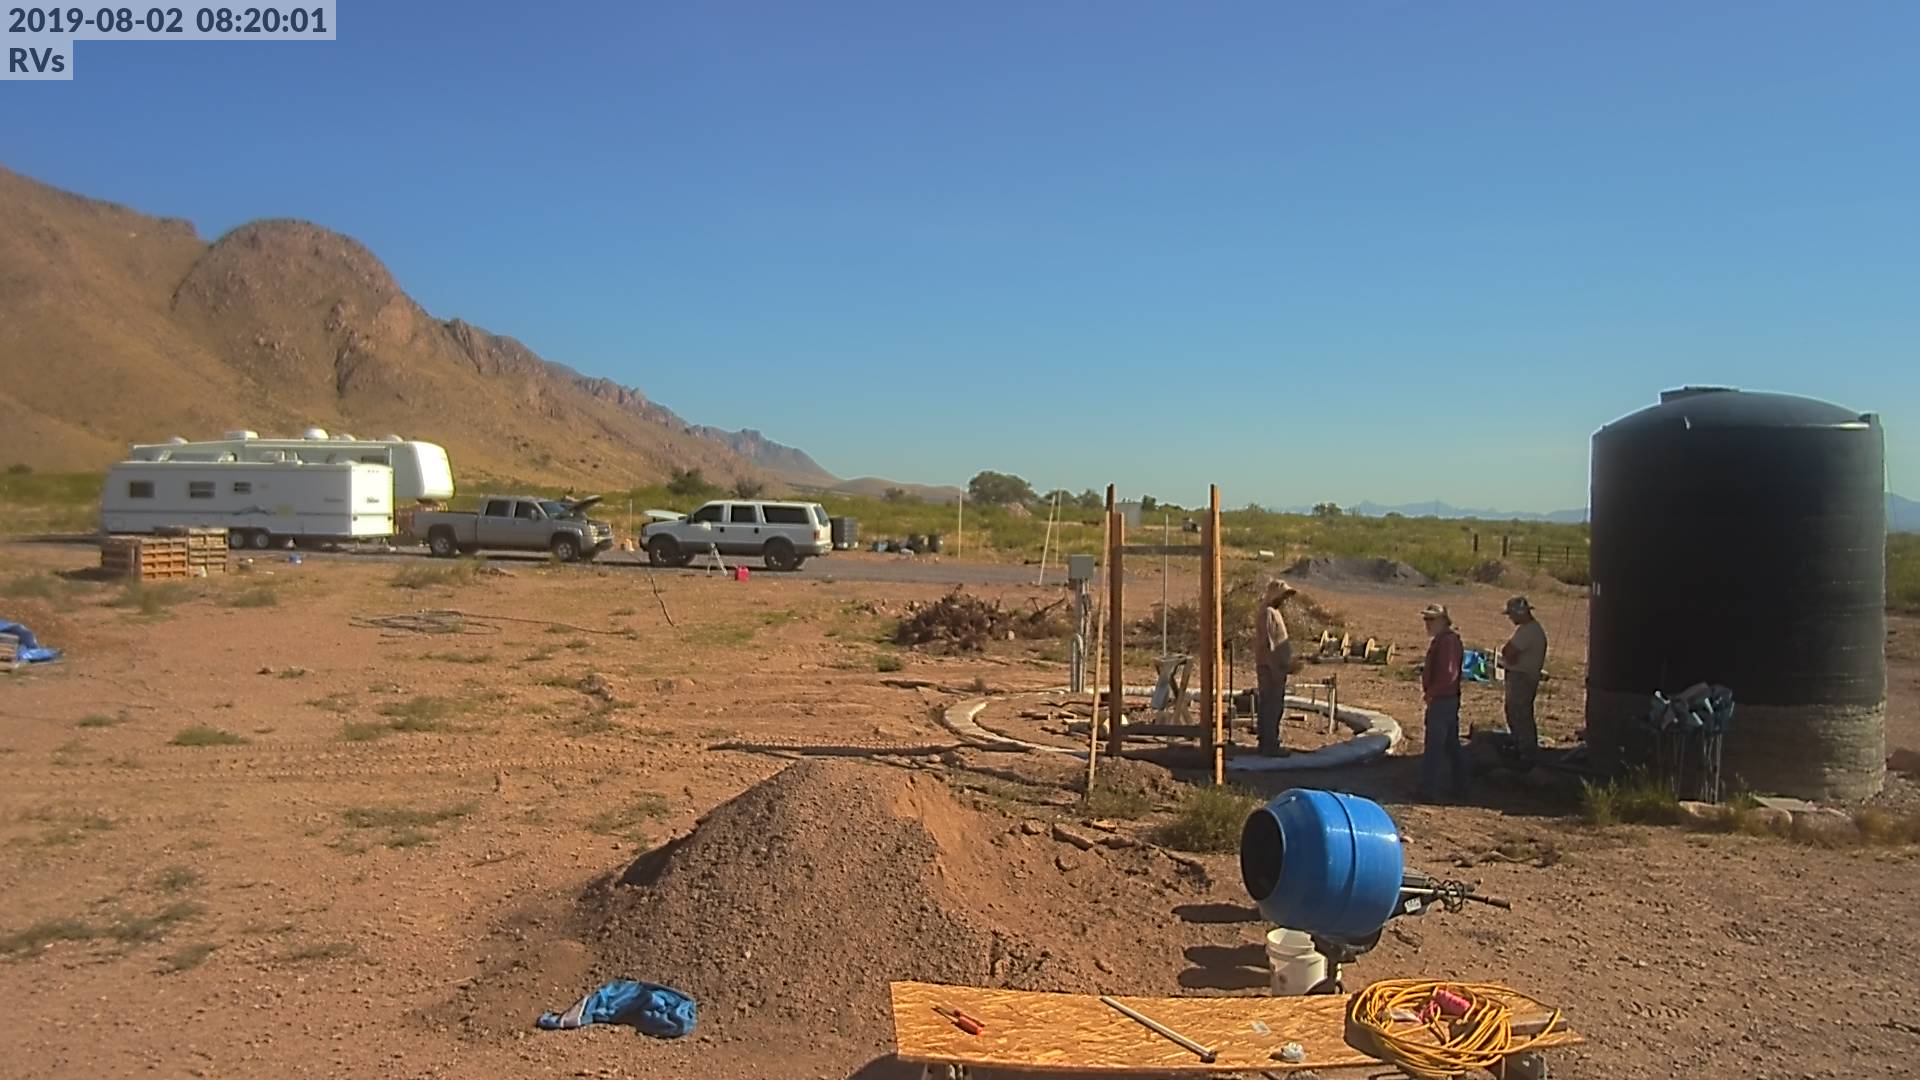
Step one is to dig up some dirt. I’m digging a hole here that in the future I envision building an earthbag + ferro-cement water take that will hold in the neighborhood of 15k-20k gallons of water. If I change my mind, I will have a lot of work to do to fill that hole back in!! That hole is going to get much deeper before I’m done. I first break the dirt loose with the backhoe. Next I scope up the dirt with the front end loader and drive it over to a dirt/rock screen where I dump it and it gets screened as it falls. Why the hell didn’t I think of this a year ago as I was hand screening yards and yards of dirt for the solar system posts, electrical ground rods, filling in the electrical / water trench between the shed, water tank, and trailers??? Would have saved months of effort. It is all about learning and refining the process. I just hope I start learning a bit quicker. 🙂 After the the pile of dirt and rock around the screen reaches a max, I move the screen out of the way, use the tractor to push all the rocks out of the way, and scoop up the now mostly screened dirt and move it to a location near the build site to be used there.
Me dumping a load of mostly screened dirt near the build site.
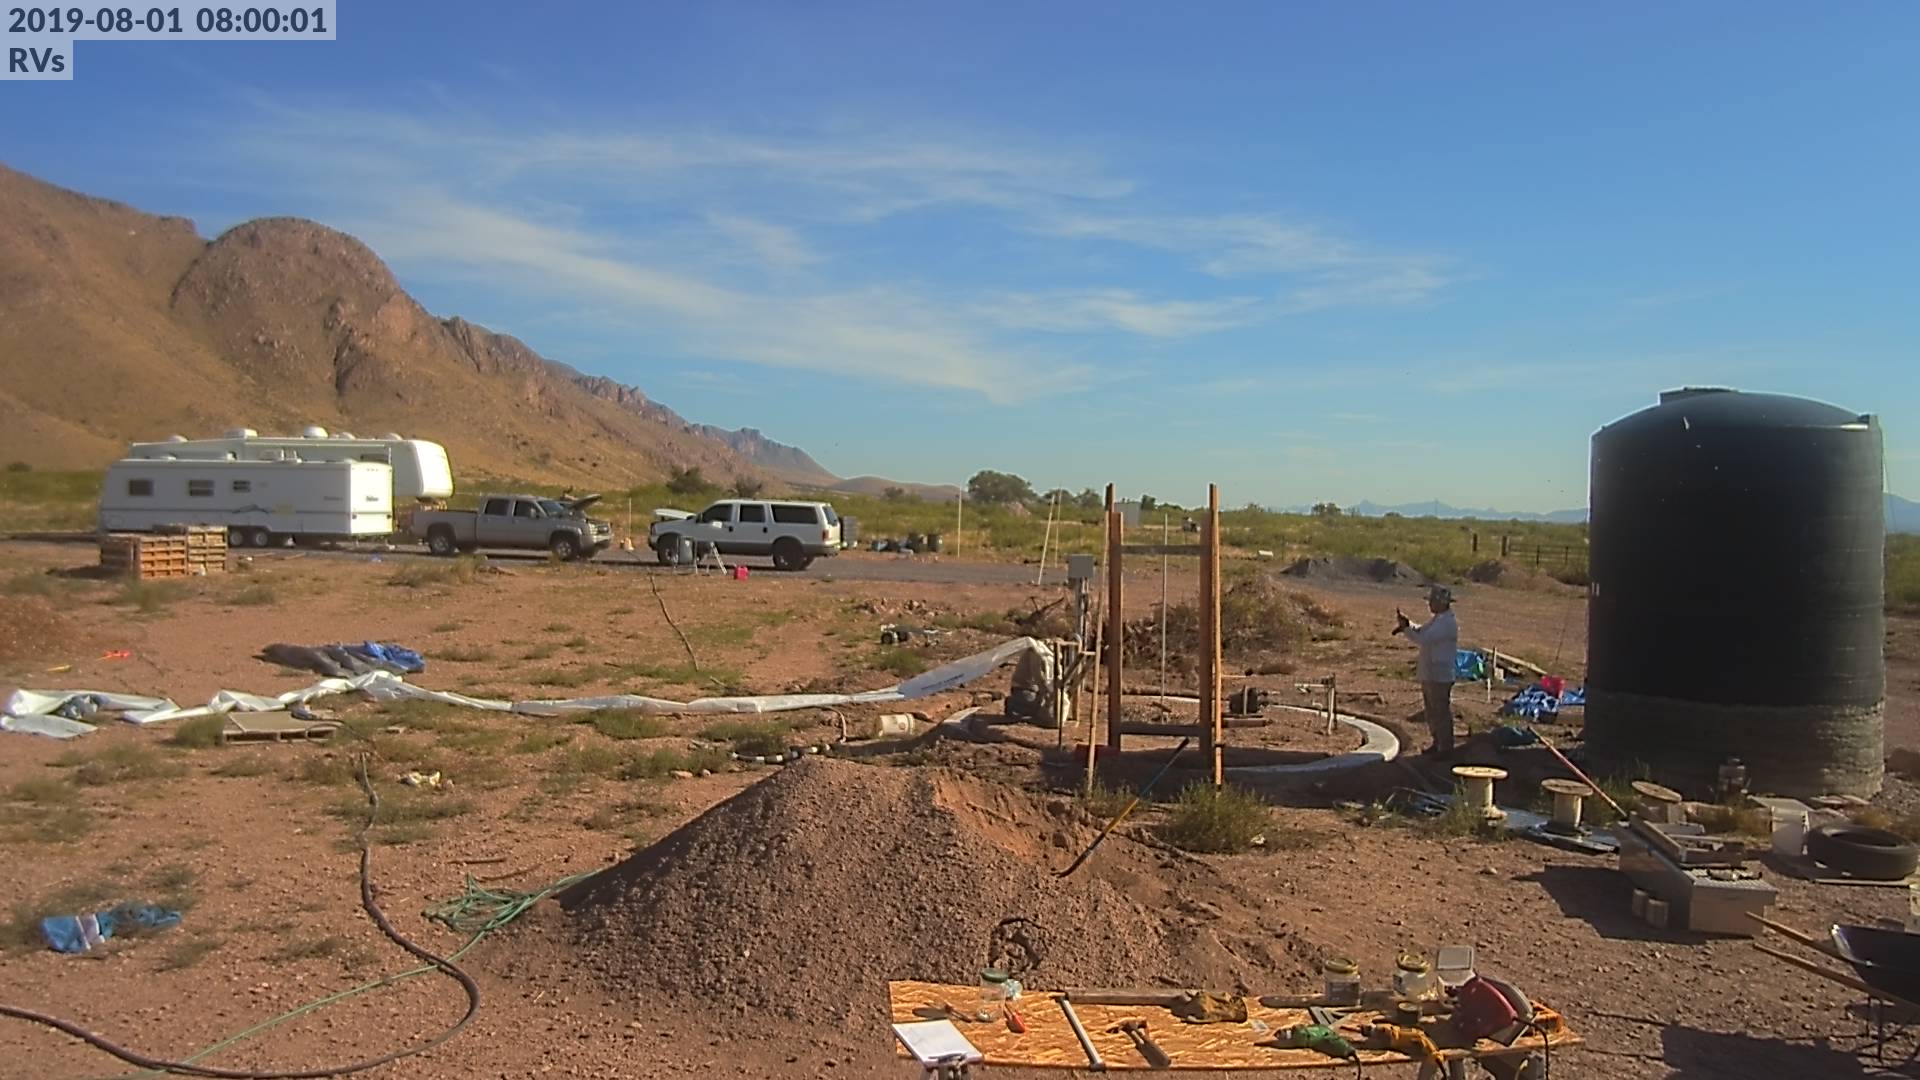
Rachel helping me install the post that will be used as the center of a compass to help locate where the walls need to go.
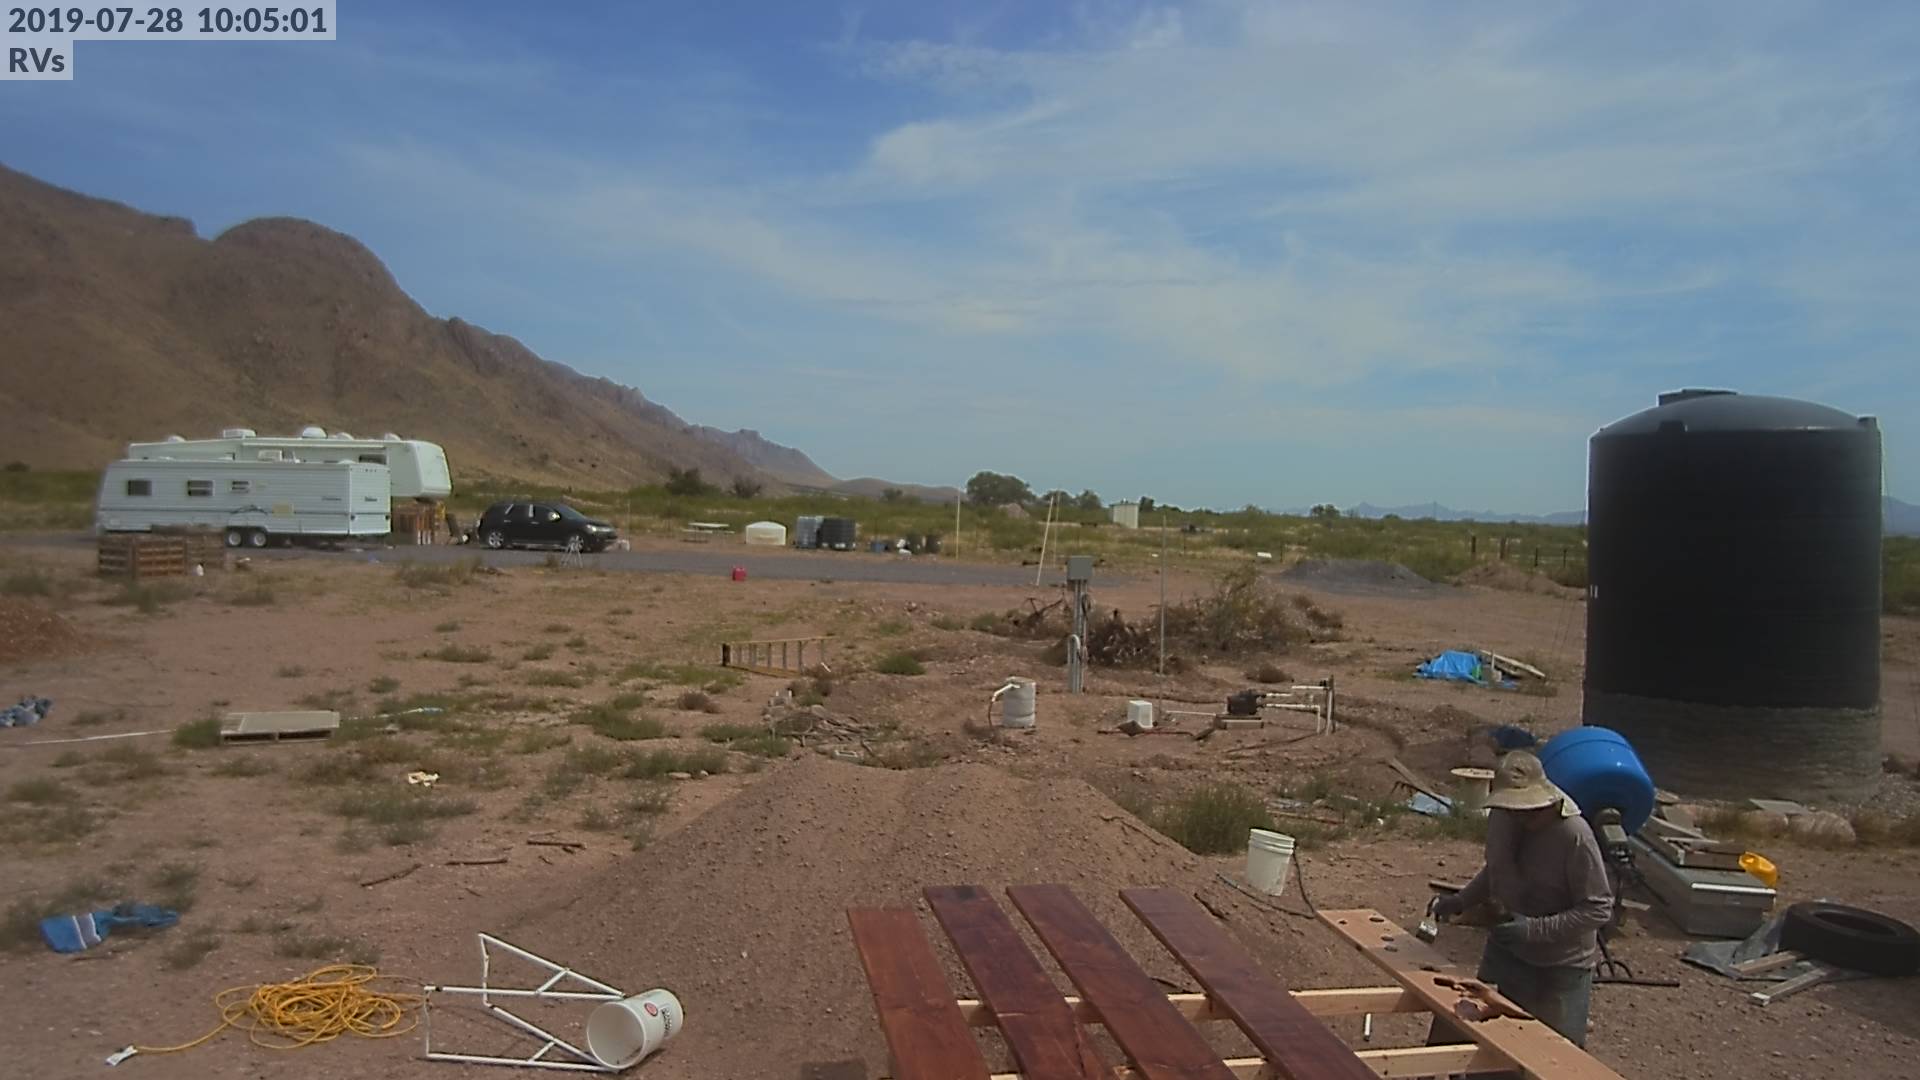
In this picture, I am building a form to make test blocks. Something I should have done months ago so I could take the time and really experiment with various mixes and learn about working with the dirt. I did one with just dirt, one with 10 dirt : 1 lime, one with 10 dirt : 1 cement. I believe that the dirt only was probably acceptable. The dirt + lime performed worse than the dirt only. The dirt + cement was the hardest to break. I also made a test bag with just dirt so I could measure how wide and tall the bags are when they are filled full and then tamped out. They are about 16″ wide and 5 inches tall. That test bag is hard as hell.
Tamping the contents of the last test block in the form as previously described.
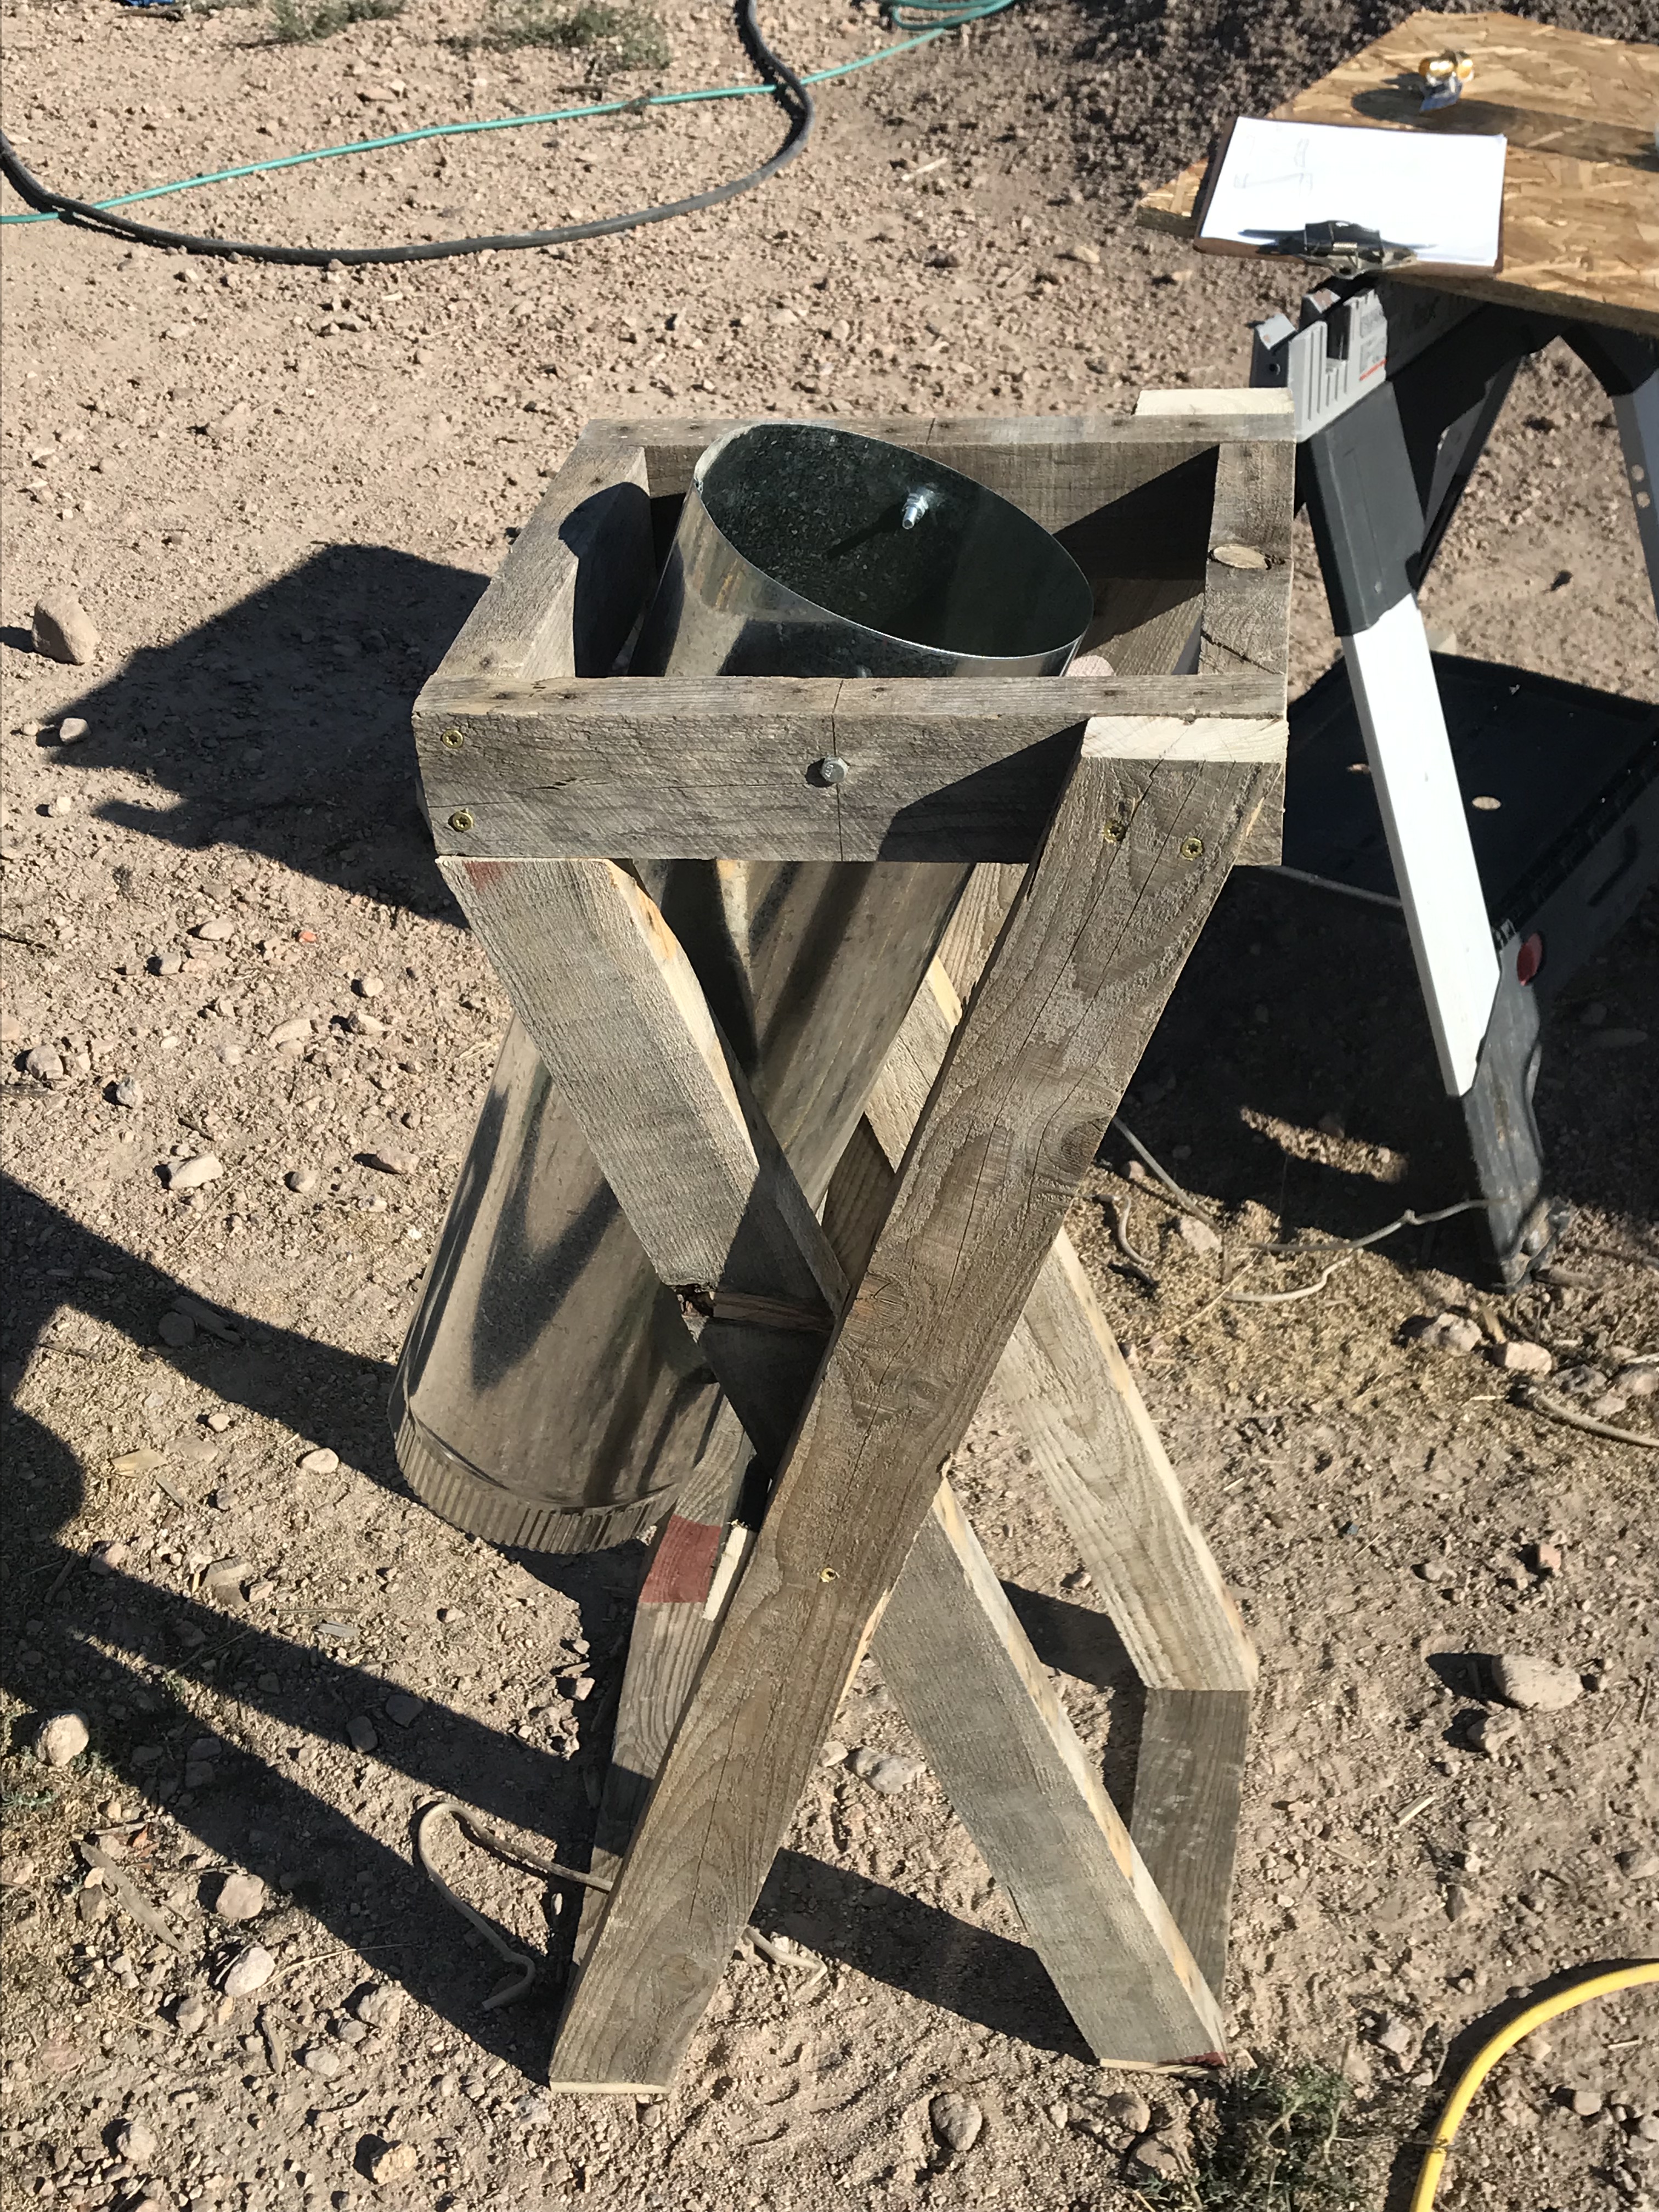
Building my first attempt at a bag stand using scrap metal from an easy up that the wind destroyed shortly after my arrival in 2017. The test blocks are curing under the scrap corrugated metal and tire holding it down.
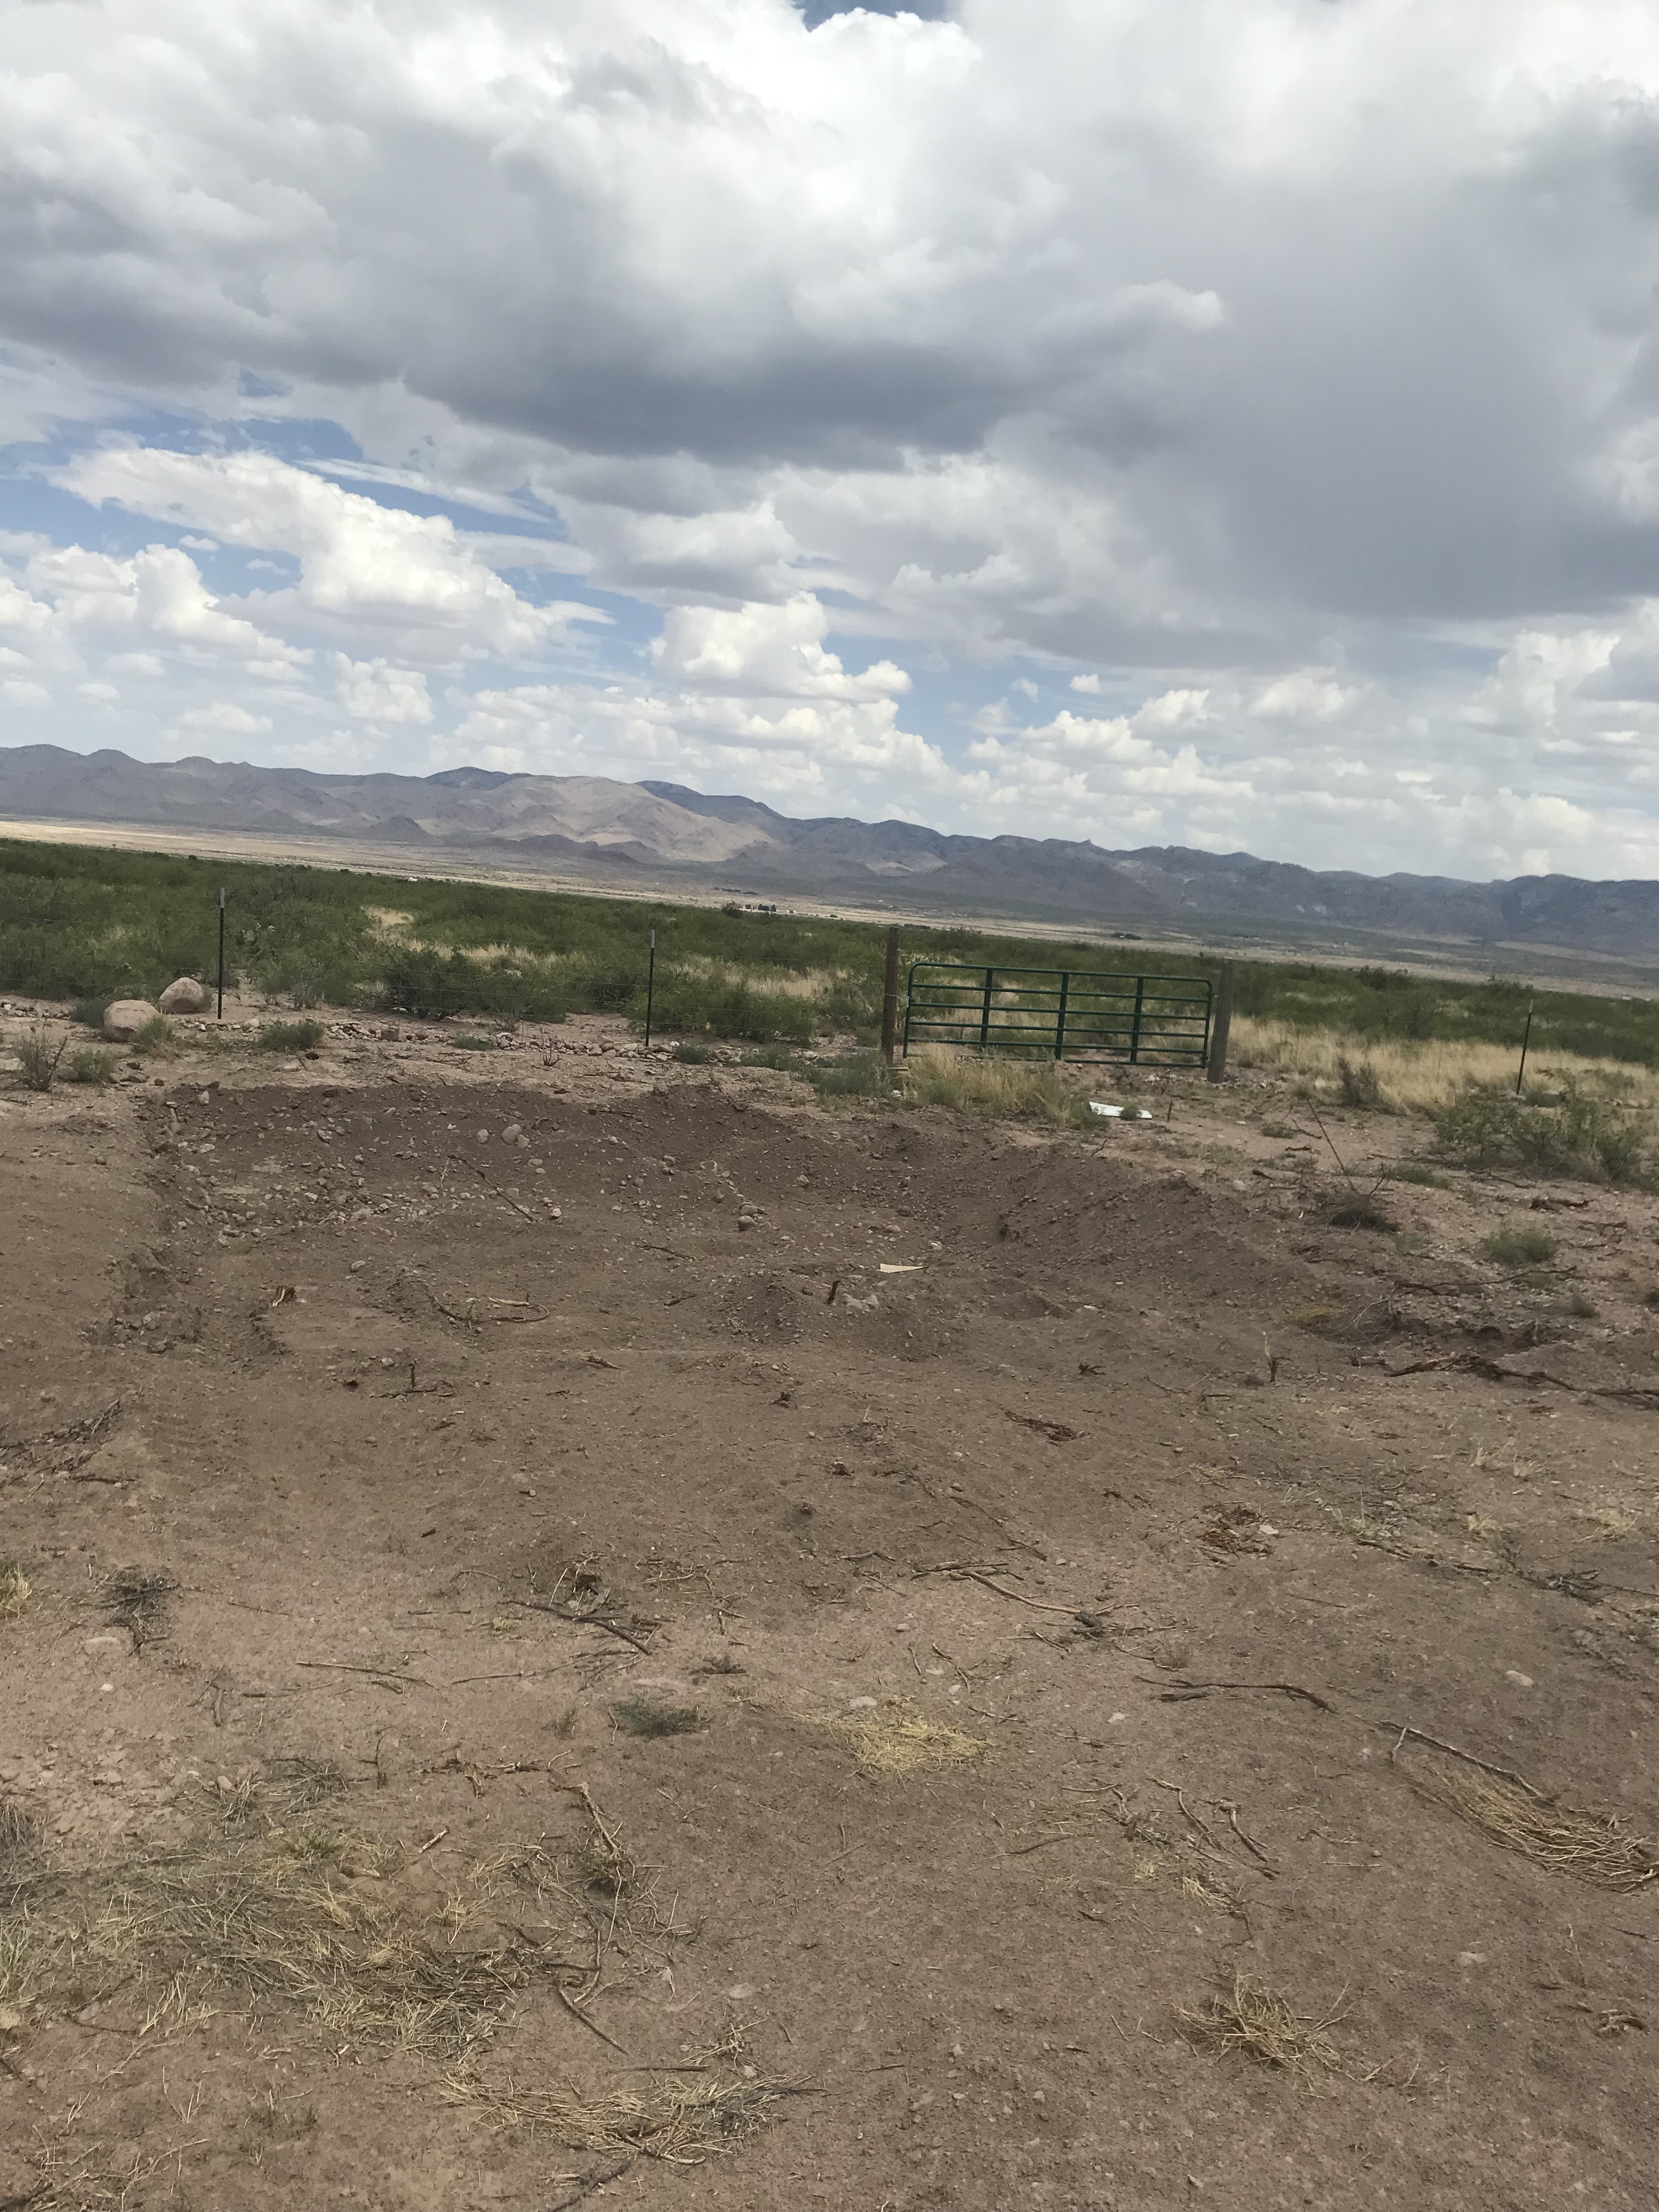
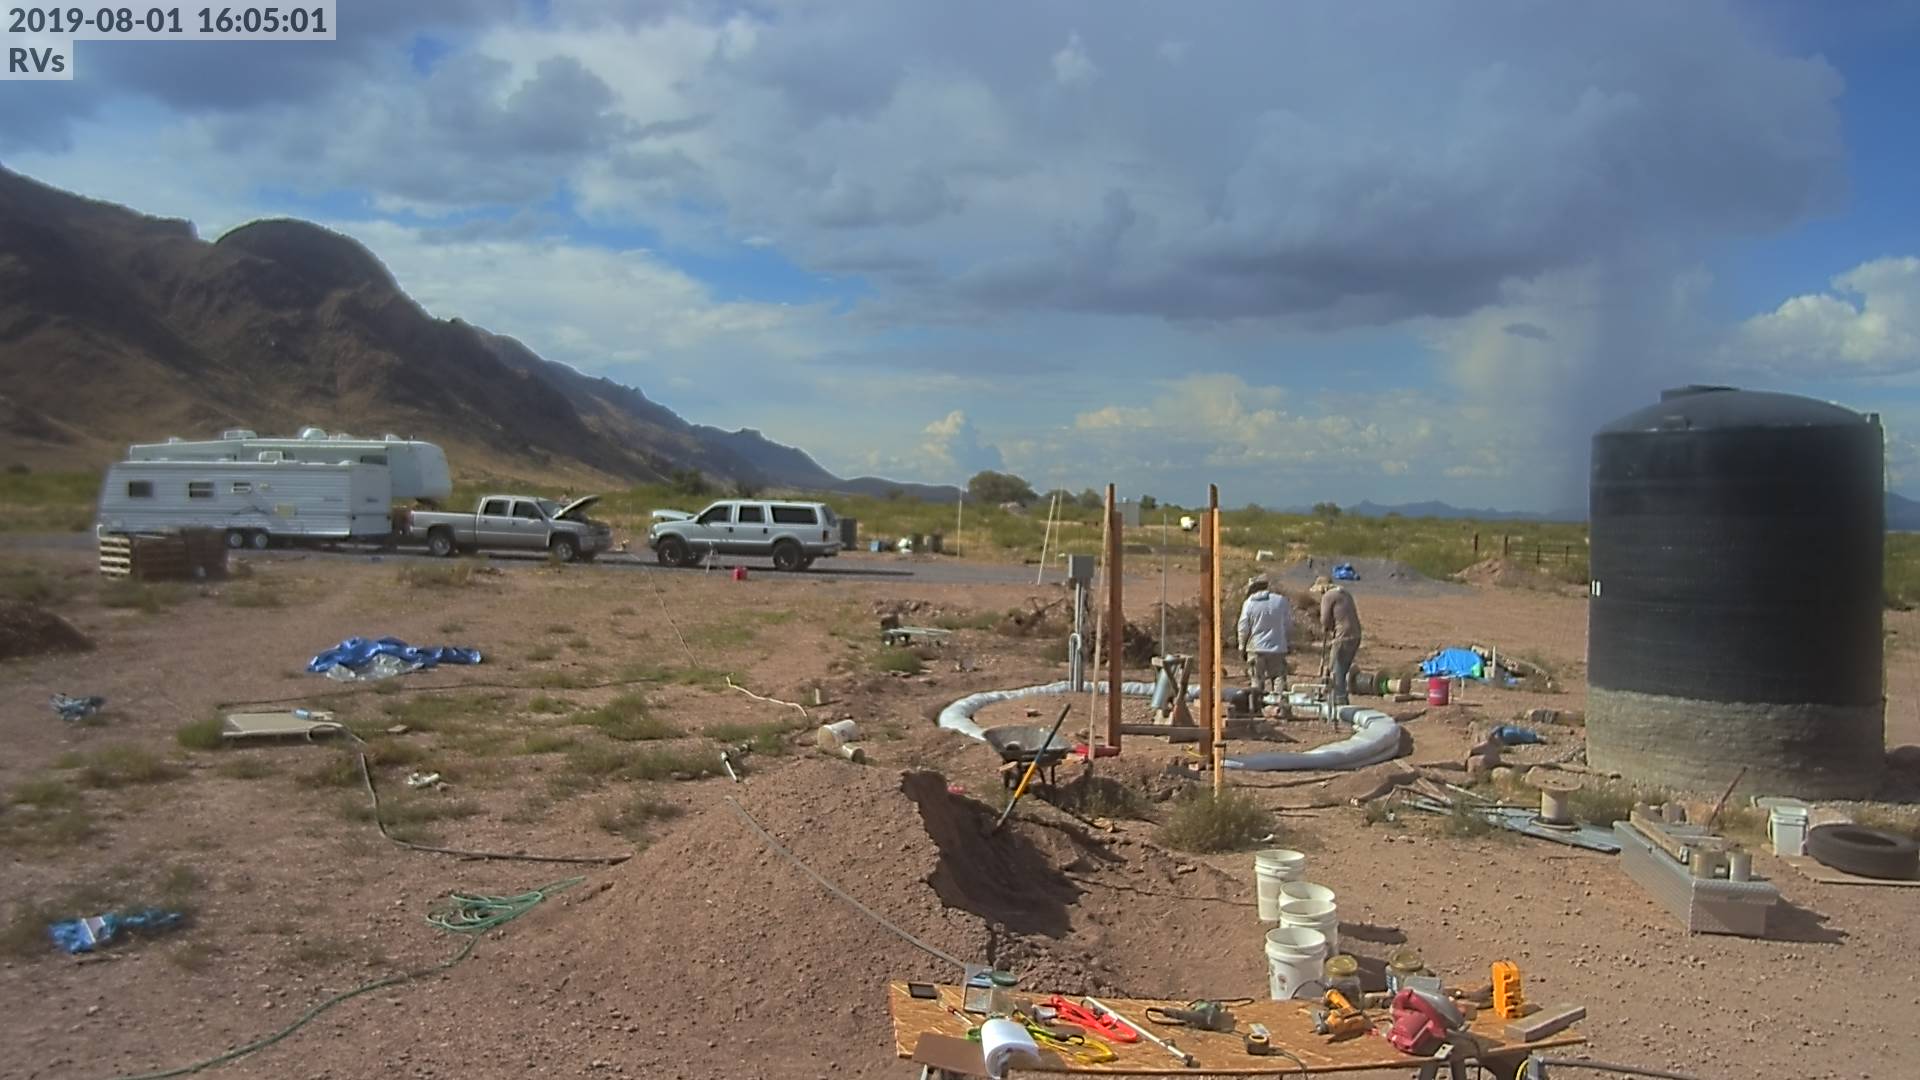
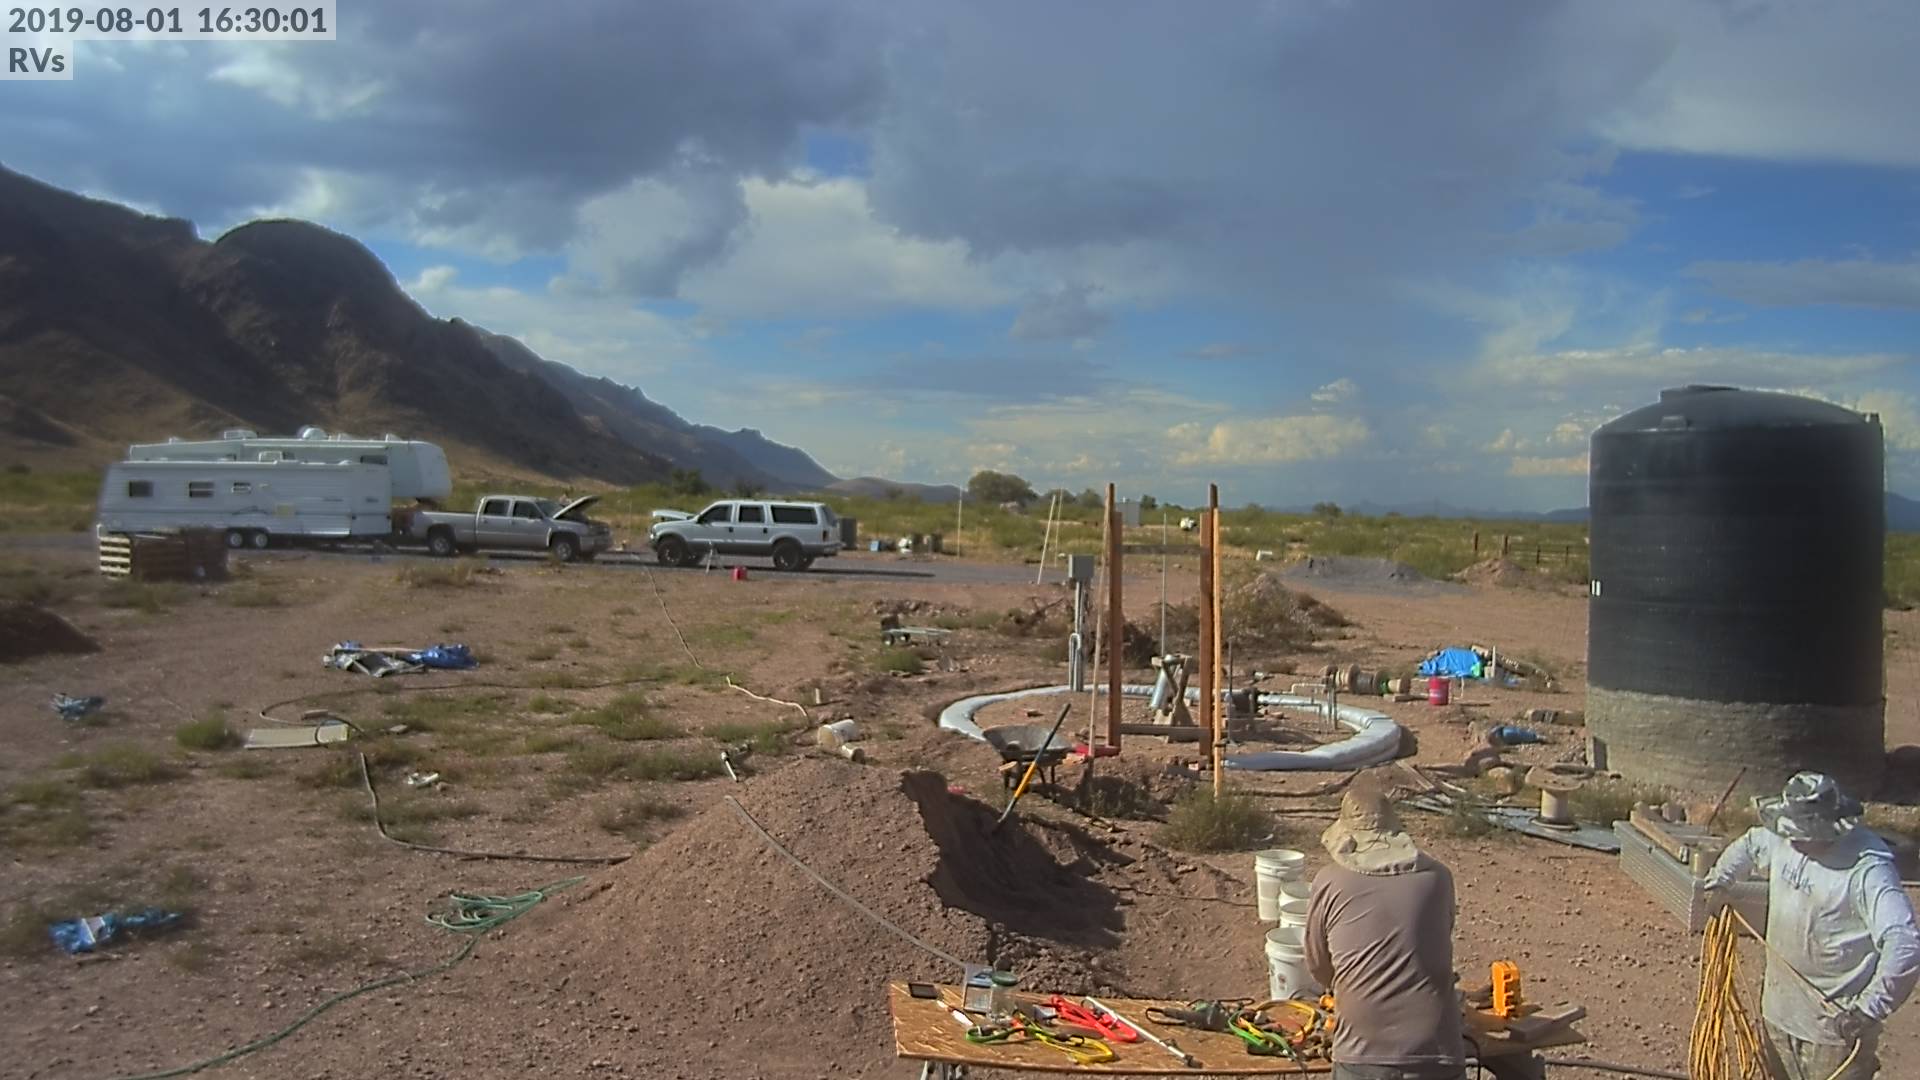
Used the compass and marking paint to mark a circle where I need to dig out the ground for the foundation. Note I misjudged the location of that water spigot. I was thinking I had put it outside the walls of the building. Oops. Maybe I was planning on a smaller building and decided to make it bigger after I put in that spigot. Ya, that’s it!
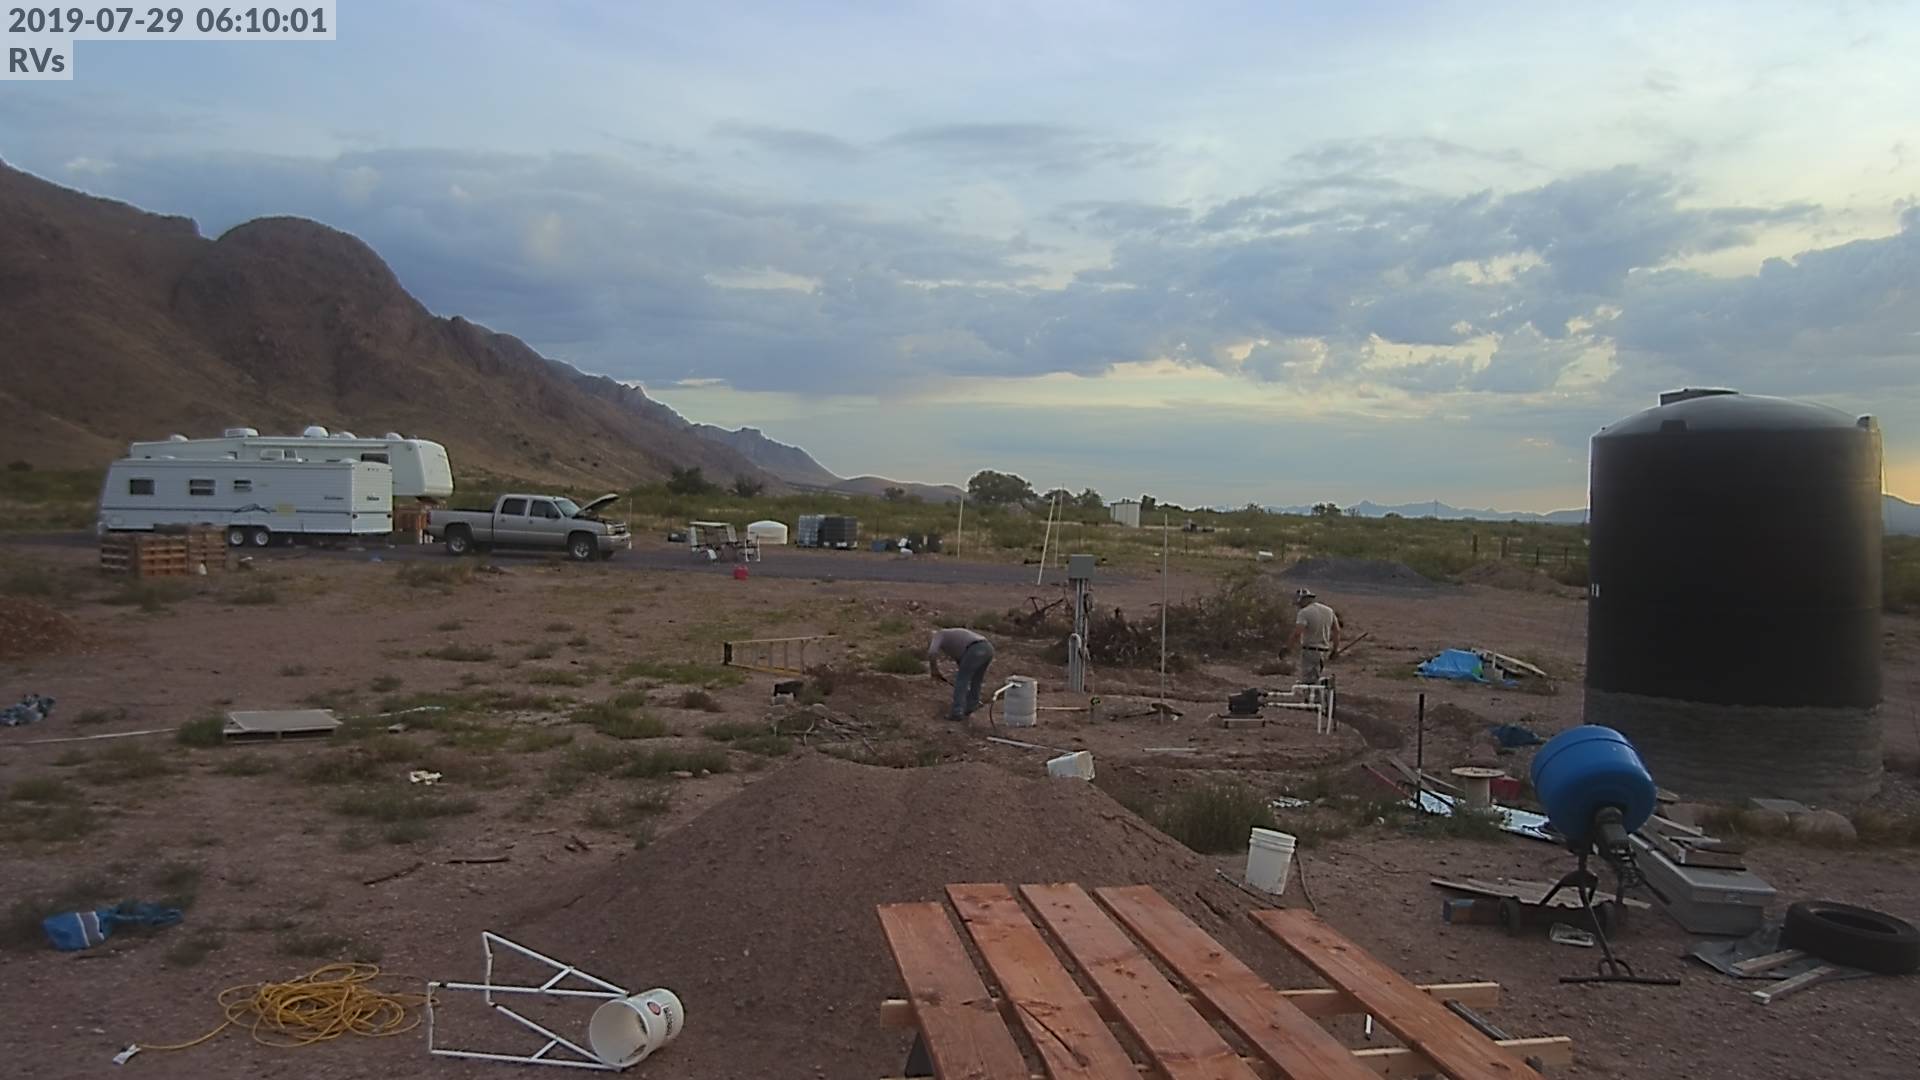
Need to dig out the trench for the foundation by hand so I don’t over dig using the tractor like I did with the solar system. In this photo you see me using a digging bar. I had never seen or heard of one until I moved out here. They are popular out here. They make breaking up this hard ground and working around the rocks in the ground when digging easier. Easier being relative of course. Working that bar is still hard work for a desk jockey like myself. After breaking the dirt loose, I follow up with a flat dirt shovel to scope it out of the trench and work a bit on vertically squaring up the trench walls.
Good start on the trench.
2×10’s to be used for door and window frames. I’m treating them resist weather and pests.
My friend Erik came from California to spend the week and help me out so I took a week of vacation. I hadn’t gotten all the processes and etc worked out and didn’t have everything we needed so we ended up spending a lot of time driving around the area. I think it worked out okay those as he and his wife are considering moving to the area so as we were making our shopping runs, we toured a few areas I’ve never been too and I shared what little knowledge of the area I have acquired over the last couple of years. In this picture we are finishing up the foundation trench getting it close to level. Close enough for me anyway. 🙂
Taking a break and discussing next steps.
Talking though my ideas of how to prevent the door and window frames from bowing in as we pack dirt in bags up against them. Illustrating my concept of a double I-Beam.
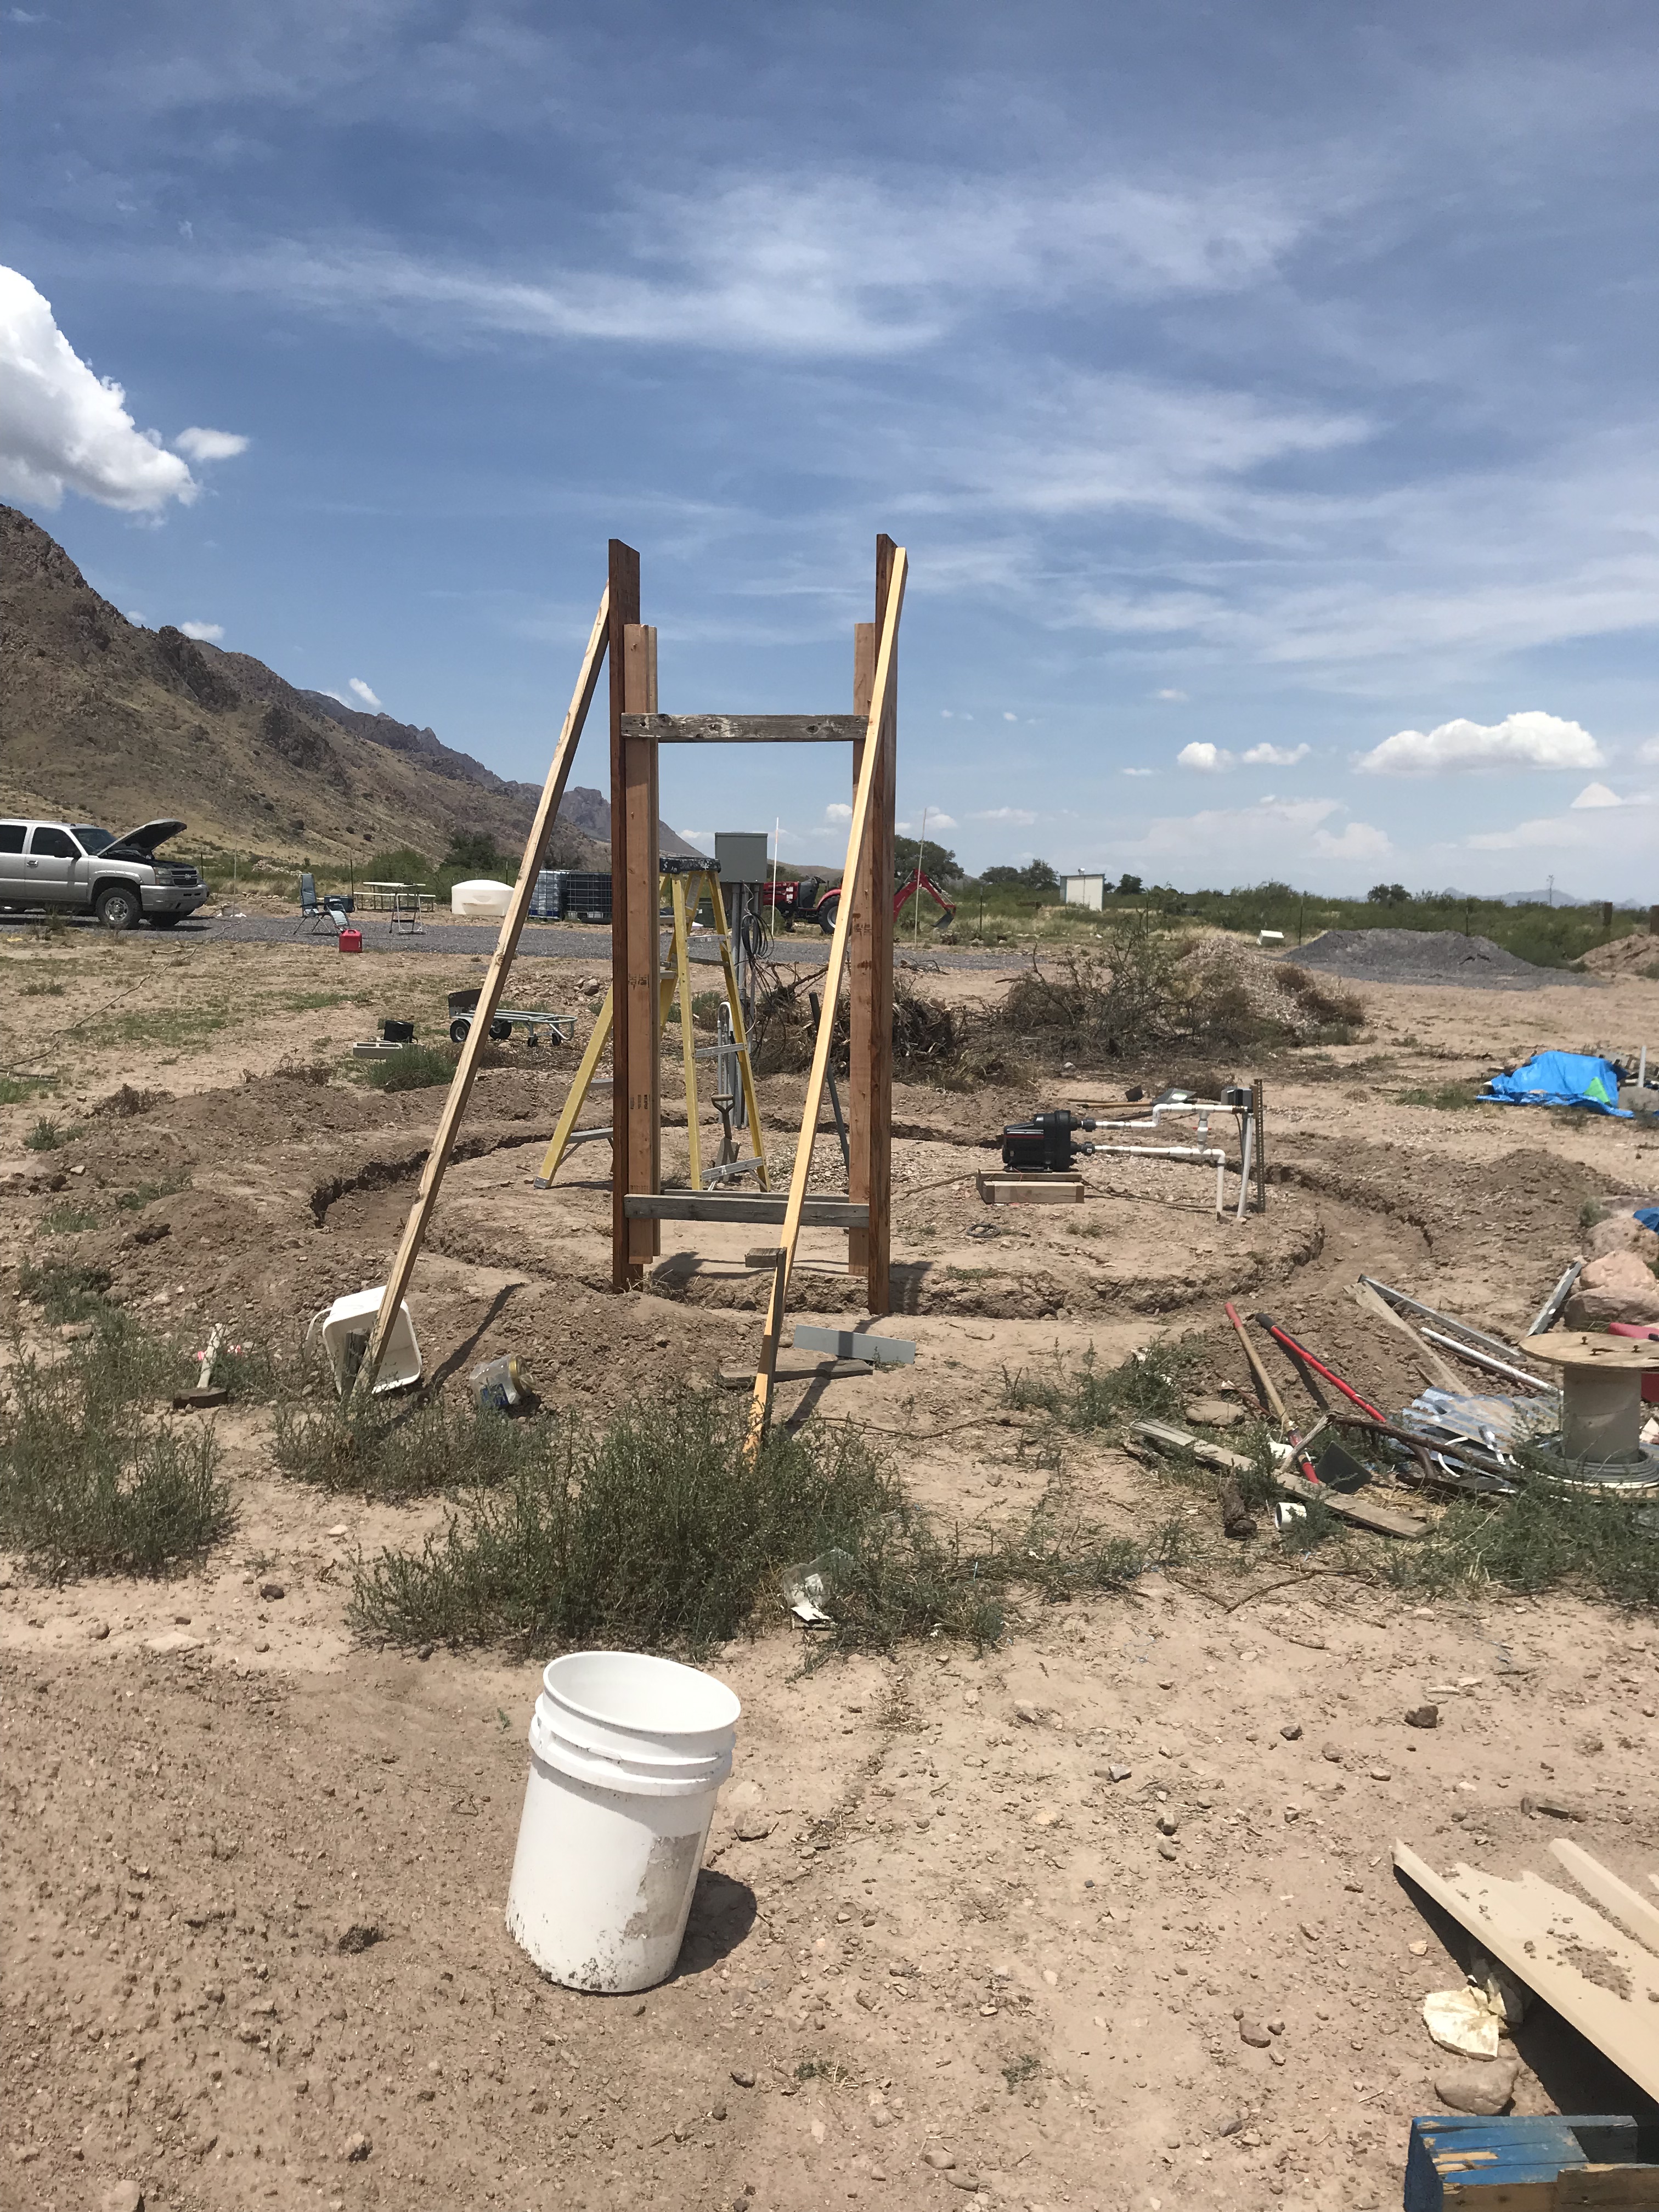
Assembling second door frame with 2×4 ibeams and cross braces secured to the ibeams. You can see the first one done and waiting for us by the trench.
Attaching the cross braces between the two door frames making sure both sides are standing plumb and are parallel to each other. This task wasn’t too difficult because the four cross braces were all the same length.
Bracing the frame front to back so it was vertically plumb and won’t fall over much less move as we are filling bags up against them.
Closer photo of the door frame.
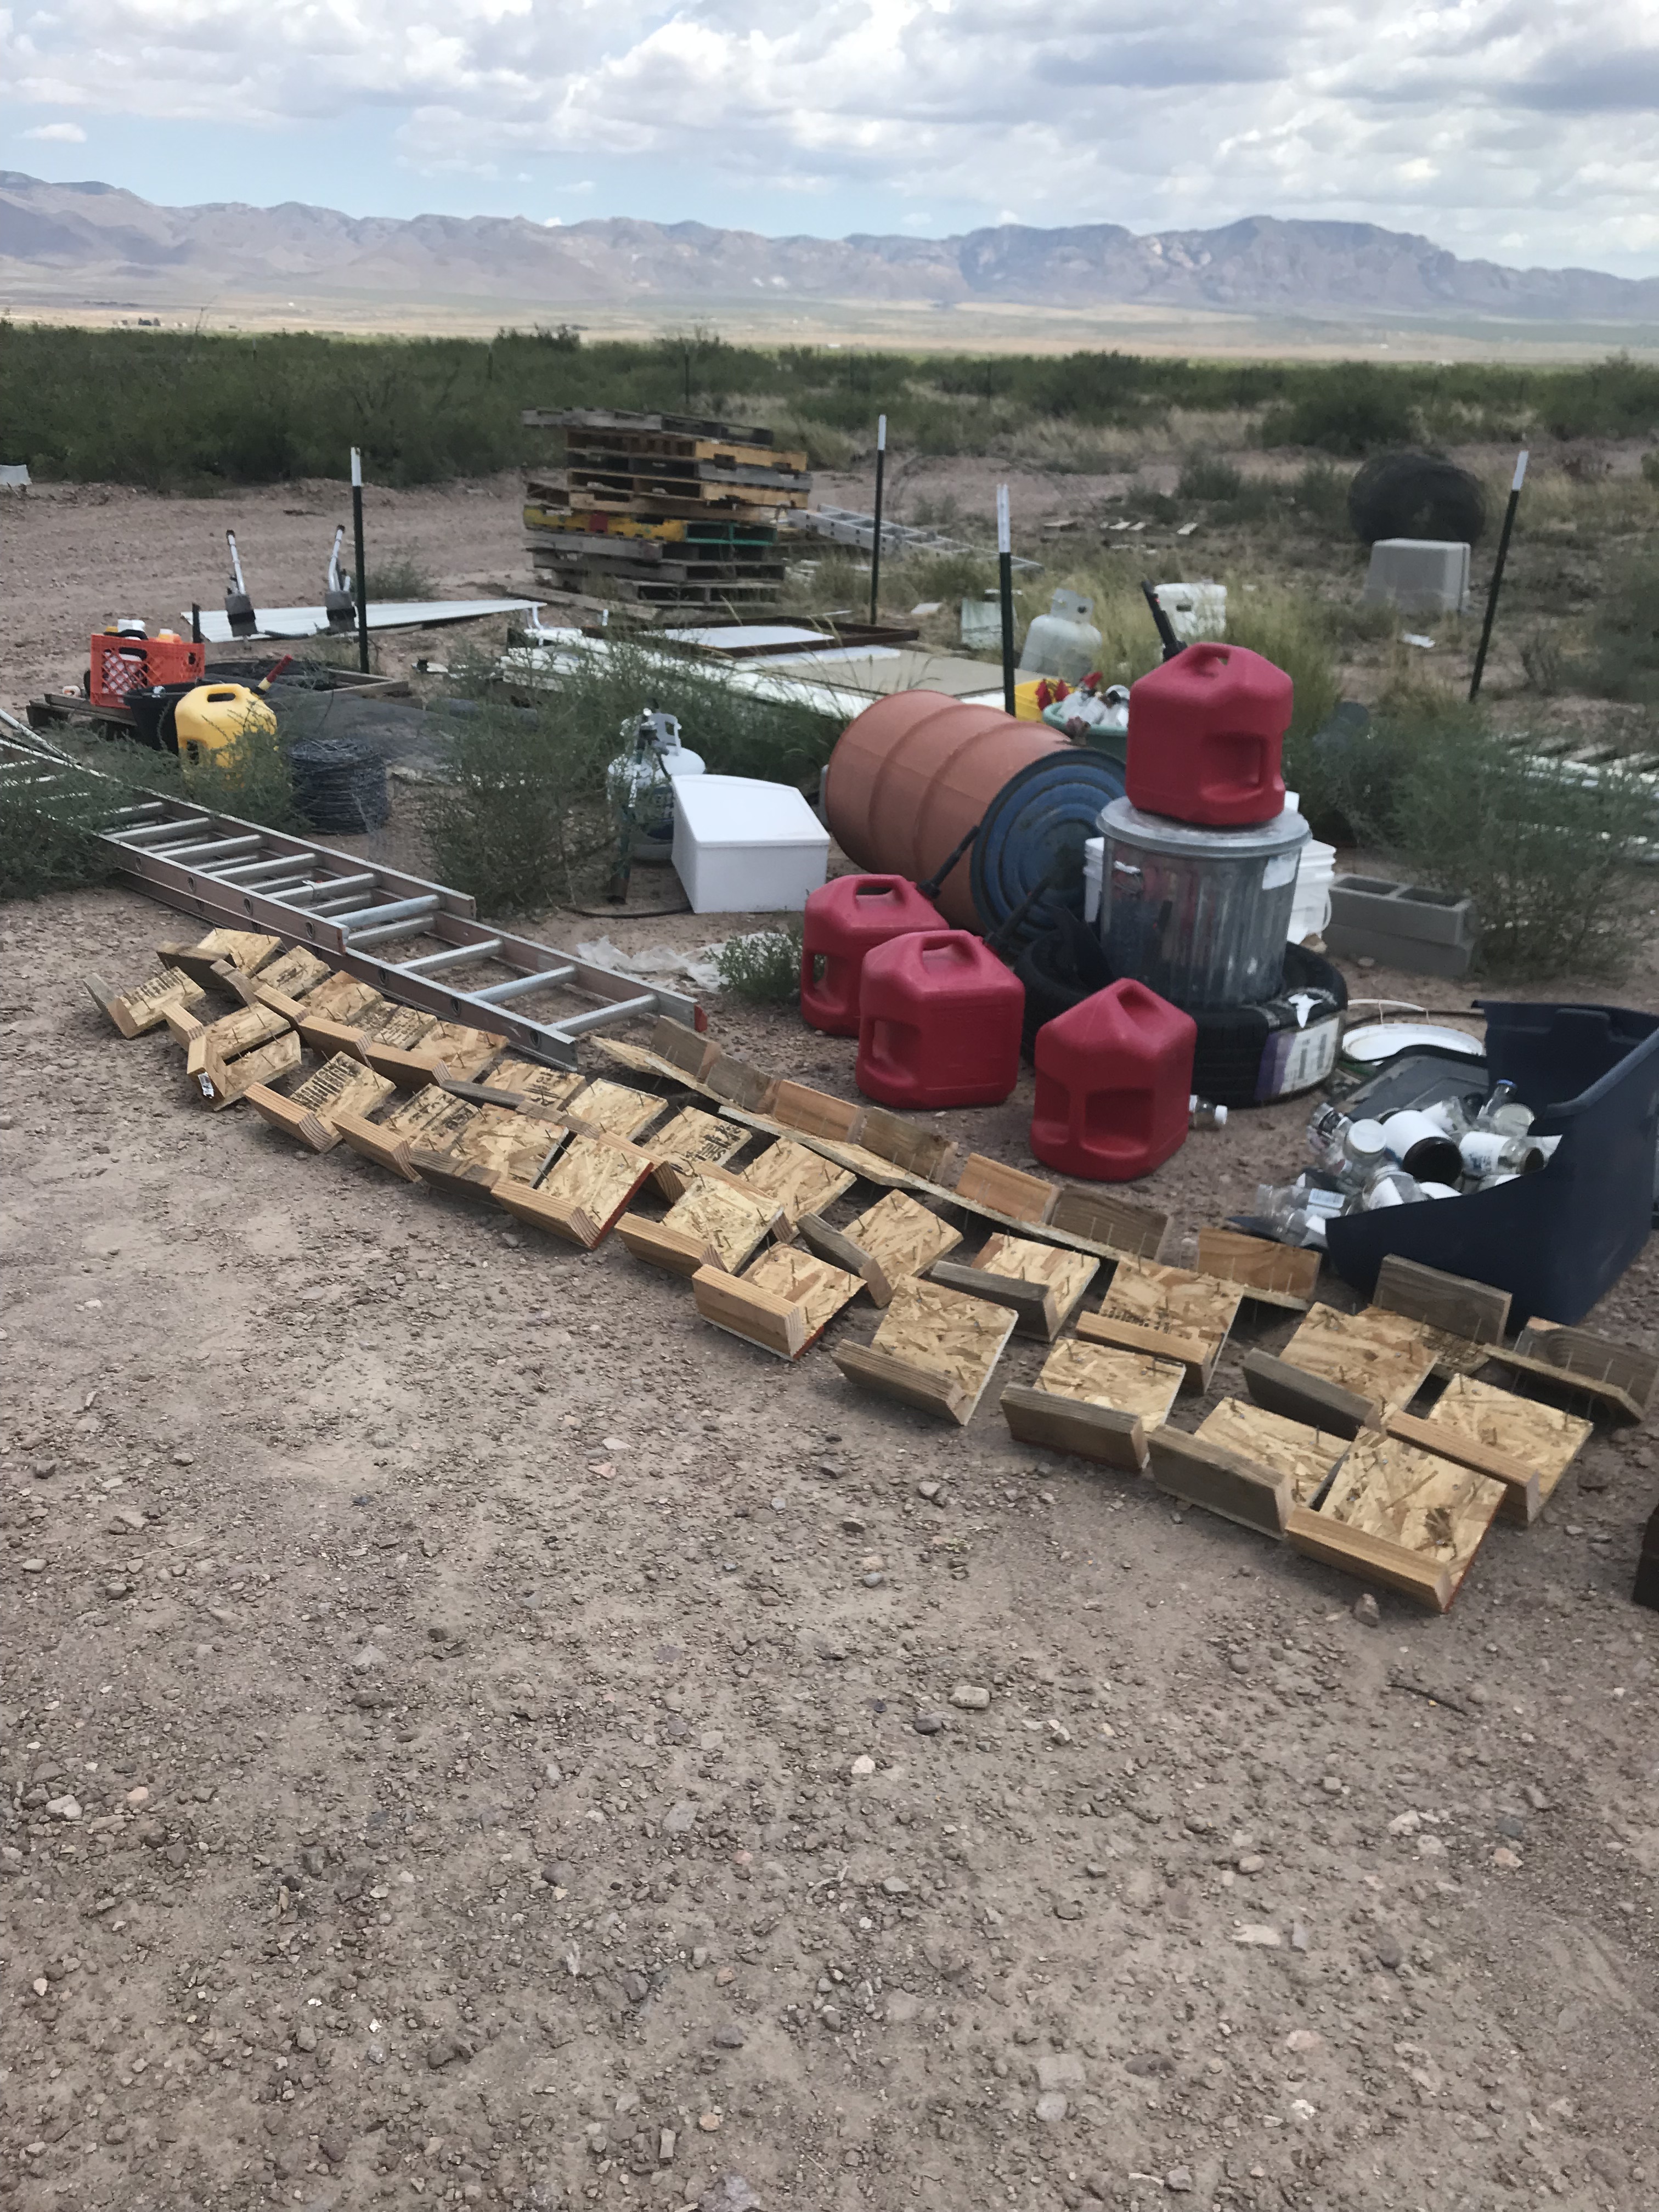
Making cleats to be used to attach the door and window frames to the bags.
Pay no attention to the junk yard. These are the cleats we made. There are nails going in both directions though the OSB (thinner board). Those nails will go into the bags. The 2×4 attached to the OSB will be attached to the door / window frames. The cleats will be installed every third row of bags.
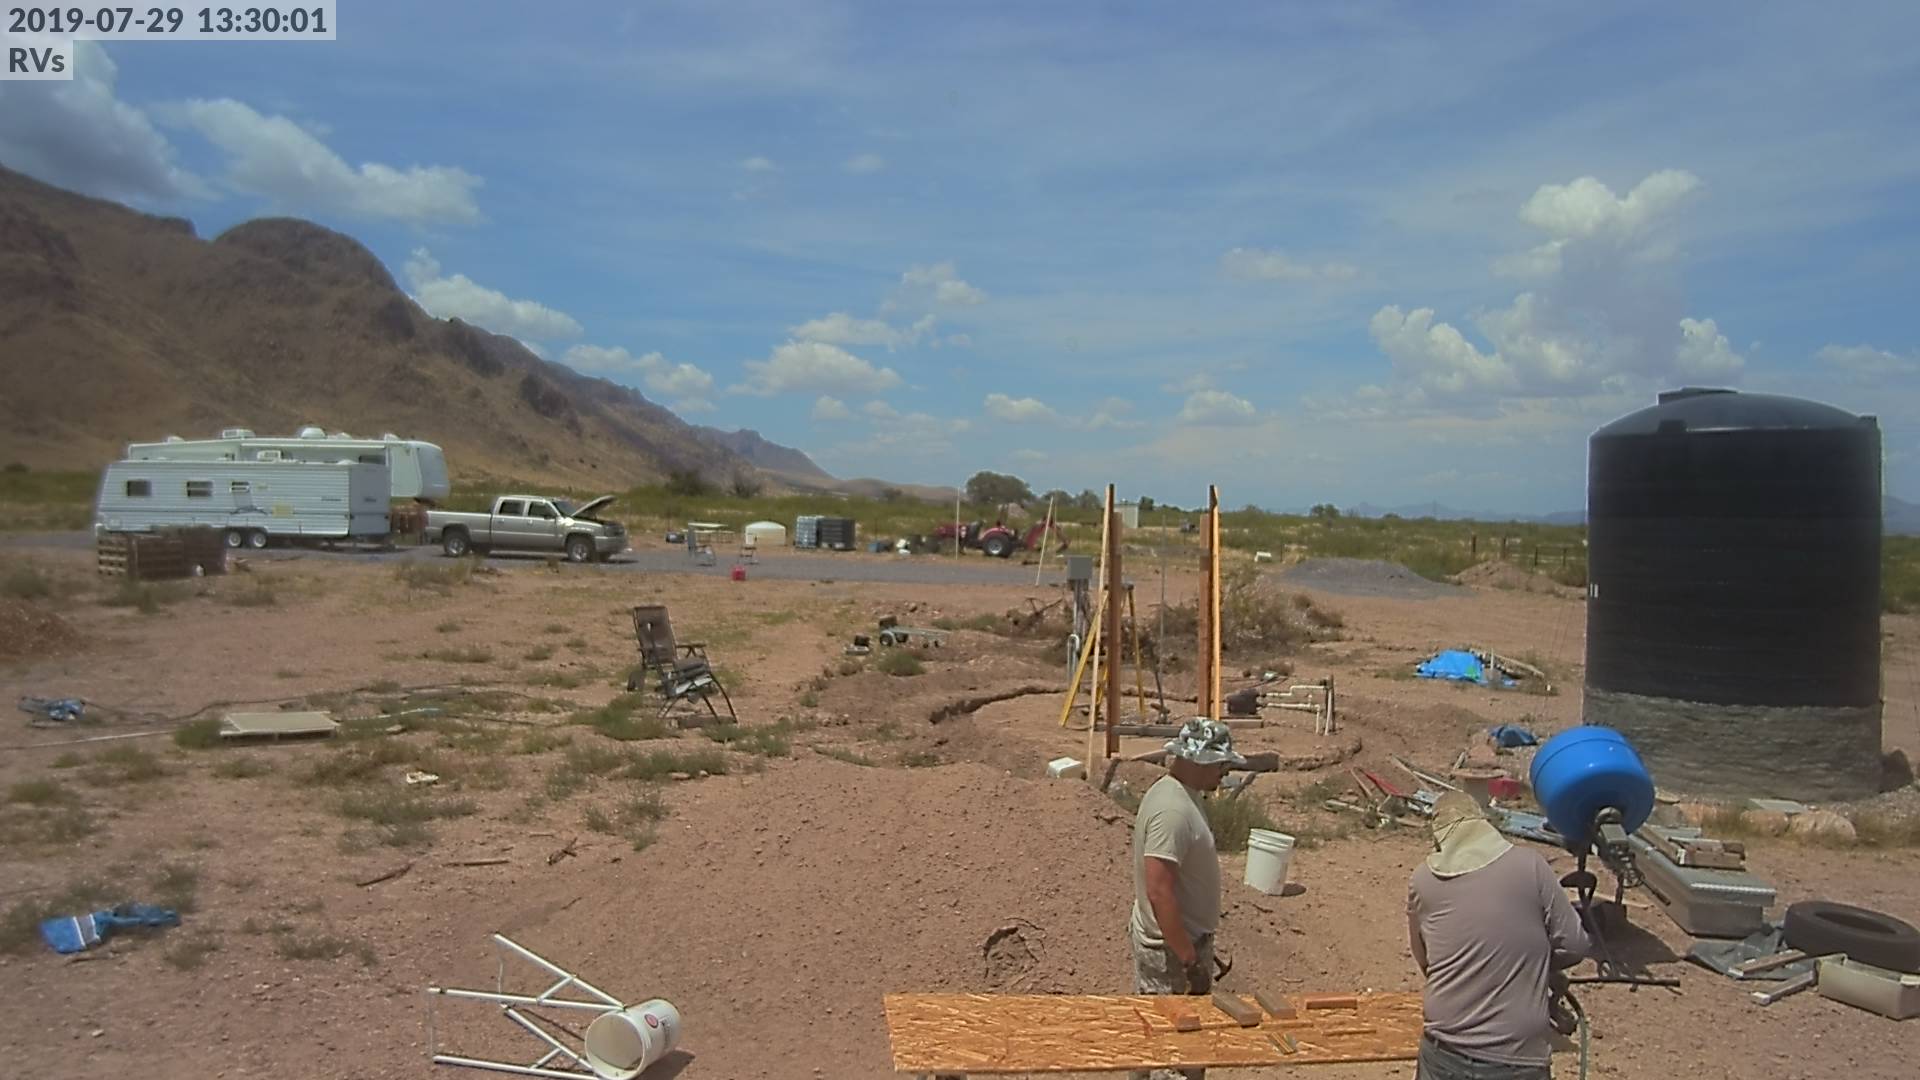
Bags loaded on the bag stand and the bag stand in place ready for dirt. And away we go!
While we have both worked on earthbag builds ever so briefly, neither of us has been in the roll of putting dirt in the bags and working the bag stand, so this was definitely a learning experience for something that seemed like it should be so easy.
That first day, in addition to all the other aspects that come with building with earth, we did a lot of standing around and discussing what wasn’t working, why, and how we might fix it.
Starting to get things figured out. Looks to be about 5 feet done after about 70 minutes. Only about 50 feet left to go. Over 10 more hours for the first row at this rate.
To reduce the issues being experience, cut the bag so that the amount (length) of bag on bucket is substantially less and going to use just the bucket without the stand.
Traded roles. Erik started filling and I started mixing.
Teamwork loading another bag on the bucket.
Time to tamp the bags to compact the contents. We stopped about 4 feet short of completing the row. We ran out of bag on the bucket, we were tired, and there was a desire to run to Wilcox to pick Erik’s truck up from the shop. It was threatening rain so I tarped the bags while Erik tamped.
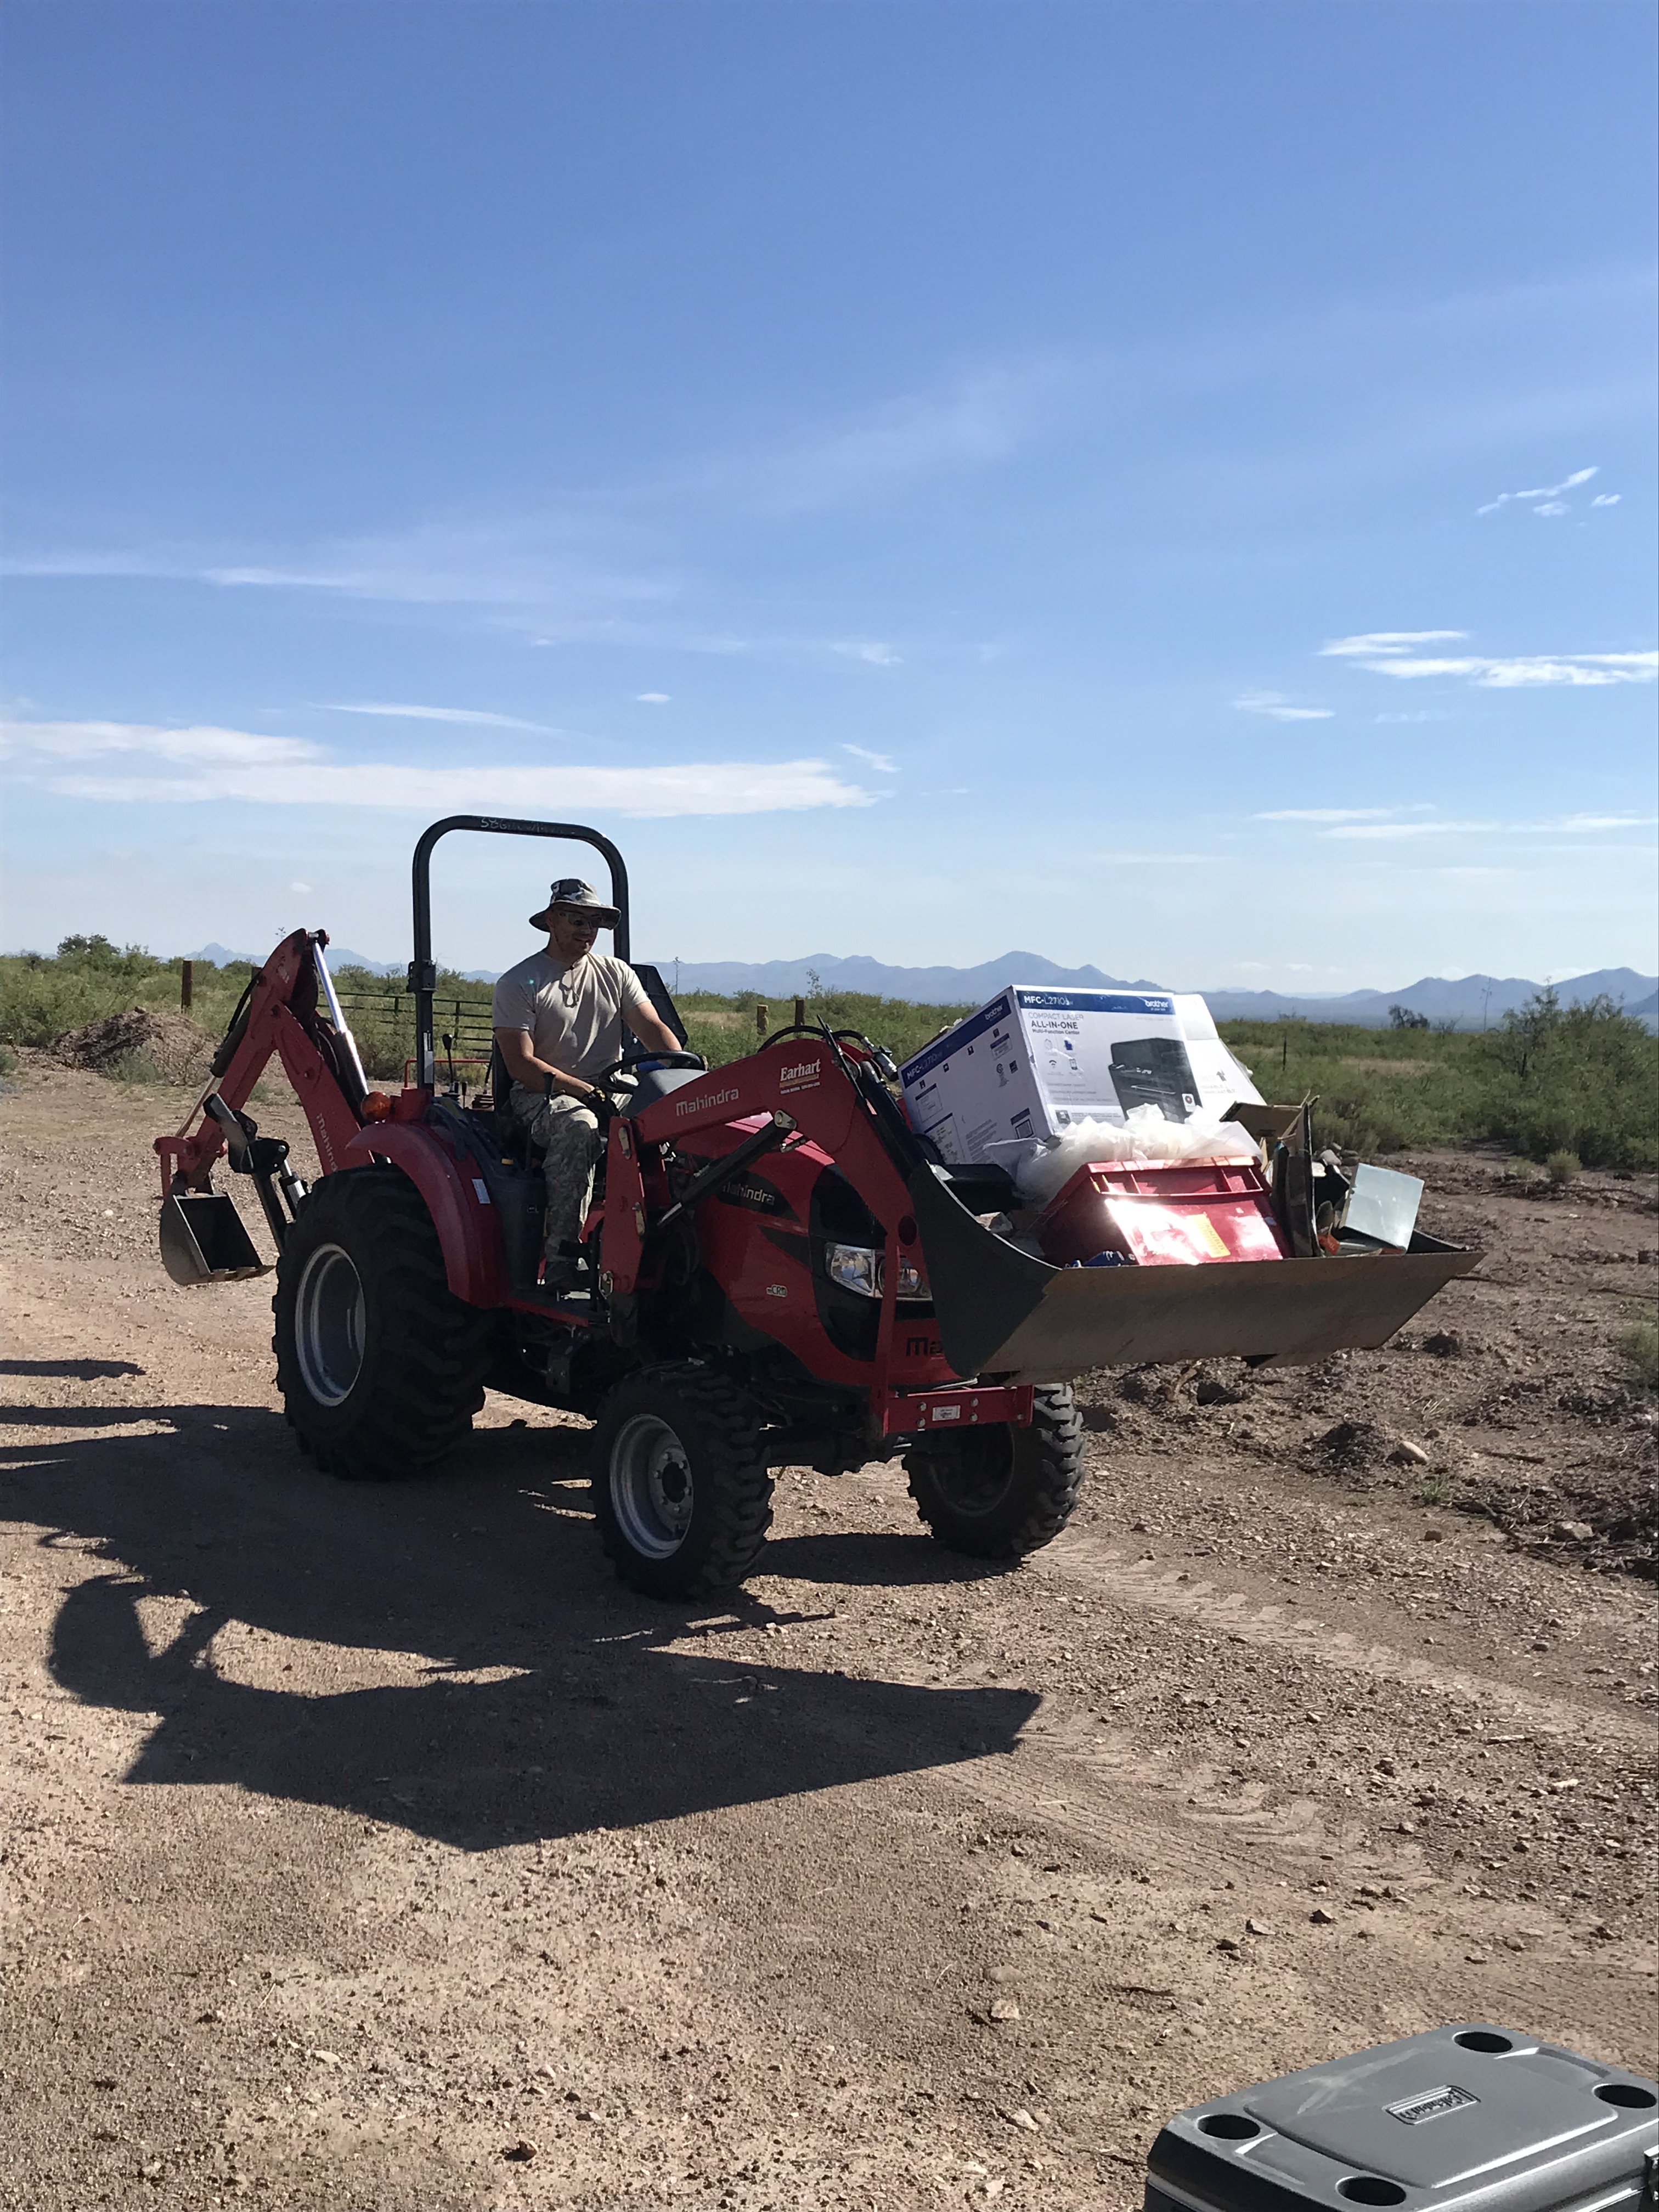
The next day we finished that first row in short order using the same methods we were using the last half of the first row the previous day. Once done, we agreed we wanted to improve the method/setup so I could at least do the lower portion of the wall solo if I so choose. We also needed more cement. Before leaving, I needed to make room in the electronics shed so we moved stuff to the far storage shed. To fit stuff in the far storage shed, I needed to get rid of some empty boxes I was keeping “just in case”. Erik was a bit hesitant, but I thought he might enjoy driving the tractor being a city slicker and all. With some coaxing and coaching, we was cruising along. We cleaned up and headed off to Douglas for coffee and lunch at the Blueberry Cafe, then onto Sierra Vista for materials to build a new stand. That all pretty much killed the day.
Building stand version 2.0.
Bag Stand 2.0. Bag stand 1.0 was using a 5 gallon bucket as a chute which you could just slide the bag over. This one is using a section of duct work which is both longer and narrower. Being narrower, you are able to bunch more bag onto the chute in the same space than you could on the 5 gallon bucket. As it is longer, you have more real estate to bunch bag on the chute. I was able to easily get 55′ of bag on this chute. That is about all it would comfortably hold.
Loading bag on the chute of the new stand.
Laying a double row of 4 point barbed wire to secure the layers of bags together (prevent them from shifting off each other).
Got Rachel out there helping us. Erik’s mixing, Rachel moving the wheel barrel and scooping dirt using a 5# can out of the wheel barrel and handing them to me to fill the chute.
Still struggling with the stand. Taking a moment to evaluate it to see what adjustments are needed.
Moving along. The end of the row is getting closer. Made an adjustment to the stand which helped a lot. Then it was just a matter of learning to work it.
Rachel scooping dirt out of the barrel for me. Working as a team, we are able to very quickly transfer the dirt from the wheel barrel to the chute.
Done bagging. Time to tamp. CRAP!!! Cement in the mix had set. DUH! We weren’t able to really compact the bags on the east side where we started. As you might expect, the further around the circle toward the more recently laid section of bag, the easier it was to tamp. Erik used his military muscle to tamp the bags with set mix in it as much as he could. So, lesson learned. Because we are adding cement to the mix, we can’t wait until we are done laying the row to tamp. Especially when we are using quickcrete that we picked up on the Sierra Vista run. Searching our memories of how the first day went, we are thinking that the cement mix from B&D Lumber in Douglas set more slowly.
Cleaning up for the day. You can see the difference in the bags between untamped in the previous photo and this one. You can also see that the west (left) is better tamped than the east (right). You can see the low spot in the front right where I was still struggling with the new stand as we were getting started in the morning. We are all exhausted by this time. We cleaned up and went out for a hard earned dinner at Sky Island.
It was very evident working the last couple of rows, all the stuff laying around the build side had to go. There was also the desire to level the ground around the bags to make it easier to get the wheel barrels around the work area. Erik and I back filled around the outside of the bags shoveling dirt by hand, then I had him practice dragging dirt with the front loader to level the ground out a bit.
My neighbor Boyd stopped by to check out what we were doing after we finished grading the ground and before we started laying barb wire in preparation of the next row. We were all still sore and fatigued from spending all day doing a full row the previous day, we decided to take a day off from bagging to let our bodies recover a bit more. Perfect time for another Sierra Vista run for misc shopping, lunch, and taking the long way home coming back through Benson so Erik could see that area.
Using a laser level before the sun gets too high in the sky and we can’t see it. We mark the bags with measurements from the laser line down to the bags to get an an understanding of where the highs and lows are as well as just how much of a delta there is between the highs and lows.
We decided to not kill ourselves again and just targeted doing half a row this day. We got Rachel out helping again and the three of us were working like a well oiled machine and got done with that half circle in just 2 hours. Additional lessons we learned with this half circult is that when using the quickcrete mix were were using, it still took too long to get half a circle done before tamping. We need to tamp after filling every three feet or so. It wasn’t as bad as the previous row, but dirt mix in the bag was still too far into the setting process for complete compression via tamping. We contemplated doing the second half of the circle given how quickly the first went but ultimately decided against it so as not to over fatigue our bodies again. As I had to go back to work the following week and Cheryl was bringing our son Sergei back from Michigan with her, it was clear I wasn’t going to have time to spend on bagging in the coming week or two, Erik decided he would head back home.
Sergei at Tom and Alicia’s with one of their outdoor cats kept around for mouse control. I spent much of the time while Sergei was here working long hours for work to catch up from being behind from taking vacation the week before. Cheryl and Rachel were able to keep him busy most of the time with trips to Douglas, Sierra Vista, and Tuscon. However, I did take him out on a ghost tour/hunt in Bisbee. That was a nice Friday night out for the two of us. In processing the audio files of recordings I took on my iphone during the ghost hunt, I swear I found a response to one of our questions that we couldn’t hear there in person but the iphone recorded.
With Cheryl and Rachel gone taking Sergei home, I decided to get back to work to see how much I could reasonable do in a day solo. I’m laying barbed wire here in prep of laying bag.
Rather than boring you with all the photos I have of me working, I’ll skip to the end of the workday for me.
Laying the bag nearly complete for the day. Did you know it is far more efficient to put the right amount of dirt in the end of the bag to start with than it is to put too much in then have to dig 1 – 2 5# cans worth of dirt mix back out with a substantially smaller can? I should also note at this point that the nails in the previously discussed cleats are very long and can easily puncture the nylon plate in the bottom of those hiking boots I’m using as work boots. In the future I will be placing a brick between the nails to act as a support for me to step on as I’m working the very end of the back by a door or window frame where a cleat has been installed.
All tamped. Done for the day except maybe just a bit more cleanup. Half circle with some about 10′ of it being less full so as to bring the full circle closer to level took me from 6AM – 2PM (8 hours) with somewhere between 60 – 90 minutes of break time spread throughout the day for a total of about 6.5 -7 hours of labor. I was wiped. I opted not to bag the following day. I think 1/4 circles solo and 1/2 circles with a partner in a single day is reasonable. As we build our muscles and stamina, I imagine we can do more daily. As we start entering cooler season and monsoon season wanes, I hope to be able to be able to bag during the week more frequently. In regards to adjustments made to work solo, I made the mix wetter than is normally used, and I tamped every time I completed filling 3-4 feet of bag. That all worked quite well.
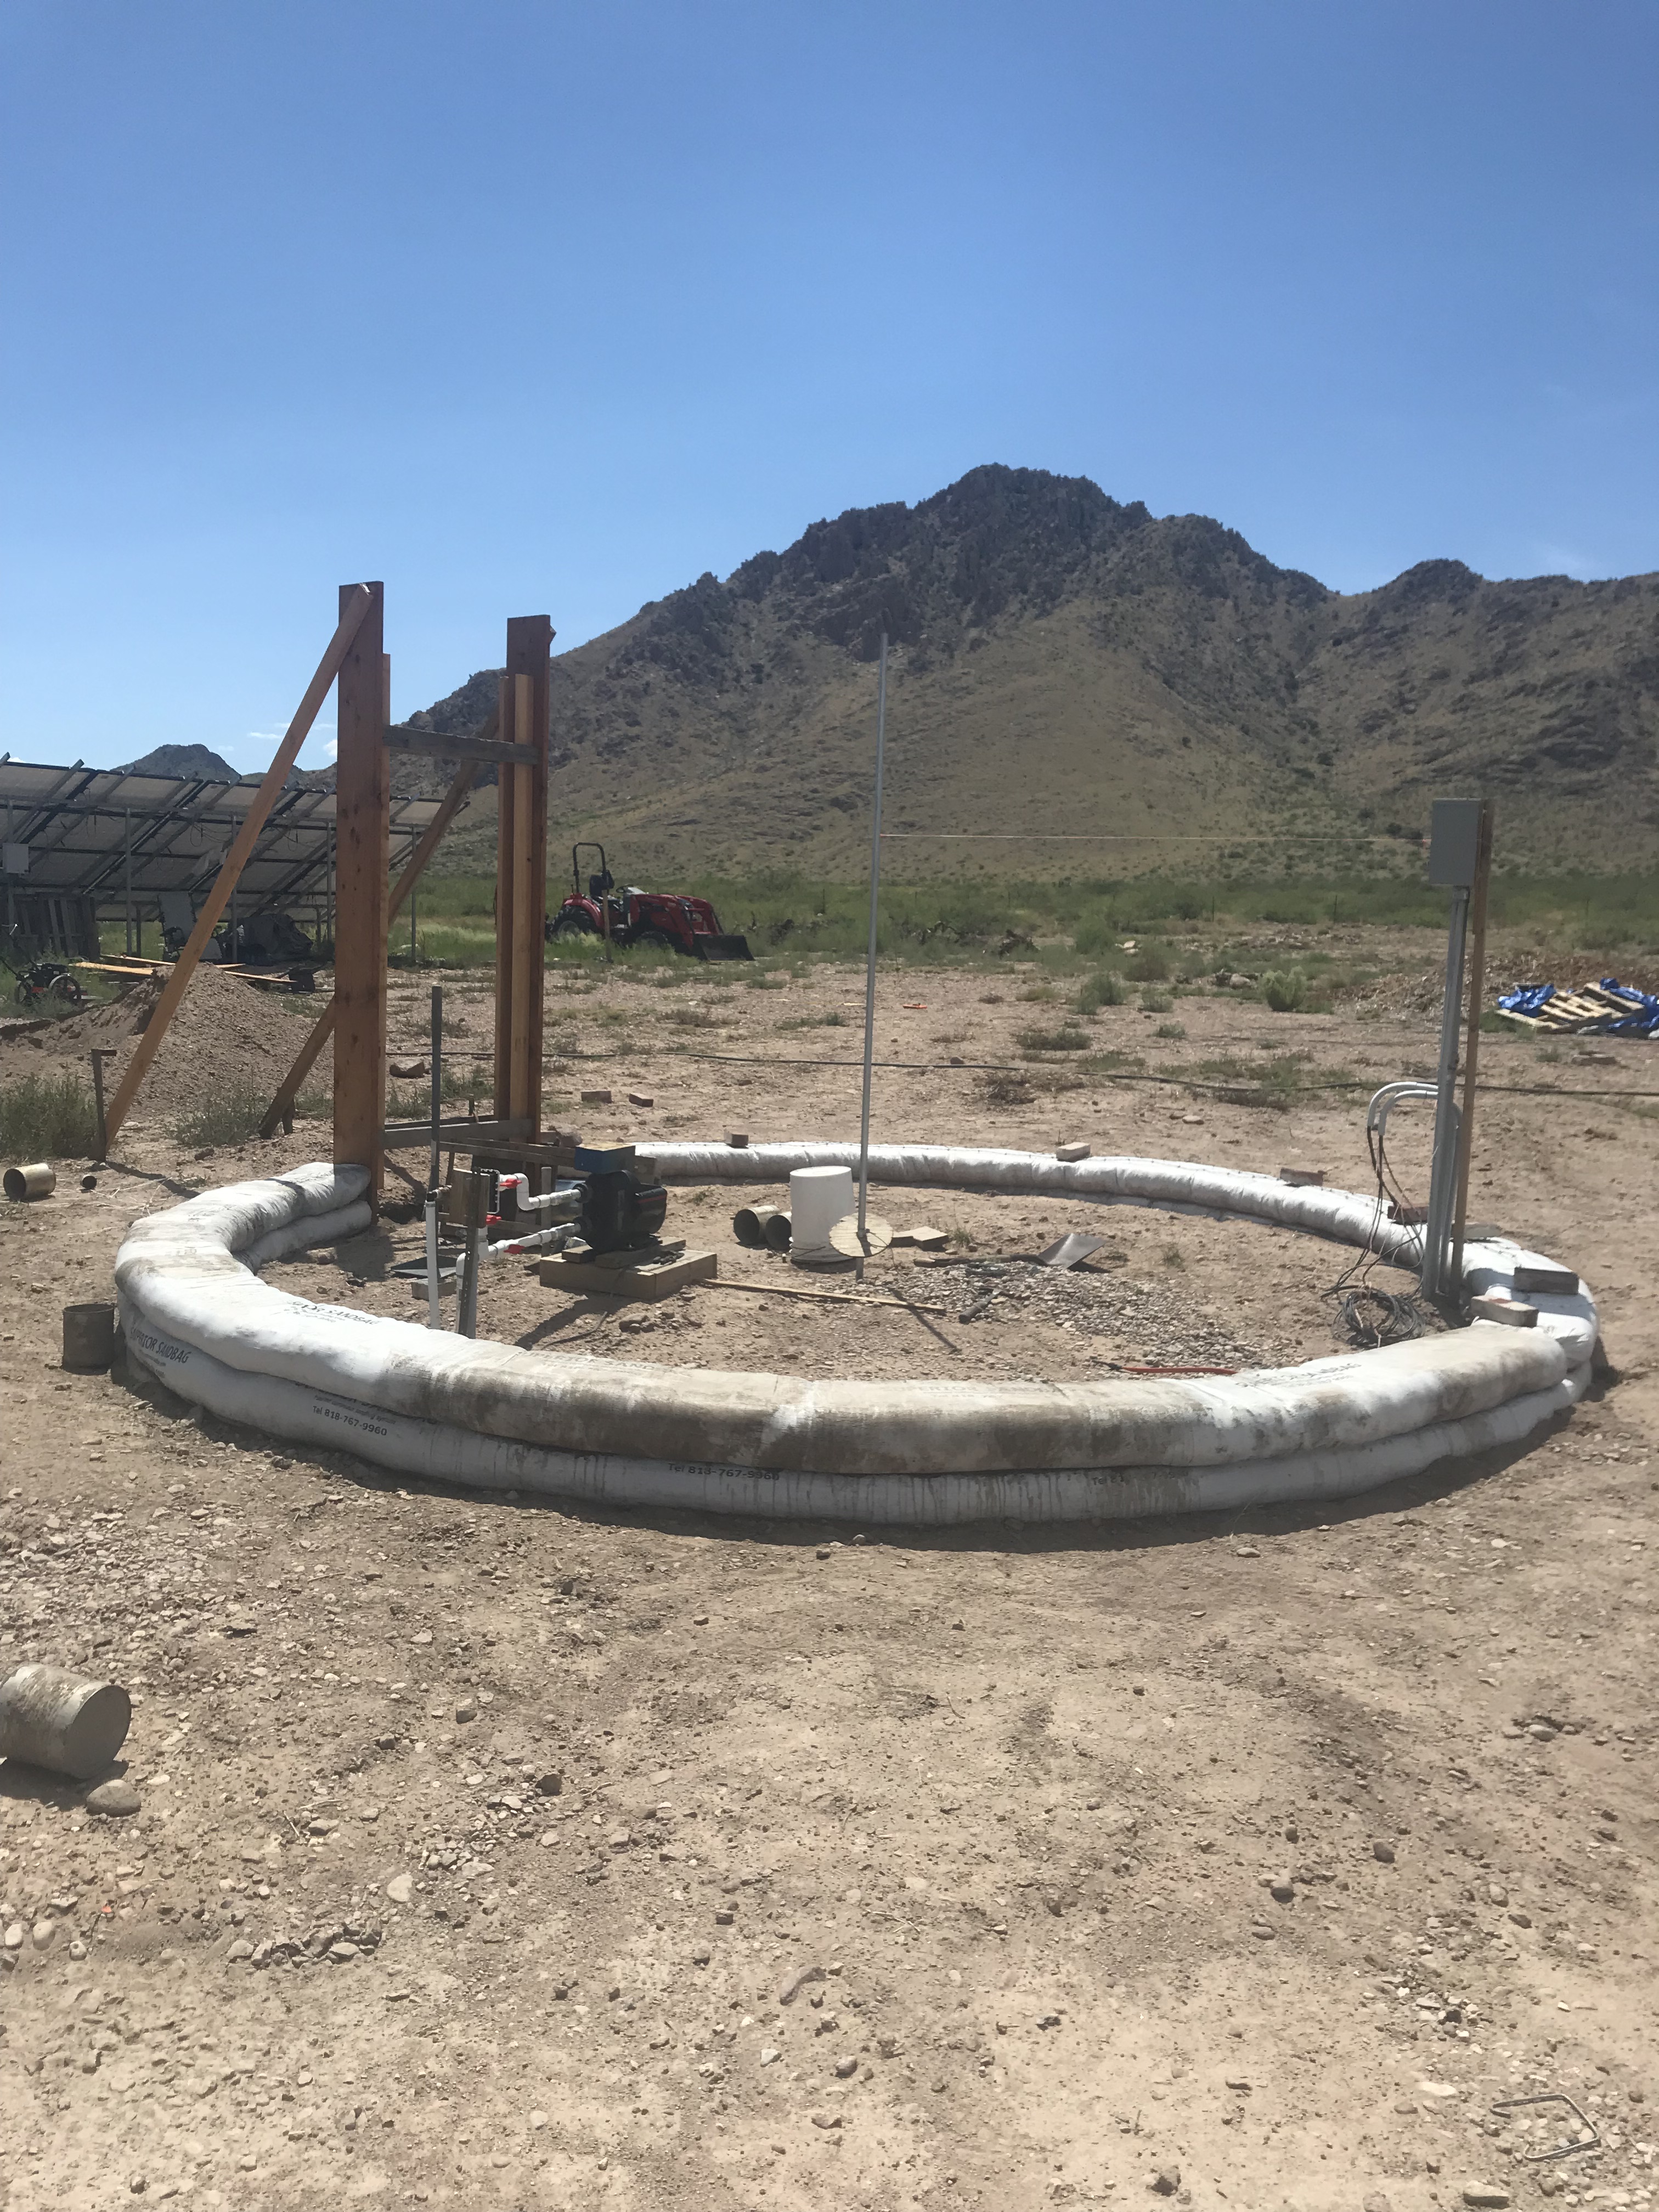
Finished row from a different and closer perspective.
An now, for a couple misc pics.
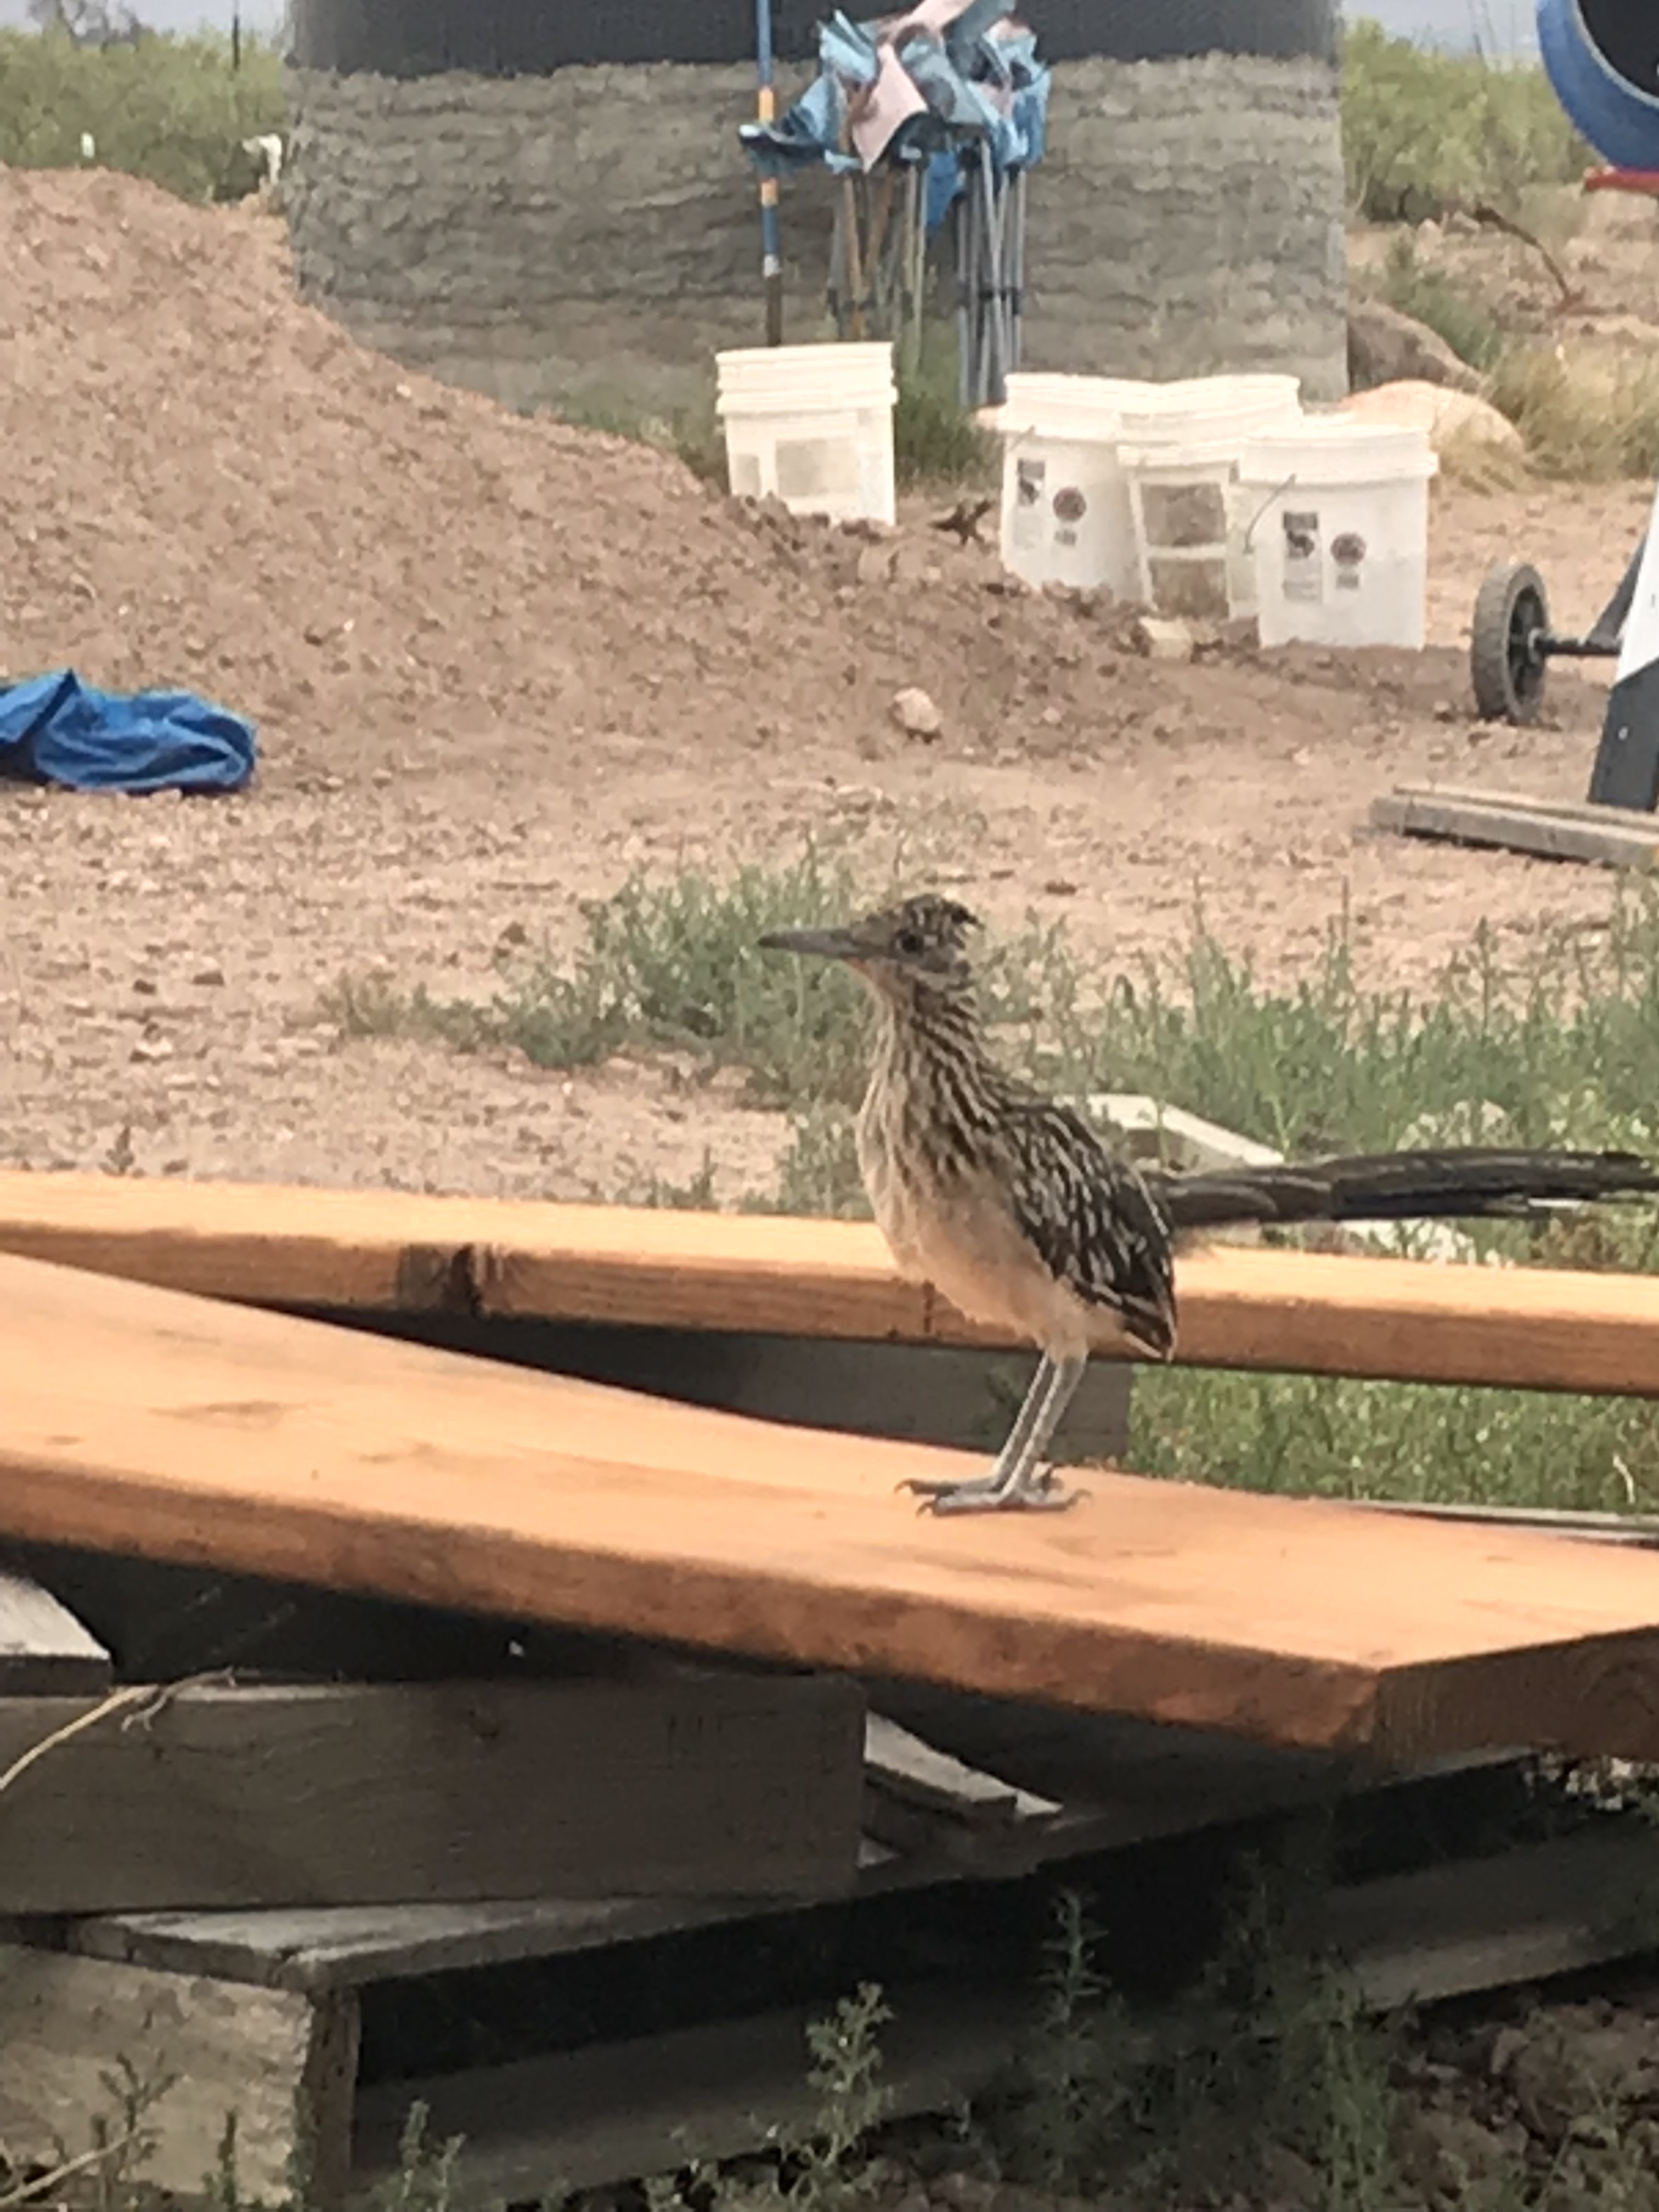
Road runner visiting with us while we were taking one of our breaks.
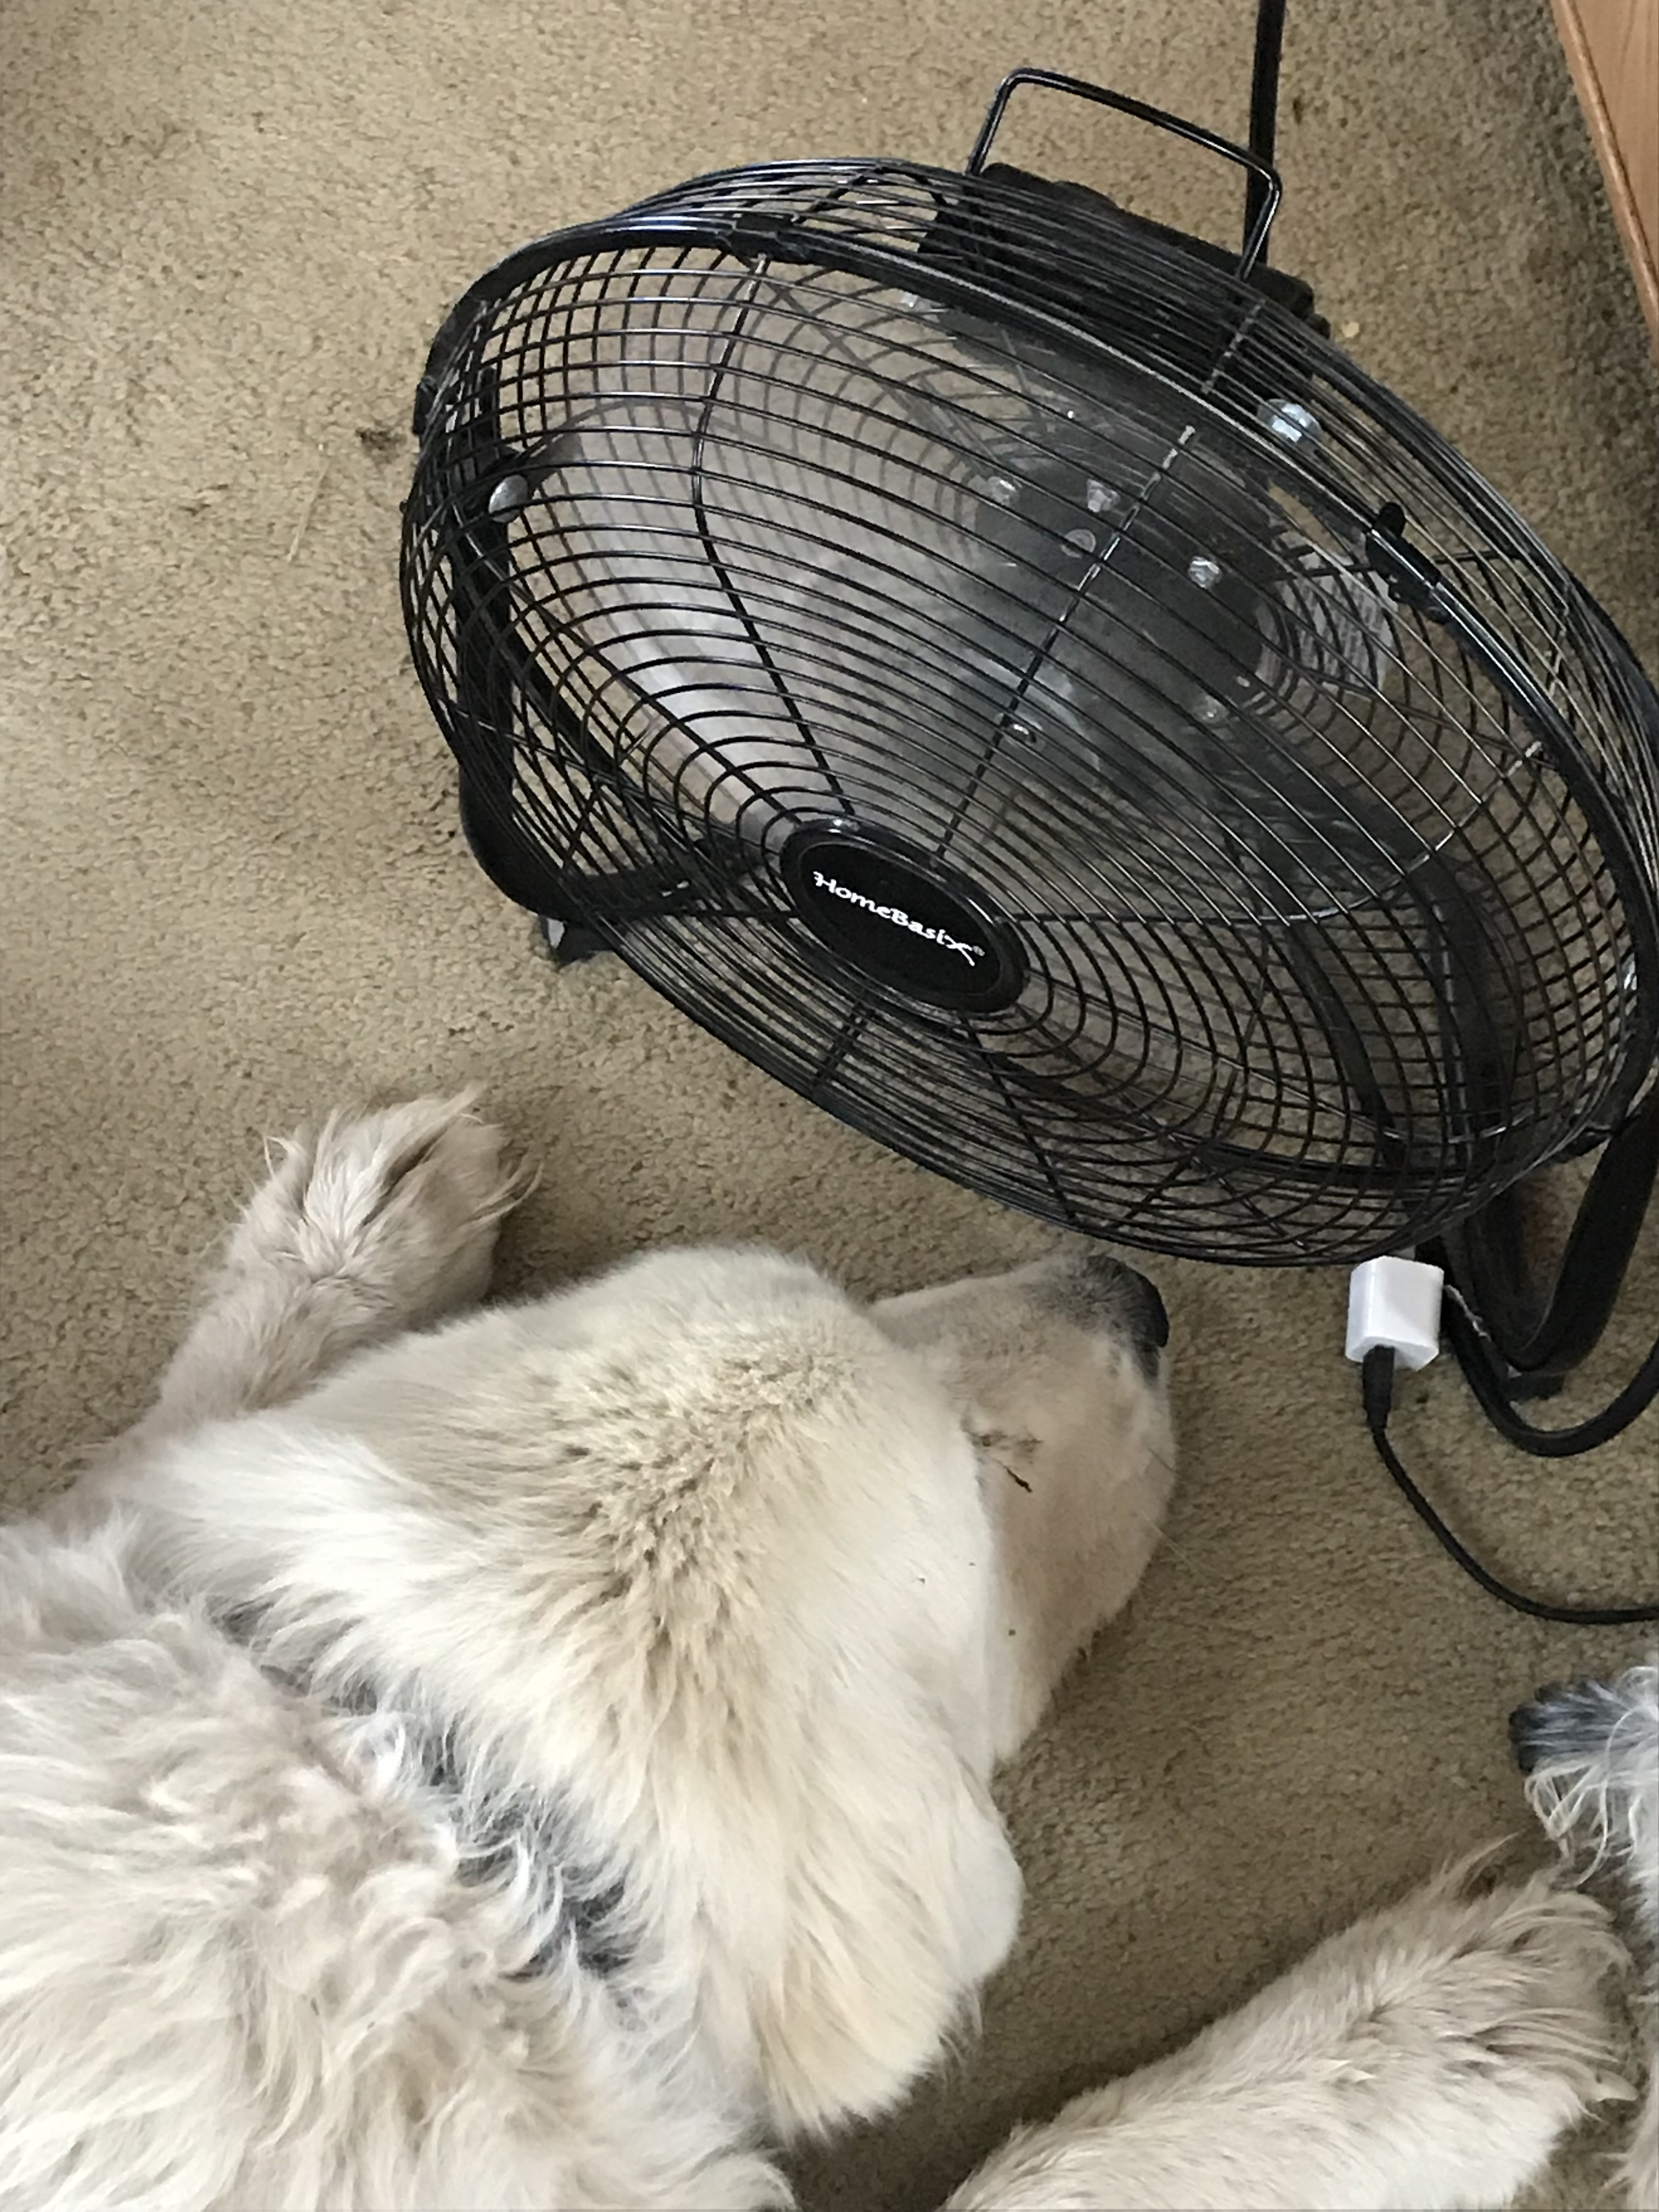
Sasha’s no dummy. She knows where to lay.
I closing, I’ll share another lesson learned (not really “learned”, because I have repeated doing it to varying degrees multiple times since the first).
When transporting a carbonated beverage such as Kombucha from the store to the vehicle when you plan on drinking it on the way home, do not leave it in the child seat of the shopping cart all by itself, hitting darn near every possible bump between the store and your parked vehicle in the back of the lot, then open it while sitting in your vehicle before leaving the store’s parking lot. Bad idea.
Ok. So I have heard it from all directions may times: “Get your act together, sit down, and write a damn update on your blog!” To that I say: Thanks! Sometimes I just need a major kick in the ass (or 10).
So it is nearly 4 months since my last update. Geeze, I’m getting worse, not better. I don’t believe in excuses so I won’t give any. I just didn’t take the time to blog.
As you can see from the title and dates, this post won’t get you up to date, but will cover half the time since my last post and I will try to follow this one up in a few days with a second post. I spent much of yesterday evening and part of this evening gathering photos and getting them uploaded to the site here for inclusion in the blogs.
I really didn’t get much done in May, so not much to blog about. I think this blog post will primarily be photo’s with associated commentary and will close with a number of lessons learn that you may find humorous (mostly due to my sheer stupidity).
Sasha let me know that I needed to encourage another rattle snake to depart from under the trailer.
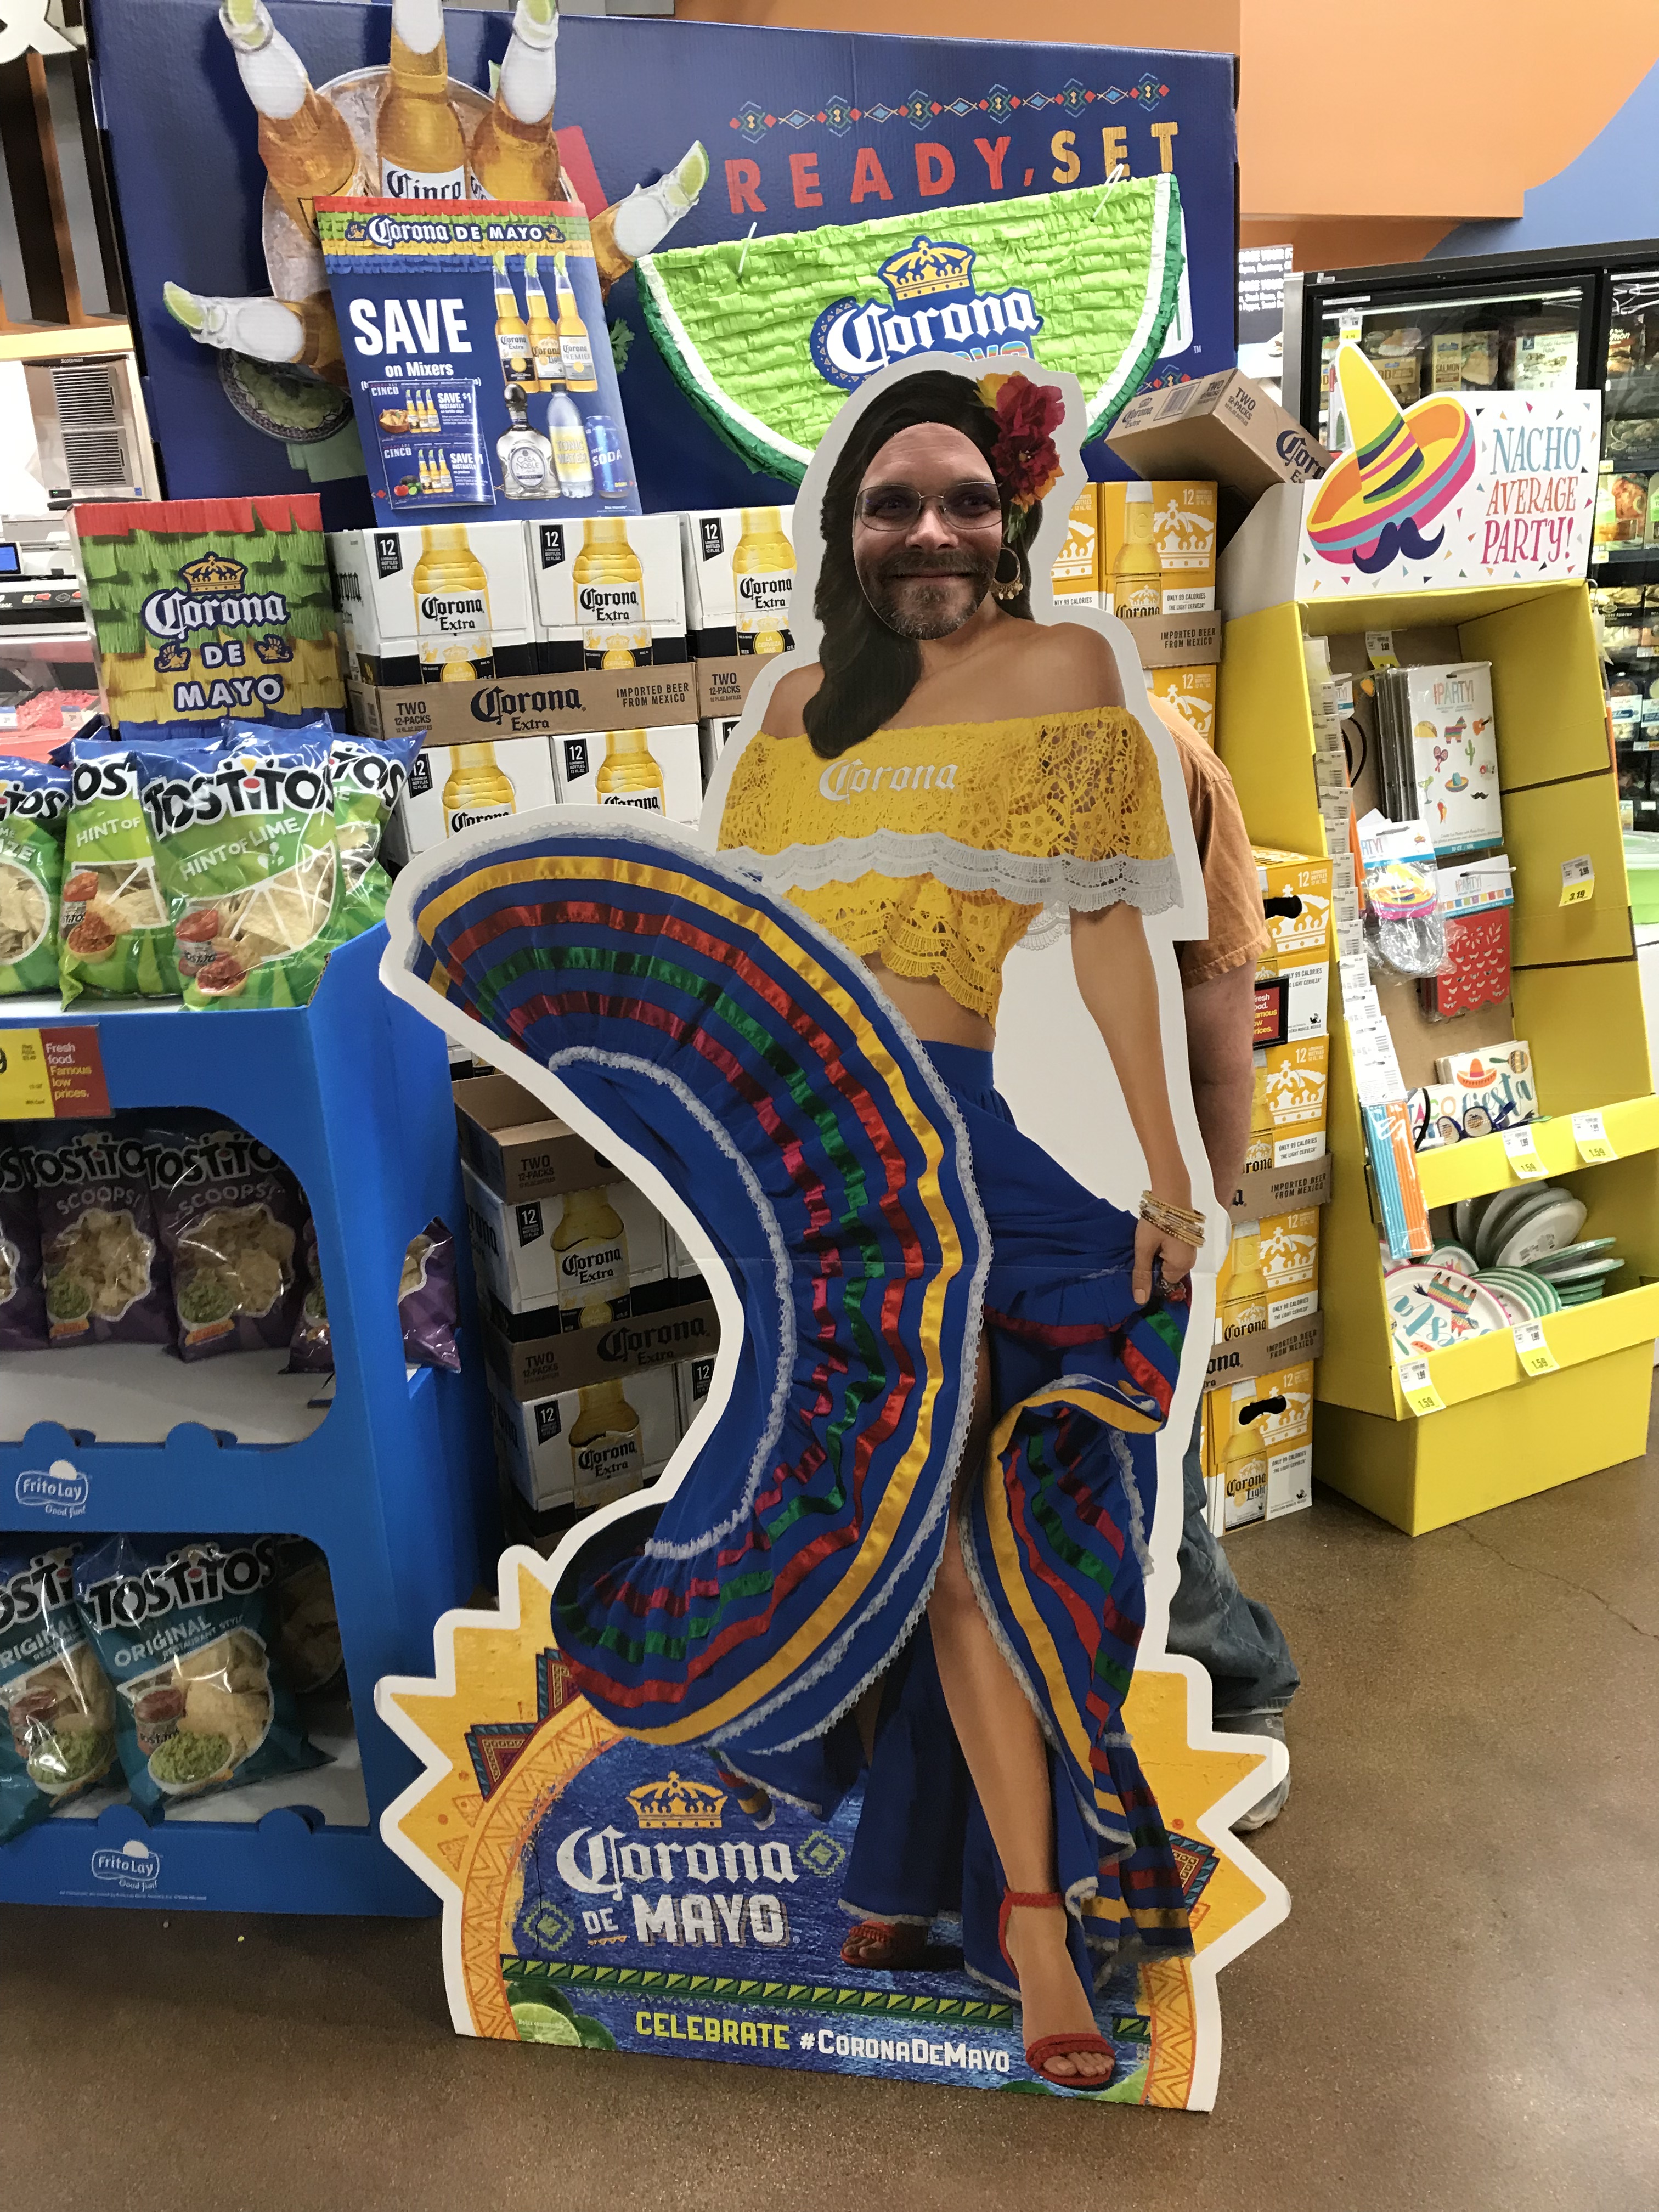
Didn’t realize I had such nice legs! It was my birthday, I was home alone so I decided to head to Sierra Vista for some shopping and dinner. Saw this and couldn’t resist. Asked a complete stranger to take my pic.
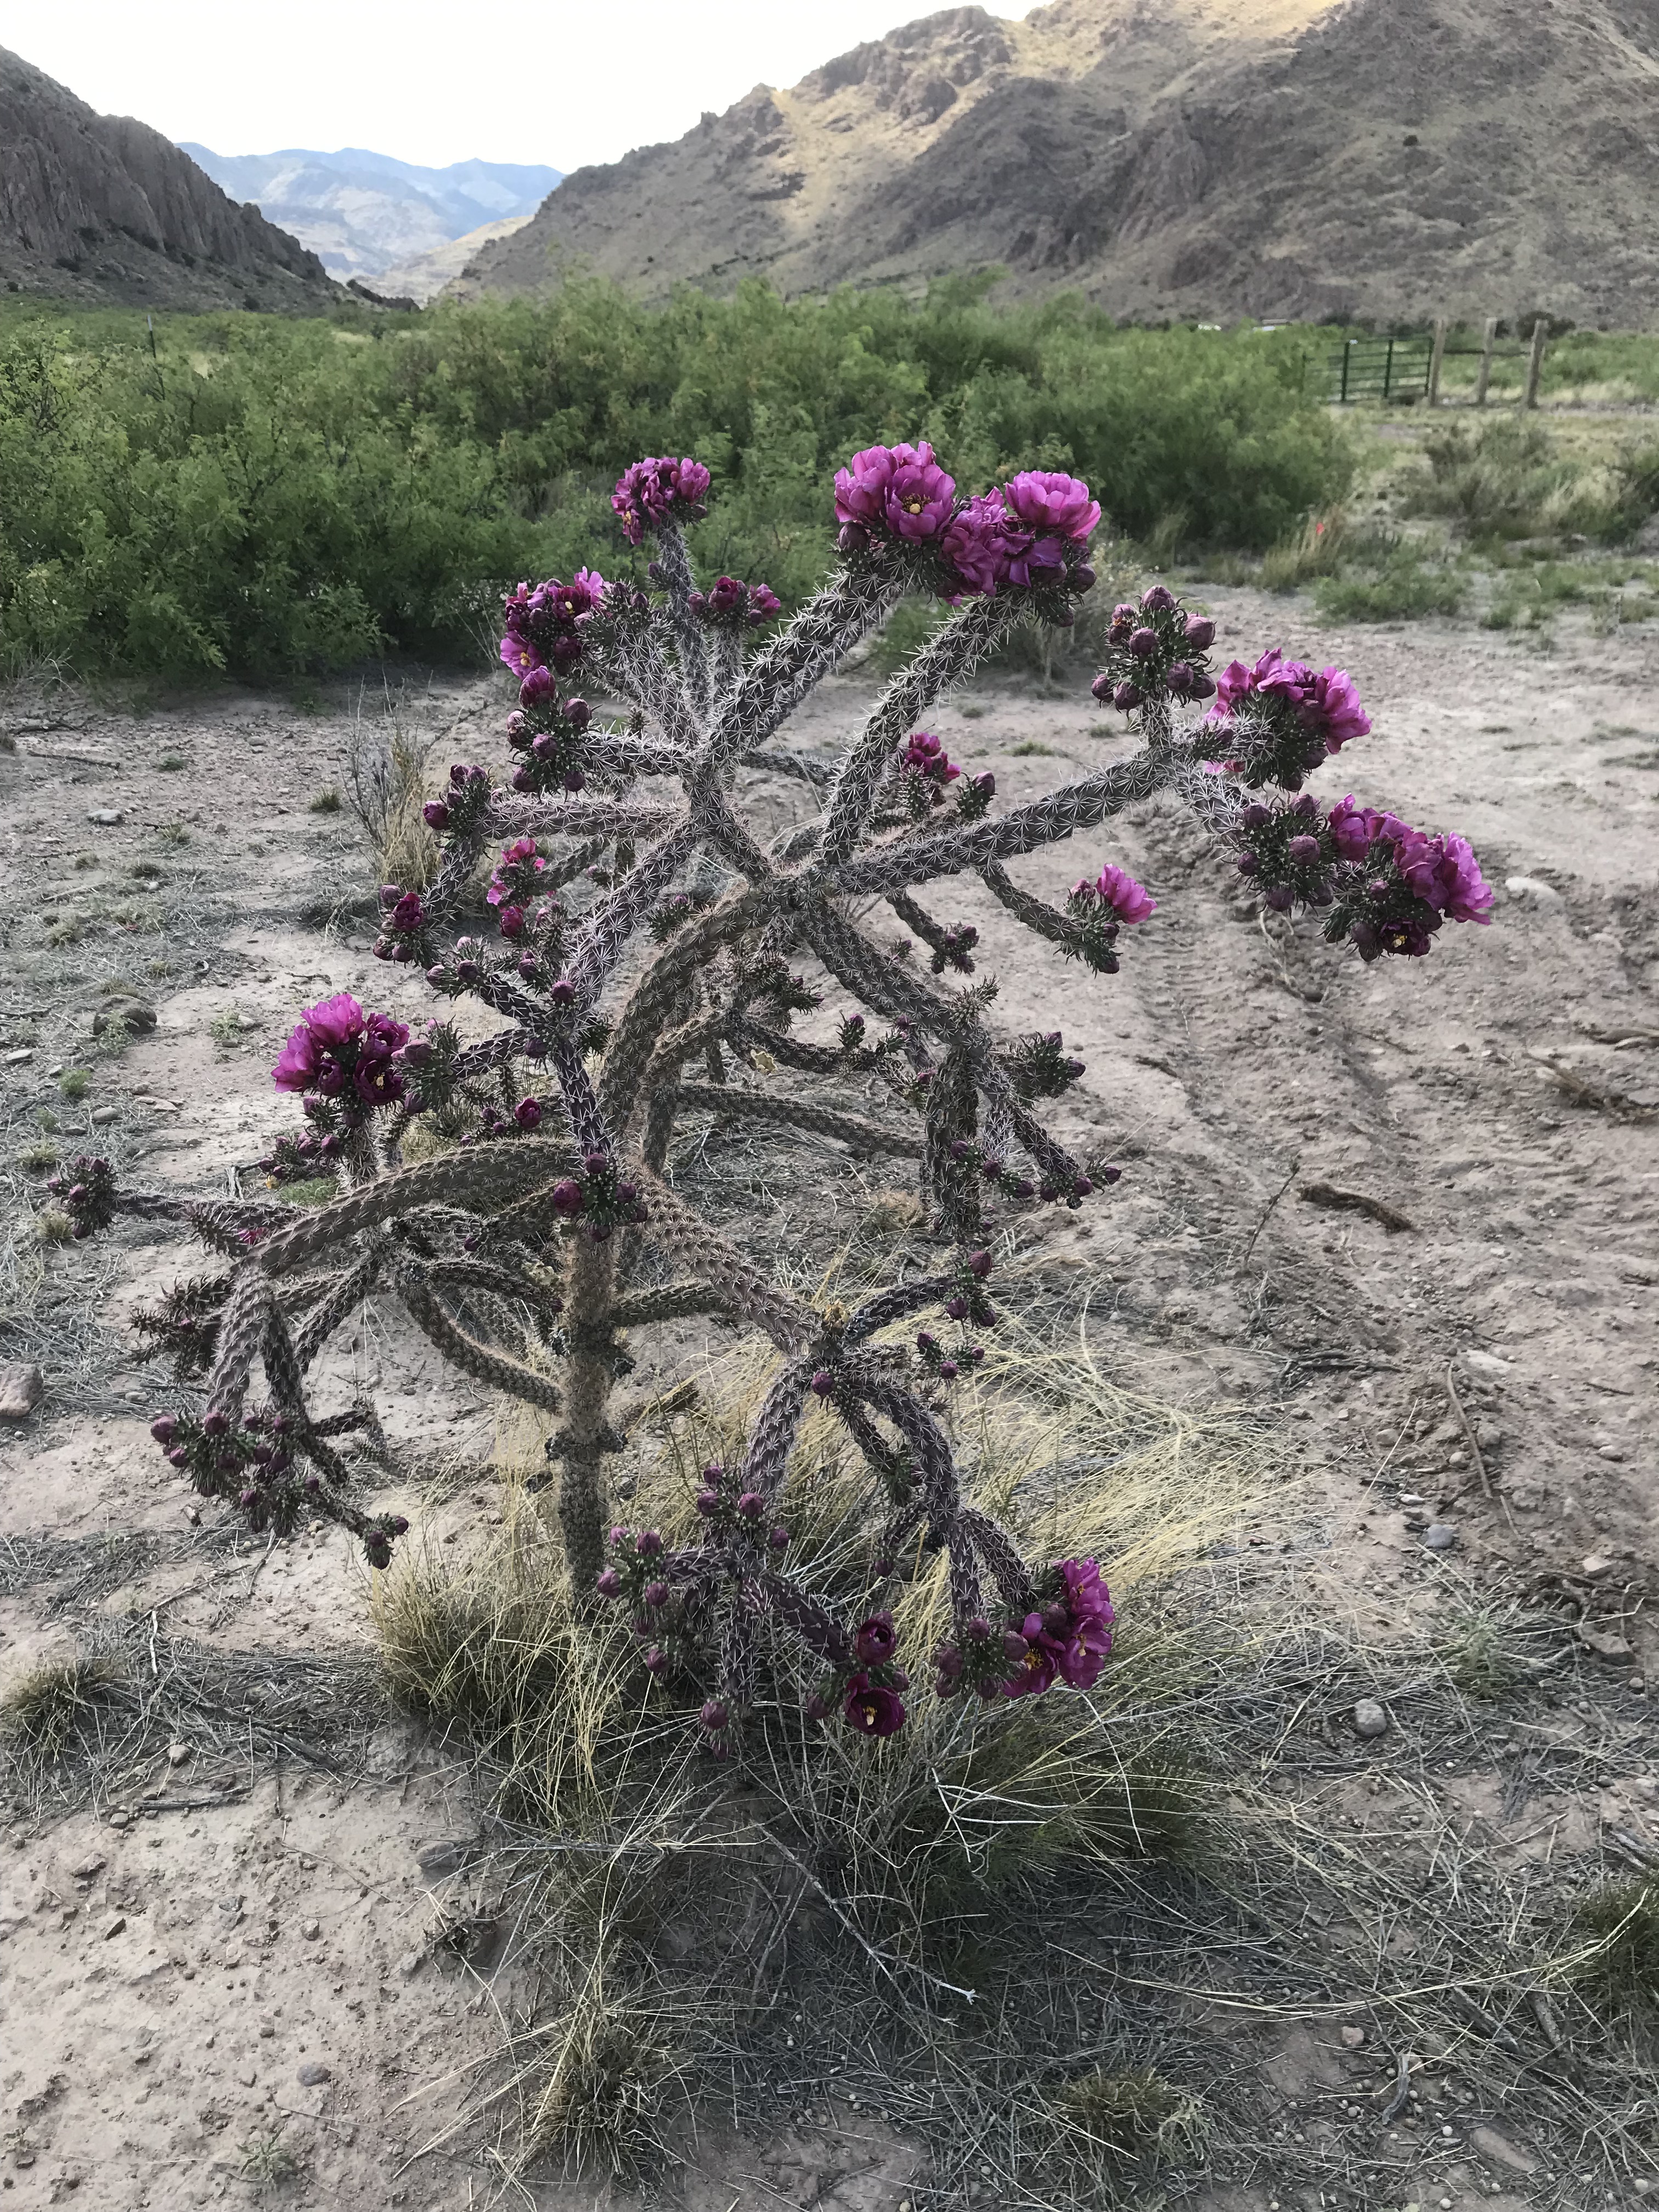
One afternoon I walked over to Boyd’s for a visit. Being spring, there were a lot of things in bloom so I snapped a number of photos as I went. Enjoy.
Some sort of cholla, maybe cane.
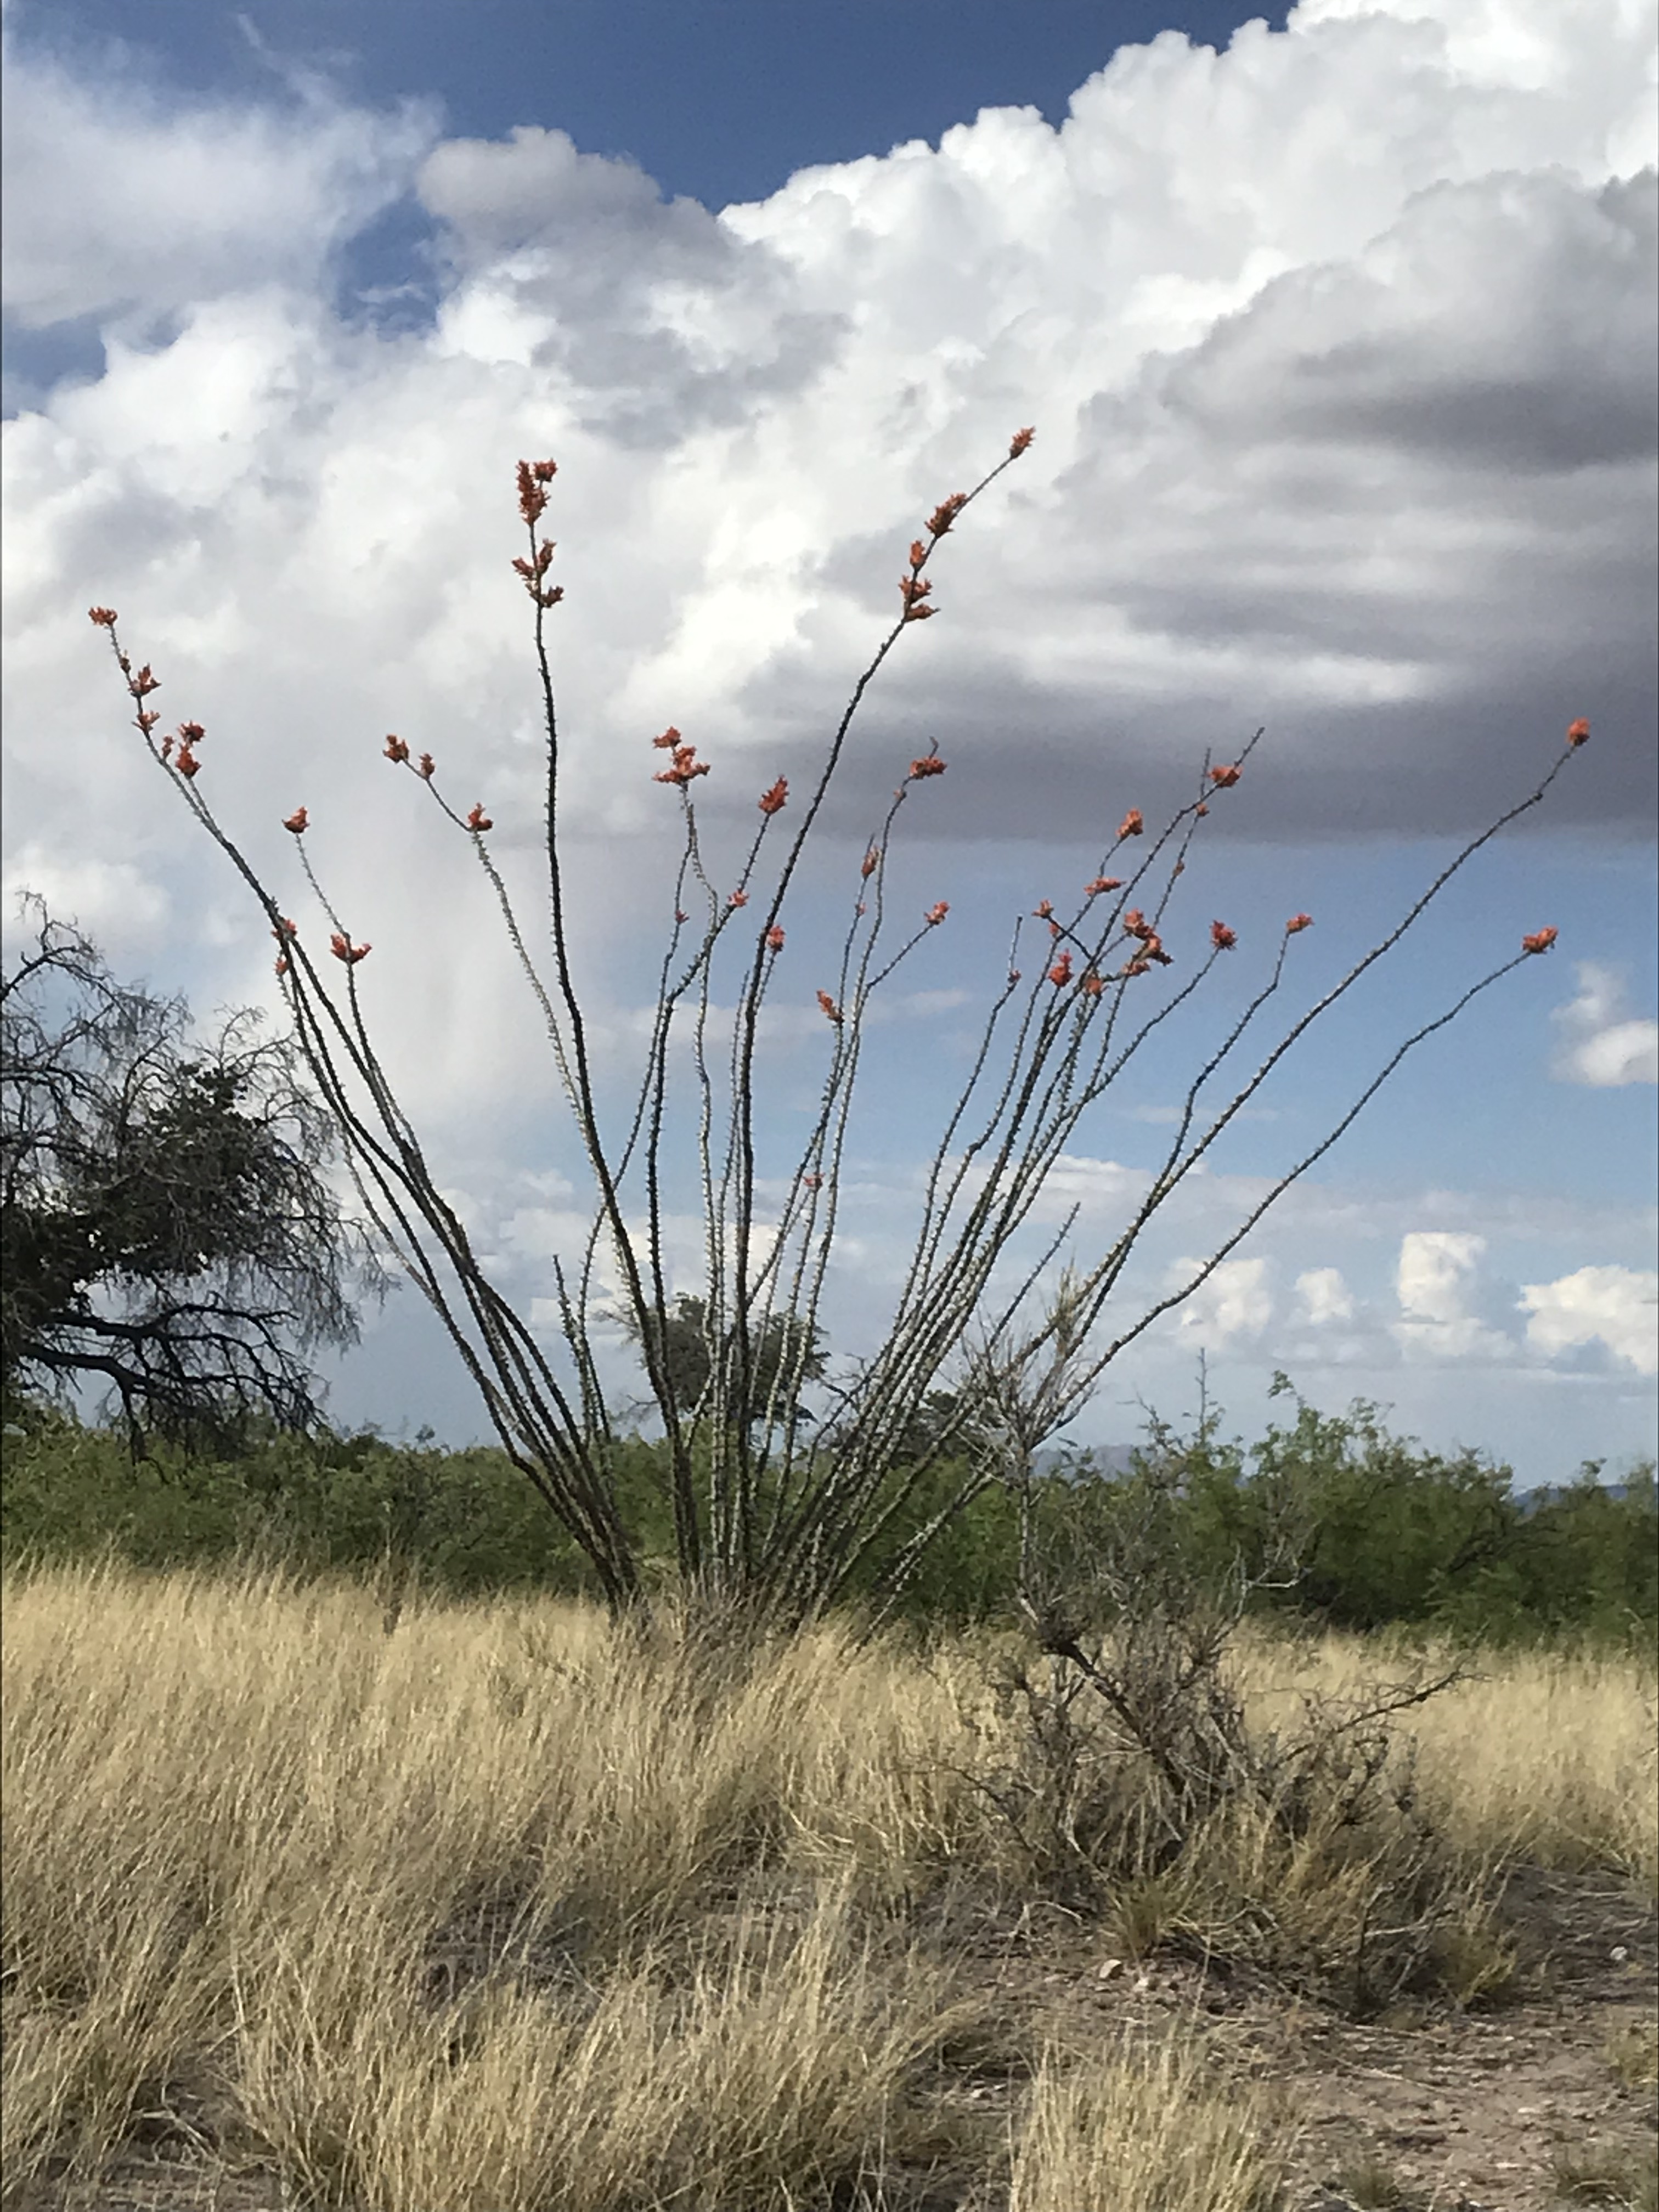
Ocotillo
Desert willow.
Desert willow flower.
Prickly pear.
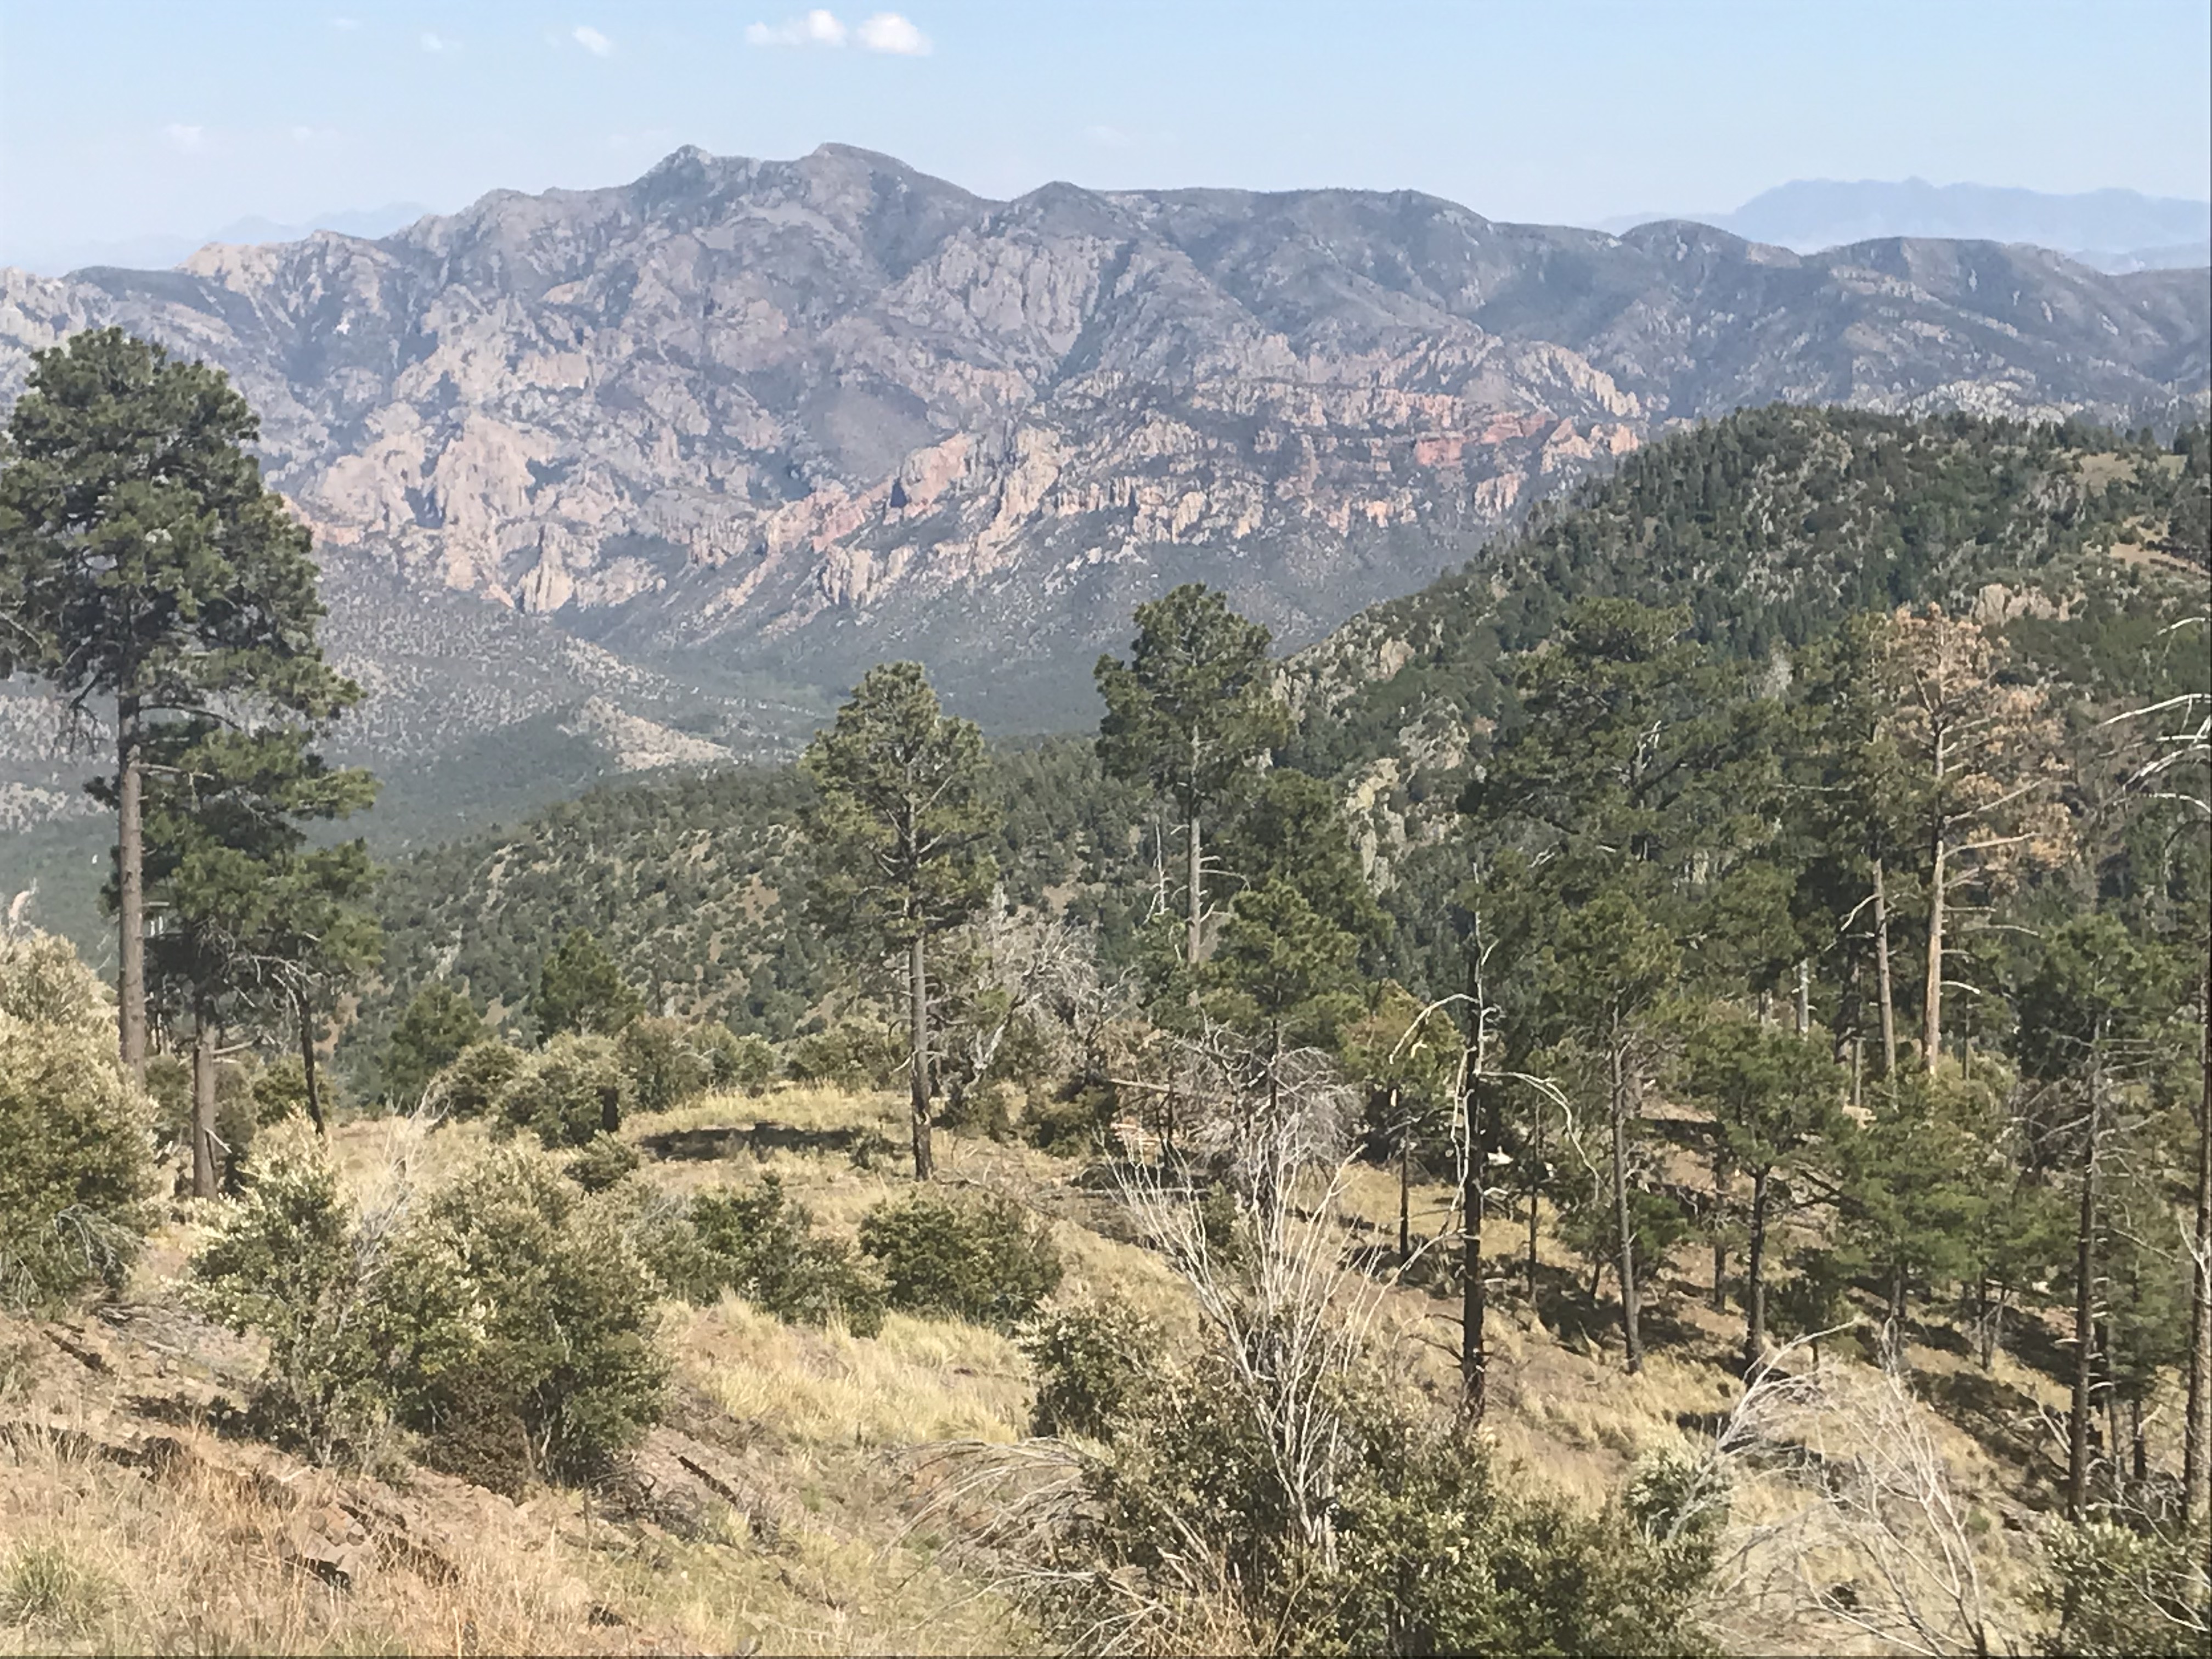
After Cheryl and Rachel got home from their travels (volunteering in Houston and Detroit for First Robotics World Championships) and visiting with family in Michigan, I took them up to Rustler’s Park and we had a picnic enjoying the views. I think Cheryl enjoyed the views from the top more so than the views from the car driving the narrow mountain roads with no guard rails to get there.
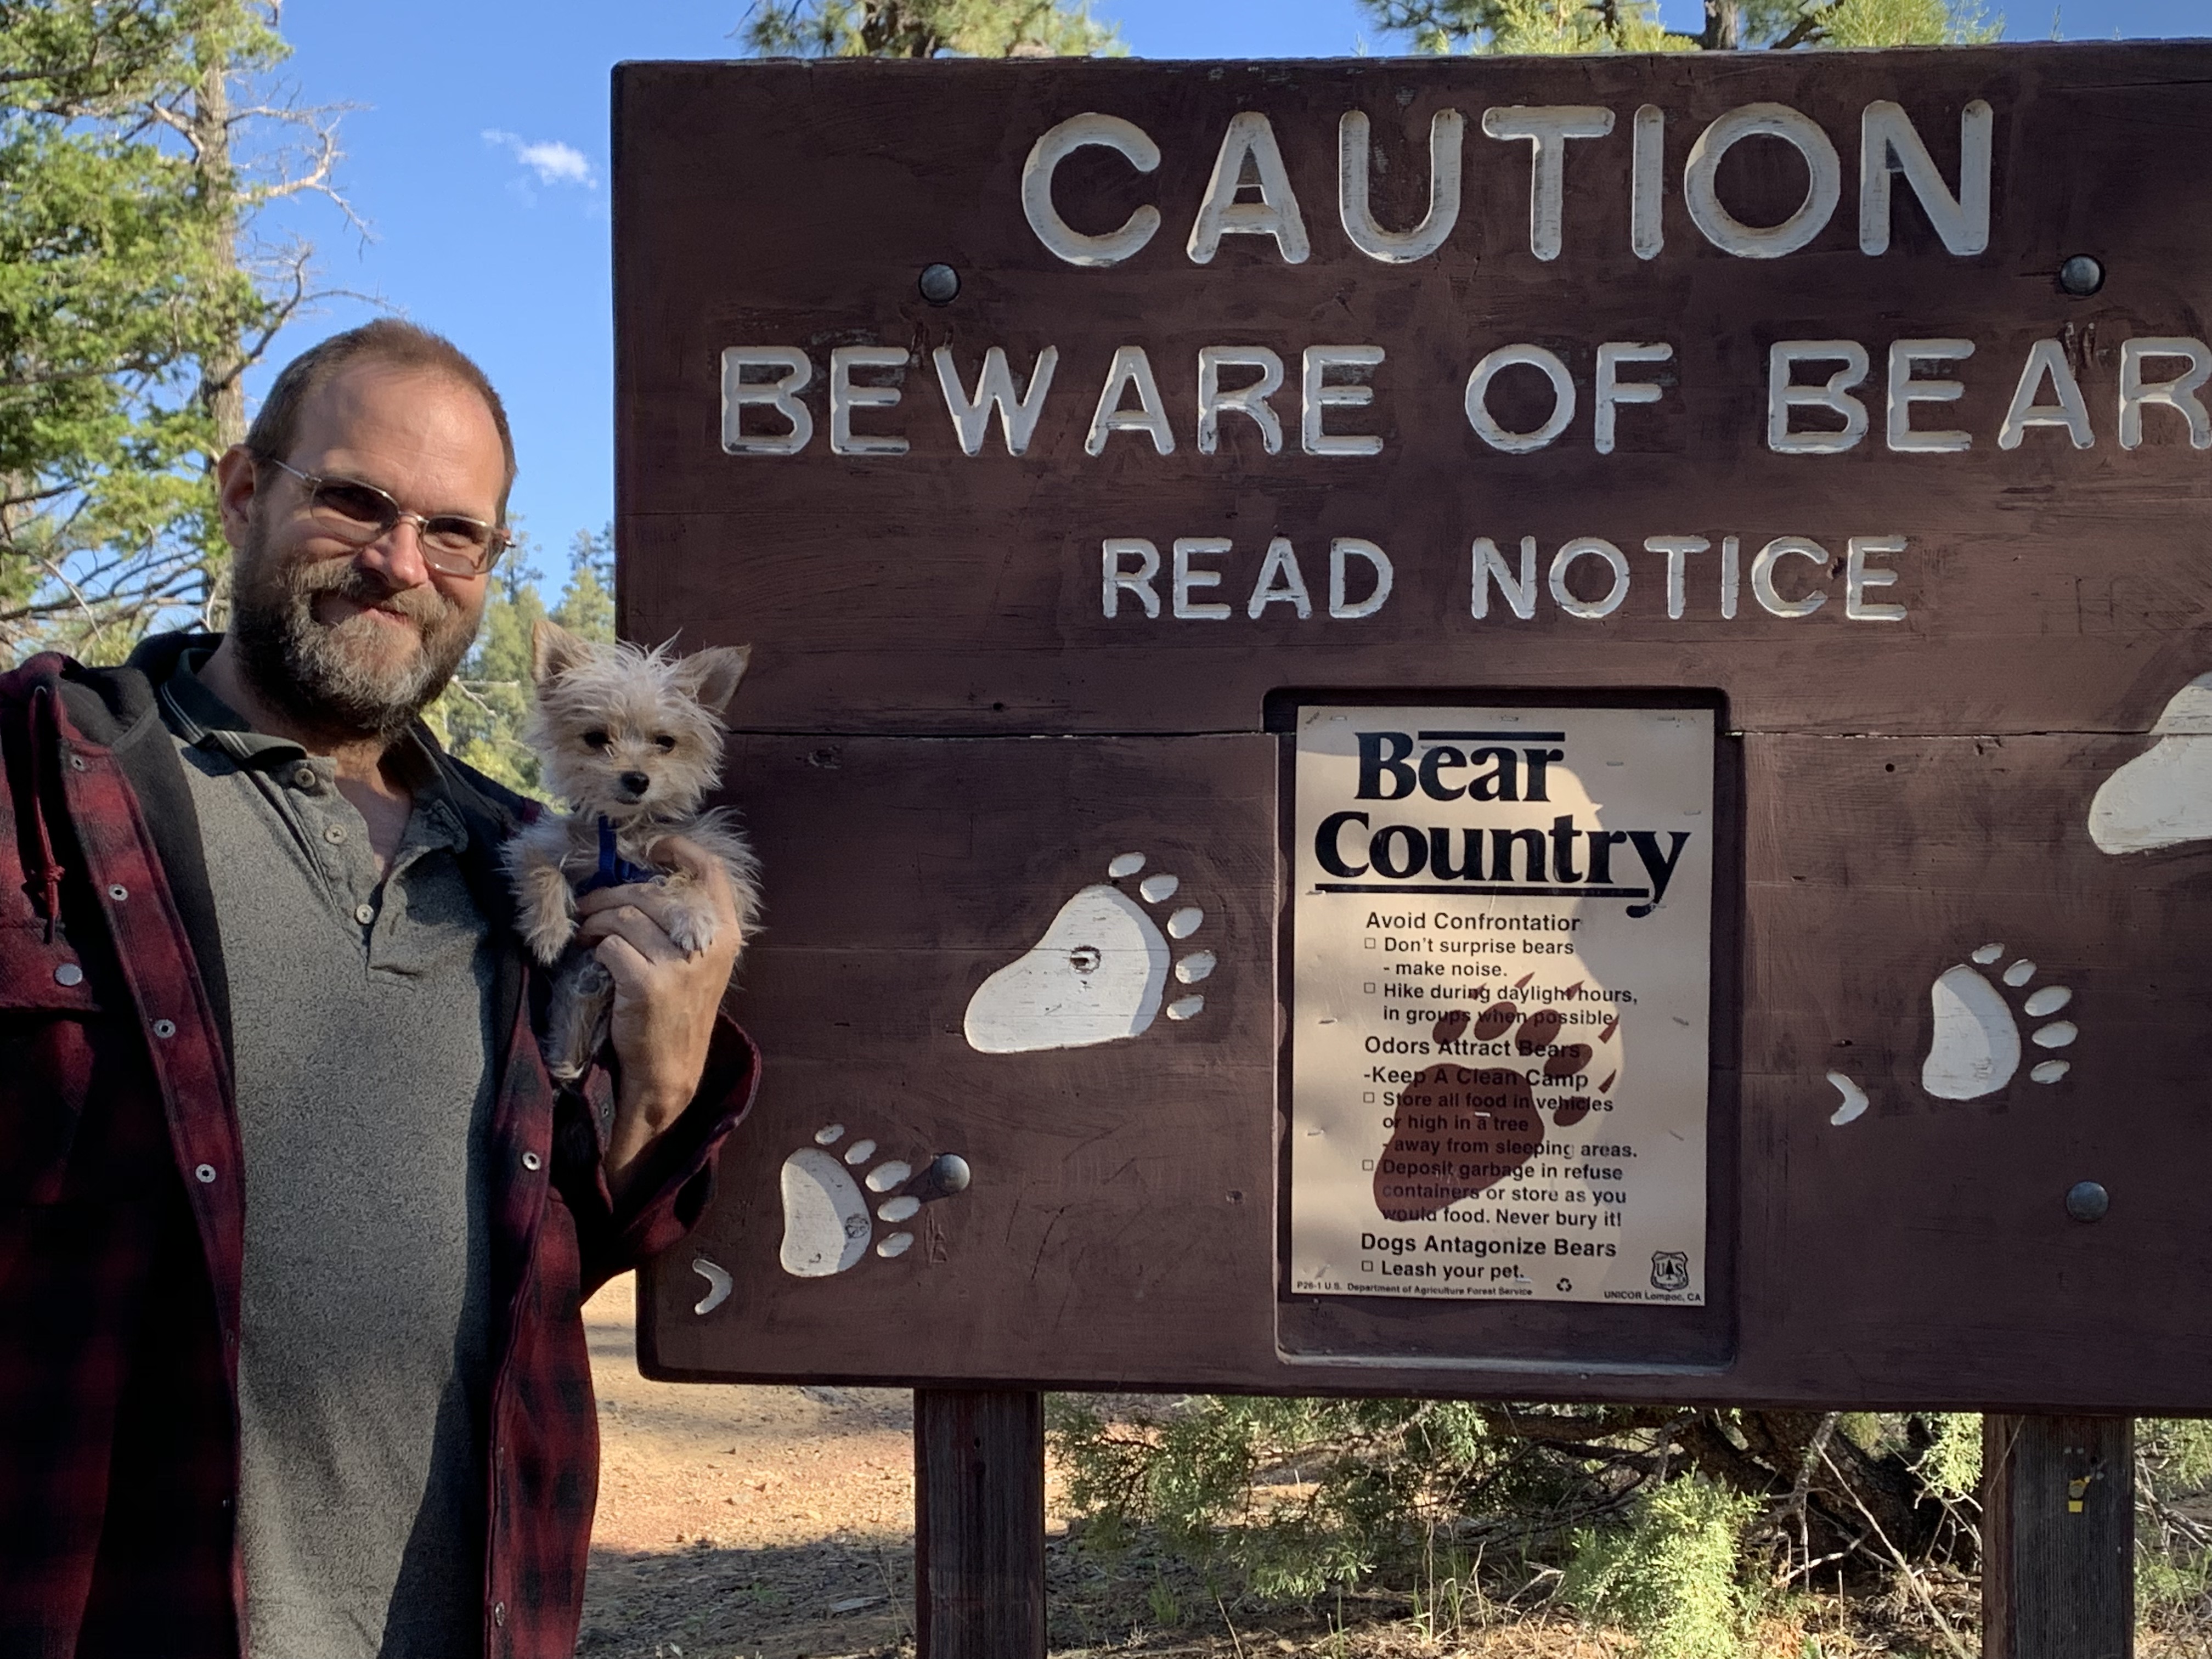
Just had to stop on the way home and take a picture with a sign warning us how to protect ourselves from our dog name “Bear”
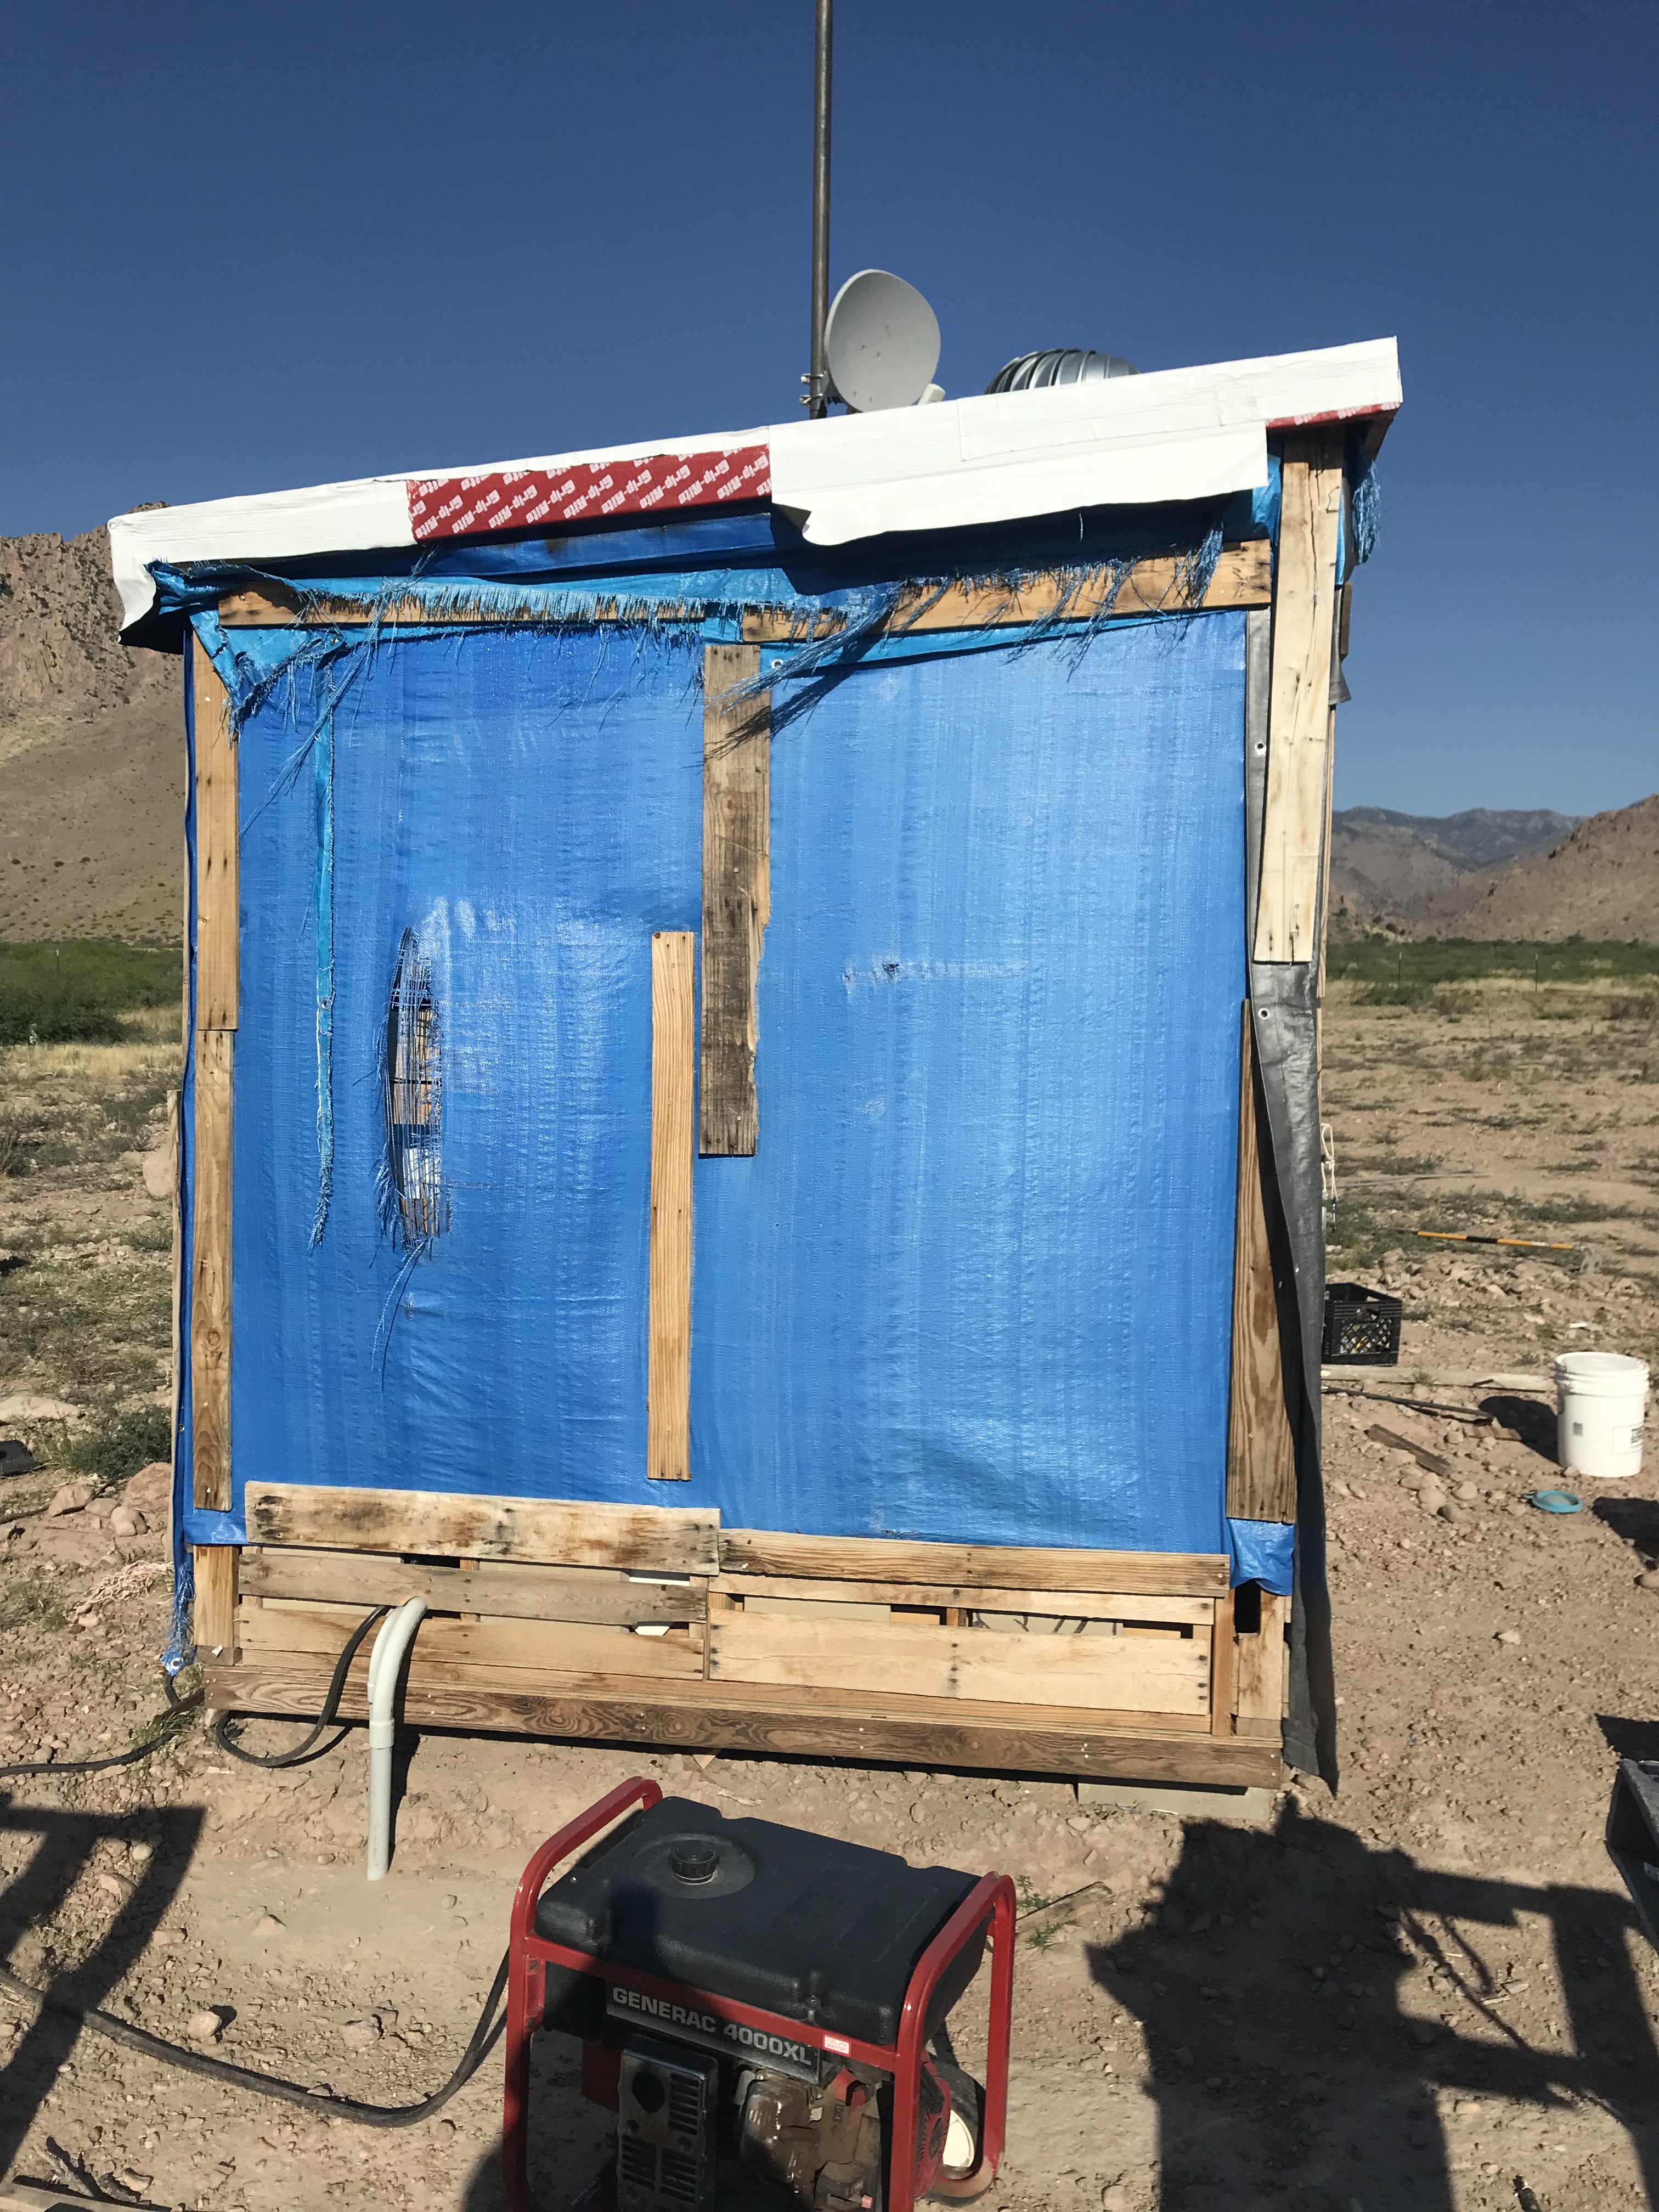
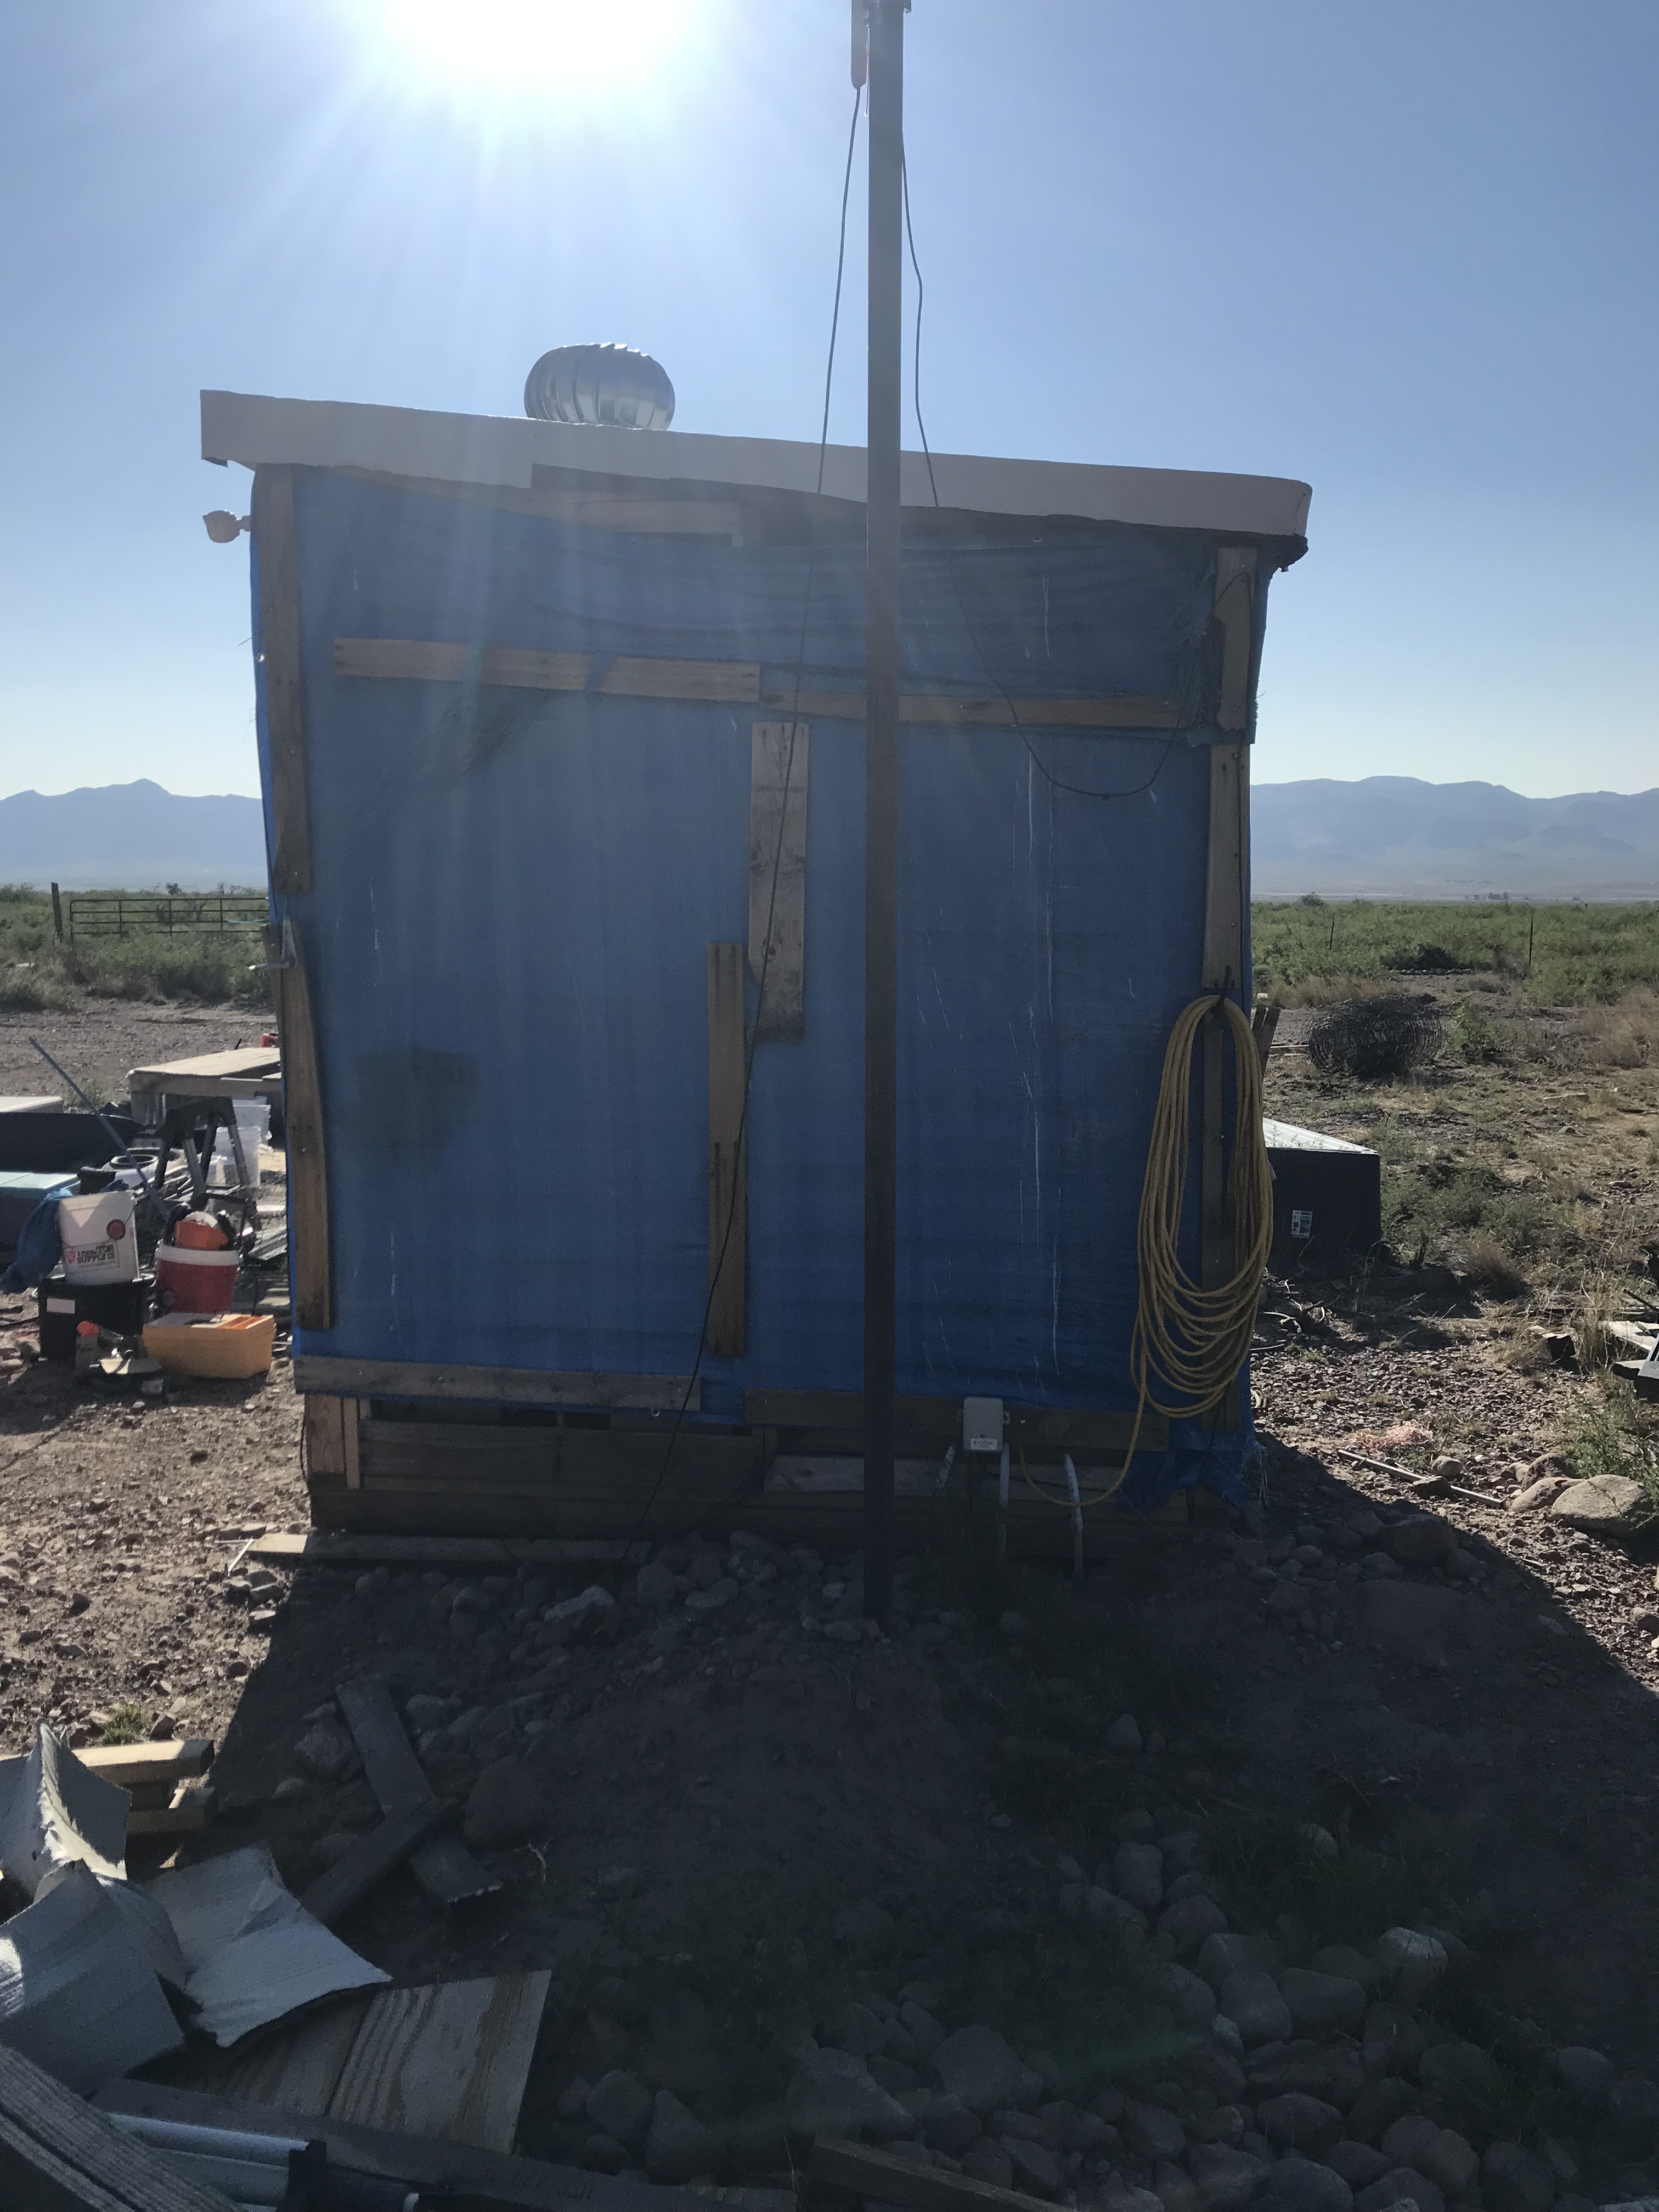
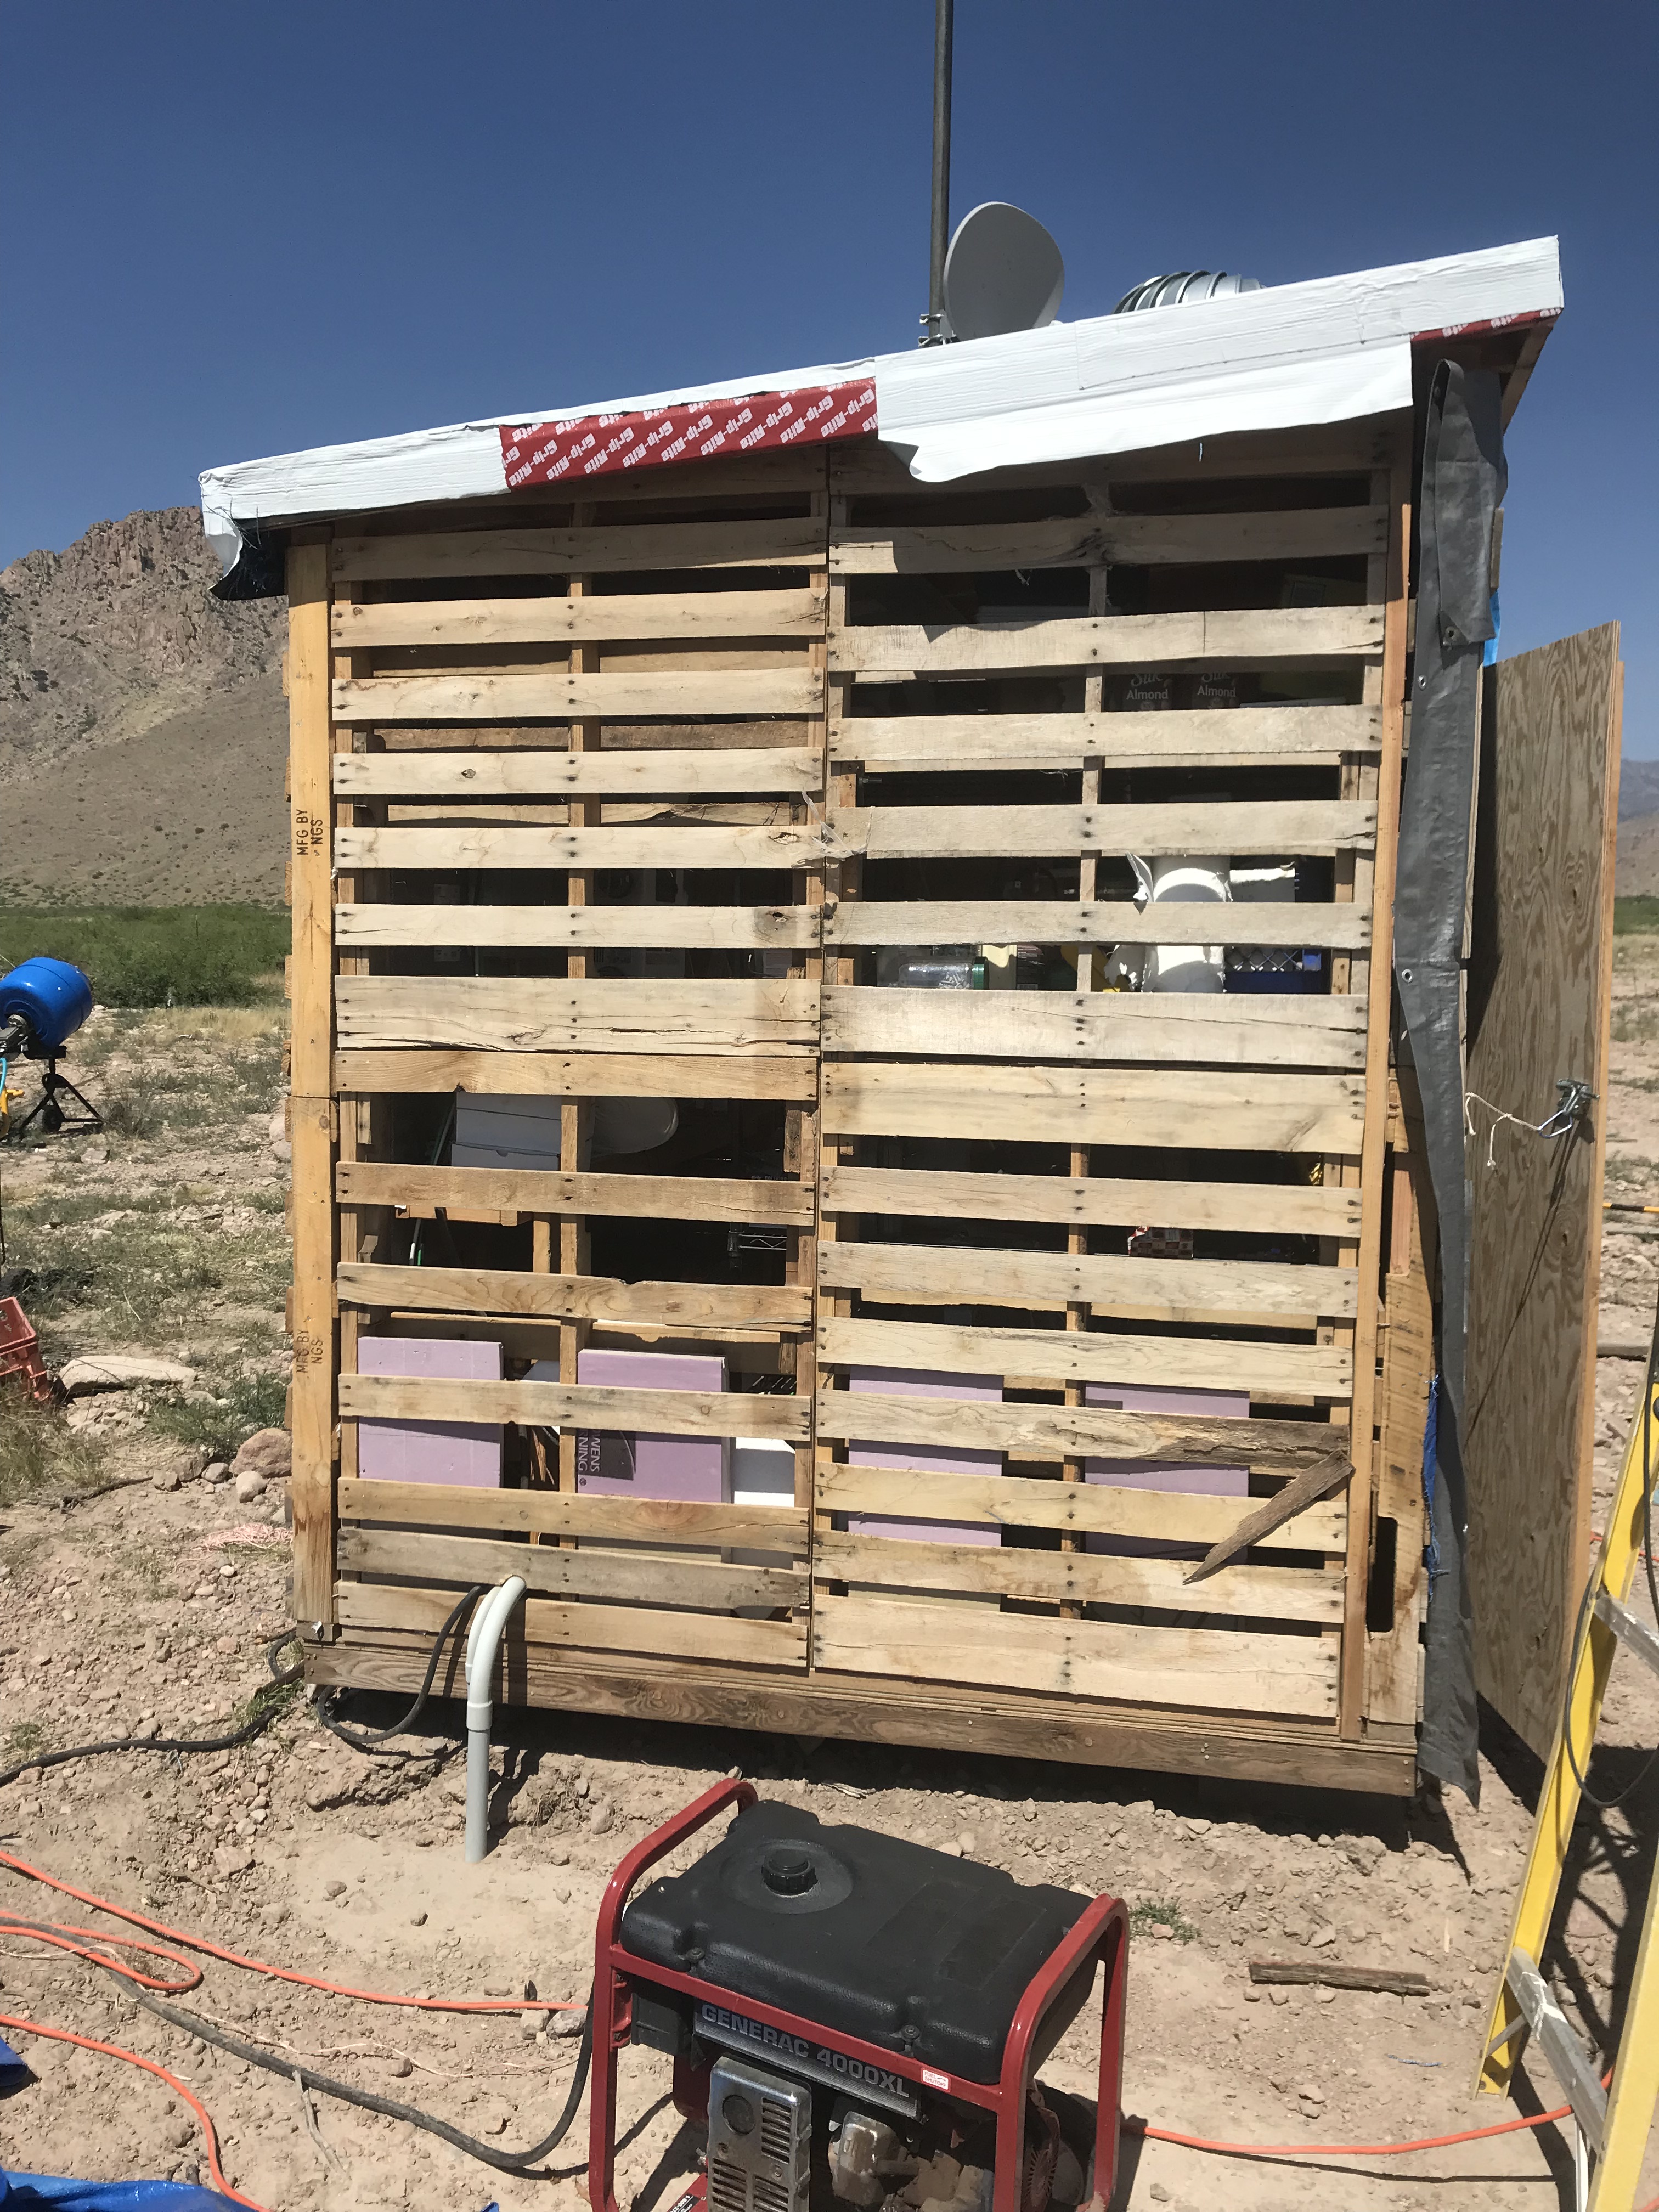
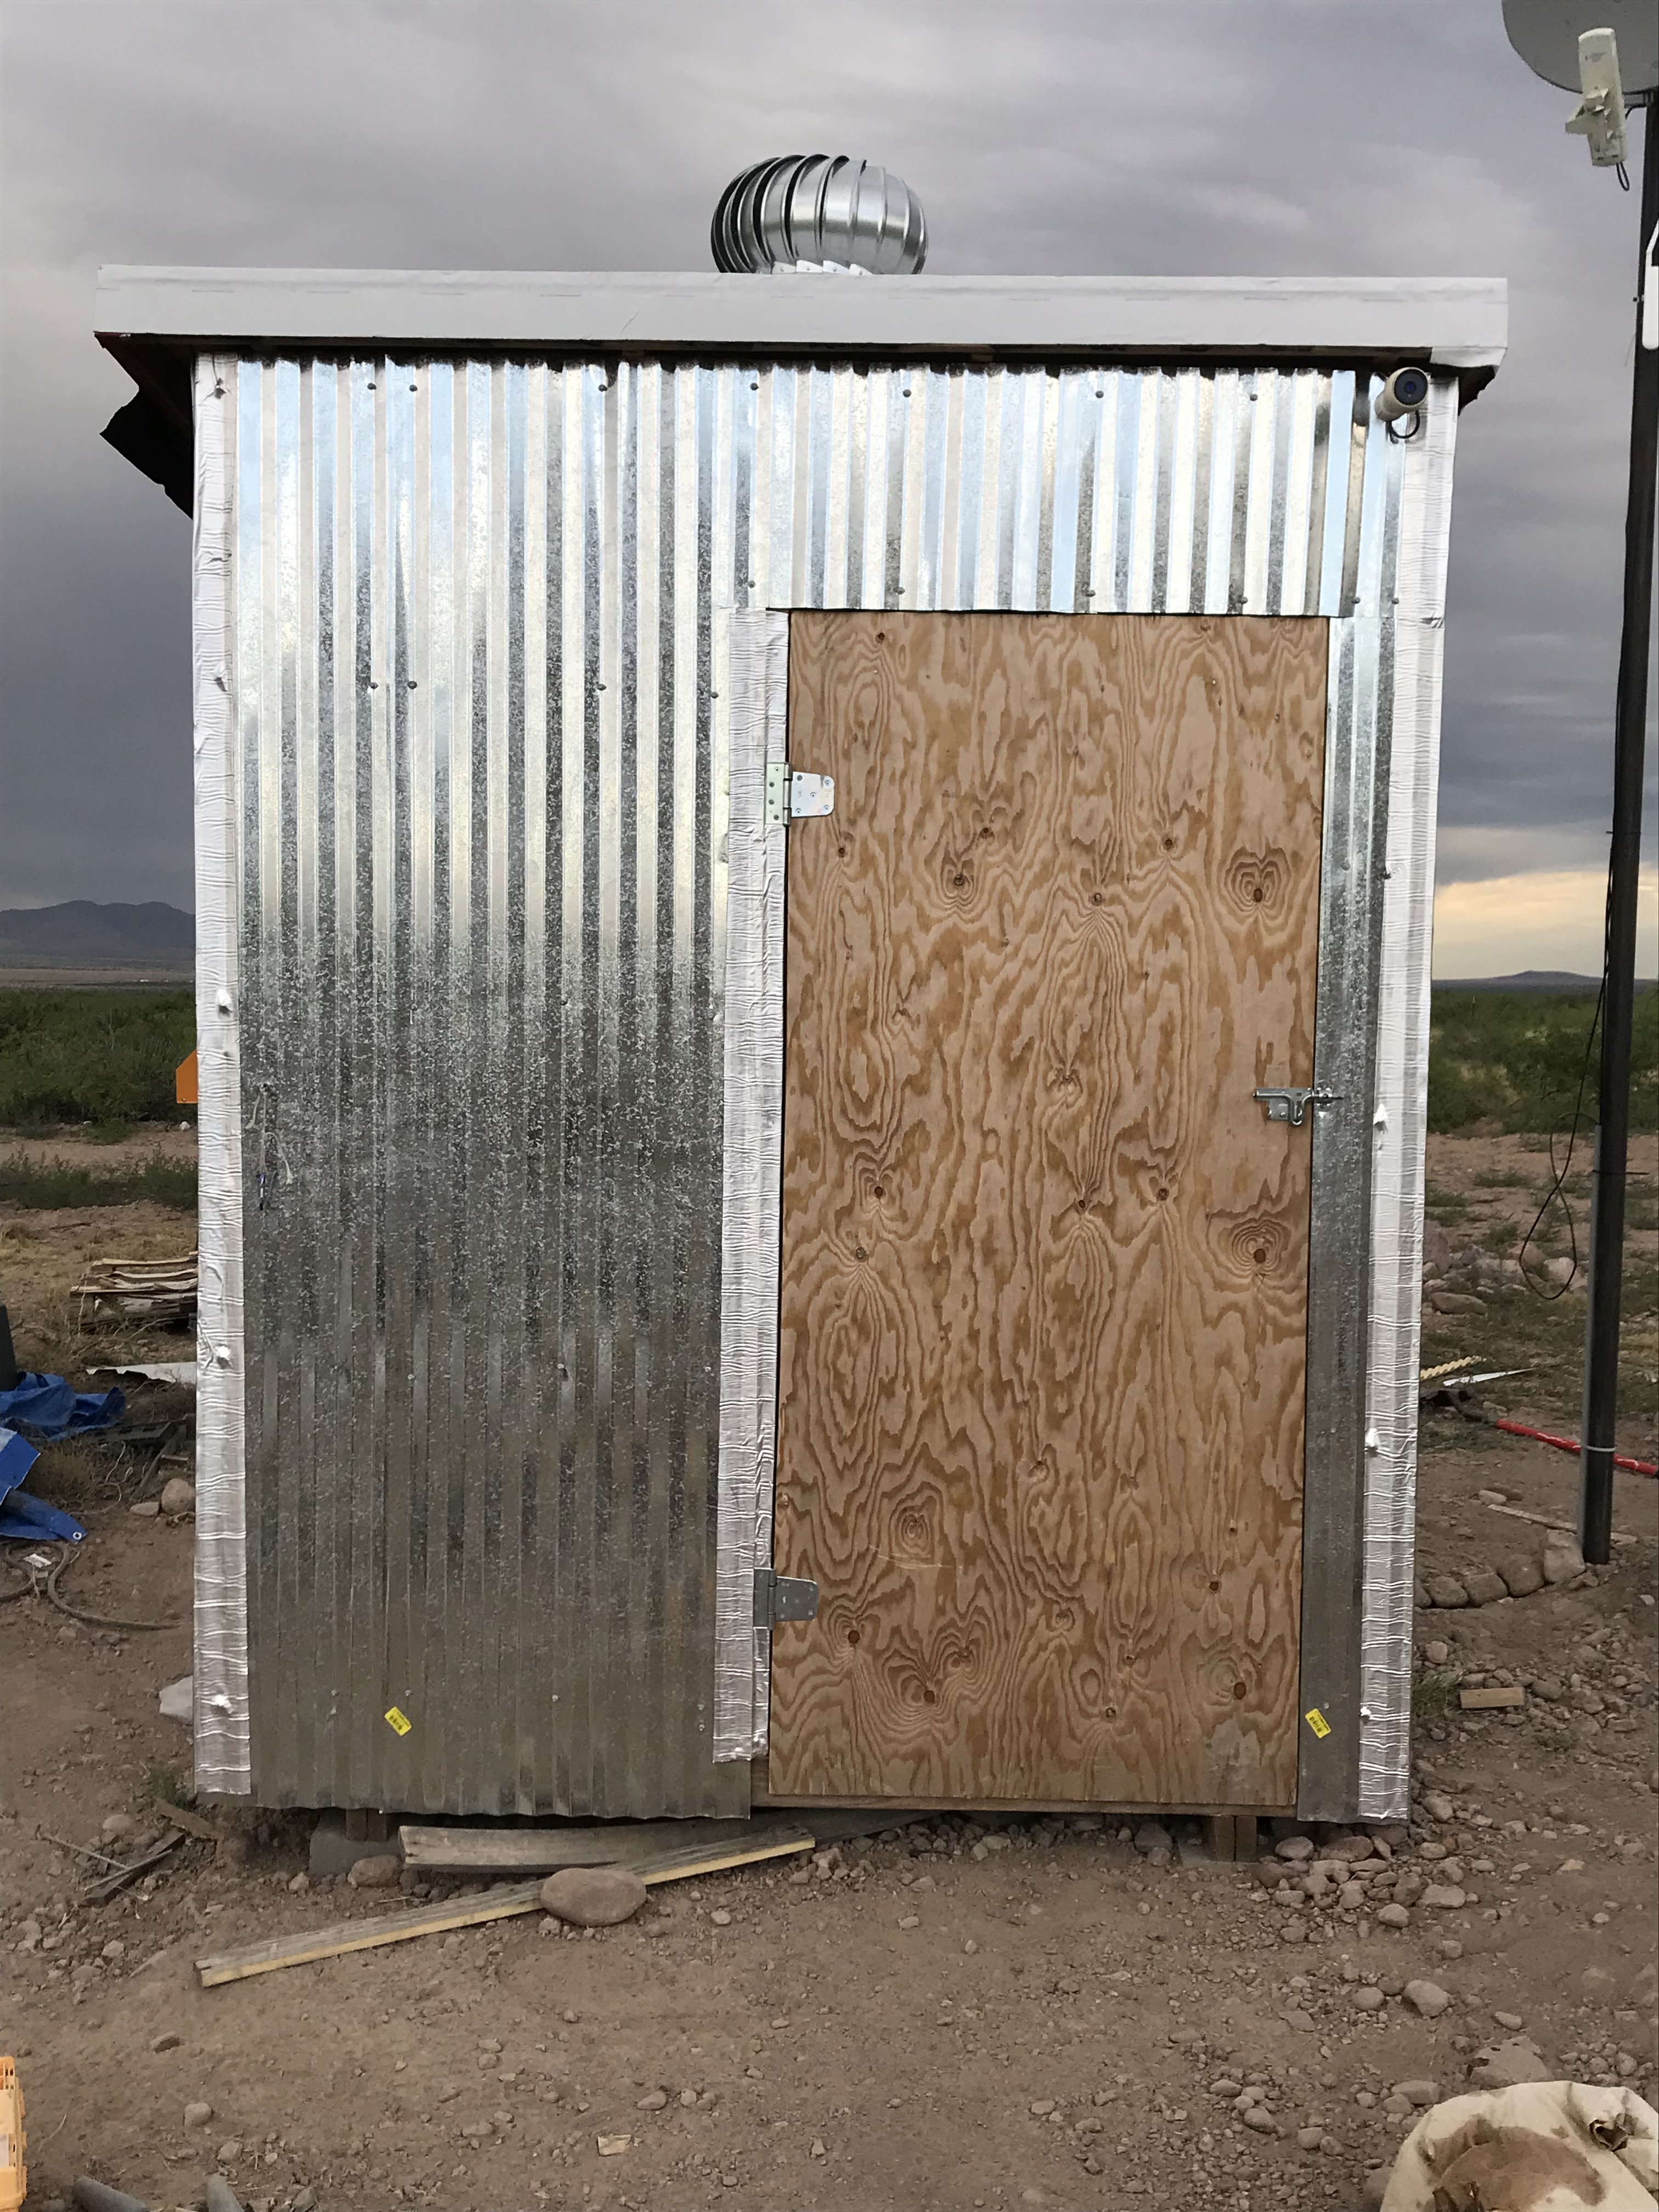
I was outside to start preparations for building the utility building when I spotted this hole in the east “wall” of the shed. There are electronics and batteries just a couple feet from that hole. Guess who changed plans. Those were cheap tarps and they lasted 18 months or so. Not bad I’d say. While I could buy some replacement tarps and have them installed in a day so I could quickly move on with construction of the utility building, right or wrong, I decided to go ahead and put some real walls on the shed. Around here, your best options are either metal, stucco, or some combination of cement and earth. I decided on stucco.
South Wall
West wall with more rips in the tarp that you can’t see well in this pic.
North Wall
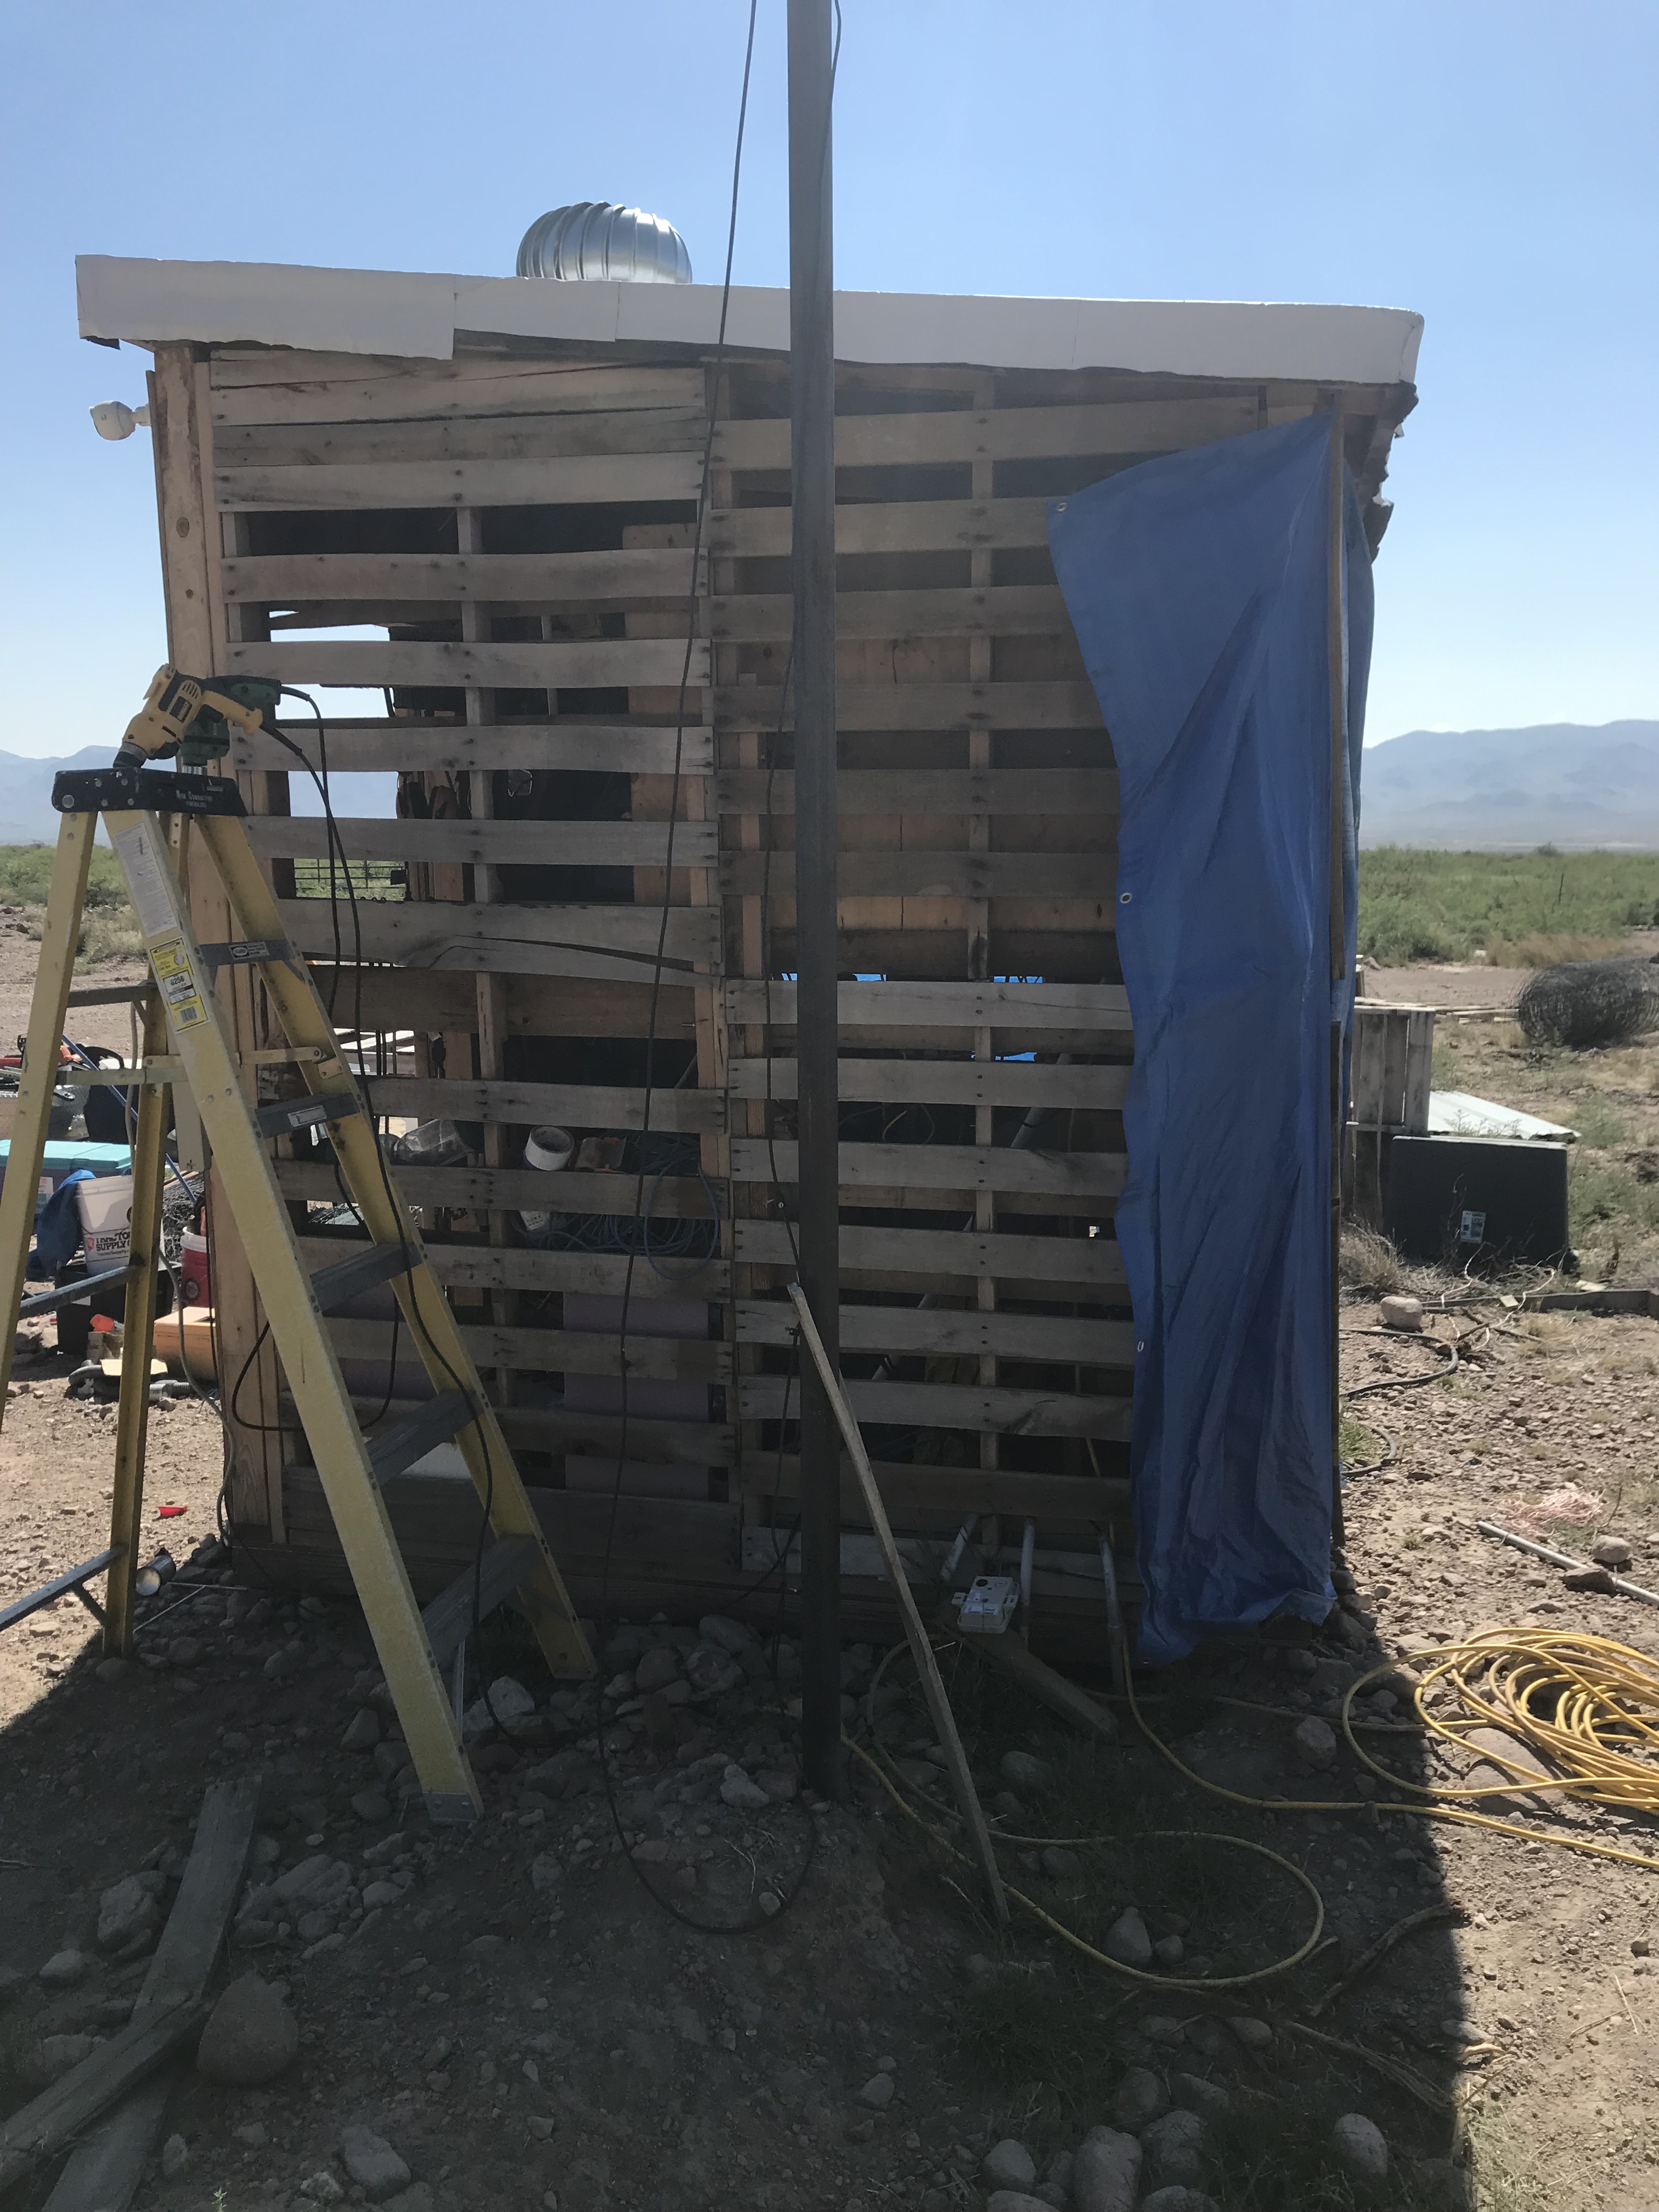
West wall with tarps removed.
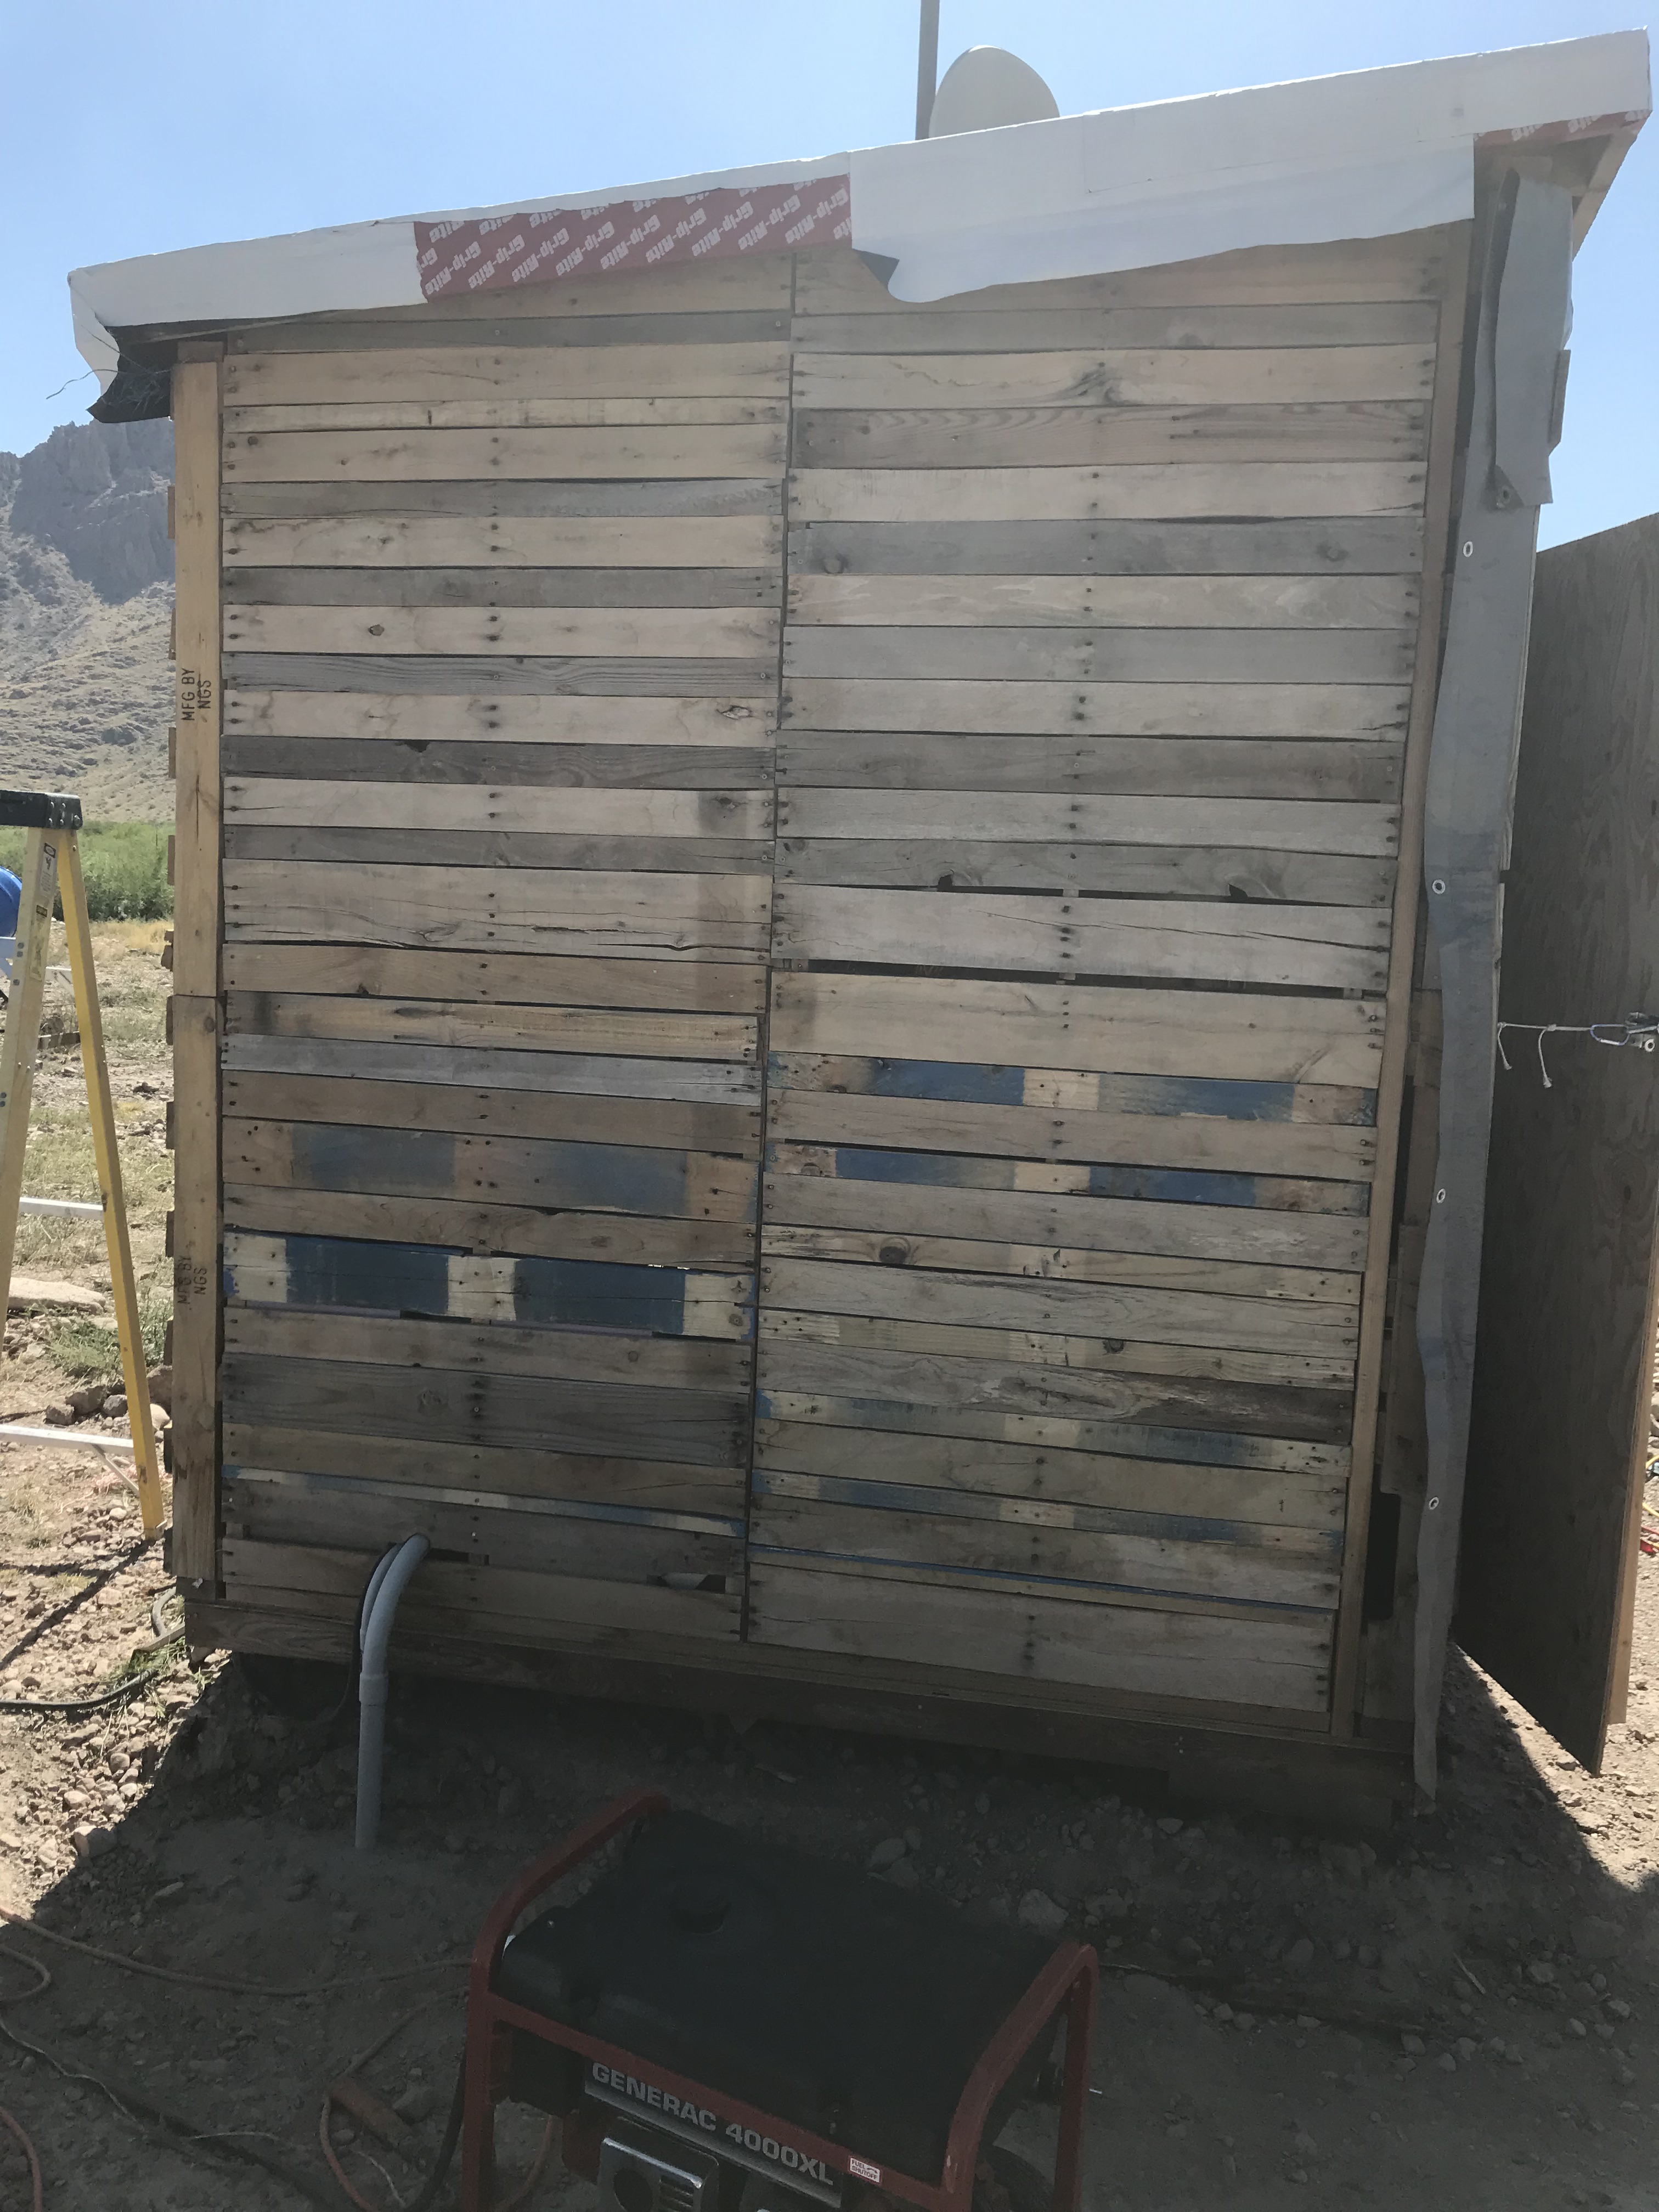
East wall with the tarps removed.
South wall with the Tarps removed.
West and South walls with pallet boards cut to width and length to fill in the gaps to give the stucco something to stick to.
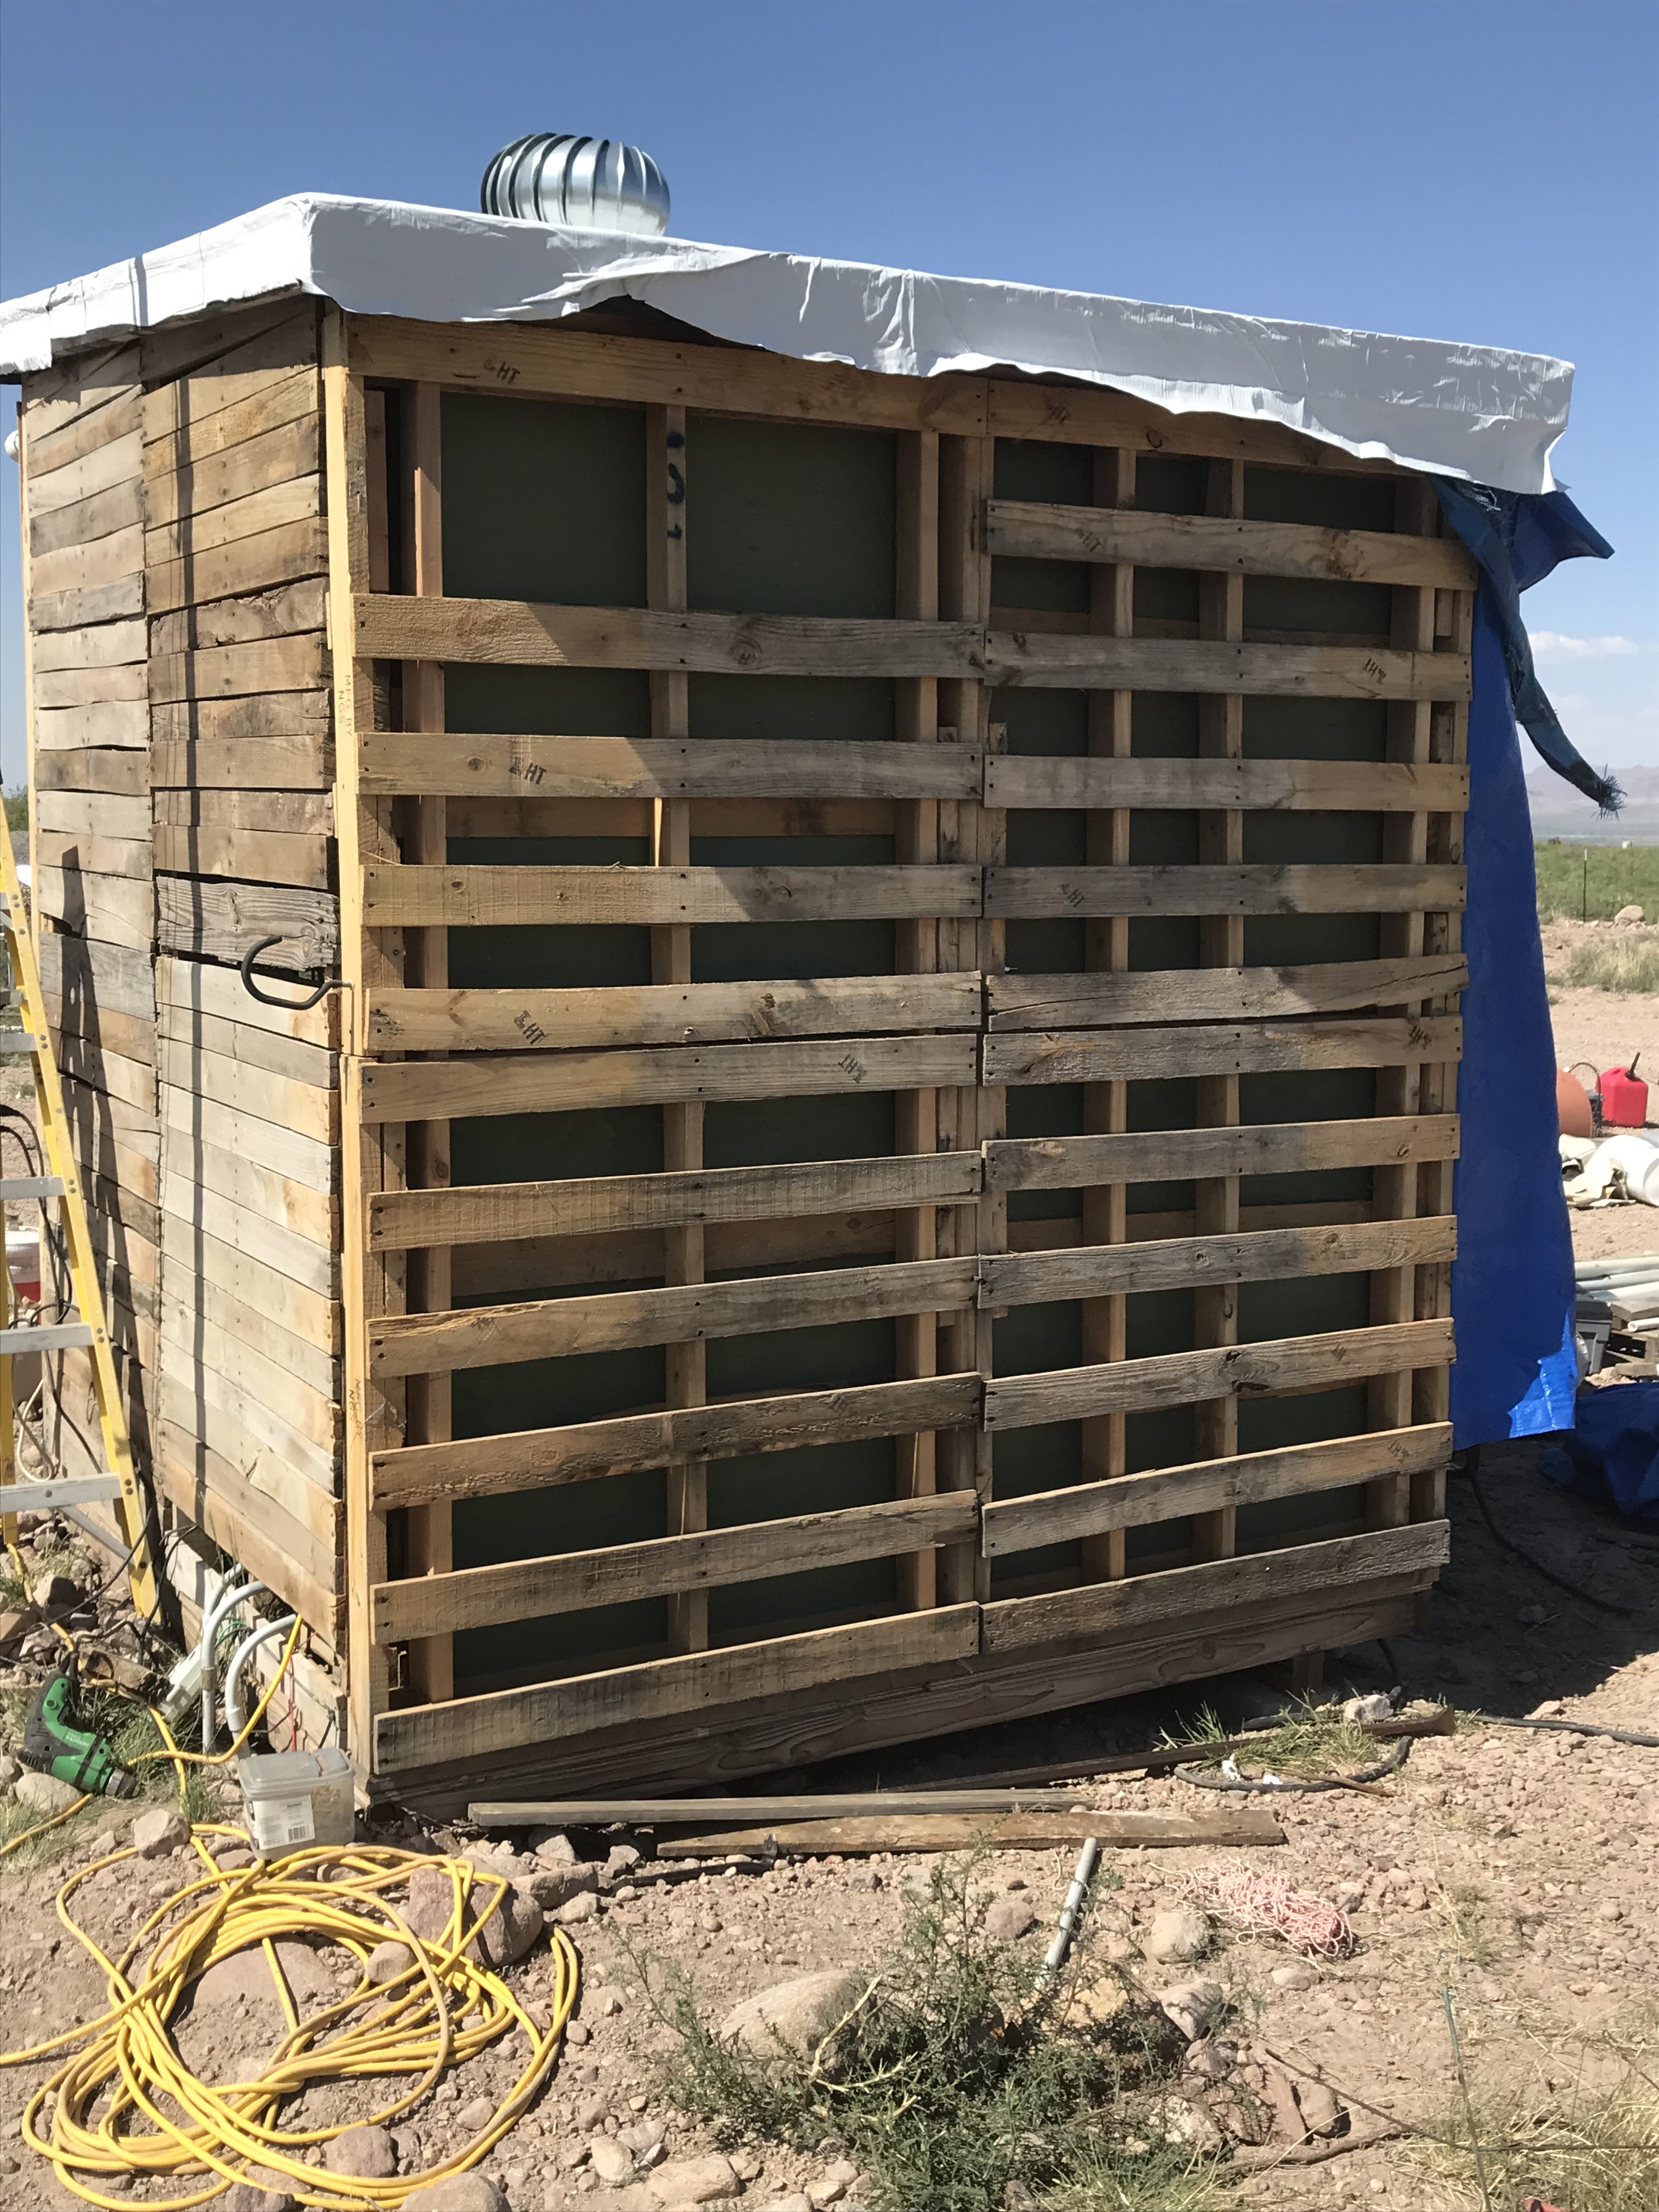
East wall with gaps filled in (mostly).
North wall with the gaps filled in.
That is all four walls. Ready to stucco, right? Welllll… maybe not. Watching youtube videos on stuccoing got me nervous. Chances are, I wasn’t going to do it right. That is fine. Not doing it right will certainly lead to wall failure and need to repair. Good to learn. But to what end in this case? Where else on my property do I plan on stuccoing over wood? Answer: No where. Note I said “plan” so that could change in the future. Soooo….. What might I do instead that would be fairly quick so I can move onto building the utility building? Metal… So back to Sierra Vista for supplies.
They didn’t have the metal siding that I wanted to use in stock, but they had corrugated metal roofing. Good enough for my purposes.
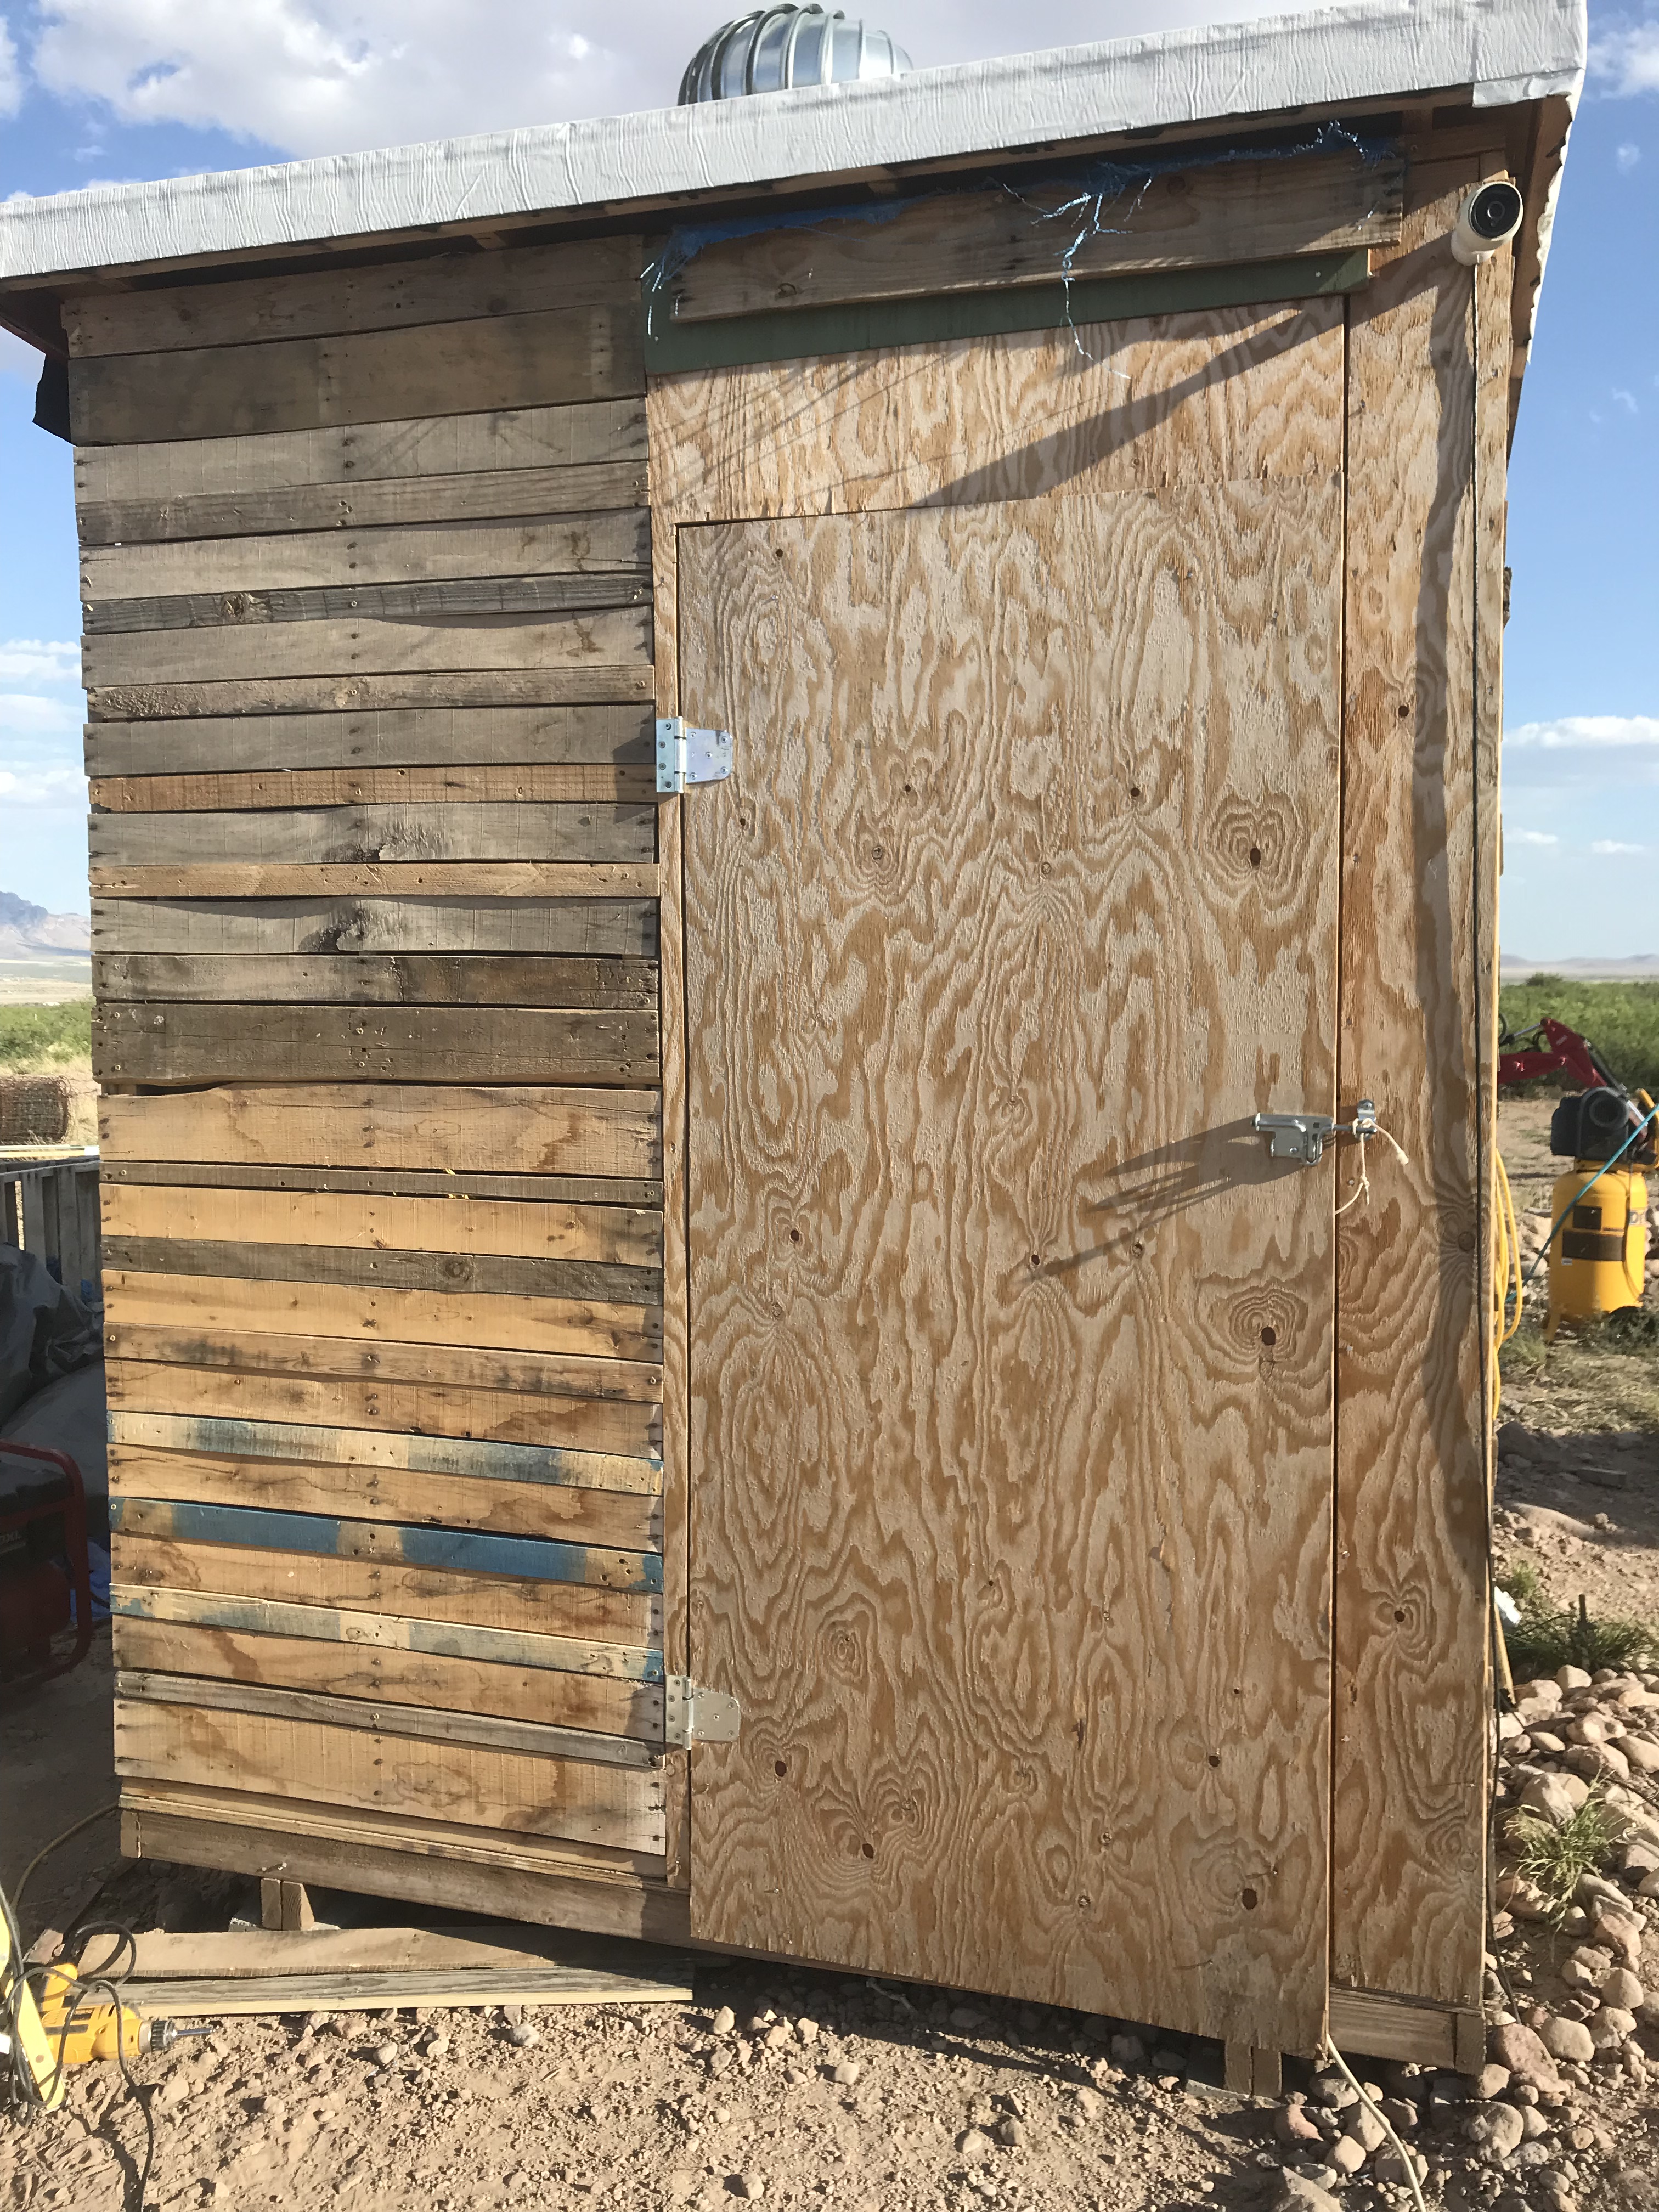
Decided to do the hardest wall with all the protrusions first.
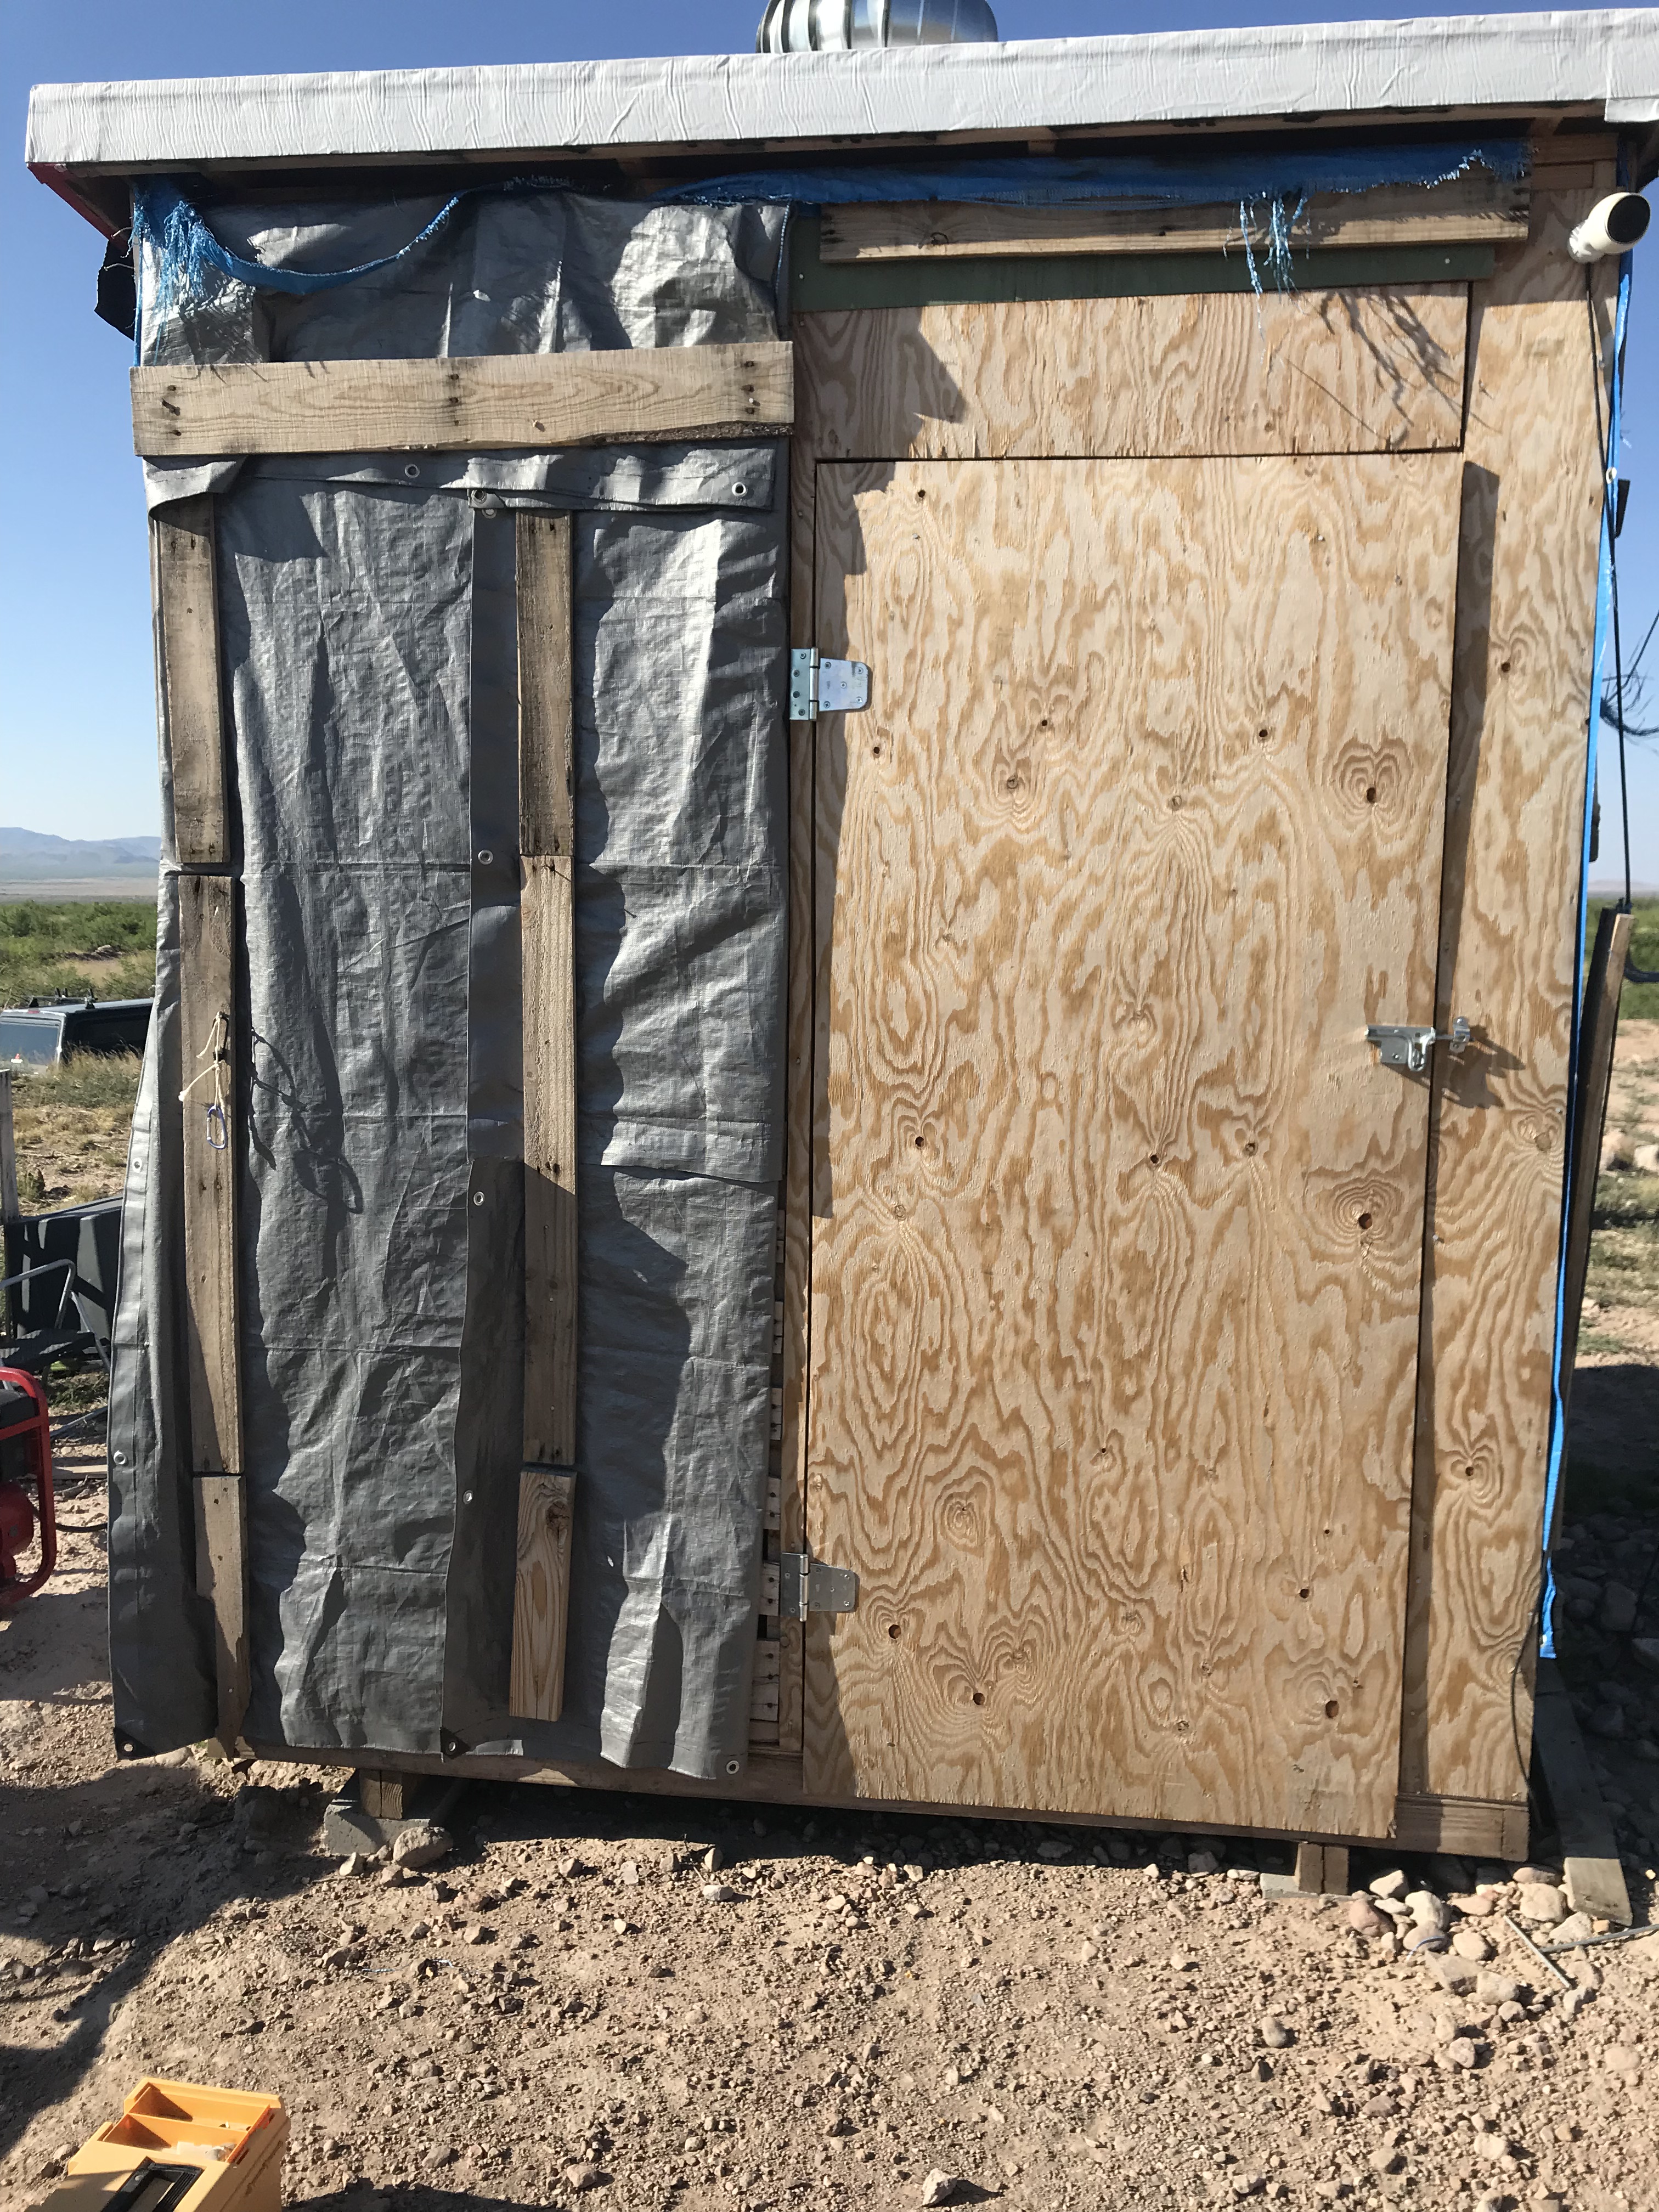
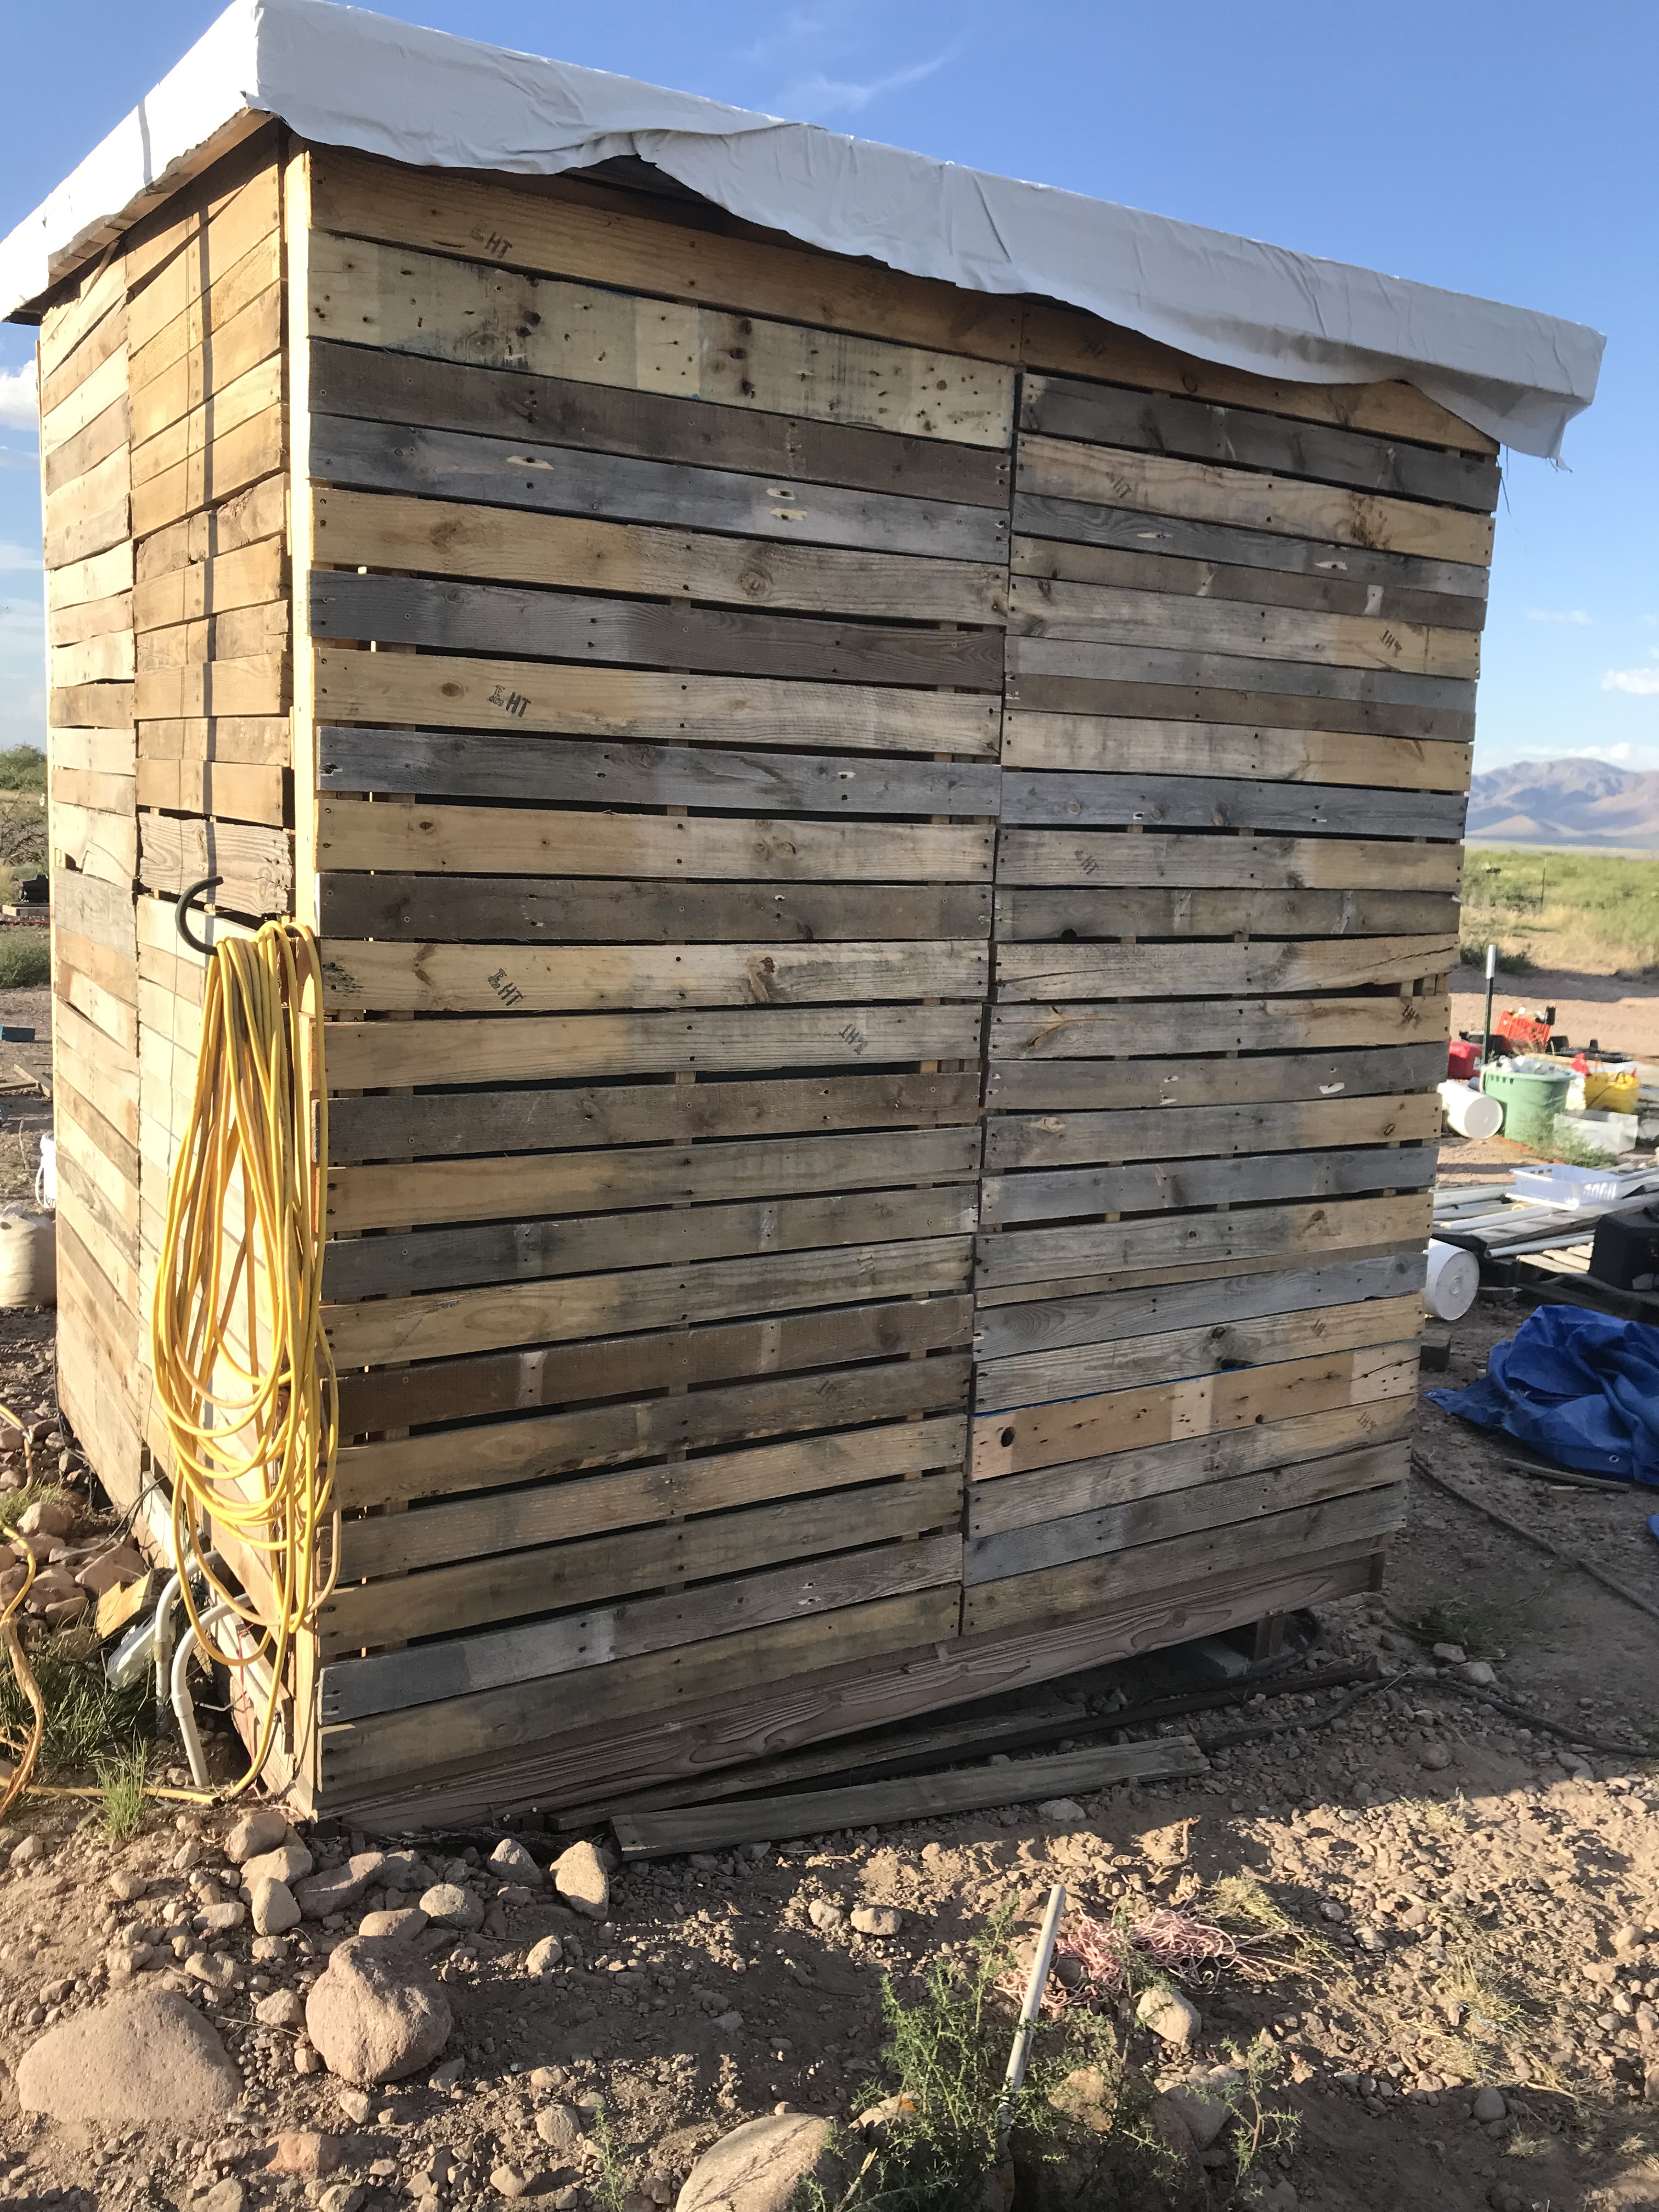
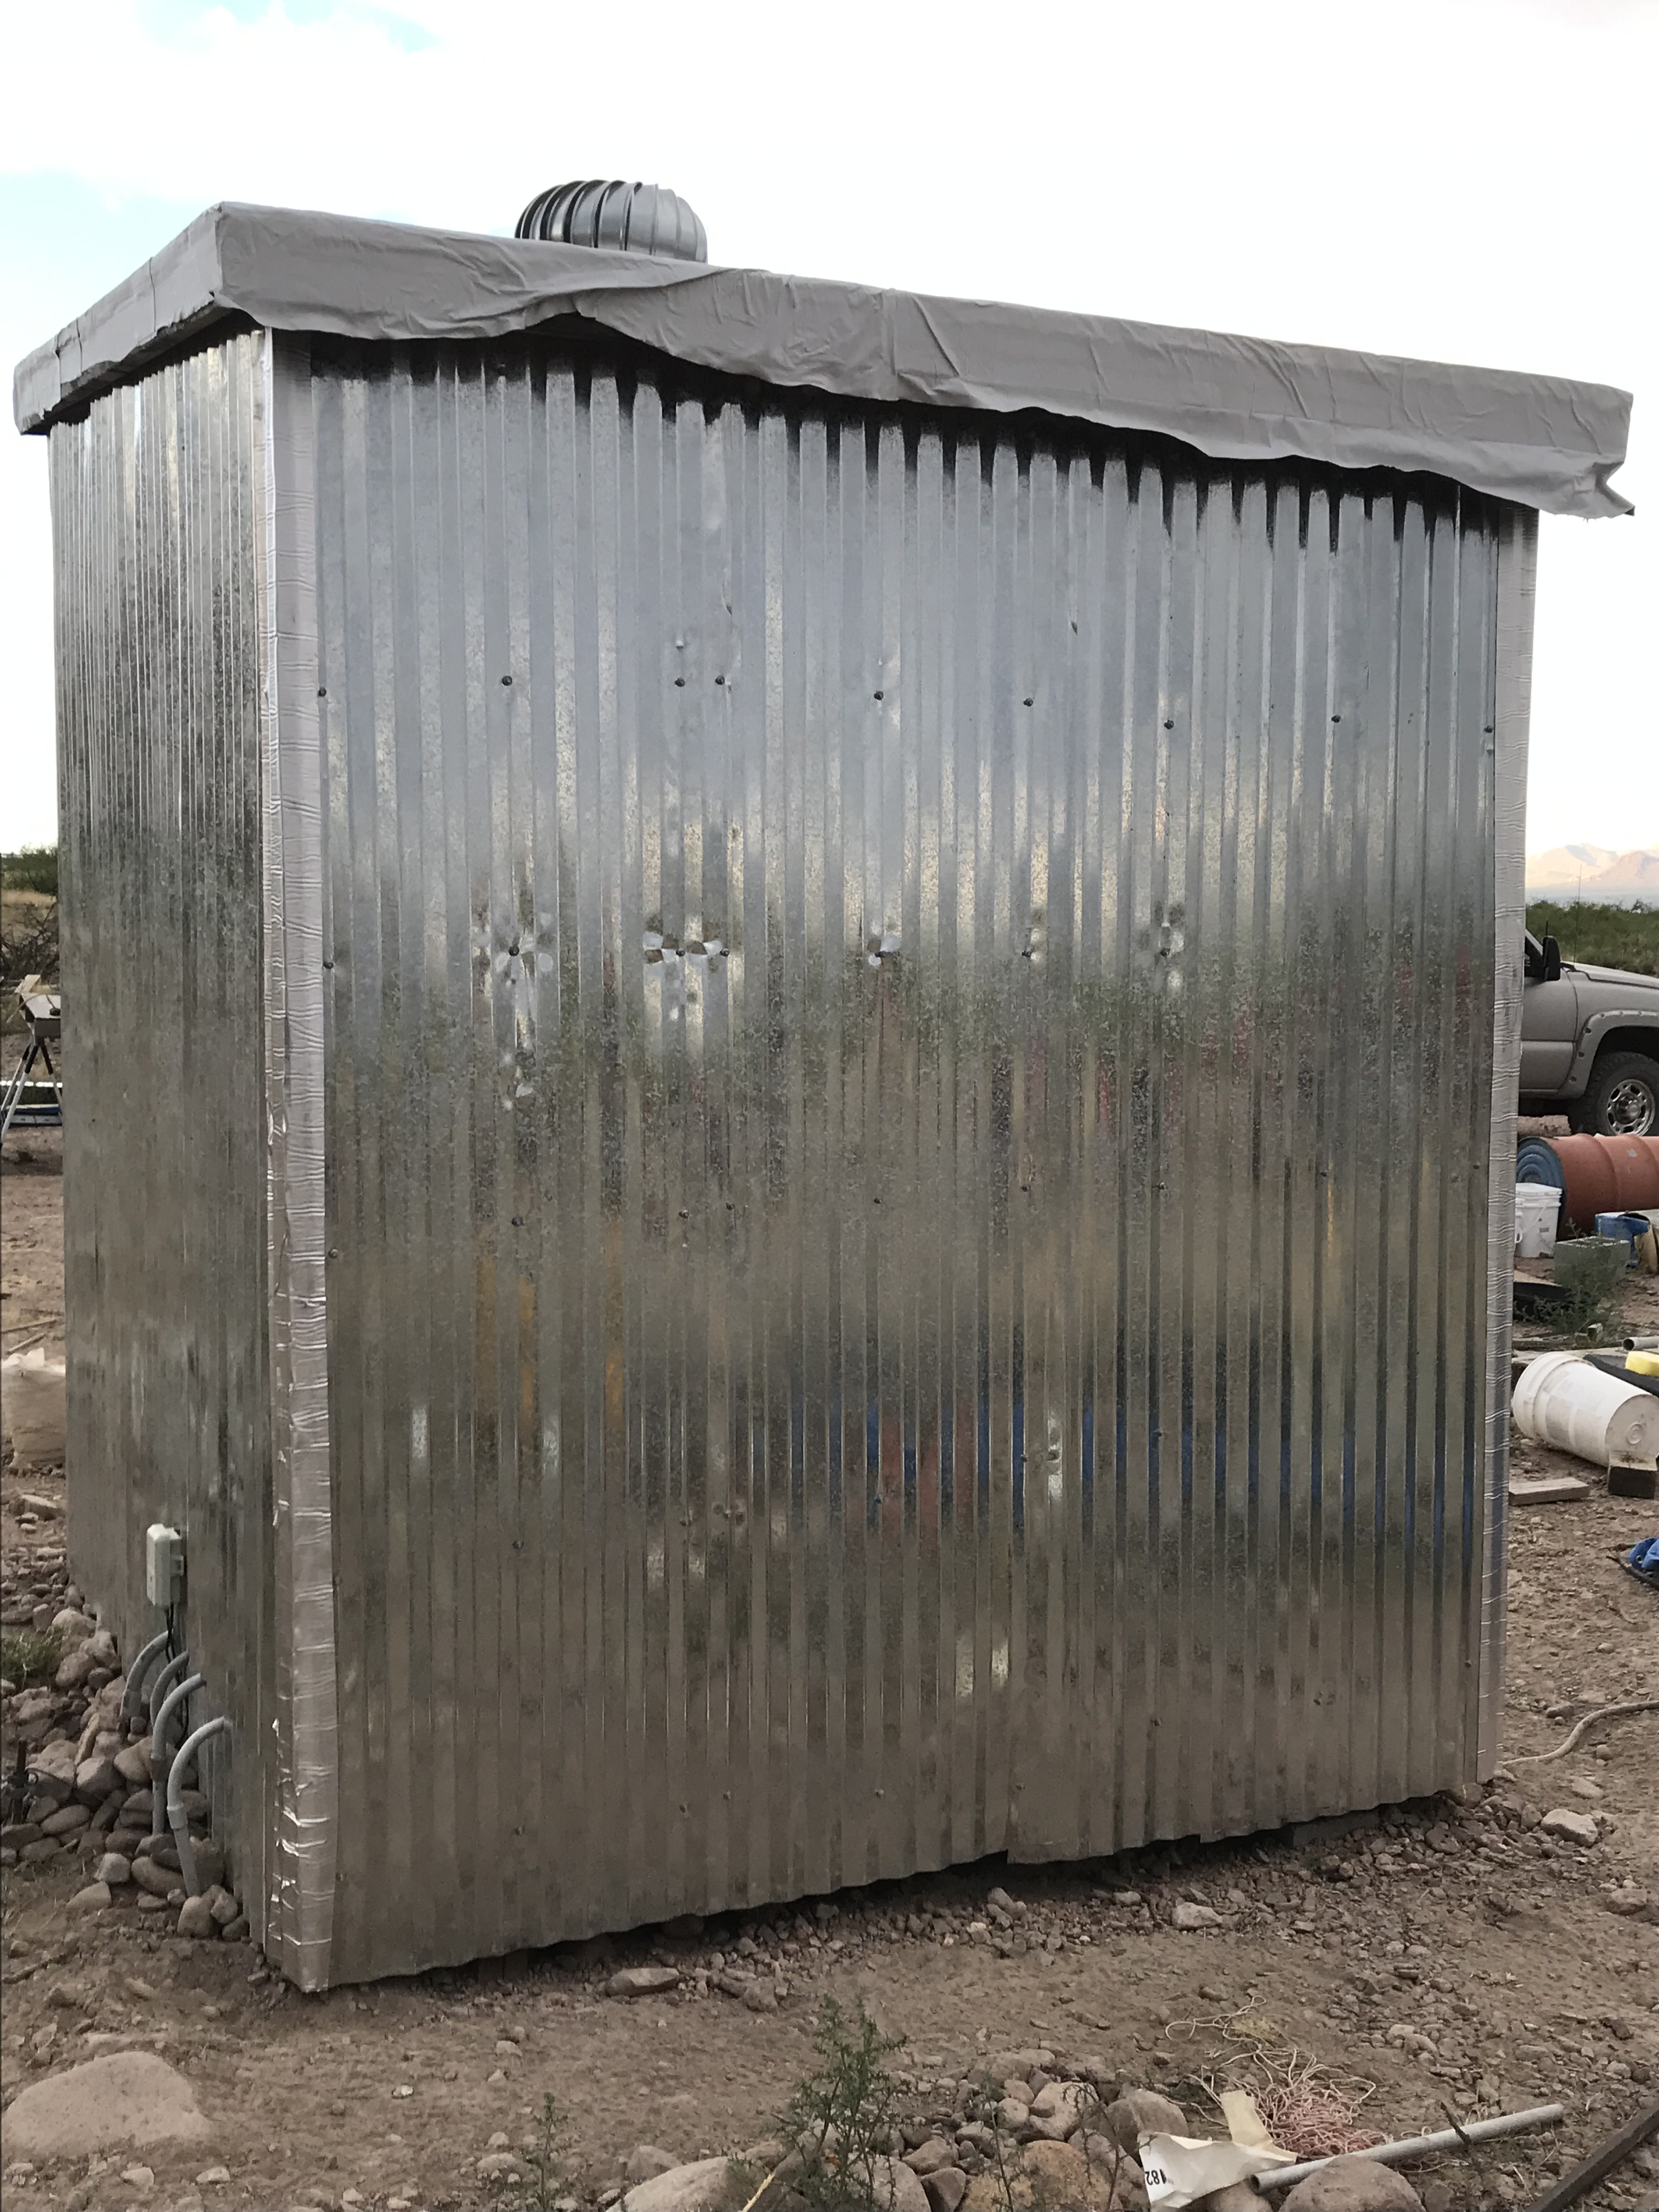
Completed East Wall
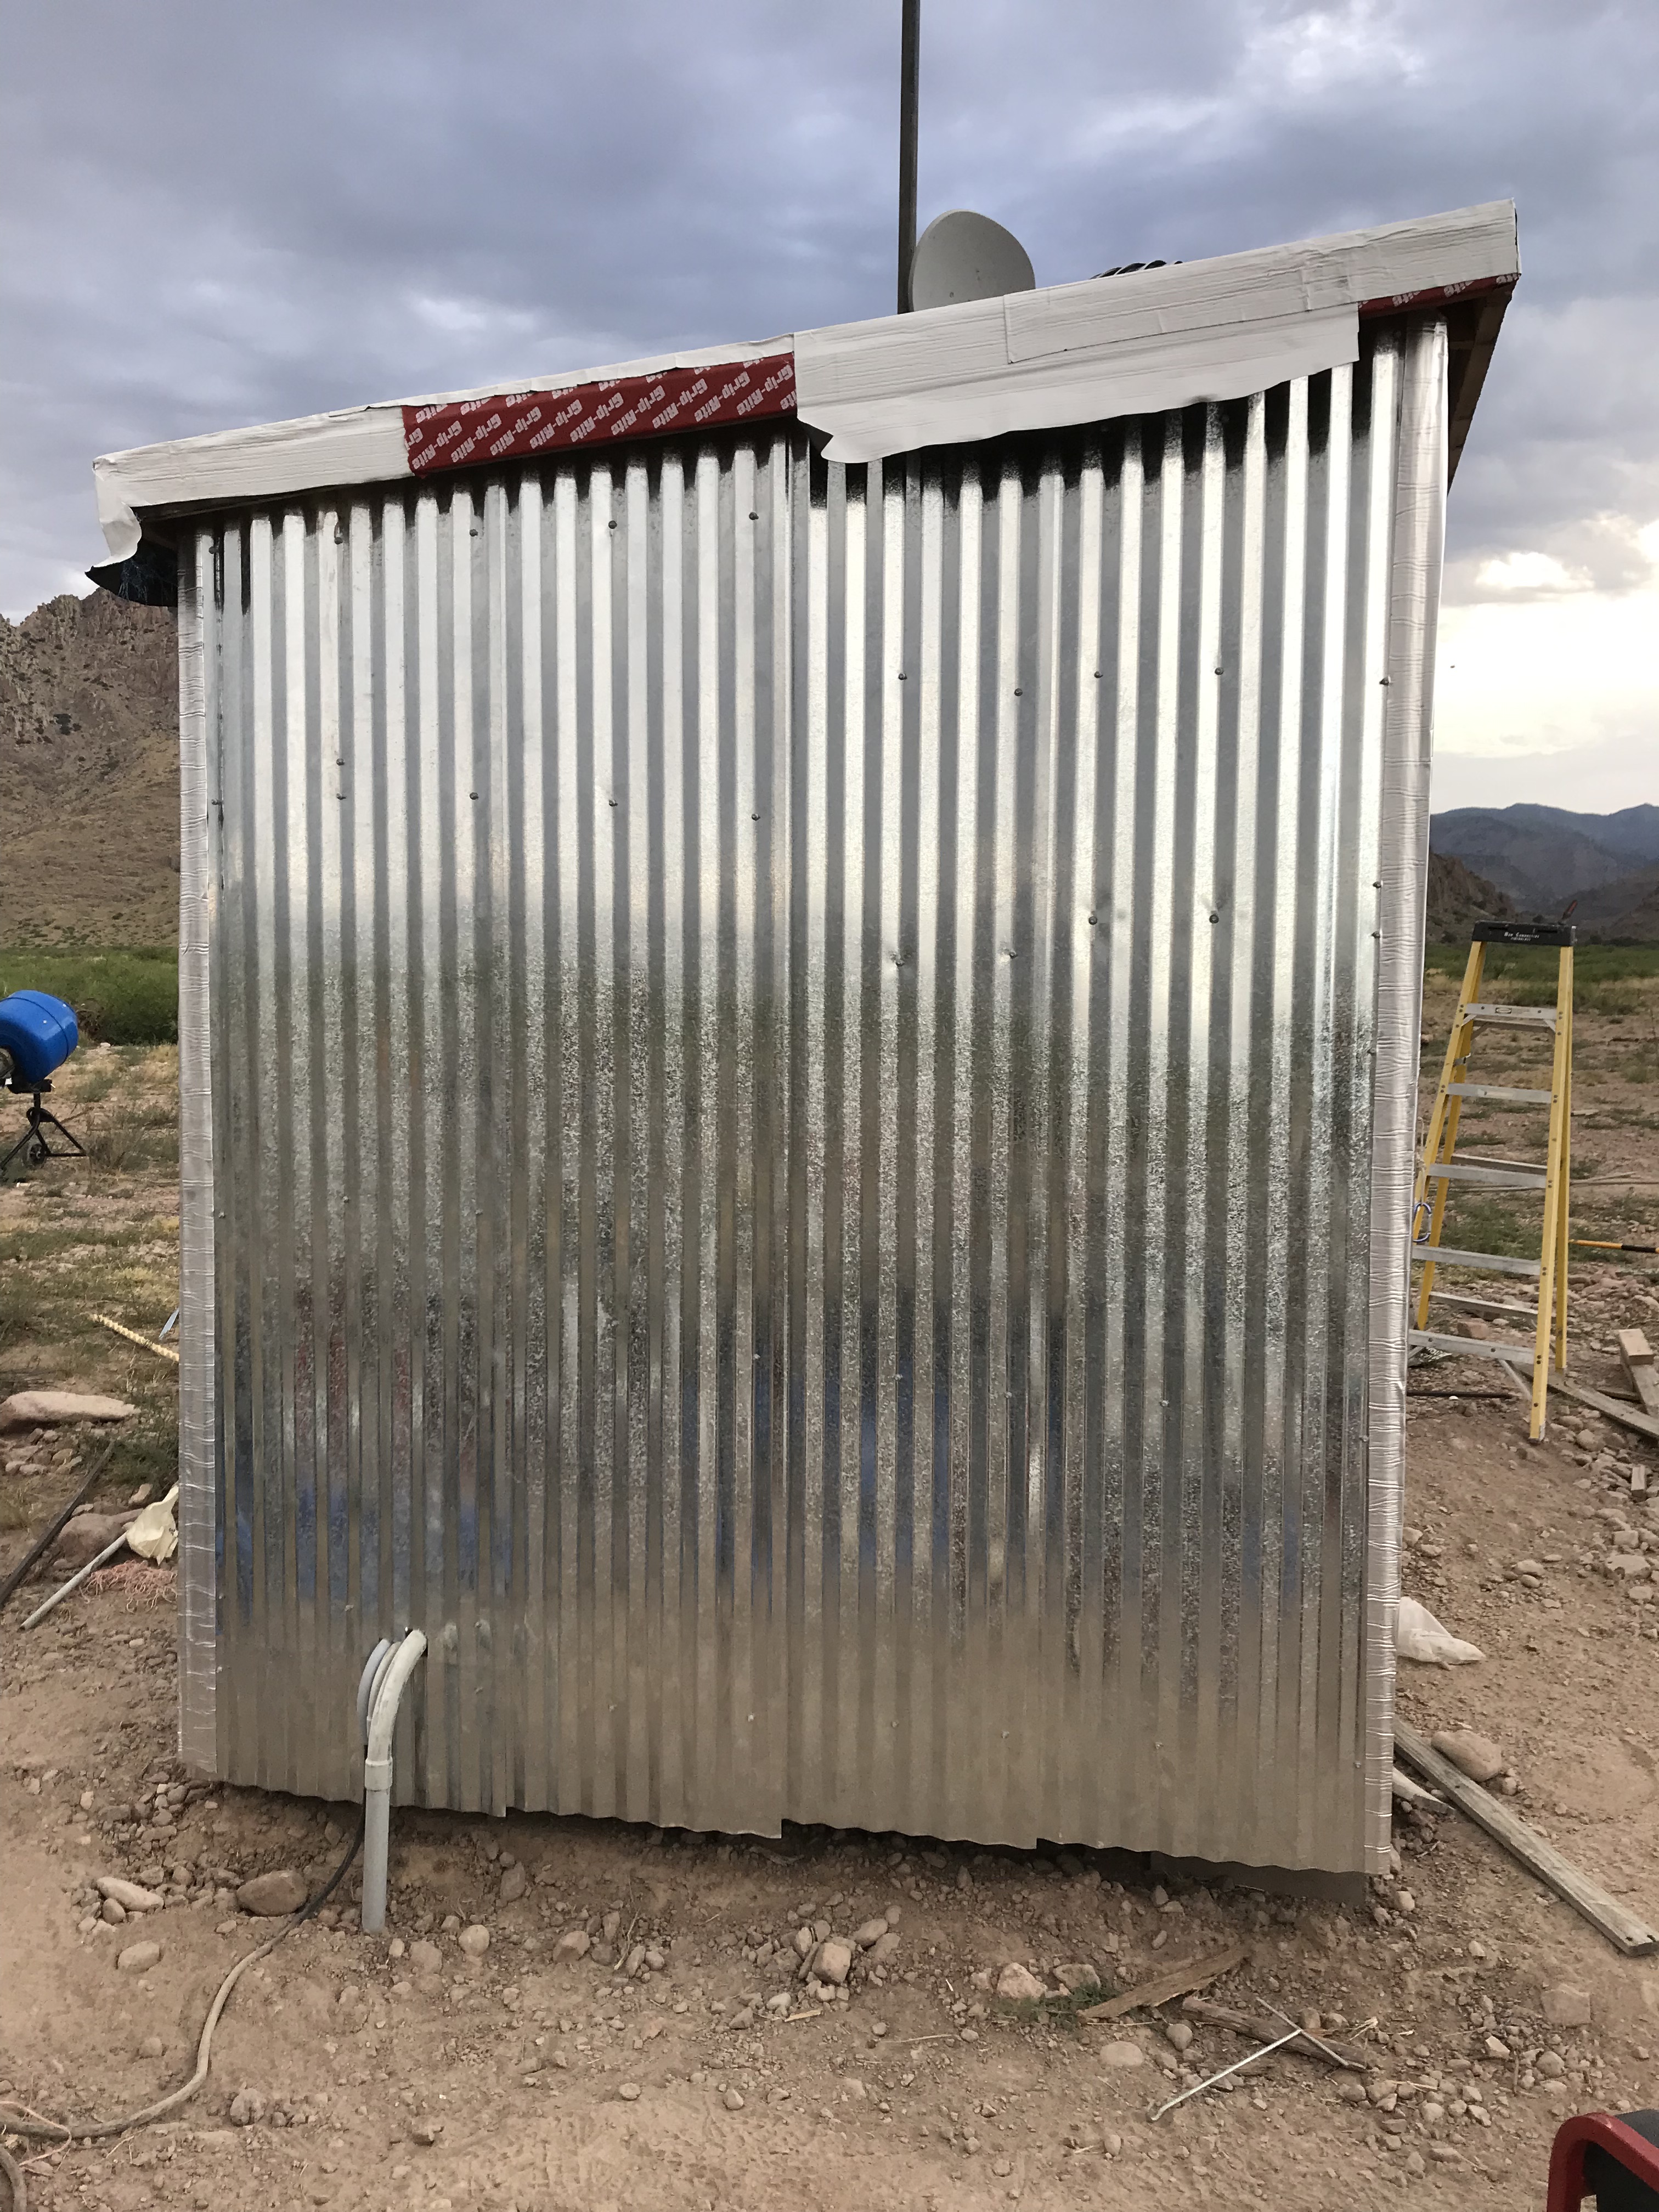
Completed South Wall
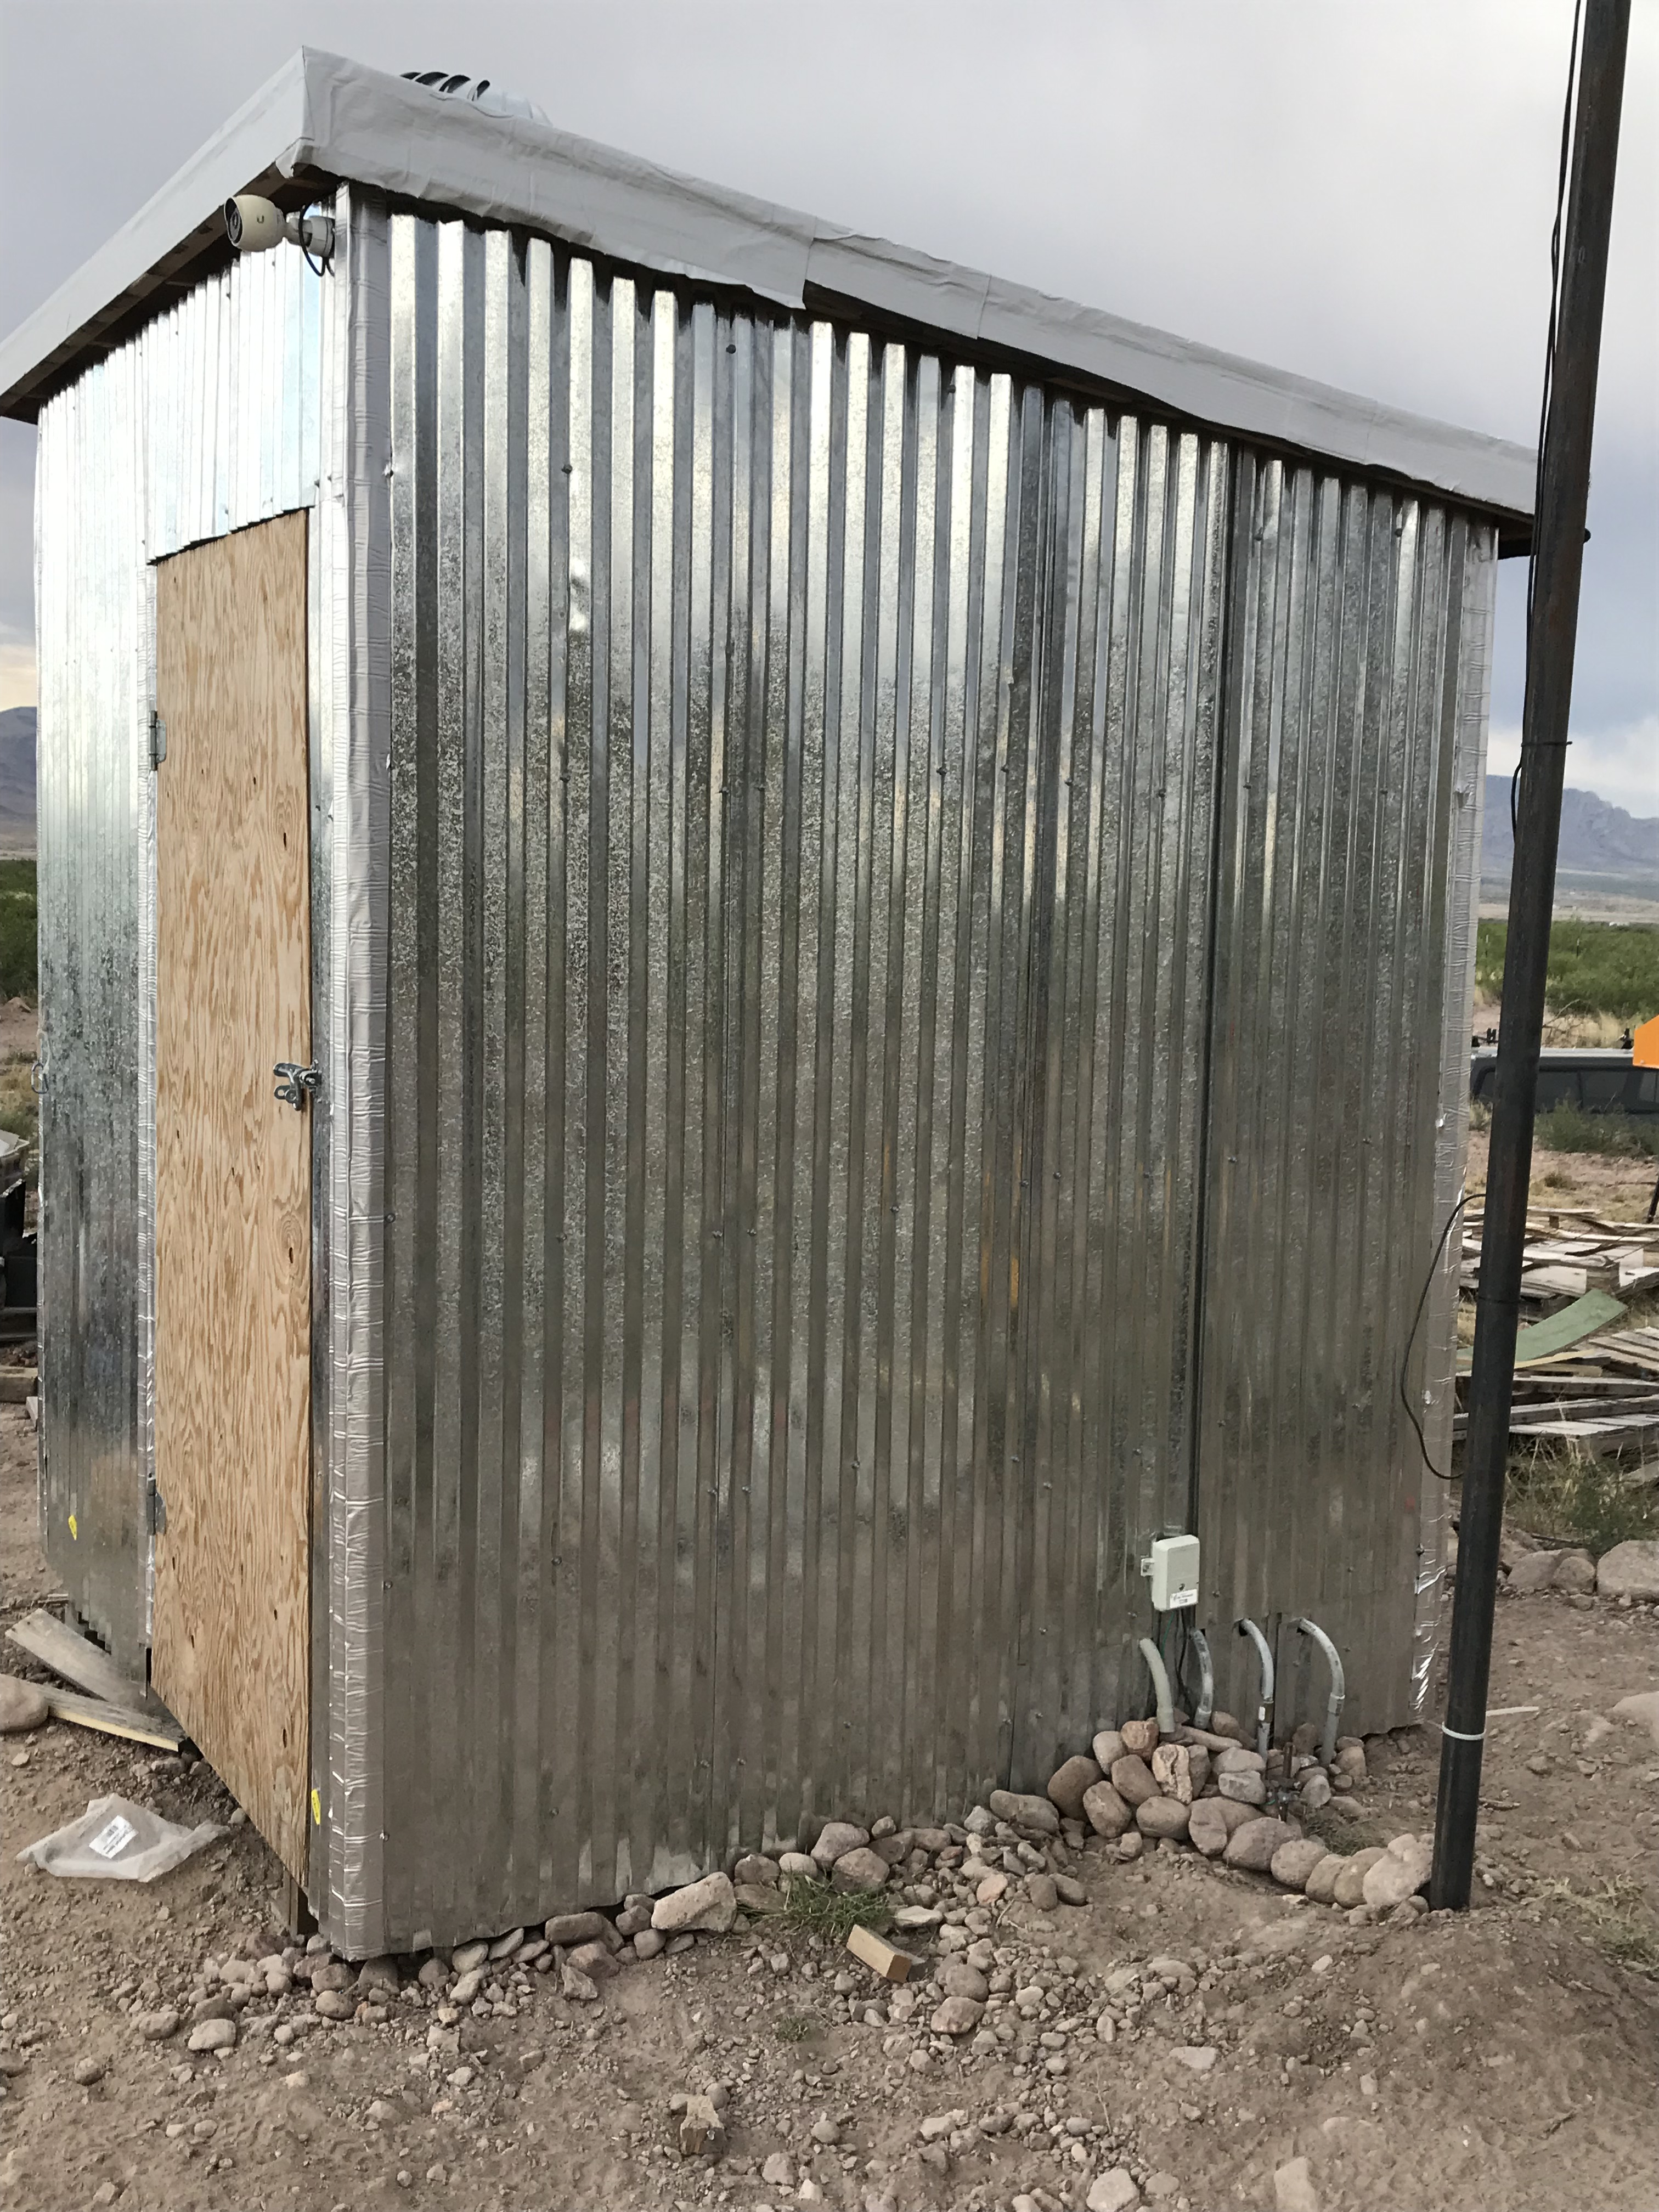
Completed West Wall. Ran the network cables for WiFi antenna and microwave antenna going up the post through PVC (on far side of steel post) and buried as much exposed cable as possible under rocks to keep the pests from chewing on them.
Completed North wall. Still need to paint the door… Some day… Rachel helped me put the walls up and it took us about two days to get the project done. I snapped these pics shortly after having finished up. You might notice the ominous looking sky. I was racing to get stuff picked up and put away. I finished just as the sky opened up with a down pour. What timing! Electronics protected from the rain! Even with the roof and these metal walls, if there is a fire inside or out of this shed, it is going up in flames. Some day I expect to circle back and take steps to mitigate the risk of that happening as much as I reasonably can.
Question: Did it occur to you that I wasted days filling in the gaps between the boards so I could stucco only to turn around and install metal sheeting instead? It did me. Oh well. Having all those boards installed made it easy to put up the paneling as I didn’t really have to worry a whole lot about whether or not there was a board behind the panel to screw into. I just picked a spot that looked good to screw and screwed it in with very few misses. That small consolation which saved me an hour or two at most makes me feel (slightly) better about spending days putting up those boards.
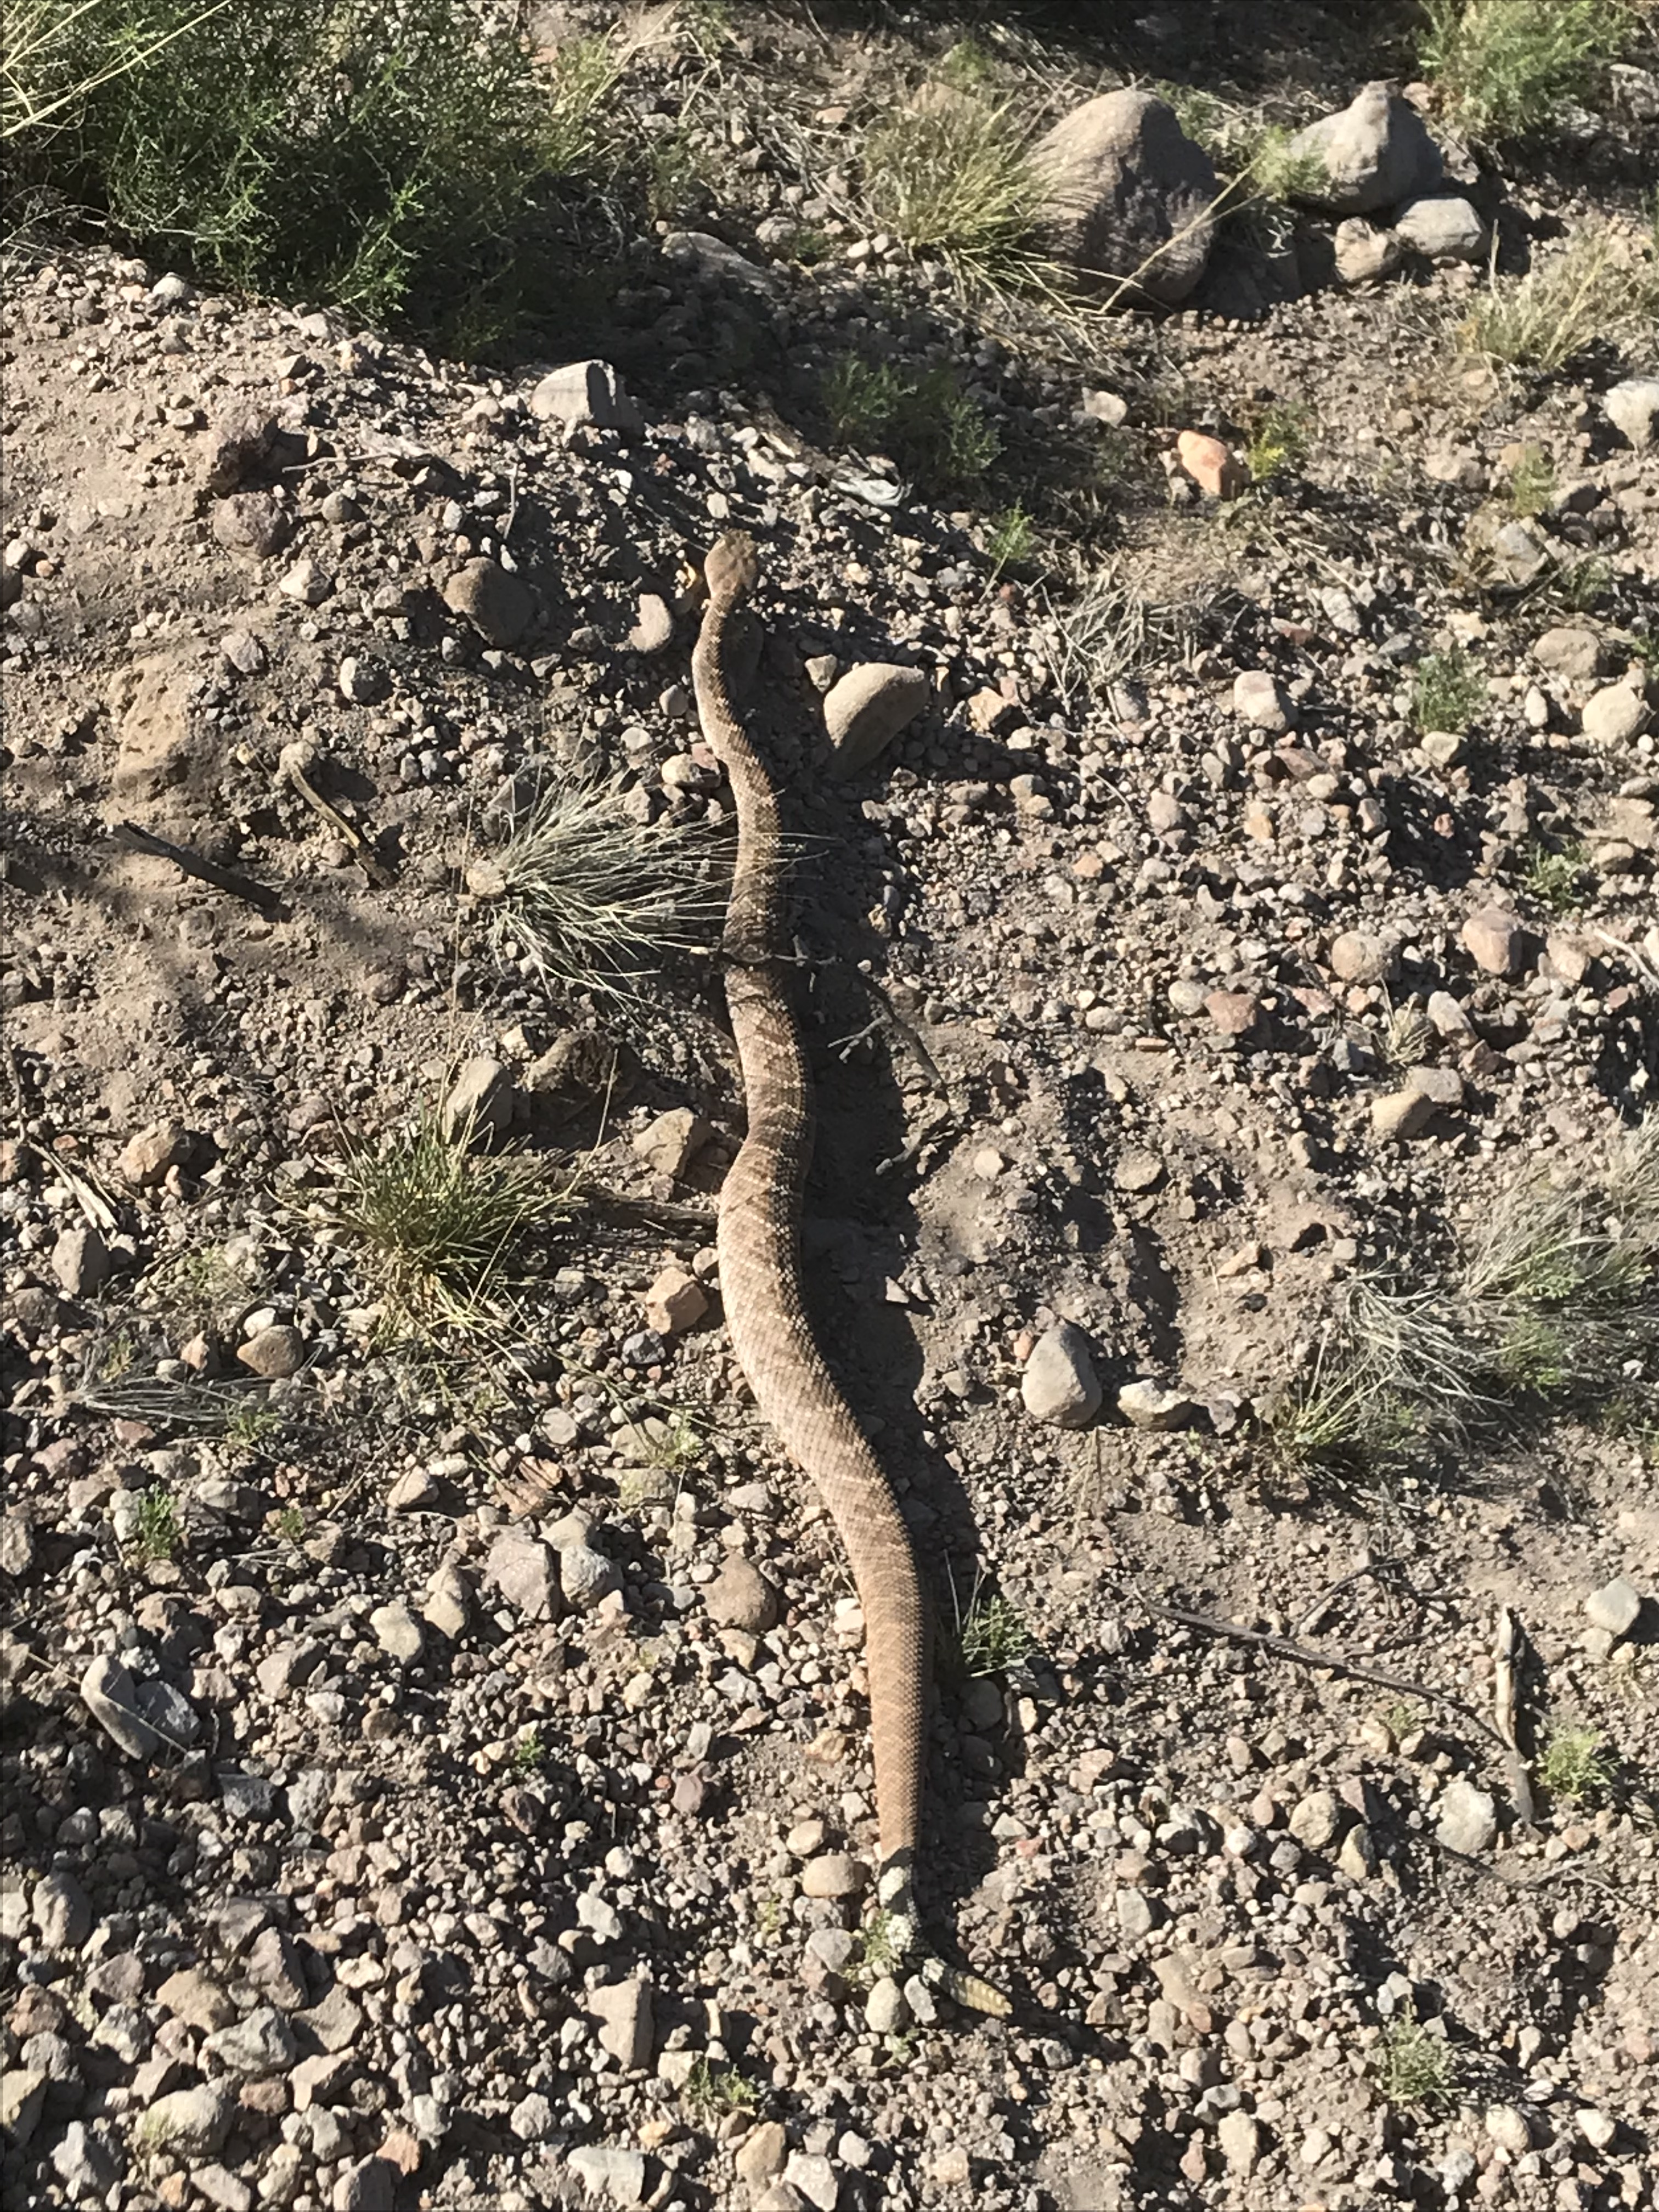
Another rattler, this time under the fifth wheel portion of the trailer. This one behaved differently that the rest I’ve encountered to dated. Never once did it rattle. From the time Sasha let me know it was there, to the time I finally got it to move out from under the trailer and make it’s way into the yard, it never rattled.
Looking back at me as if to say: “Look, I’m leaving like you wanted me to! Why the hell are you following me?”
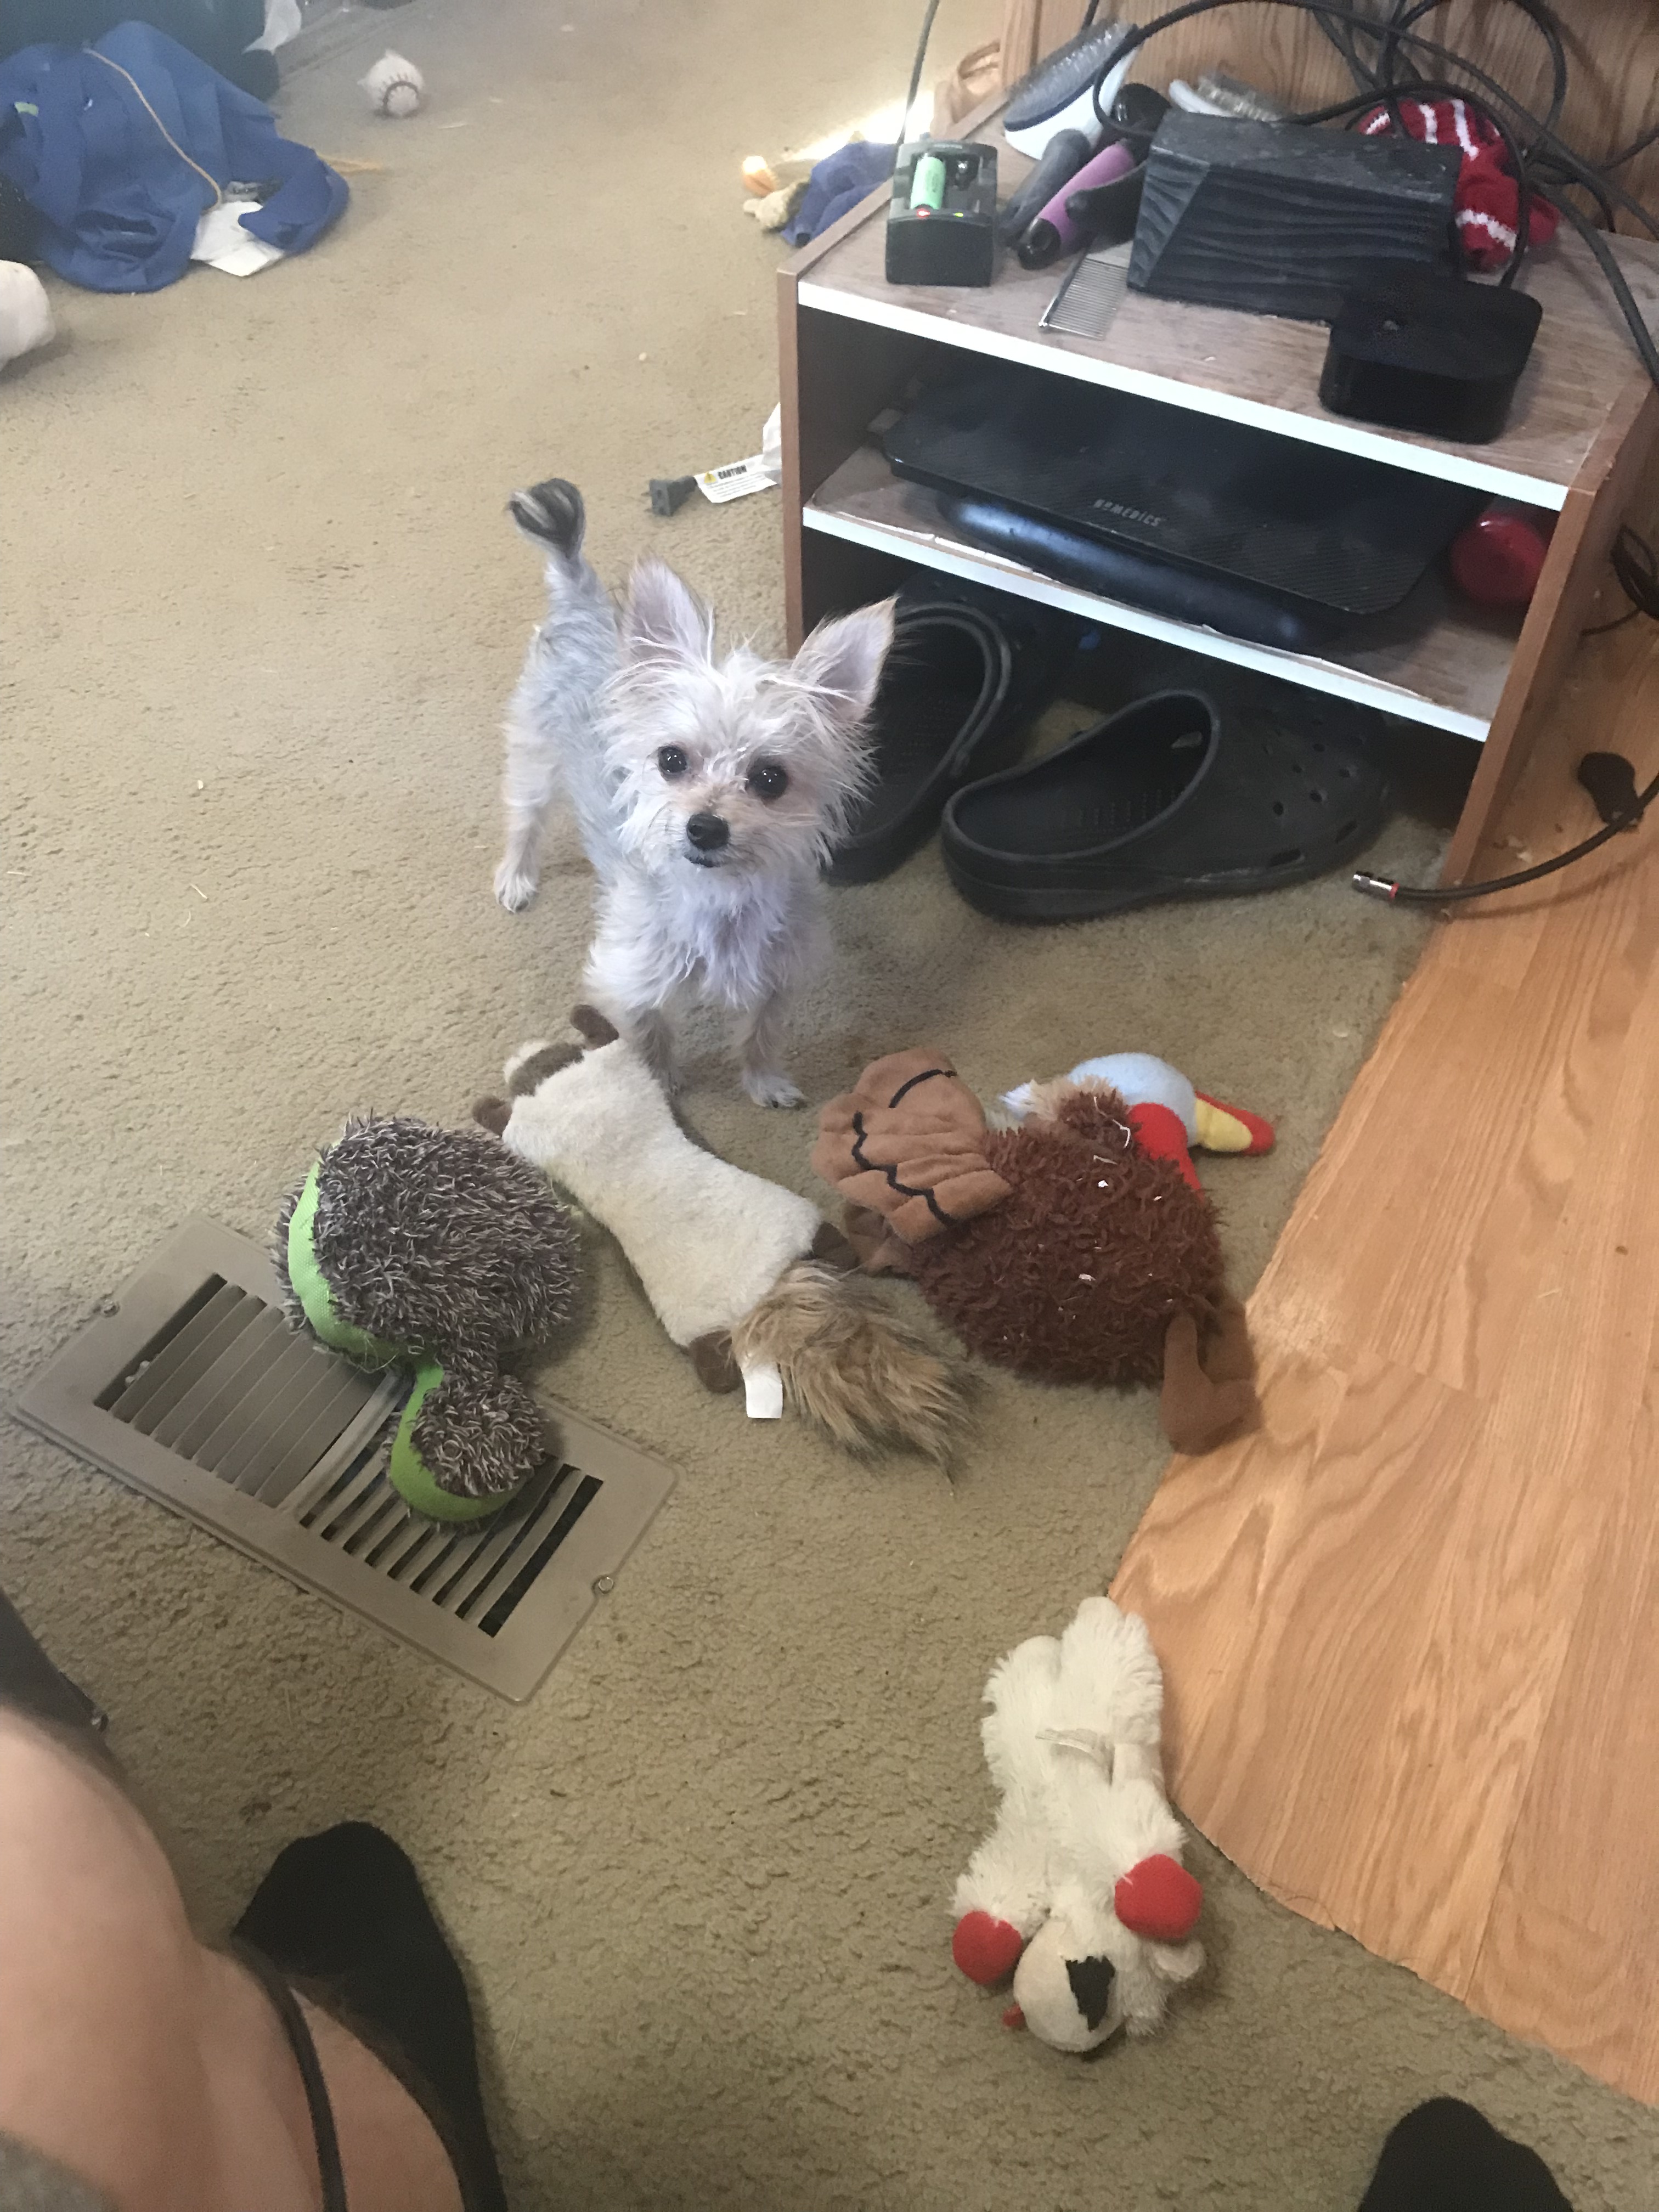
Bear: “Hey dad! It is after 6PM local time. Put away your laptop and play with me. Look, I brought you 4 toys. Pick one and throw it for me! It is time to play fetch!”
I took a few days in the month of June to visit with family in Michigan in the wake of a death in the family. While it would have been nicer to visit under better circumstances, it was still really great seeing everyone again. Will be back in Michigan in December for about two weeks so there will be more time to make the rounds and visit with friends in addition to family. Might have to pay for an extra suitcase for extra clothing so we don’t freeze while we are there. 🙂
And now for a few more lessons learned (all of which I had forgotten to share in the last post).
Remember this helmet with the screen mask I was wearing to protect my head from being cracked open when I stuck it where I wasn’t supposed to in the chipper and my face from flying debris? Well, if you feel the urge to spit, it works better if you raise the mask out of the way!
When you are working outside around here (especially around the wood chipper) and need to sit on the ground for what ever reason, make sure you take the time to clear the ground where you are going to sit of mesquite thorns. Jeans do nothing to stop them and they really hurt when you get one in your ass.
Don’t nature pee up hill – especially when wearing crocks.
When you are really fatigued, you are outside, it is breezy, you are all alone with no one around, you need to pee, and you are contemplating taking a nature pee: Don’t! Your tired and mindless ass won’t take into account what direction the wind is blowing and you will piss all over yourself.
With that TMI, I’ll end here.
If all goes according to plan, I’ll try to get another post out Sunday.
I took a week of vacation to be able to focus on getting the brush chipped. That week was mostly productive. It turned out being a balance of work and relaxation as opposed to all work. In all, not bad I guess.
I haven’t gotten as much done in the evenings after work as I’d like for various reasons. Mostly is fatigue or lack of motivation. I often spend at least an extra hour on the computer either working for work, doing email for Portal Rescue, or obsessing over finances and timing of my retirement (currently targeting 7 years from now). After that, I’m not in the mood to go out to work. Regardless, I have gotten a fair bit done since the last update.
Here is a quick synopsis of what I’ve gotten done:
Sold our last property in Michigan. YAY!!! Okay, so I didn’t have to spend much time or energy on this one, but IMO, it still counts. 🙂
Had more gravel delivered for the RV carport and spread half of it to make surface from where we park to the RVs more level to walk on.
Chipped a number of brush piles around the RV’s, all the brush I dug up around where I plan to dig for the dirt to build with, and probably 2/3’s of the brush pile near the water tank.
Took delivery of bags (tubes) that I will use to build with.
Completed and submitted income tax returns.
I’ve continued to learn a lot over this past month. Let me share everything I can remember. Warning: If you are a head smacker when you say “DUH” when someone does something stupid, I suggest you put on some protective head gear of some sort before you continue reading the rest of this blog post.
Where to start?
Personal protection equipment I find invaluable when chipping brush and operating the chains saw. Protects head from blunt force trama, protects hearing from machinery, protects face from flying debris. I have learned it does not protect eyes from dust or other really small flying debris. I have also learned that it does not protect my neck from sunburn. After getting a hearty sunburn on my neck from working all day chipping, I ordered a scull cap (dew rag) with protective neck flap from Amazon and took a couple days off from chipping waiting for it’s delivery and for my sunburn to heal.
I call the yellow bar across the top of the feed chute “a head banger”. Please don’t bother asking why I am sticking my head in the chute below it while the chipper is in operation. Leave it at “can’t fix stupid”. I have learned that the helmet pictured above is effective at avoiding helicopter rides to a hospital with a fractured skull. While I have not learned to not stick my head in there while the chipper is in operation, I have learned to duck my head when I stick it in there.
My snake boots have become uncomfortable due to wear, so I stopped in Tuscon and picked up a good pair of hiking boots made of heavy leather and a nylon plate in the sole. I have learned that the nylon plate is generally effective at resisting penetration of mesquite thorns through the bottom of the boot. Generally, not completely… After a week of wearing them paying no mind to what I was stepping on, I had a thorn penetrate them. I stopped and pulled that thorn out and more than 5 others. I learned it’s heavy leather is also effective at stopping the penetration of a spinning chainsaw chain. Can you spot which boot and where I hit it with the chainsaw? I was reminded of a lesson I previously “learned” (or not) to not operate a chainsaw when I’m fatigued because I do stupid things. I’m hoping that the boots are equally as effective at repelling a rattle snake strike.
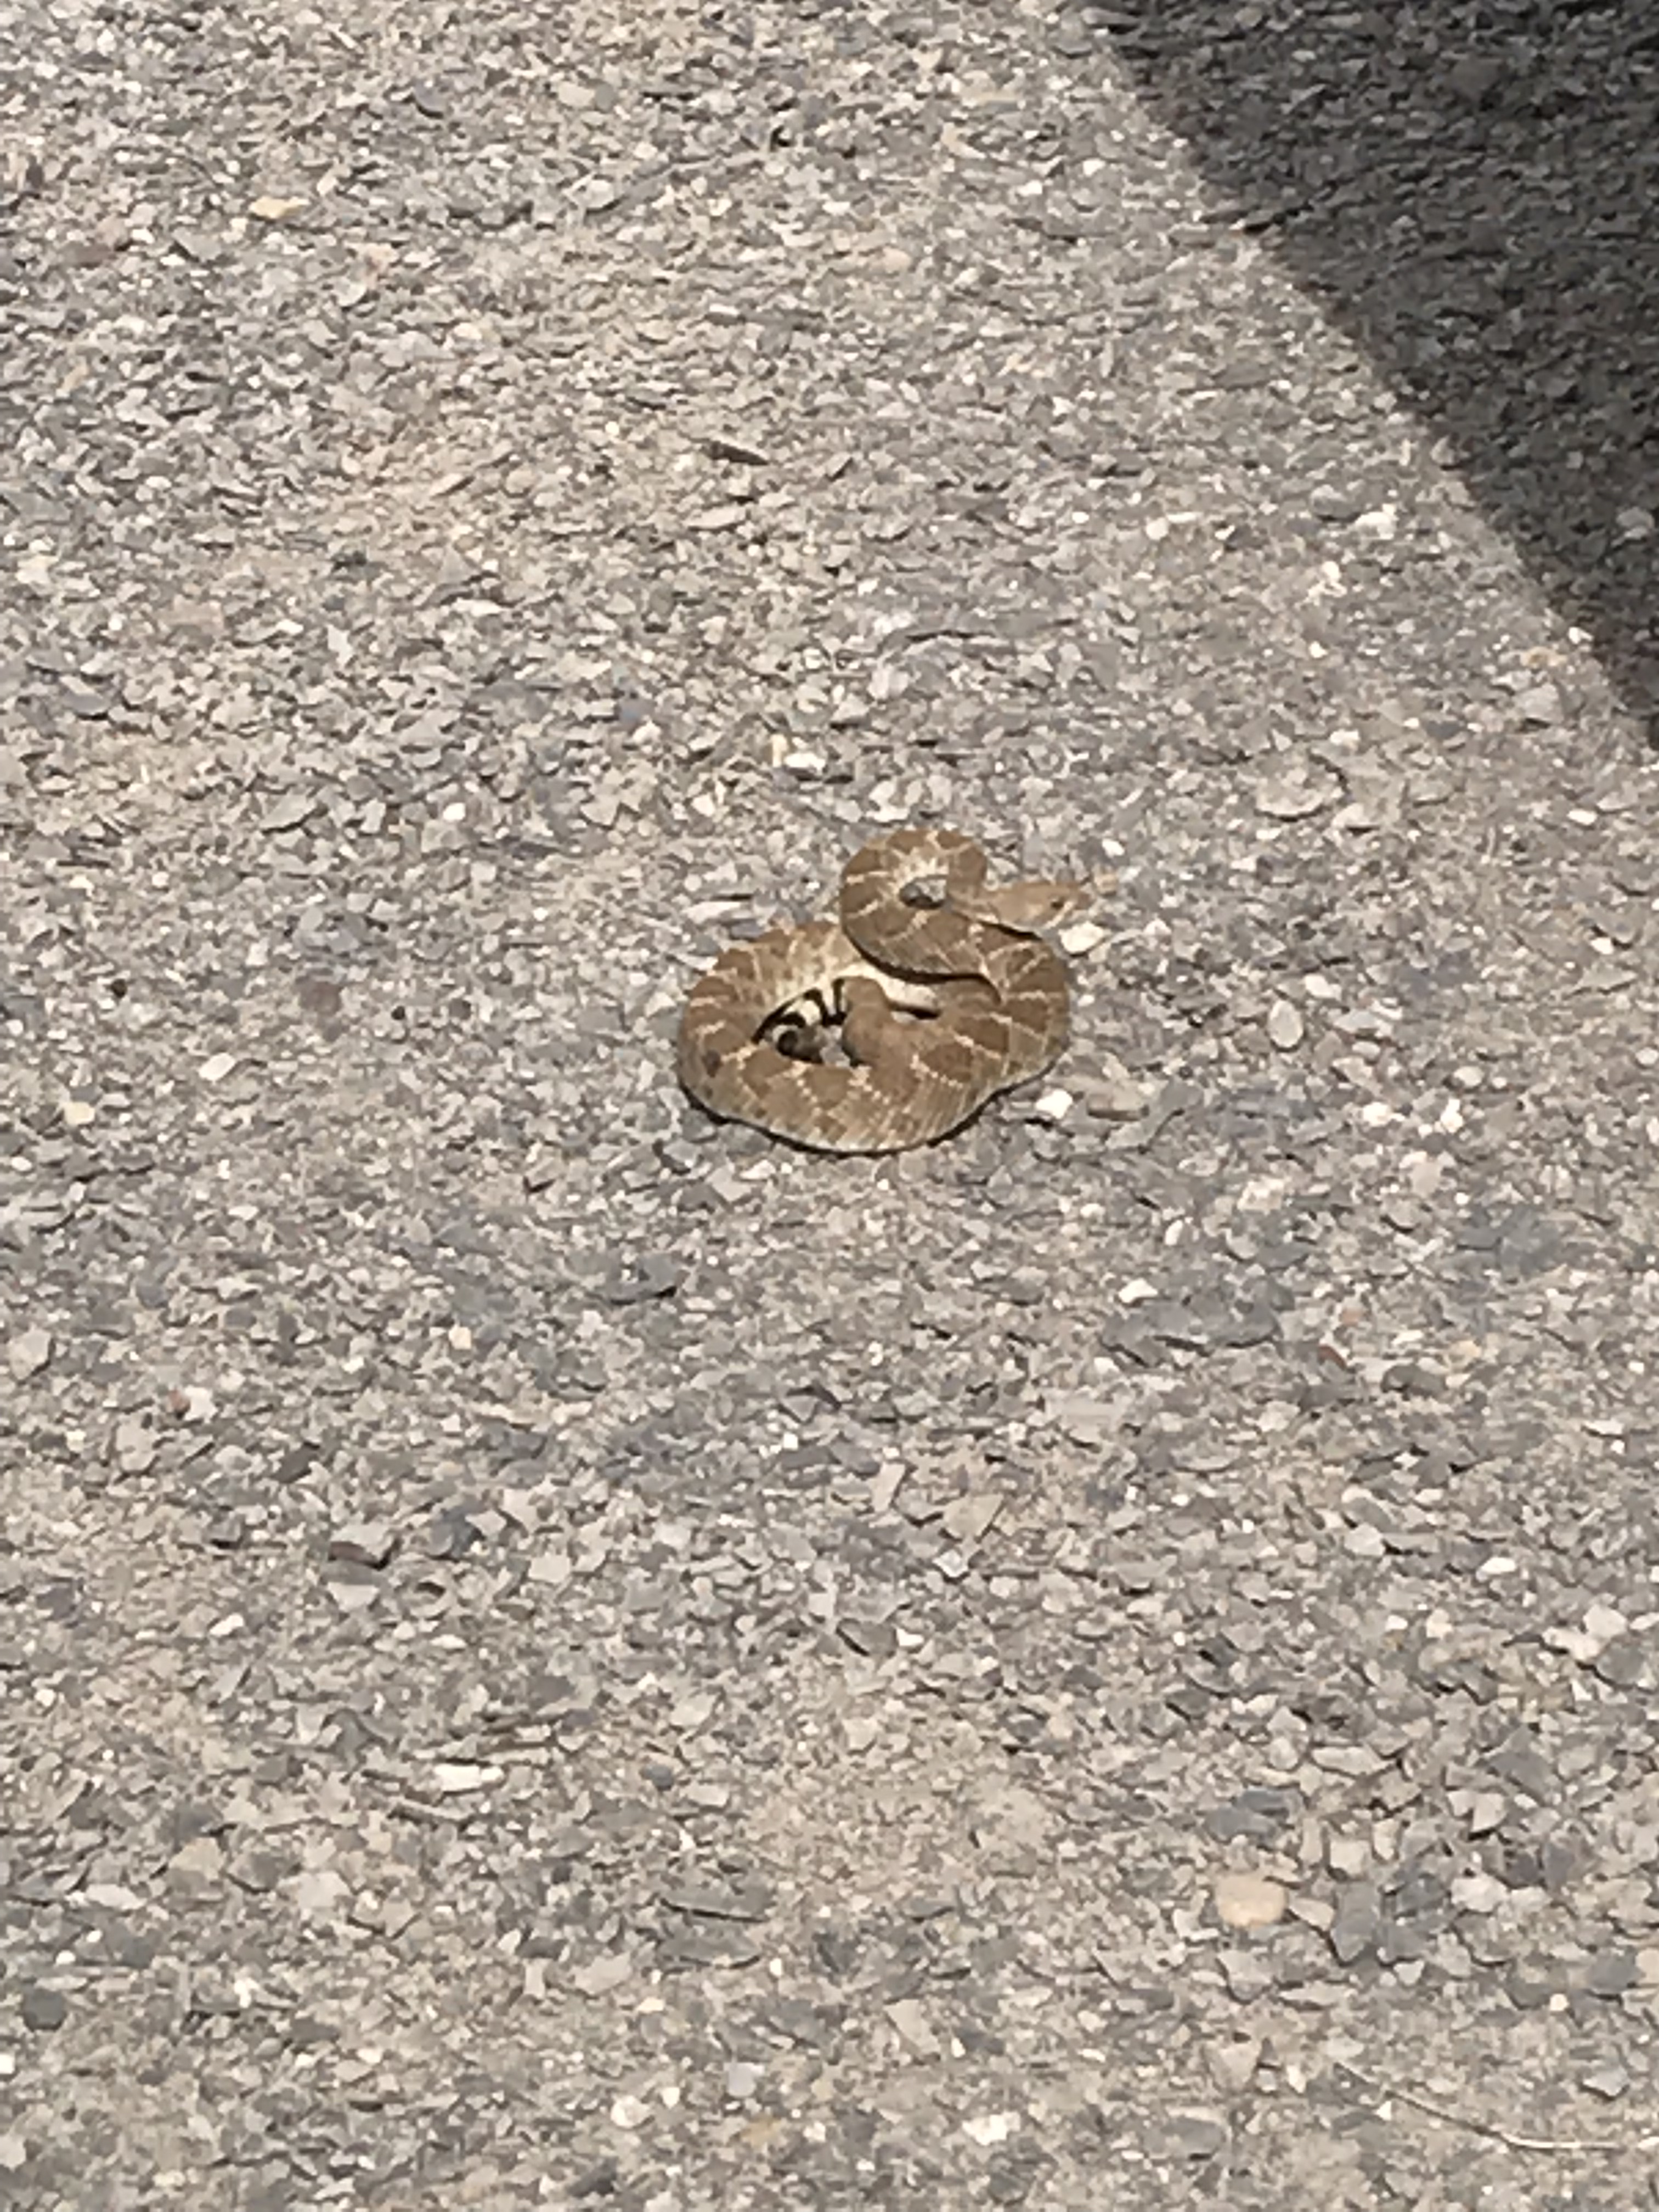
Speaking of rattle snakes, this is the first one of the year. Sasha was outside barking for an abnormally long time yesterday. I stepped out to see what she was barking at. I got to the second step down the 5th wheel steps when I heard the rattle coming from under the 5th wheel. I retreated back into the trailer rather quickly. I put on my snake boots and went back out to deal with him. I had read online that water from a garden hose is effective at getting rattle snakes to move along. I went to the far side of the trailer and sprayed him with the water. He retreated into the trailer’s wheel and I couldn’t get him out from that angle. I took the hose around and sprayed him through the holes in the wheel to get him out of the wheel, then sprayed him some more from under the trailer at a distance. He eventually moved to the the area between the trailers. I left him alone at that point figuring he needed to warm up, Sasha had moved on to let me deal with him, and he was out in the open where he was easily seen. After about 30 minutes of just sitting there, he moved off into the yard.
This is the pile of wood chips I’ve collected thus far. Over half of the pile is from my own chipping efforts. The rest are chips I picked up last year from someone that wanted them to be hauled off. I’ve learned that chipping dirty, dried, mesquite brush is hell on chipper blades. I’ve learned that a set of blades lasts between 4 and 8 hours of use chipping my dirty dried mesquite before they have to be changed out. I’ve learned that fresh blades will easily slice your finger if you are not careful. I’ve become quite adept at changing out the chipper blades.
I’ve learned that road runners are smarter than Bear. I had set him down on the ground one evening while I was resting allowing him to run around a bit and explore. There was also a road runner out and about. Bear was initially oblivious to the road runner, and the road runner was intentionally approaching him. As I didn’t know what the road runner’s intention were (given they can kill rattle snakes, they are not to be taken for granted as a hunter), I got up to intervene. It was at that point that Bear noticed the road runner and decided to chase after it. The road runner ran up on the gravel pile. Bear apparently doesn’t know how to look up as he ran around the gravel pile and kept going, looking for the road runner. At that point, he left my sight so I had to once again pop up out of my chair to go get him as there are many animals around here that would easily make a meal out of him. Sasha, being the great protective flock dog she is, saw me pop up and knew why I was getting up. She ran down the driveway until she could see Bear and waited there for me to catch up and go get him. In the mean time, that road runner stayed on top of the gravel pile presumably laughing at Bear. It all made me think of the Road Runner and Coyote cartoons from when I was a kid.
And now some photos I’ve taken to share.
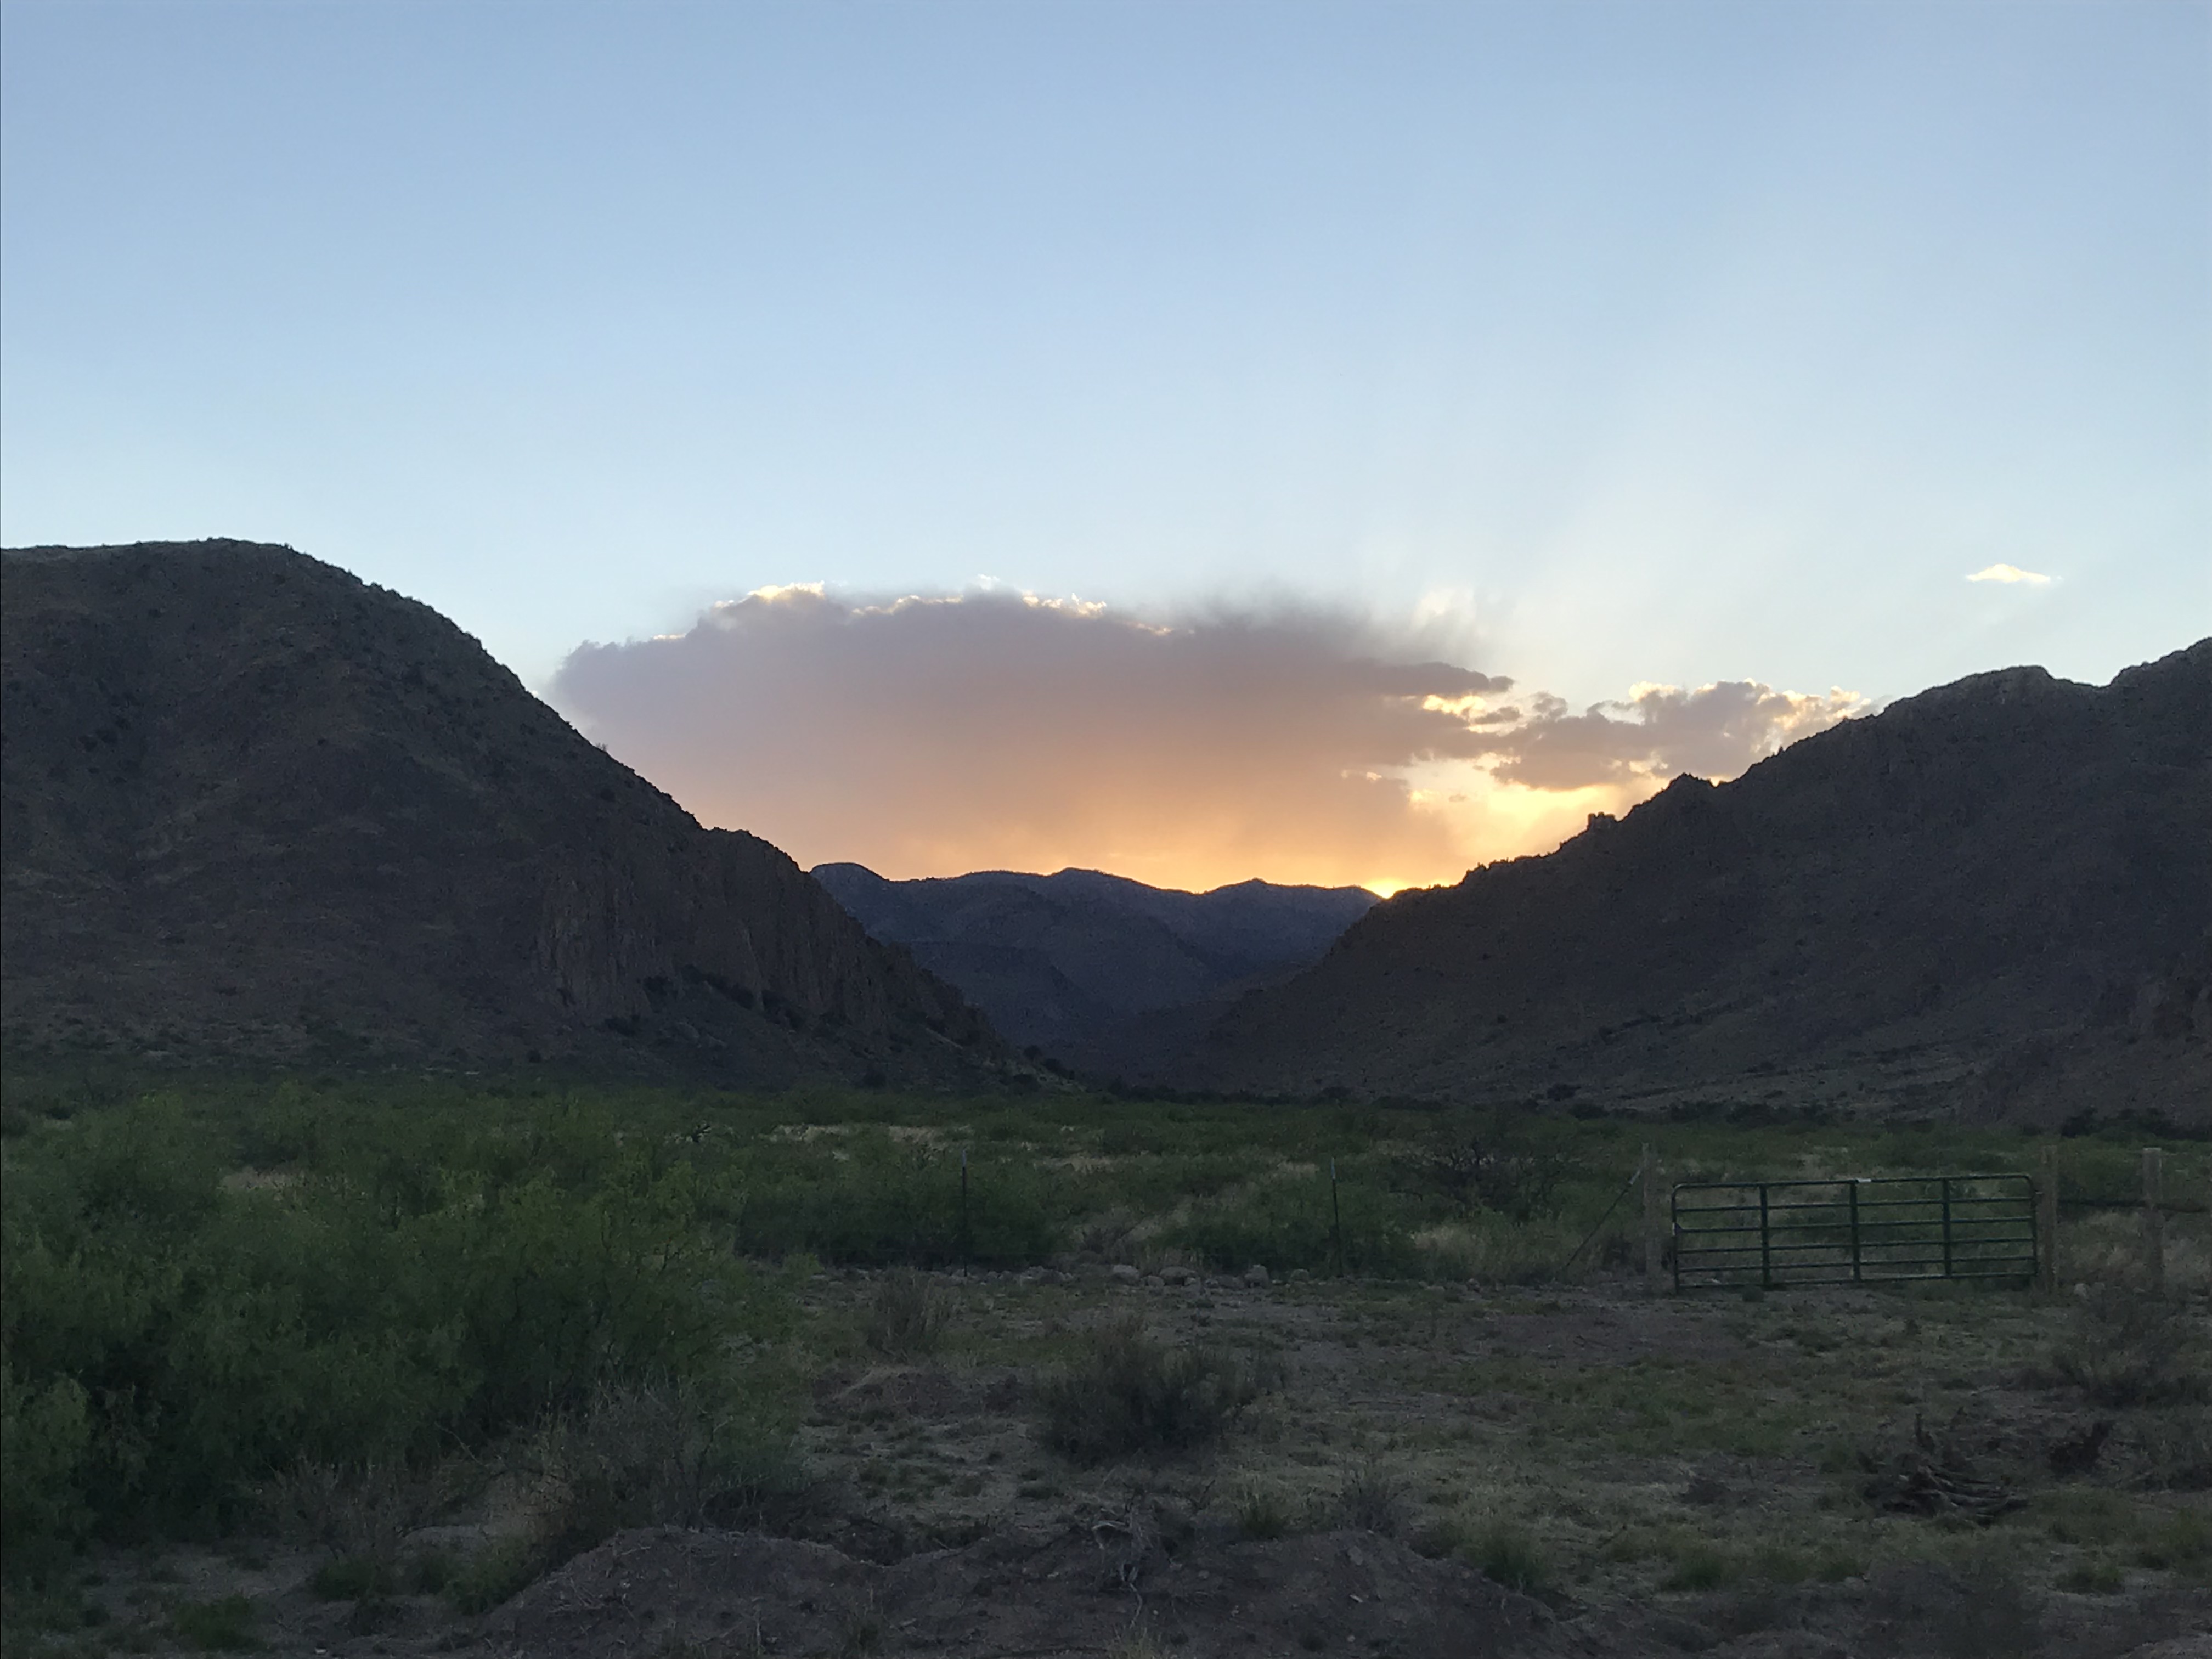
Sunset one evening just after the sun dropped below the mountains.
Talk about an isolated shower… Okay so more like sprinkles somewhere under that cloud. The evening I took this photo, a slightly larger cloud came over me and dropped a few sprinkles on me while the majority of the sky was still a beautiful blue. Note the valley and the mountains are in the shadow of the mountains behind me as the sun is setting.
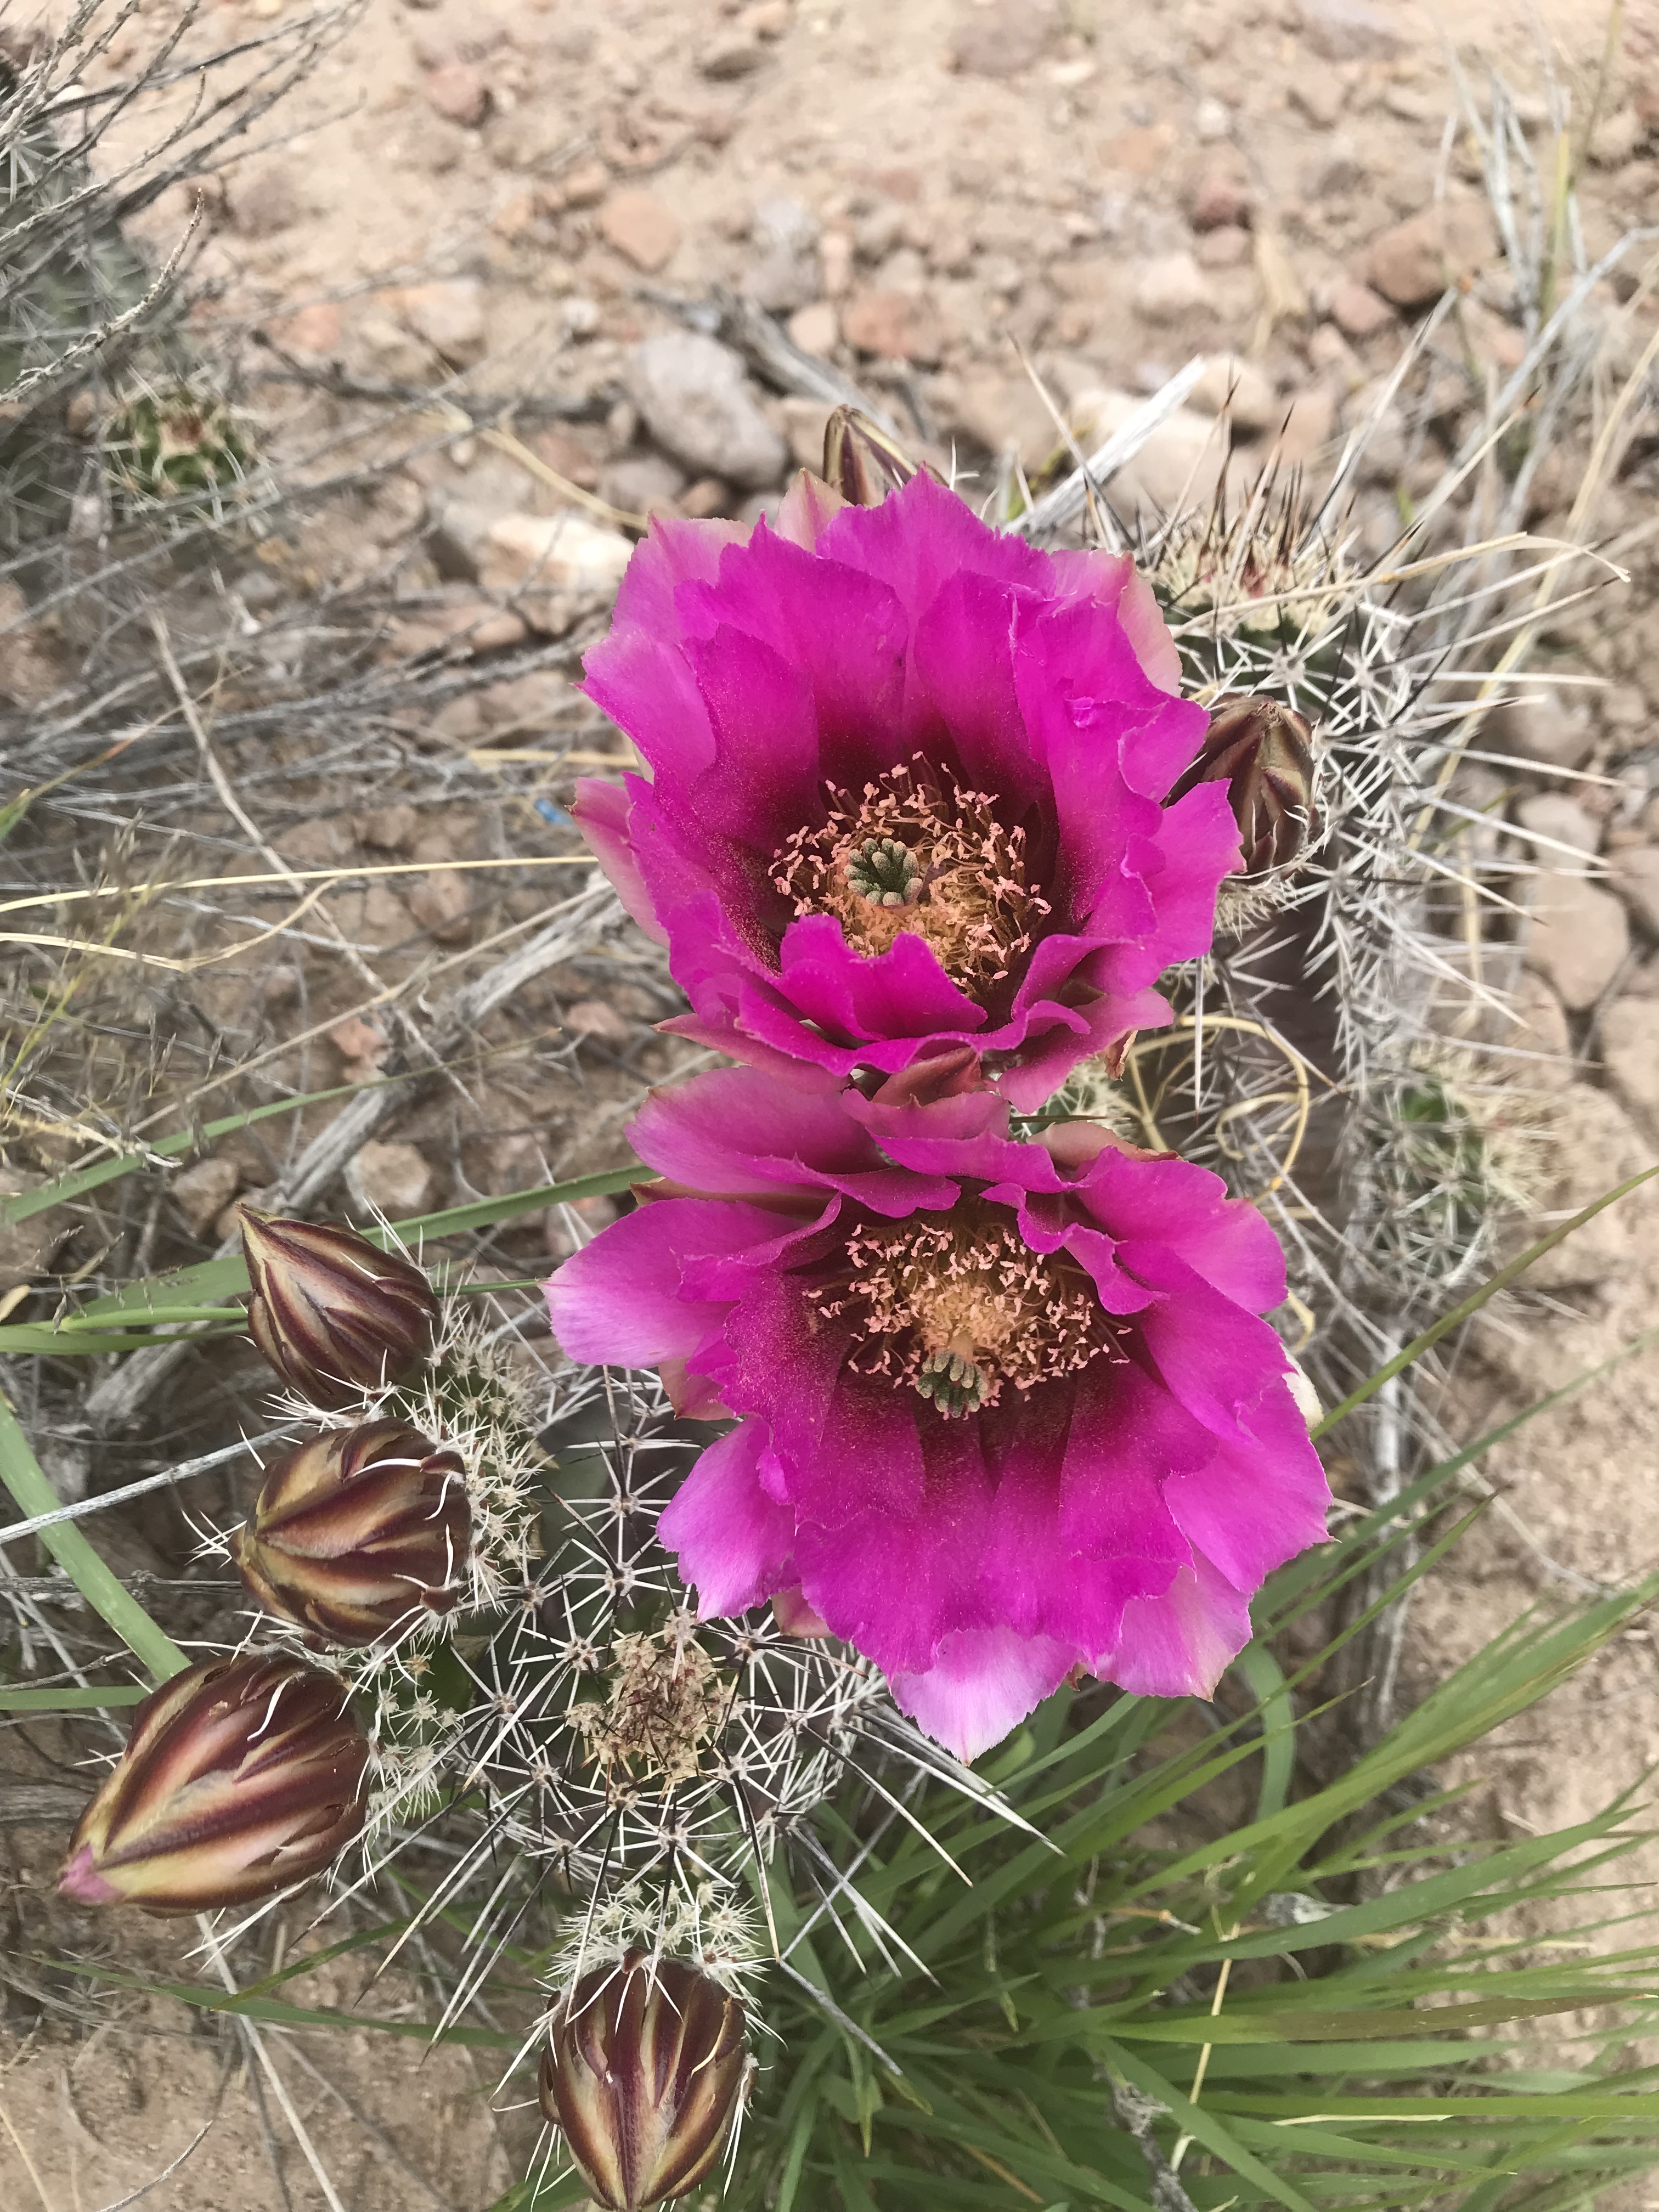
Flowering cactus. Maybe some day I’ll try to identify the name of it.
Young cotton tail bunny in the brush pile I was working on chipping. How do you like those mesquite thorns on the stick in the photo above him?
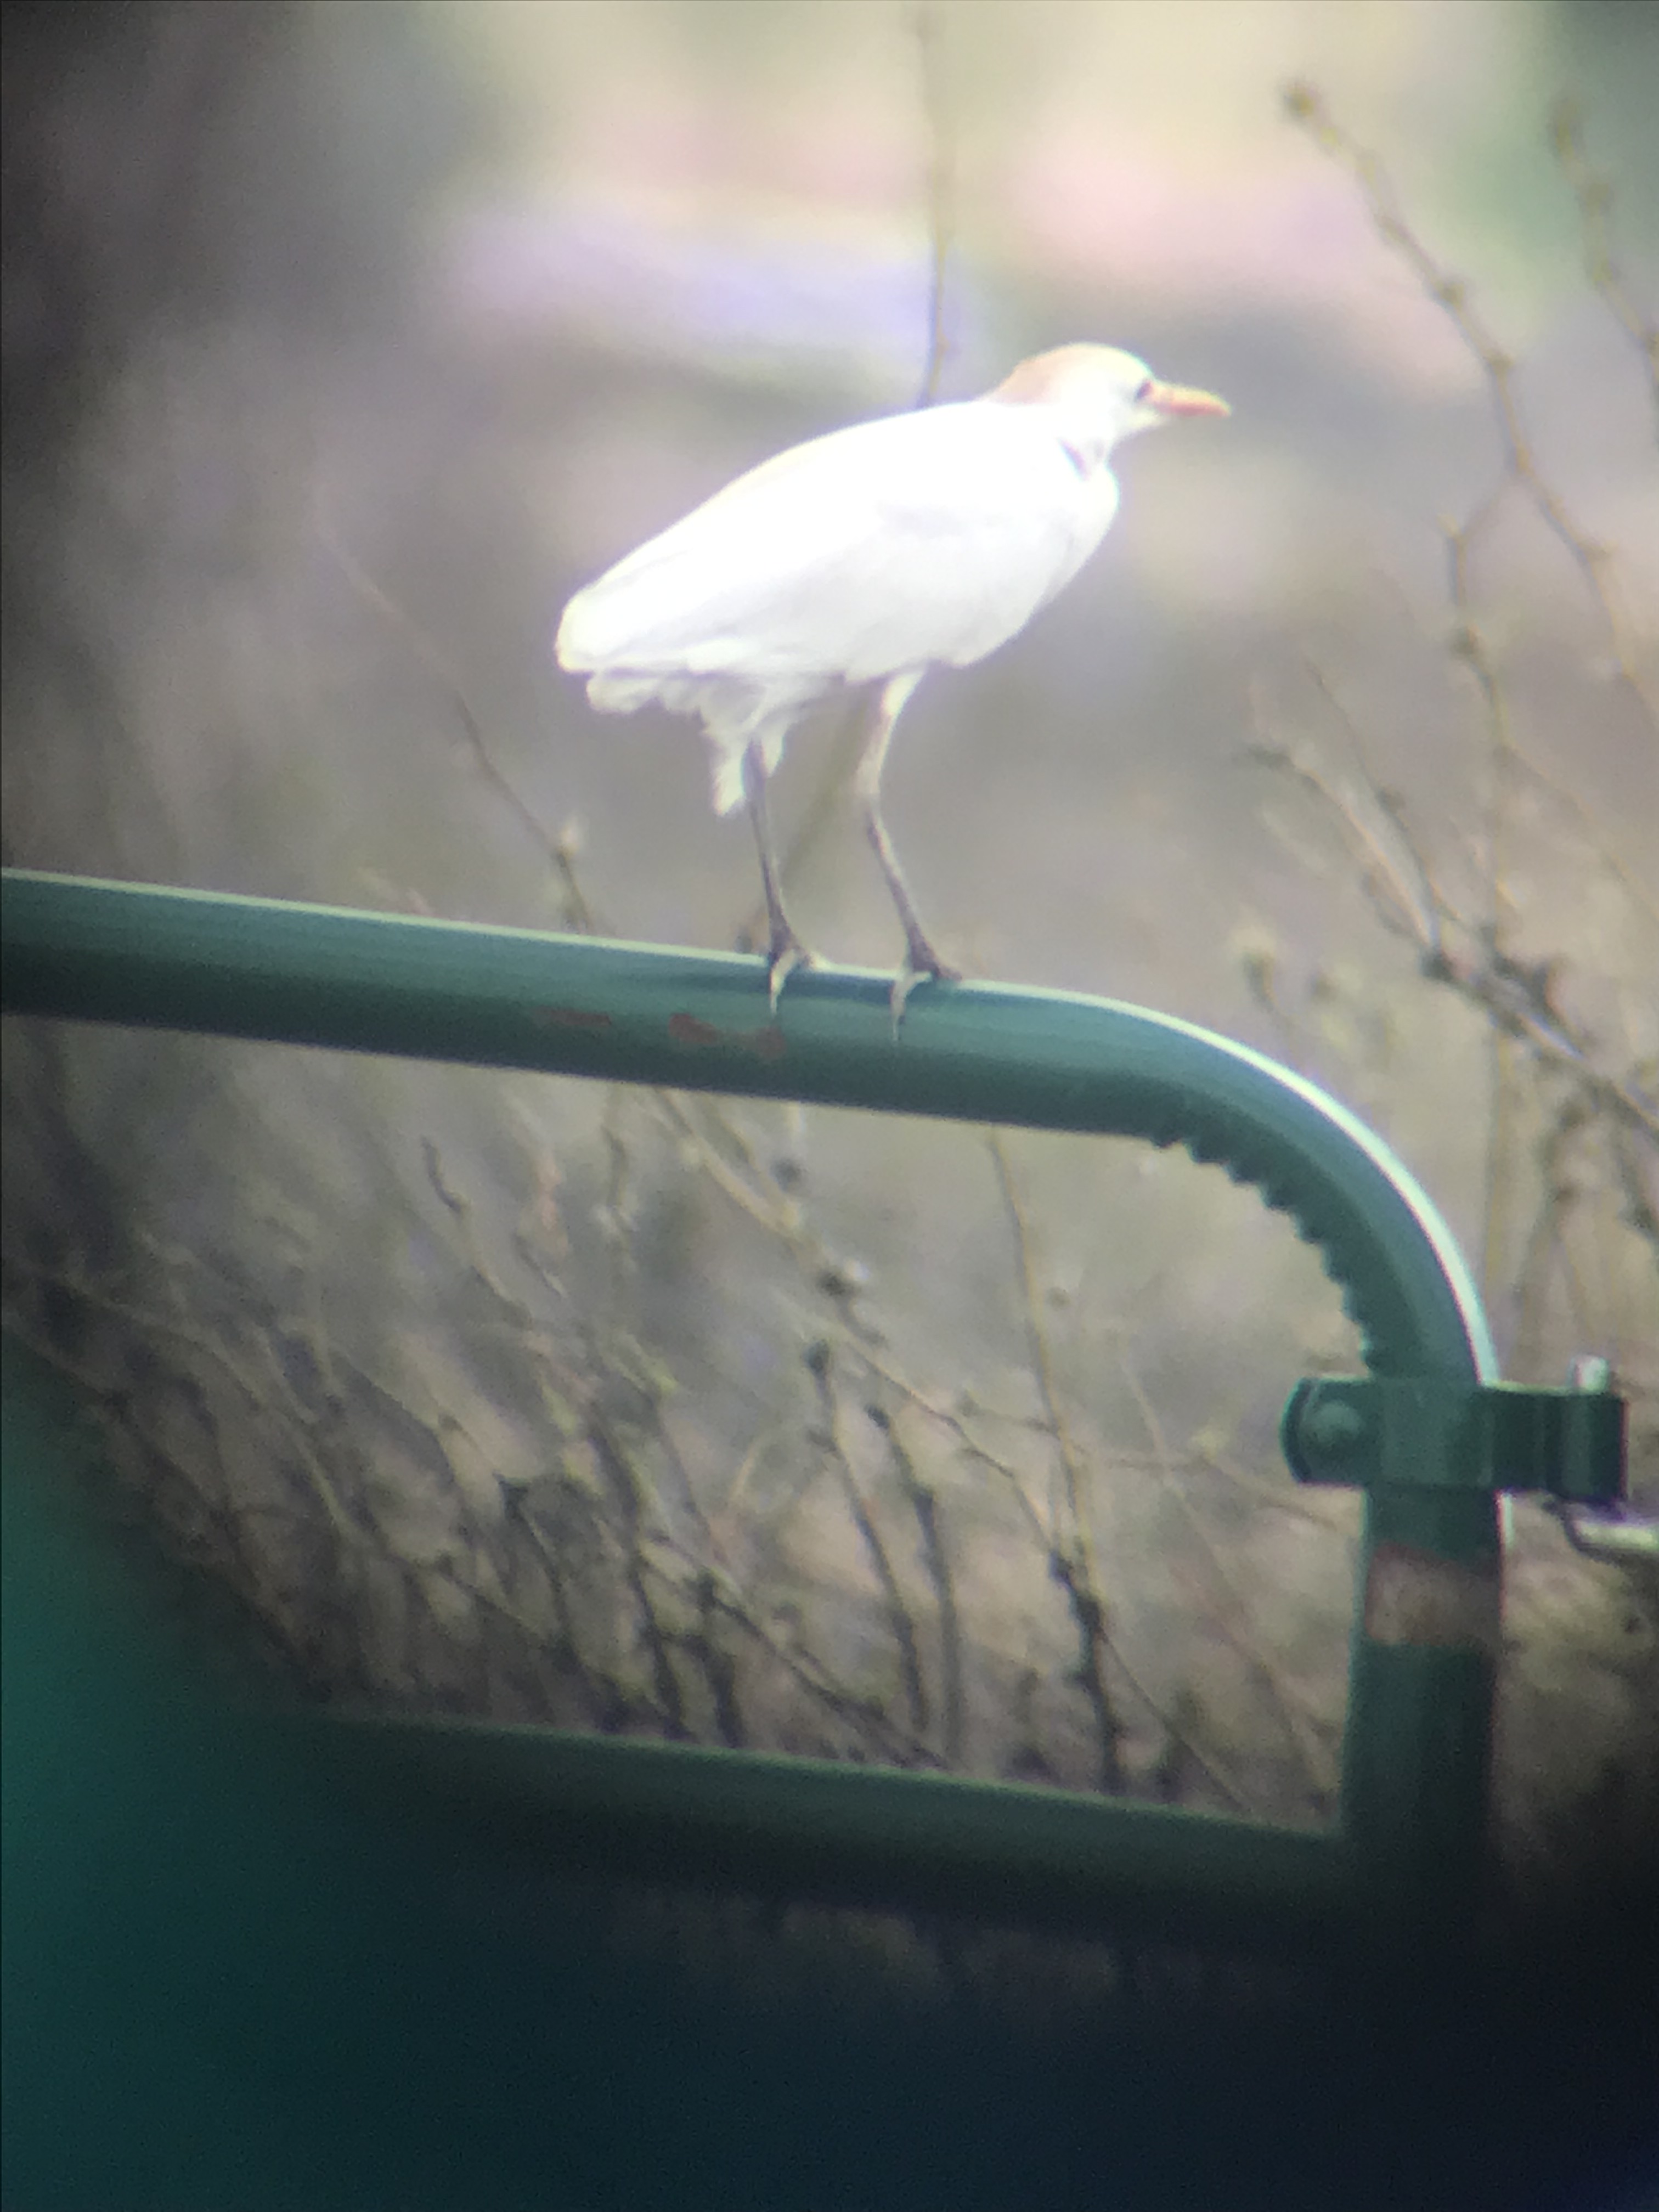
Bird I took a photo of using our scope and iphone. It was identified by locals as a cattle egret.
That’s it for me. Bed time and I still haven’t eaten dinner.
Howdy everyone! I’m happy to report progress. Once again not as much progress as I’d like but progress none the less.
The trench is filled. I completed filling the trench on Saturday March 9. I switched from using the back hoe to using the tractor’s front loader to screen the dirt. It went much faster using the front loader.
A local squatter I spotted one day while filling the trench.
Once the trench was filled, I turned my attention to preparing to move the trailers.
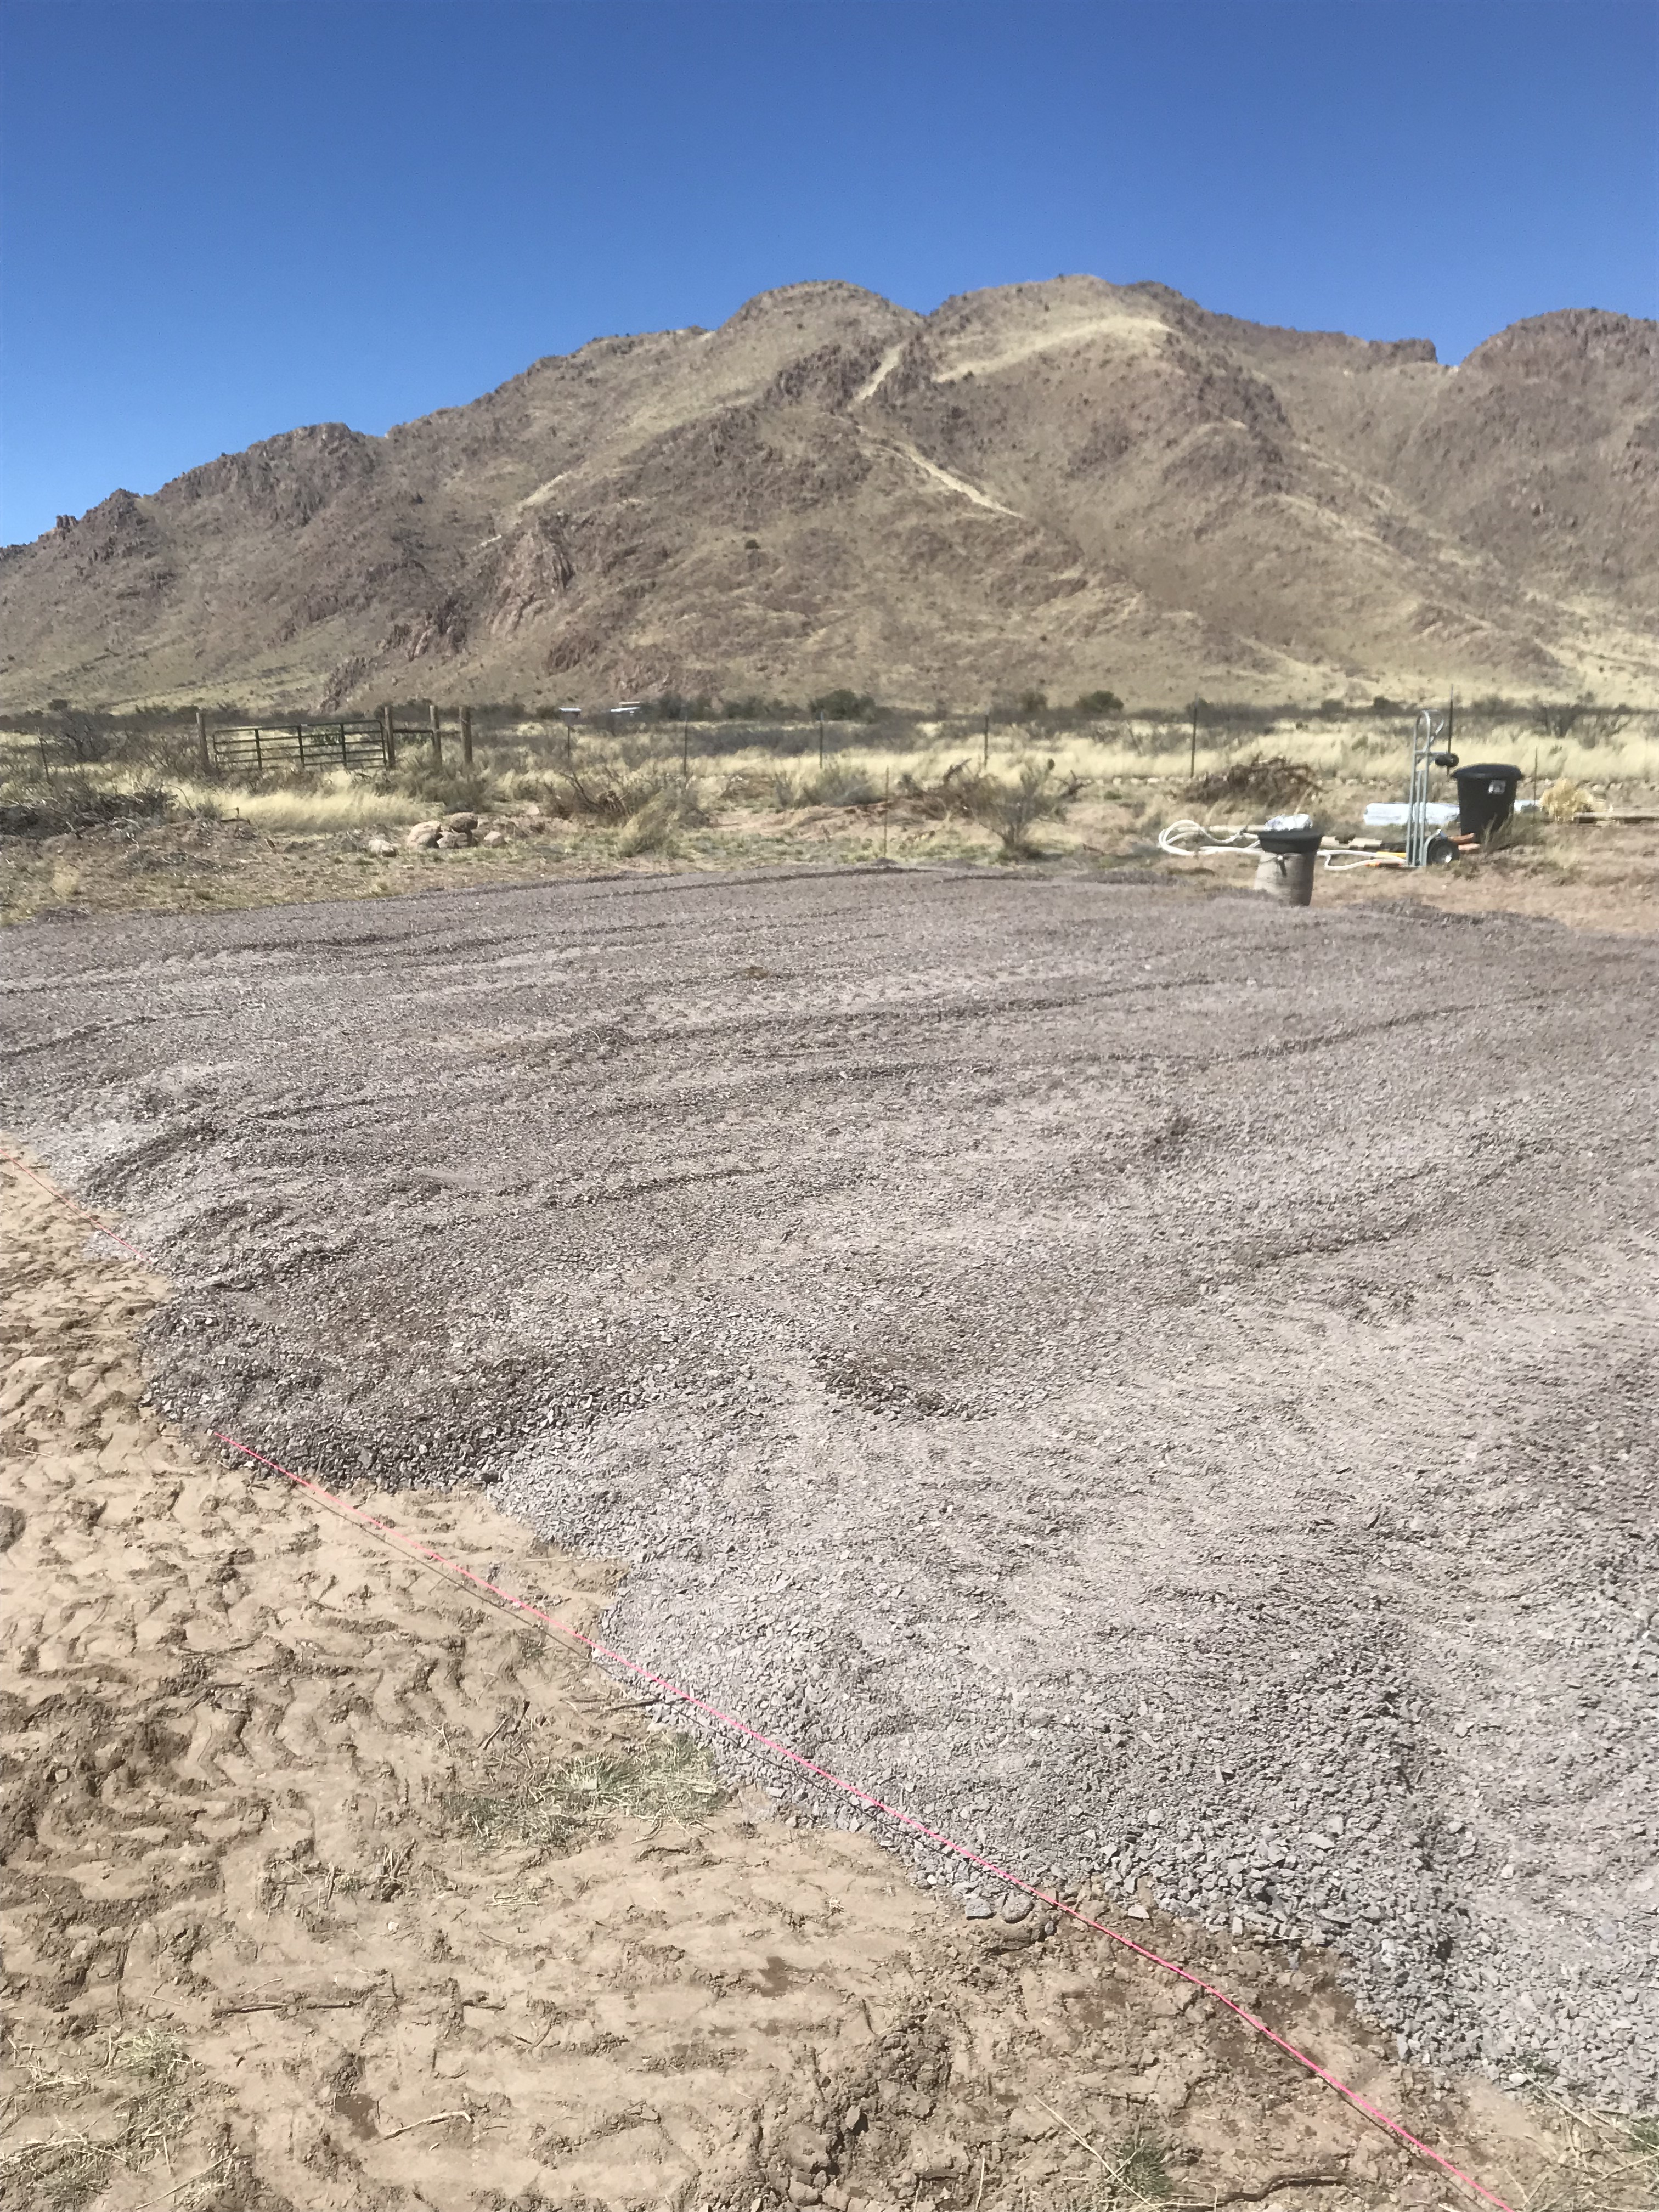
Using the tractor, I spread and packed gravel on the RV carport I spread all the gravel I had on hand which was enough to park the RV’s on but not enough to park the vehicles on.
It’s kinda, sorta, okay, not really level. Good enough to park RV’s on and I can fill in troublesome low areas as needed.
I finally got around to terminating the data cables I had run from the utility shed to the RV carport.
One analog phone, one network, one to be determined.
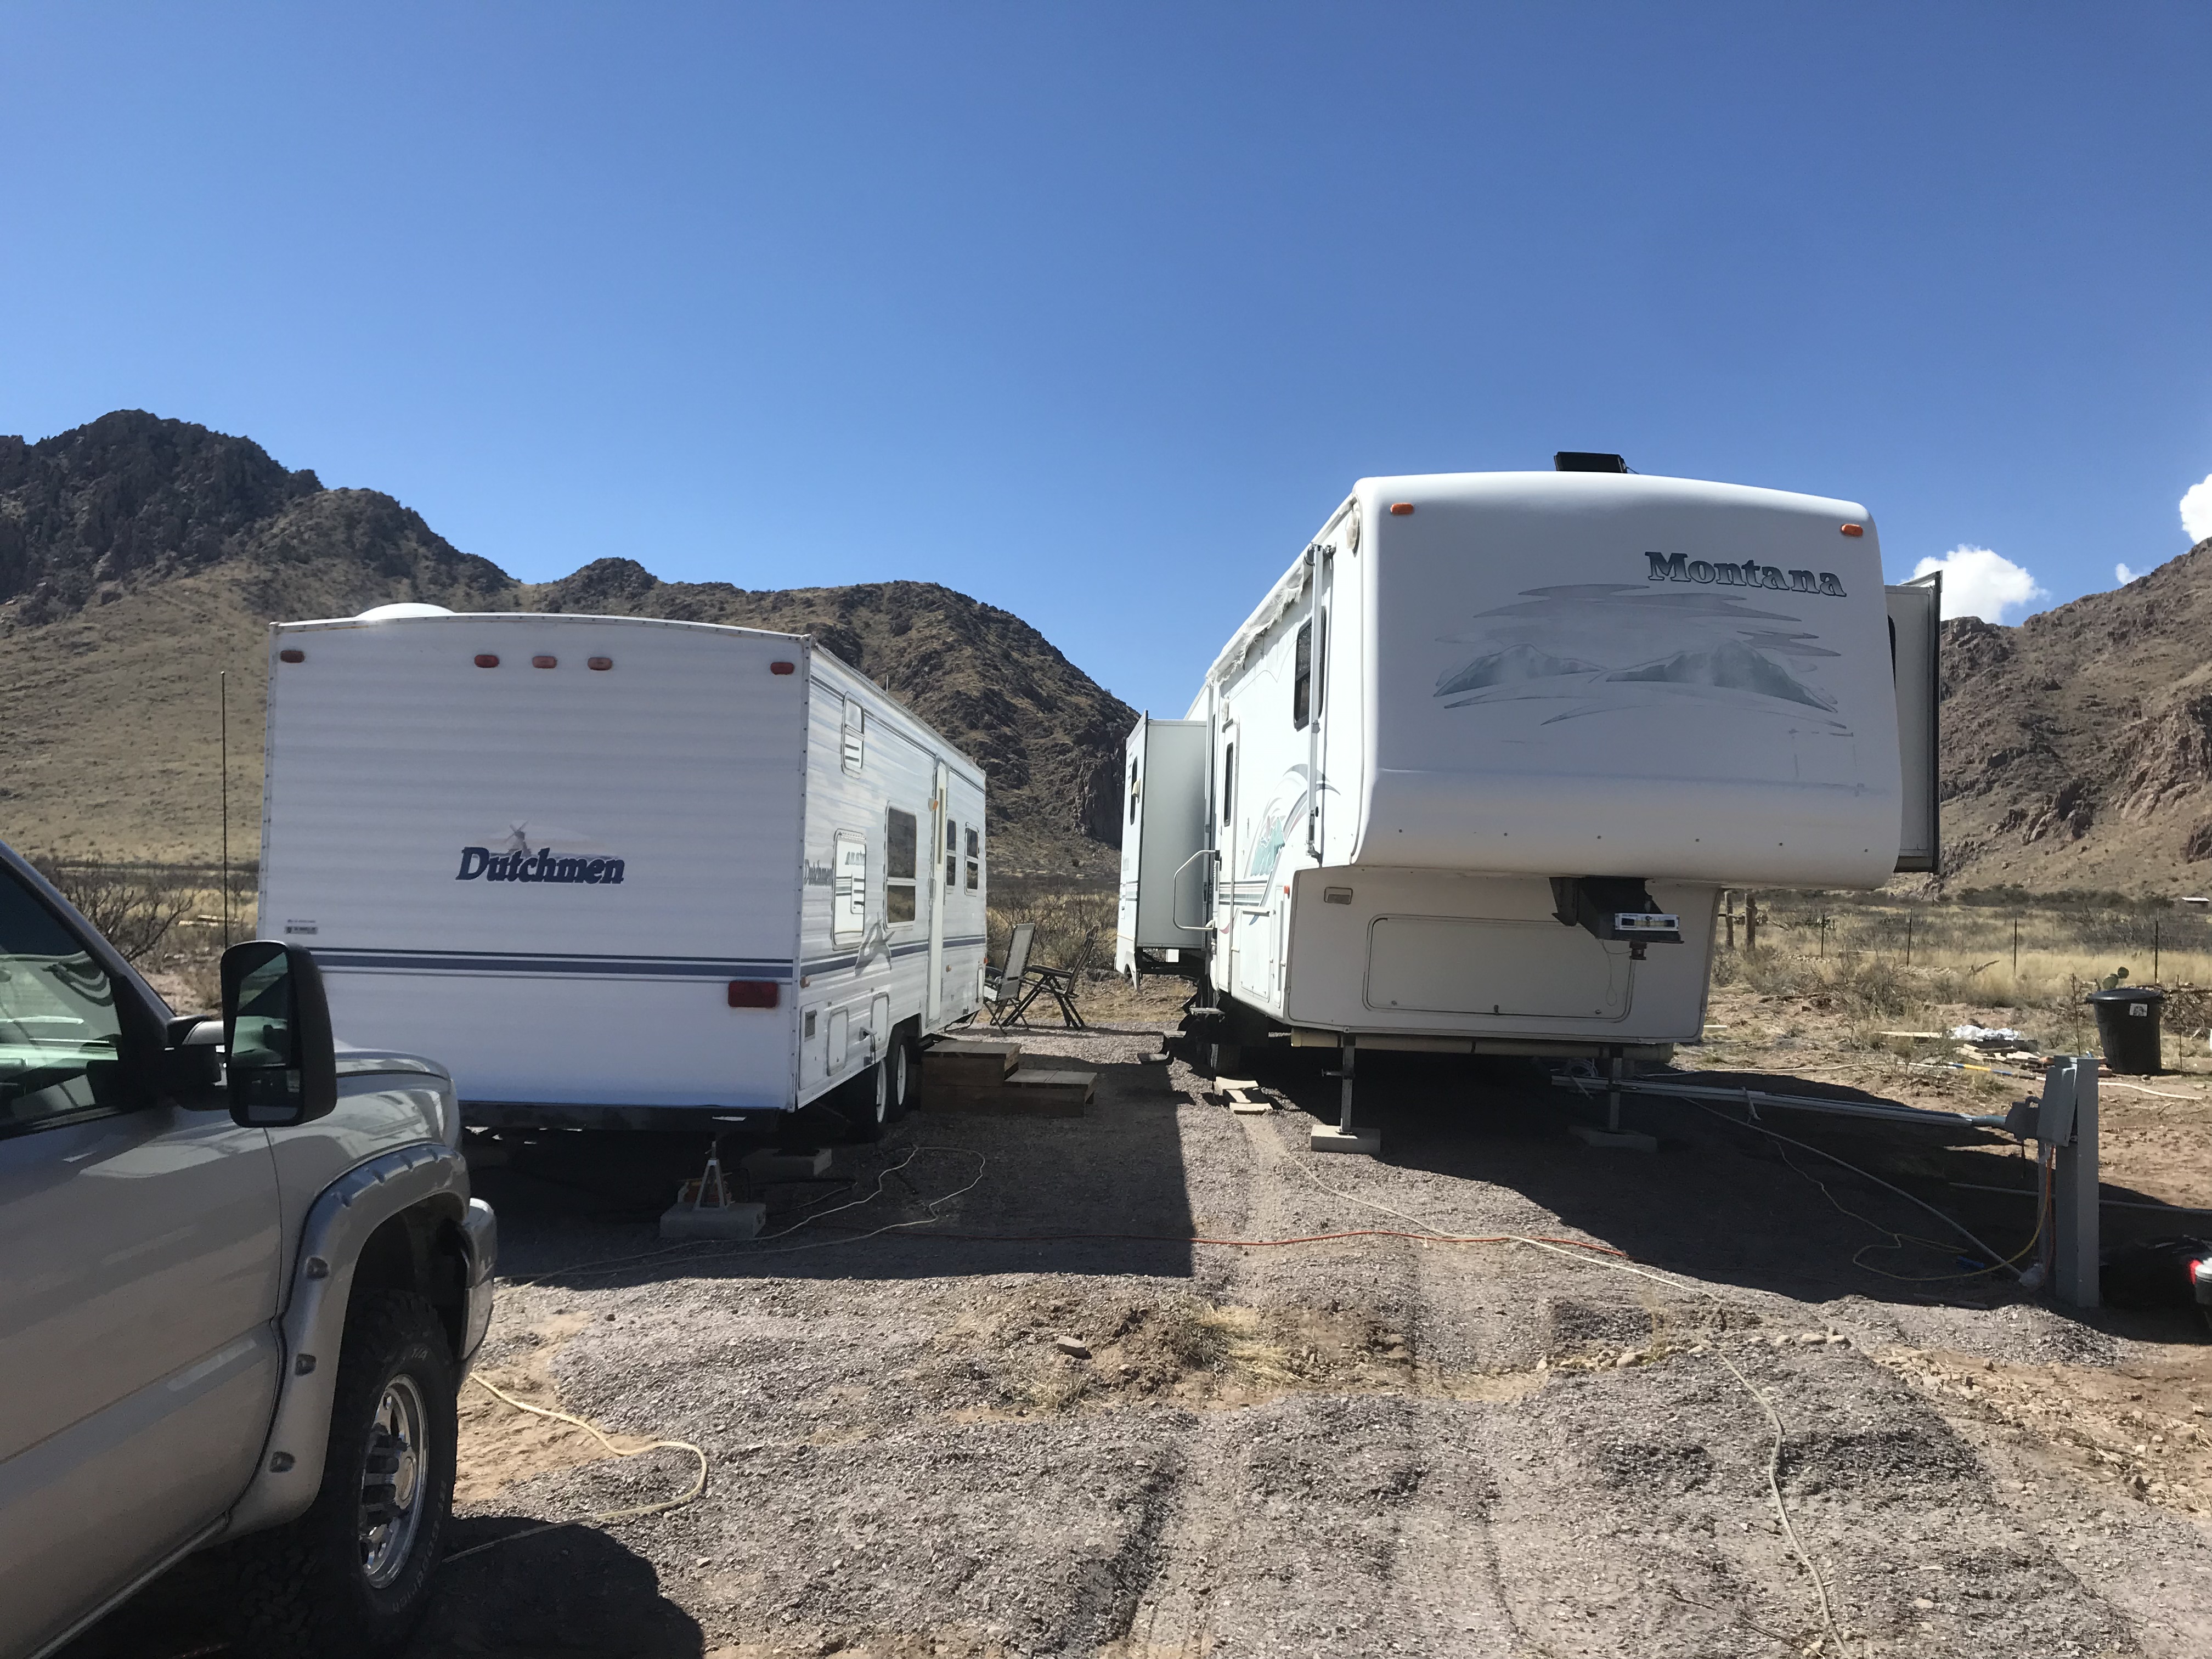
I moved Rachel’s trailer into position on March 14 then had Drew (a local friend) come and move the 5th wheel March 17. Past time for me to get a 5th wheel hitch. Thinking that will be an April/May expenditure.
Decided to try to use Rachel’s trailer as a wind block for our trailer as most of the wind comes from the south (left) and west (canyon). Of course, now the windy season is over.
I have since replaced the 10 AMP extension cables with 30 AMP cables. The trailers are sharing a 30 AMP circuit. I took the time to bury the 30 AMP power cables in the gravel to prevent critters from coming along and chewing on them as they have done with every extension/power cable I’ve left laying across the top of the ground. They are only exposed for chewing hazard at the point where they come out of the gravel at each end.
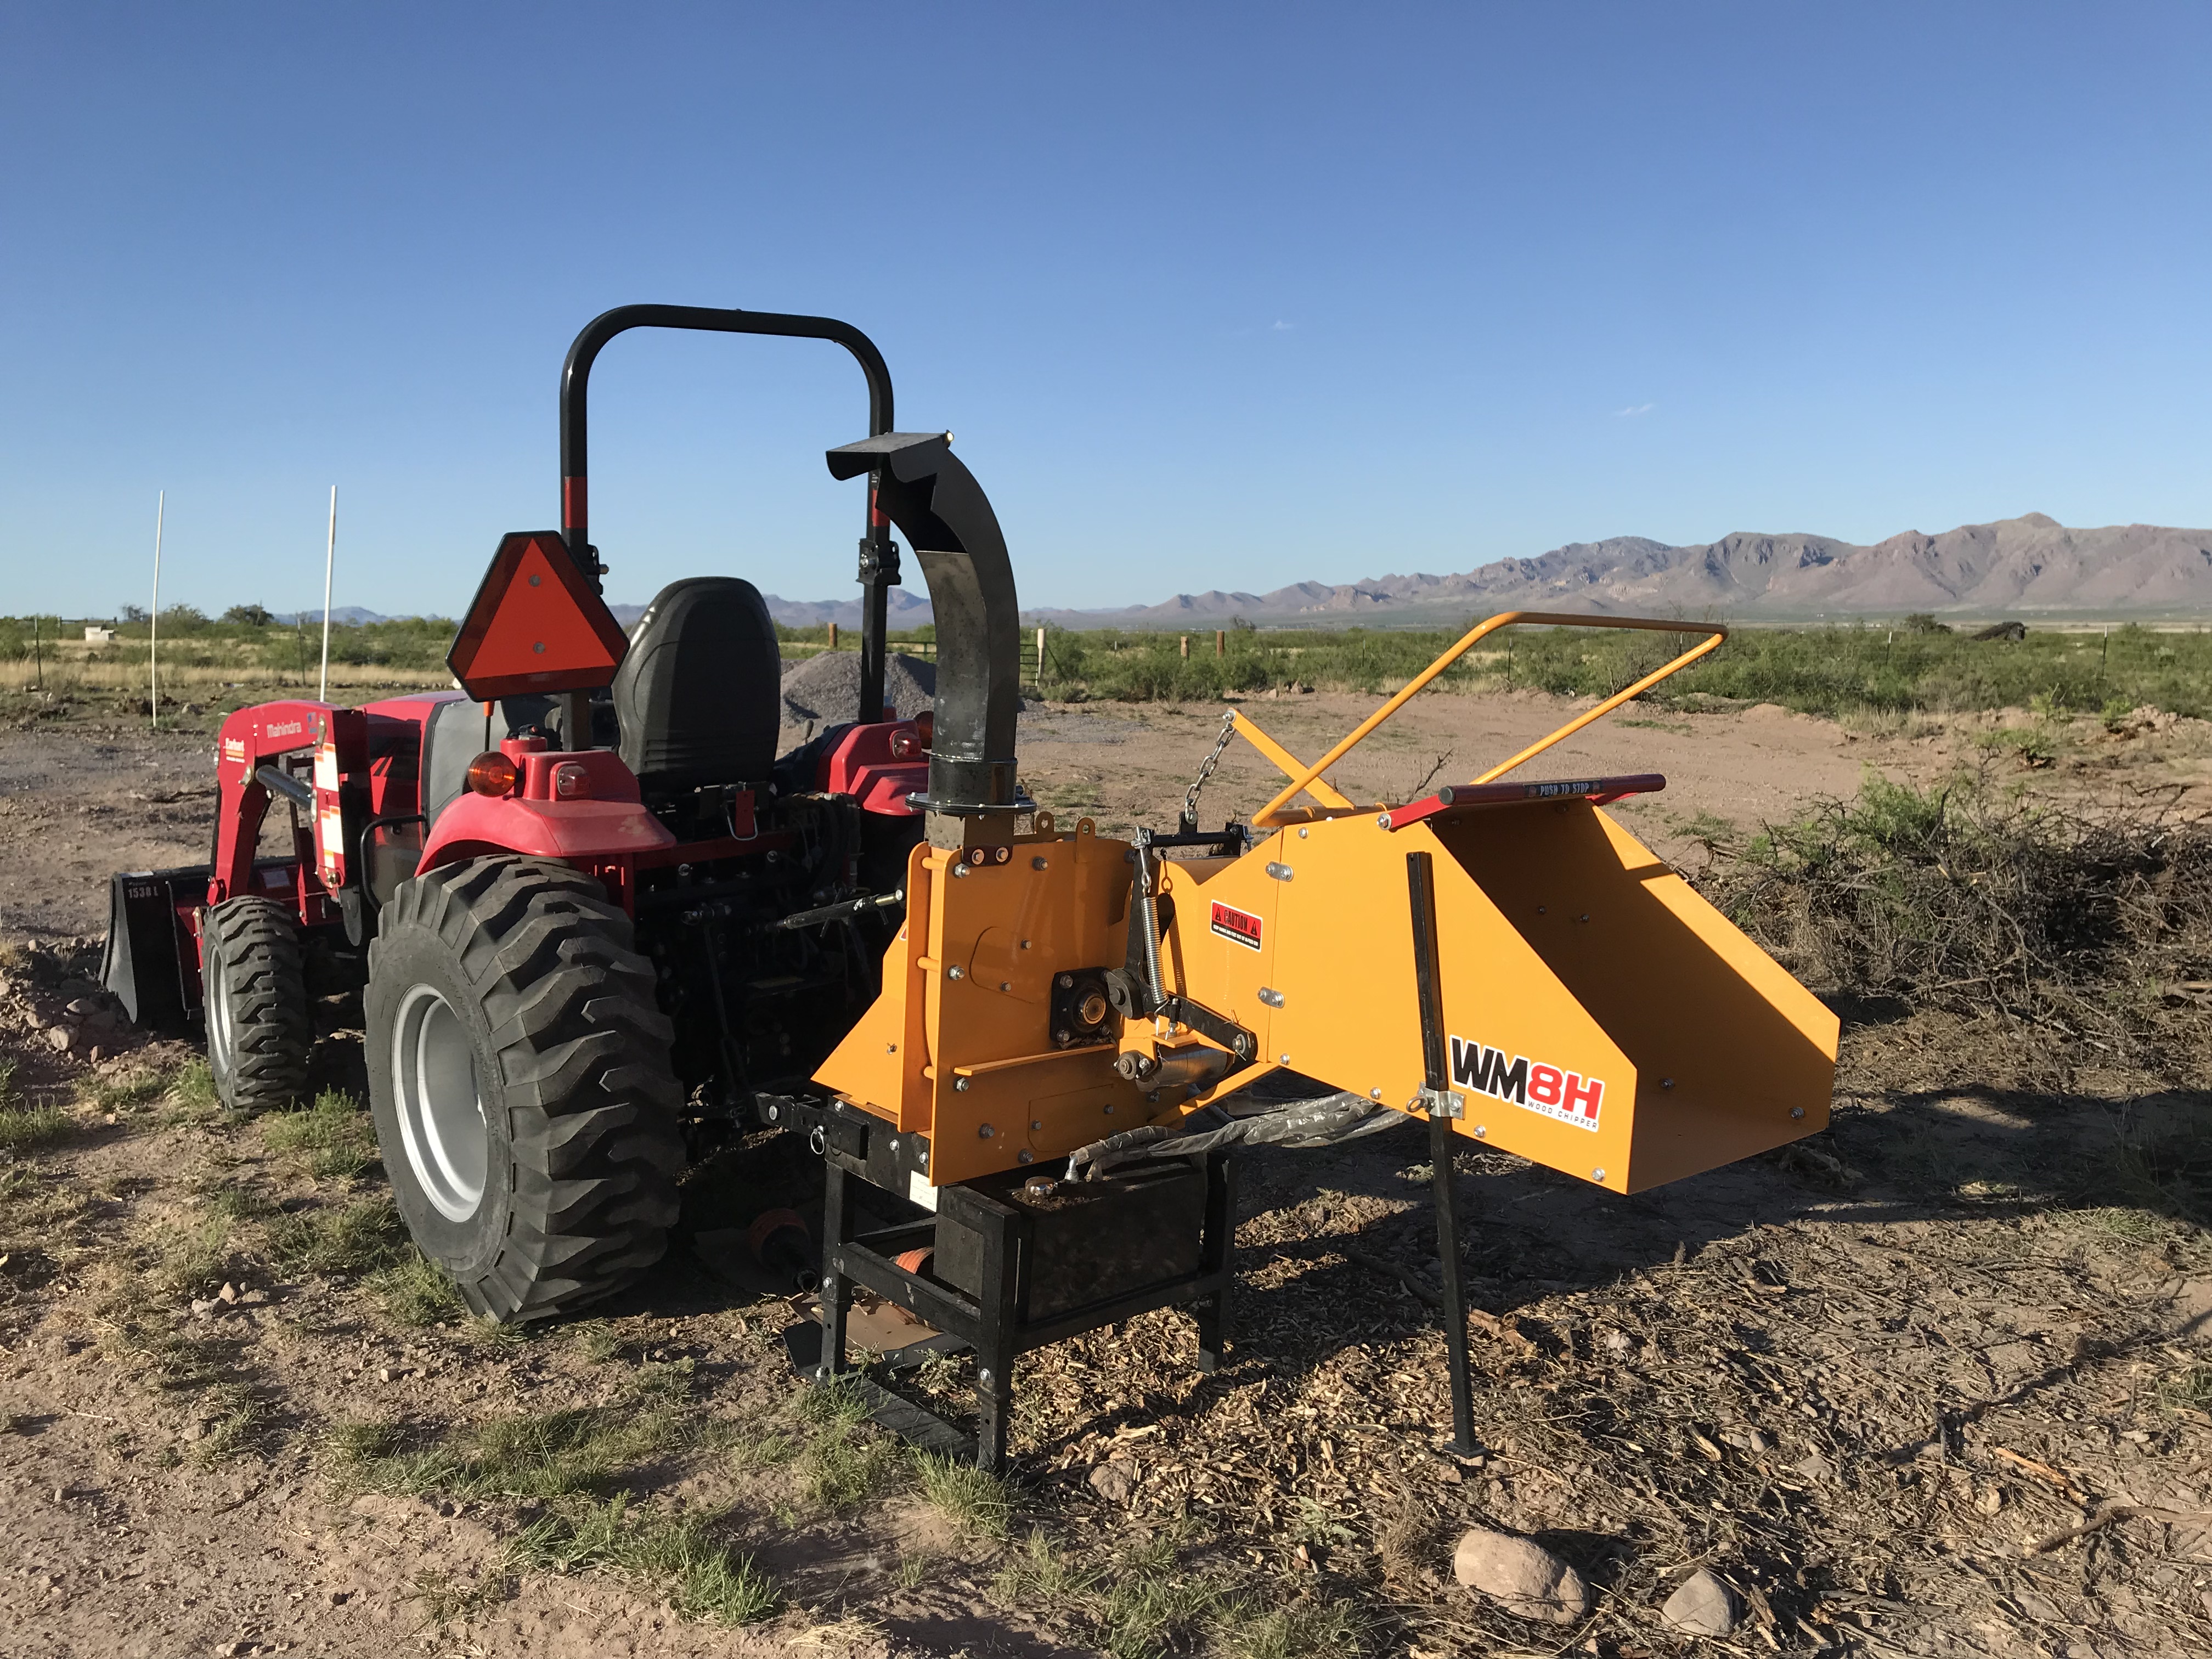
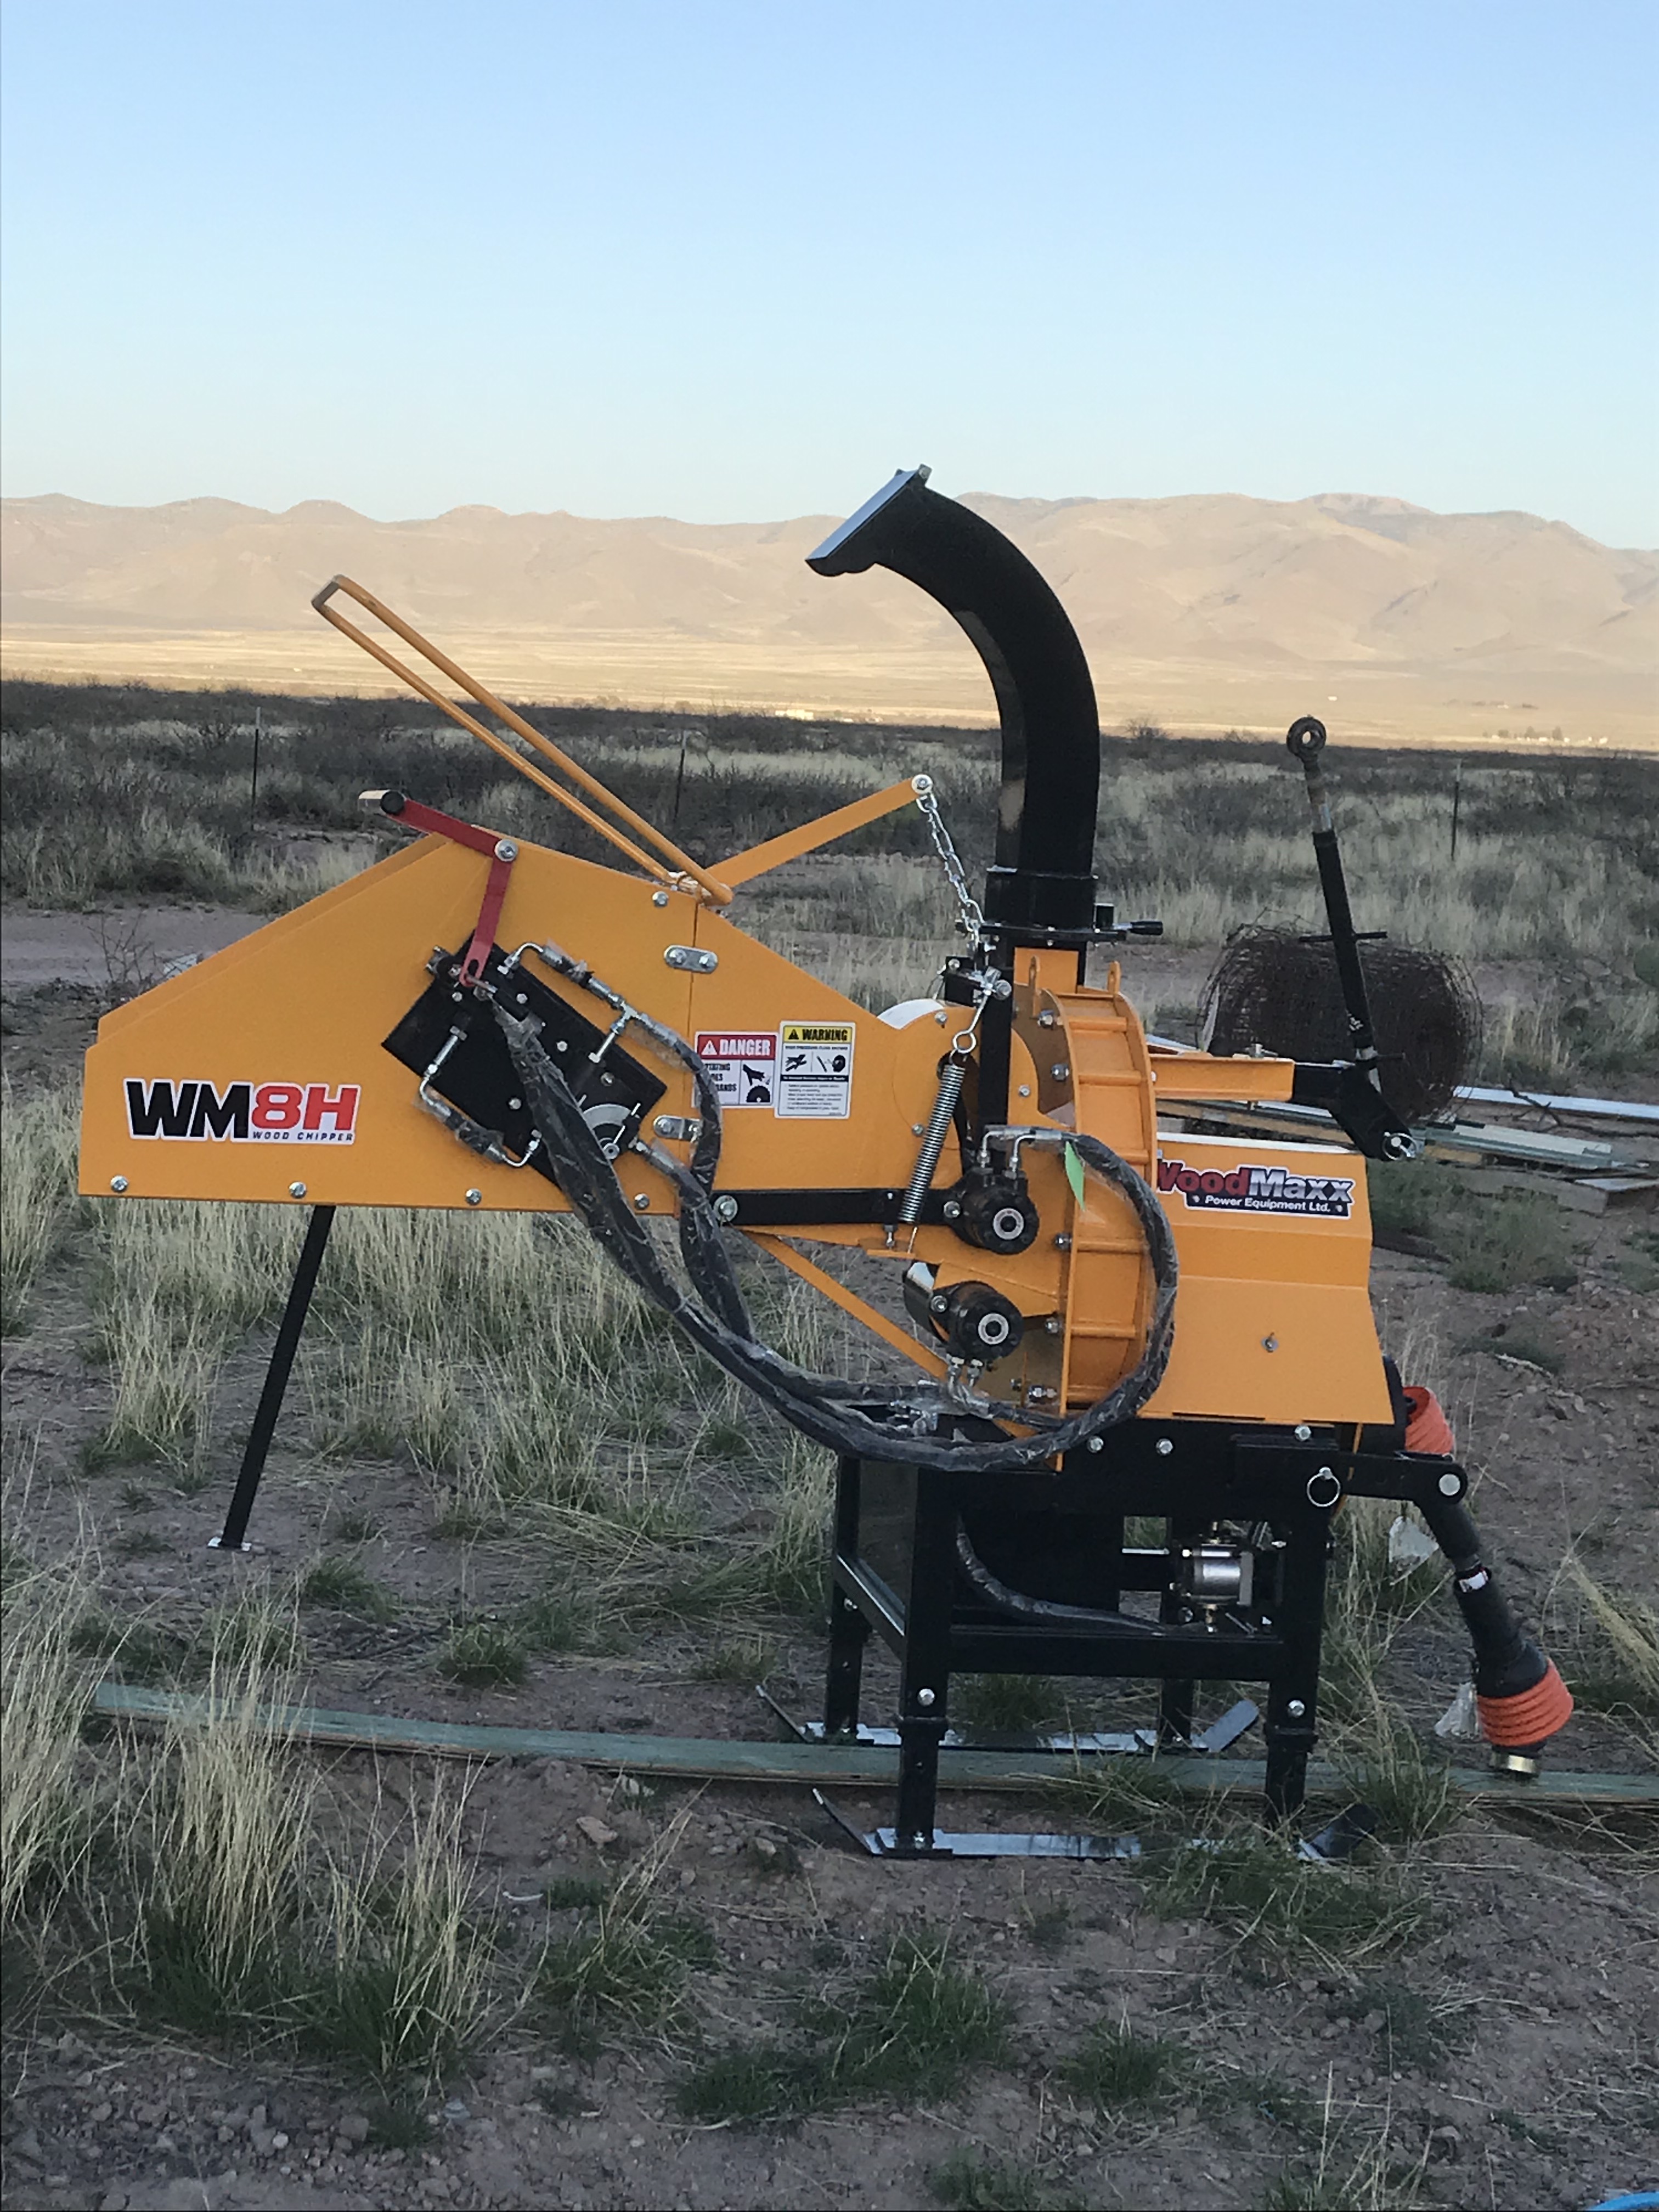
As fire season around here is upon us, before I jump into building, I need to chip all these brush piles around here. To that end, I bought a new wood chipper that runs off the tractor’s PTO drive. I picked it up from the shipping terminal in Douglas on Wednesday March 27, Tom helped me unload it from the truck with his big CAT front loader Friday. I spent Friday afternoon unpacking it and much of Saturday assembling it. I need to run to Douglas for more hydraulic fluid for it before I can run it.
I struggled to decide between a new chipper that is powered by the tractor or a used commercial sized chipper with it’s own engine found on craigslist. I ultimately decided to go with the tractor powered chipper so I don’t have yet another engine to have to maintain and it was new.
I have learned a lot this weekend. I learned how to take the back hoe off the tractor and put it back on. Taking it off is a hell of a lot easier than putting it on. That’s for sure. Hopefully it will get easier to put on in time. I certainly found a number of ways not to do it. Some how no damage done that I’m aware of. I’ve learned how to connect a category 1 three point hitch and associated PTO drive line. I learned what happens when you accidentally release the lock on a quick change grease gun when the plunger is not released. In case you are wondering, the canister containing the tube of grease falls to the ground and the spring loaded plunger expels all the grease from the tube onto the ground.
I have also ordered the bags that I will use to build with. I expect to be able to pick them up from the shipping terminal tomorrow (Monday).
Since I expect to make a Douglas run Monday, I opted not to run Saturday evening or Sunday to pickup the hydraulic fluid needed for the wood chipper. To make “good” use of time Sunday, I decided go continue digging up mesquite from around the yard. After about 3-4 hours of digging up mesquite, it occurred to me…
I want to start building ASAP.
I shouldn’t build until after I get all the dug up brush chipped up so it is not posing an increased fire hazard.
I’ve been digging for hours adding to the piles that I need to chip that will further delay me starting to build. Stop digging dumb-ass. Yes mesquite shrubs are still a fire hazard but not as big of one as when it is laying on the ground drying out and I’ve cleared enough space around the structures, them burning doesn’t directly increase the risk to our belongings.
Given that epiphany, stopped digging for the day and turned my attention to answering some important questions:
Where am I going to dig dirt from to use to build the utility structure? FYI, I plan to build a test/learning structure that I will use as a utility building and move the solar system and computer network into. It will also be home to our water pump, washing machine, and a full size refrigerator/freezer until the house is built.
Where am I going to screen the dirt to be used for the building?
Where am I going to put the dirt after it has been screened?
Where am I putting the rocks that have been screened out of the dirt?
Got that all figured out, at least until I change my mind.
Last weekend while waiting for the chipper to arrive, I spent the weekend cutting a path from my back drive to an old road that used to run through the property but was in disrepair. I dug out mesquite on the road and along the sides of it. I also filled in low areas that had eroded due rain water run off.
Last week I attended my first ever Portal Rescue board meeting. Portal Rescue is the area’s all volunteer fire and EMS organization. As chance would have it, it was an annual board meeting where board members are elected. The board is comprised of the EMS Chief, the Fire Chief, two active members (fire fighter or EMT), and three members from the community at large. As board members were being nominated, one of the existing board members asked if I would be willing to serve and I agreed not expecting to get elected given all the other nominees and if I was figuring I could manage the treasure role as I’m pretty good with spreadsheets. As it turned out, I was one of the three elected. Furthermore, when we went into the back room do deliberate what roles each board member would have, it became clear that everyone had a role in mind for themselves and no one wanted the role of president. Guess who is now President of Portal Rescue Inc. This is going to be an interesting year to say the least.
A gopher snake somewhere between 3 and 4 feet long I disturbed from his hibernation while digging mesquite. Hoping it sticks around to eat some mice and rats.
My goal for the month of April is to get all the brush laying around chipped up, screen dirt for the build, and finalize the building plans so I can break ground in May. It’s going to be really interesting to see how long the build is going to take. Not planning on any windows, just a door, walls, and a roof. It would be spectacular if I could get the walls up, roof on, and outside plastered before the monsoon rains start in July. That is what I call a “stretch goal” !
I also started reading my first “for leisure” book that I’ve read in probably over 15 years and boy did I pick a doosie – “Walden” by Henry David Thoreau. I can really identify with many of his thoughts and opinions although I’m still no where near living as simply as he embraced. Interesting perspective on materialistic lifestyles back in 1854. Amazing how it still applies to today’s times.
Hi everyone. So, not great, but not as long between posts as last time.
Hope everyone up north is staying warm and safe in the winter weather.
So, it has been three weeks since my last post. What have I been doing?? Hmm..
Not as much as I’d like or should. I’ve been working late for work for an hour or two frequently. By the time I’m done, I’m not real motivated to go outside and work for the remaining couple hours of daylight. It is nice that the days are getting longer in terms of daylight again.
I spent some time on my micro controller projects but ran into a road block getting it to read the temperature sensors and I haven’t gotten back to it.
I used the tractor’s bucket to move some larger rocks that were dug up when digging the trench to the fence line.
Spent a weekend with a colleague, Erik, and his wife, Naomi, that came out to visit. Friday evening visiting for an hour or so before dinner. Saturday morning, target shooting with at Tom’s with Erik, Naomi, Tom, Andrew (Tom’s new ranch hand), Rachel (my daughter) and myself. It was COLD that morning (40’s). I know, not as cold as Michigan, but for here, here it was cold. It had been snowing Friday and there was a fair bit of snow on the mountains for much of the day. We shot for a couple hours at which time it was lunch time.
Erik coaching Rachel on lining up her shot with a hand gun.
Erik coaching Rachel on lining up her shot with my riffle. You might notice we had a few guns to chose from.
Rachel is still a darn good shot for no more than she has shot.
In the afternoon discovered we were low on water (go figure – shocking given a I let a leak go unfixed for weeks. I also showed Erik and Naomi around what I had gotten done and talked about my plans for the property. Dinner with the family and Erik and Naomi at Tom and Alicia’s.
Sunday we went to Bisbee to help for a couple hours on a build project that was underway. Then we went on to visit Marcia at Ransom Ranch and she gave us a tour of her place. We followed that with a visit to Bob and Karen who gave us a tour of their place and we visited for a short while. We ended the day with a drive through old Bisbee and a stop at the store “Olive Oil” and Bisbee Coffee, and finally the mining pit on the way out of town.
Got the tractor repaired. They repaired it under warranty. I removed the broken part from the tractor. Cheryl and Rachel took the part to Tuscon and made and outing of it staying over night. It turns out they ordered the wrong seal kit so it was going to take a third day to repair. I asked them to ship it and told Cheryl who was waiting for the call that it was complete to come on home without it. When the part arrived via UPS a couple of days later, I got it installed without too much difficulty. I replaced the broken zerk as well with no problems. When I went to grease everything, it was long over due and a number of the fittings would not accept grease indicating the grease in it had gotten old and dirty plugging up the works. I had to take apart 5 grease fittings, remove the associated pins that they were greasing, steal wool the pins, and scrape out and clean the sleeves the pins fit into, and clean out the grease fittings themselves. Lesson learned. Grease before each use or once every couple of uses. I bought a pneumatic grease gone to make it much easier. There are still a couple of zerks I need to replace but that is easy enough to do. So, tractor was finally back in service as of yesterday around noon.
I spent Saturday afternoon moving rock (never ending chore for the next few year while I’m moving earth around) from around the solar system to the fence line. As Rachel, Cheryl, Alicia, and Christine were all out of town at the First Robotics competition in El Paso TX, Tom arranged a guy’s night at his place. Dinner, drinking, and visiting.
Today, I started work outside around 8 AM. I filled a fair bit of trench and moved larger rock separated from the trench dirt to the fence line. Somewhat early in the morning I tore the screen with the tractor so had to replace the chicken wire. Notes to self: 1. work up wind of where you are dumping dirt. 2. If wind does start blowing dirt in your face, take you damn hands off the back hoe controls while you have your eyes closed. I added some heavy 6″ square fencing under the chicken wire this time to provide more support. That was a 3 hour repair and improvement effort. I worked for another three hours or so screening dirt and moving large rocks to the fence line. Filling the trench is going nicely with the screen and the back hoe. If I can get out of work and if it is not too windy this week (Monday and Tuesday are looking good – the rest of the week not so much), then I expect to make good progress in filling the trench this week. I will be sooo glad when that trench is filled and I can move onto another project. Having something done as opposed to half done like so many other projects right now will be really nice too.
My Gosh! Has it really been that long since I posted?? My apologies. Hope you have some time to read cause I’m guessing this is going to be a long one to get you up to speed. It is cool, windy and rainy out so I’m not inclined to work outside today. As much as I’d love to be working on developing my electronics monitoring systems on this unpleasant weather day, if I don’t get this blog entry done now, it will only become an even greater undertaking. So update the blog entry it is. You’ll be happy to know that I have a number of pics to share as well.
Where shall I start??? Maybe I should start where I left off. Sounds like a good idea. I’m going to organize this entry by subject and not timeline.
My efforts were around protecting the plumbing and spigots from the cold. So far so good. The only issues I’ve had are around the host going into the trailer. I had a pressure regulator connected between the hose and the inlet to the trailer. I think between the weight of the hose hanging on the pressure regulator and the freezing temperatures, it’s seals failed so by the time I decided to replace it it had a pretty decent drip of water coming from it. Had some decent sized icicles hanging from some twine that I used to keep the access door from swinging in the wind. Saw that, the saturated pipe insulation around the hose, and the soaked trench that the hose was in and scolded myself for letting it go unrepaired for so long. Removed the regulator, reconnected the hose, turned the pressure down on the pump to reduce risk of over pressurizing the 5th wheels plumbing, and turned the water back on. No problems. On nights that it is supposed to get below 27, I turn off the water pump and depressurize the water line out of an over abundance of paranoia.
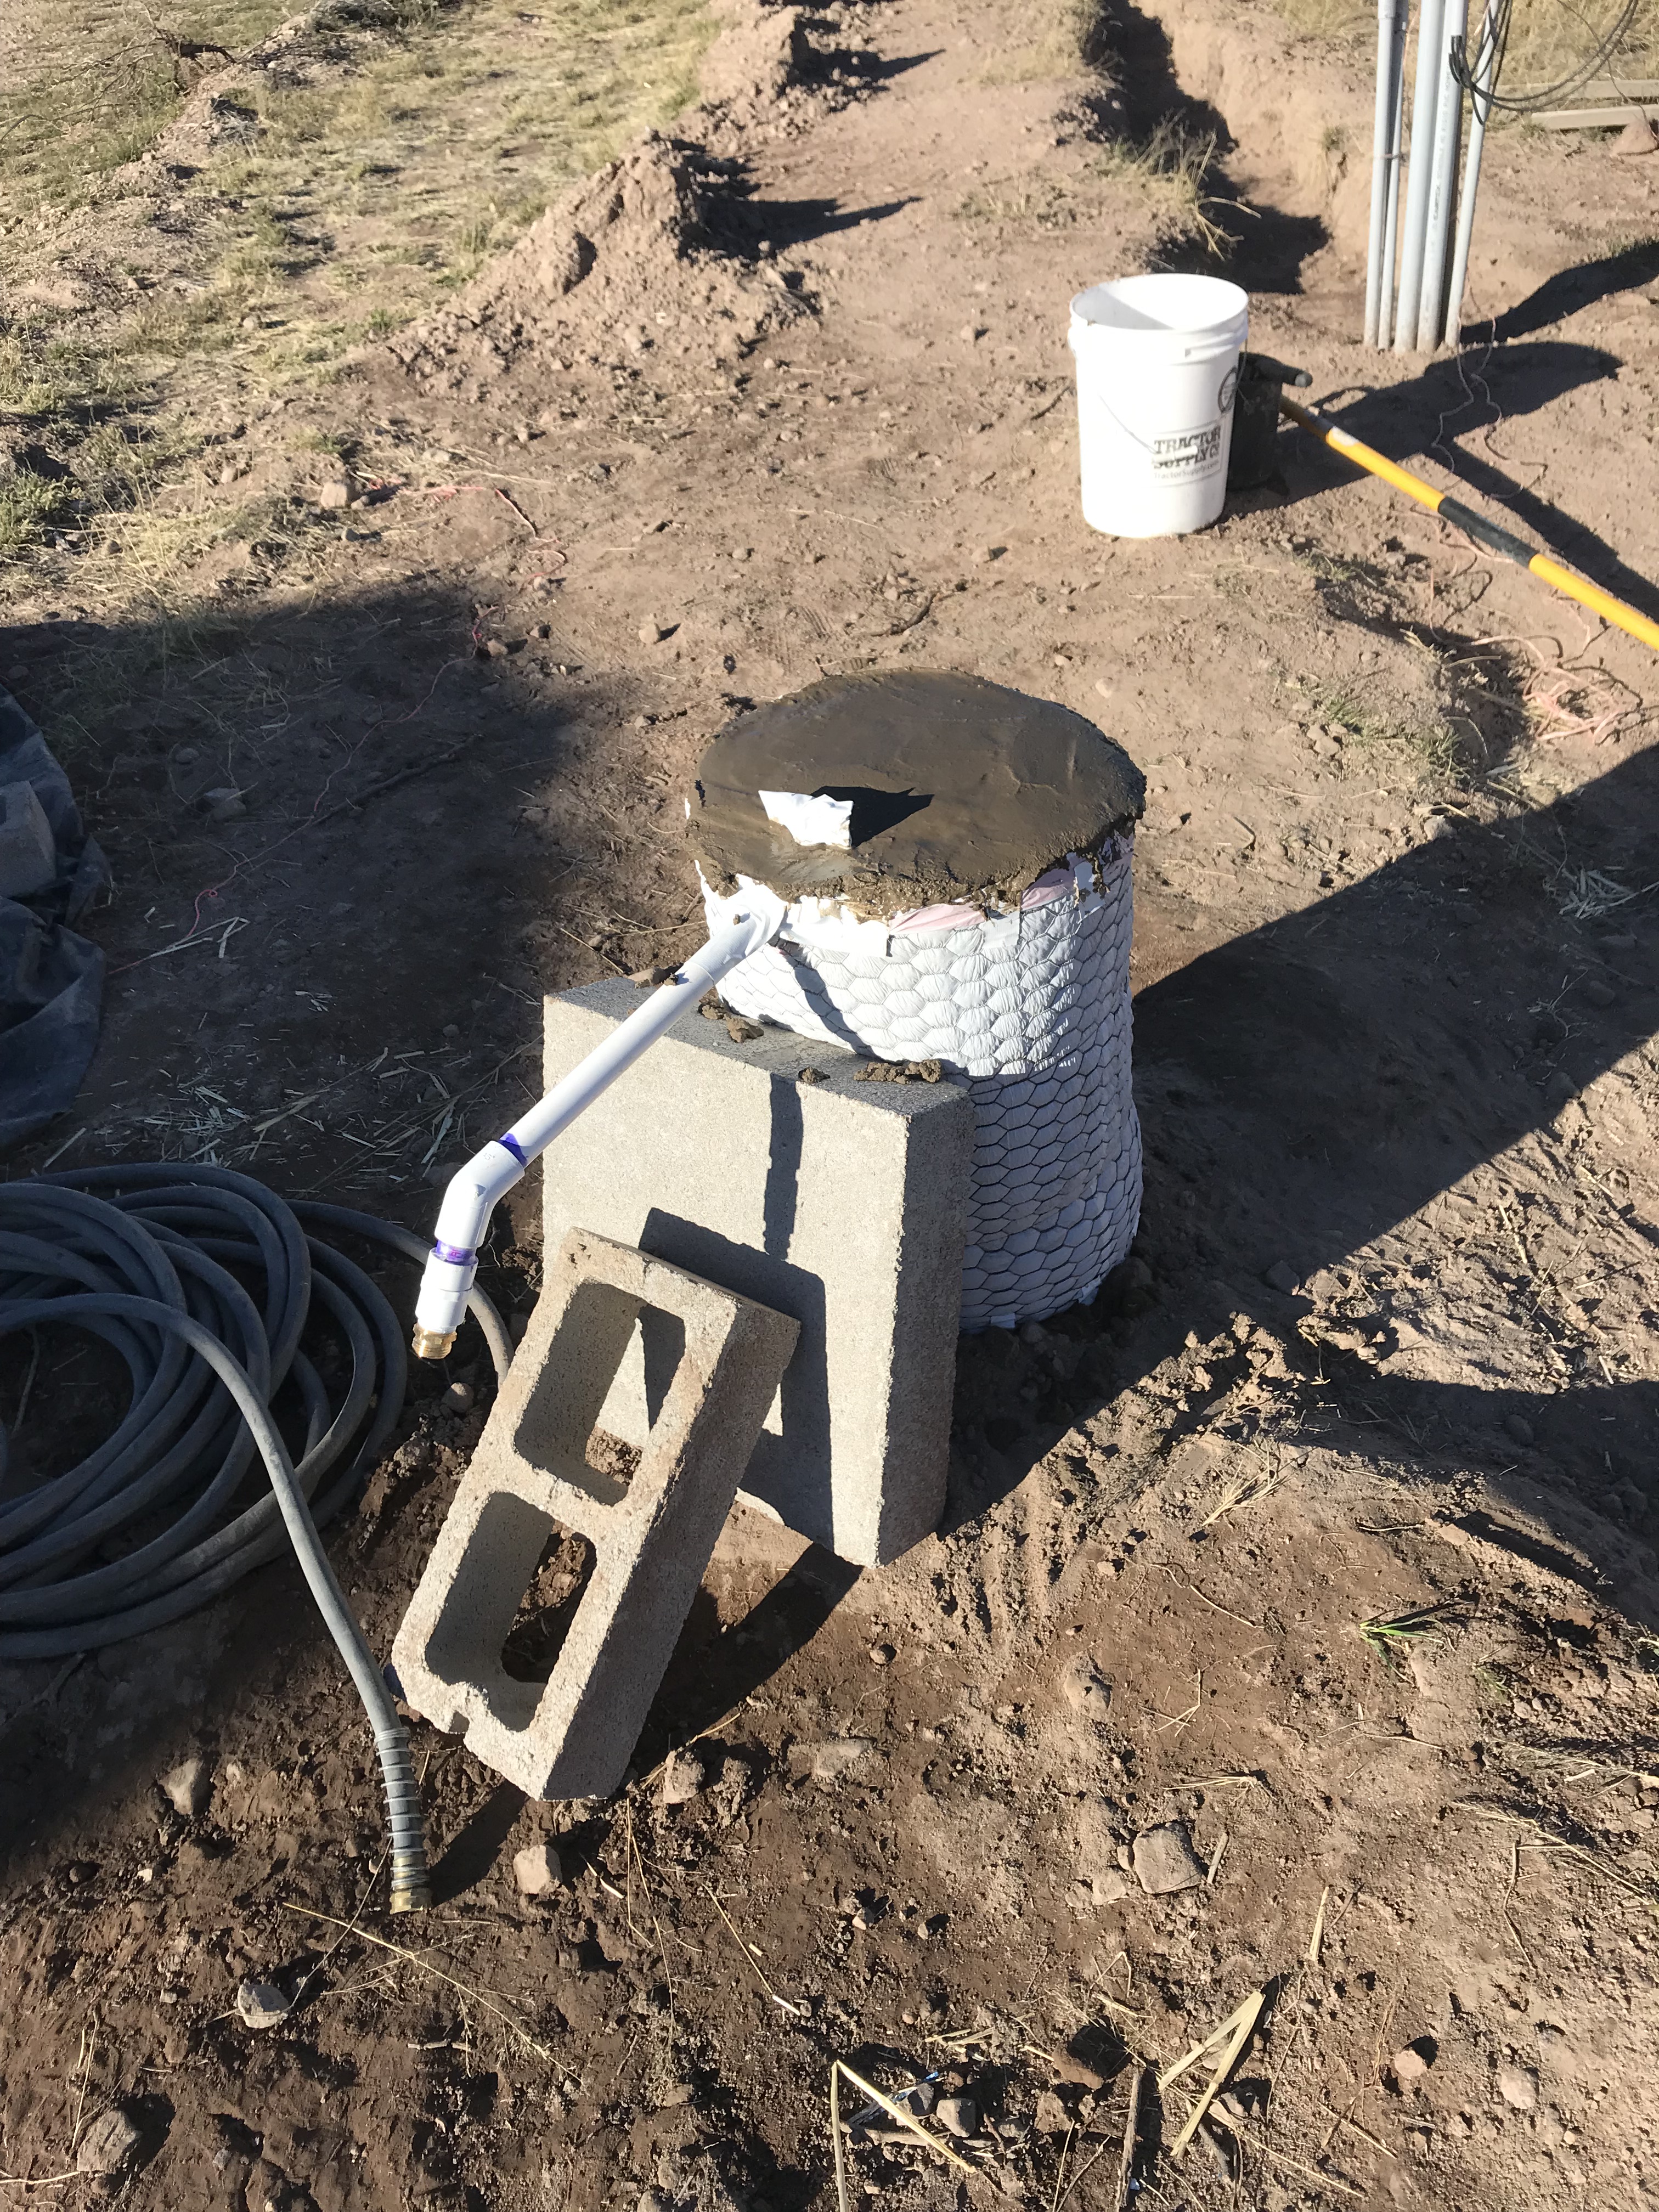
So far, my solution for protecting the spigots has worked out. No issues there. Not exactly pretty, but effective thus far.
West most RV parking spigot encased in cement stabilized earth.
Future garden area spigot currently being used for 5th wheel RV. Not sure why I made the horizontal PVC so long. Did realize before I poured the mix for this that I had miscalculated the placement for the spigot. I either put it where the wall of the future utility building is going to be or inside the wall. Either way, it will need to be moved. Will have to dig that area back up later this spring and move it. This one wanted to lean even more than the other so I used the blocks to keep it upright until the mix dried.
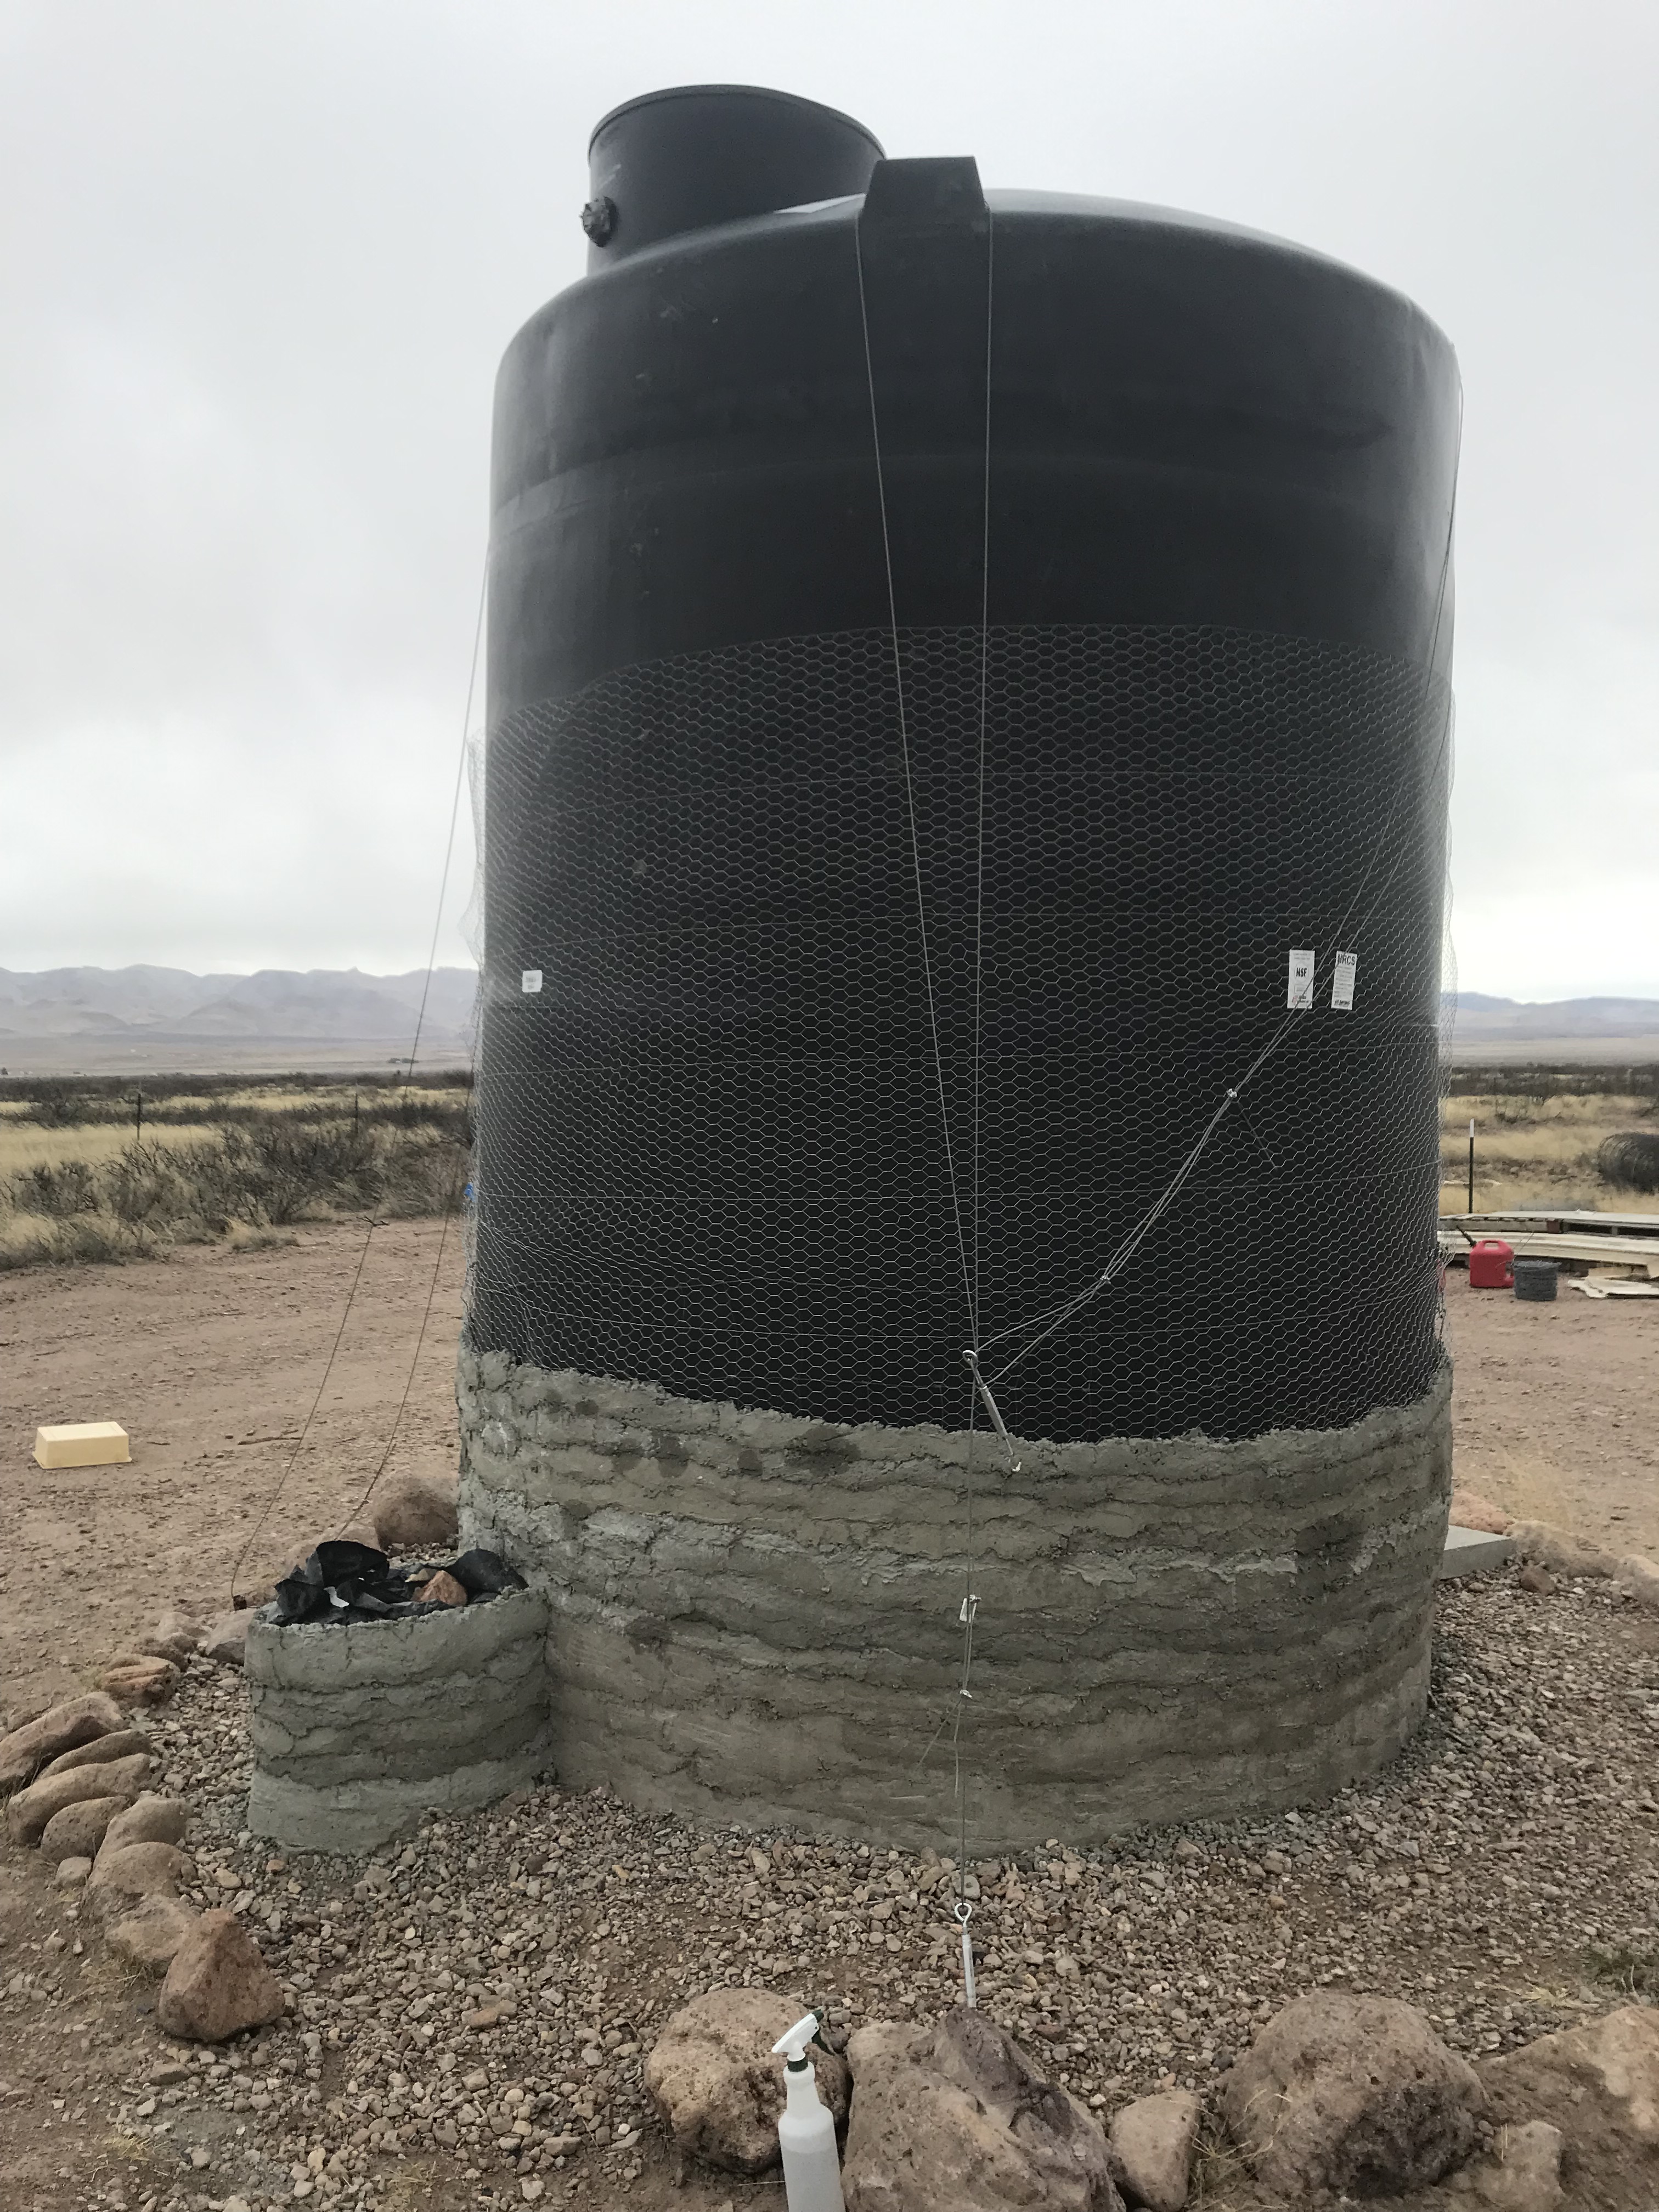
My efforts thus far to wrap the water tank in ferro cement. The concrete mix I was using had too large of aggregate in it for this application. That largish aggregate made working the mix into the space between the wire and tank time consuming and troublesome. As you can see on the left side, I completed the effort to surround the 2″ plumbing pipe, shutoff valve, and fire crew emergency access in ferro cement. You can see the each course of concrete applied as I went around the tank. Each course took between 30 and 45 minutes to apply. Some day I will finish at least to the top of the current run of chicken wire and plaster over the top with a nicer finish coat. Some day. For now, my goal of protecting the plumbing from the cold is complete so I need to move onto other higher priority projects.
Closer look at the outside of the work done to encase the tanks plumbing. There is dirt to just over the horizontal pipe coming out of the tank, then bags of plastic shopping bags packed in on top to provide some degree of additional insulation that can easily be removed when access is needed. Some day I’ll make a cover for it. Not a priority now.
A look inside (with the plastic grocery bags removed) at the shutoff and vertical pipe with cap for access by fire fighters. I made sure to leave room for pipe wrenches to grab both the nipple and the cap. I may even decide to simply store my pipe wrenches there…
What pretty much wraps up the physical aspect of protecting the infrastructure from the cold. The last piece of the puzzle that I have planned is monitoring and eventual automated counter measures. Enter the nerd in me. I won’t get too technical here as I will save that for blog entries focused on technical projects as previously mentioned. That said, I have planned to develop wireless network connected micro-controller (think tiny specialized computer) based temperature, humidity, and ultrasonic distance finder sensors to monitor temperatures at various locations around the property as well as monitor the dept of the water in the water tank. That data will be logged to a local server which can send alarms if high or low thresholds are exceeded in the near term and in the long term automate some corrective action. Automated actions I am contemplating are:
turn on a heater if the temperature is too low at a given location
turn on a fan if the temperature is too high at a given location
turn off power to the water pump if the water level is either too low or is dropping too rapidly
pump water into main tank from secondary tank(s) when water drops to a particular level in the big tank
Open and close windows depending on time of day and temperature of structure.
take a photo of vehicles detected at the gate.
take photos of individuals entering and leaving remote sheds/buildings.
If it is hot, the batteries are charged, and there is power to spare, turn on fans at various locations to provide comfort to people and pets, monitoring power load on system.
Of course I would employ some method to over ride the automation. I would be able to turn something on that I want on but the system didn’t turn on in an automated fashion. I would also be able to turn something off over riding the automation that turned it on or would turn it on.
As time goes on, I’m sure there will be many more monitoring and automation projects that come to mind.
Starting the monitoring is what I spent most of my personal time over the holidays doing. The weather wasn’t very nice so I played on the computer accomplishing the following:
Setup a database to record and store sensor data
Wrote web server programs to collect the data being sent from sensors and store that data in the database
Wrote programs to collect data stored in the internet for my solar system and store it in the database
Installed and configured a monitoring program to monitor it all.
Wrote small custom monitoring programs for the bigger monitoring program to use to monitor the solar system data such as battery temperature, battery voltage, battery current, AC voltage, AC current, setting custom high or low warning or critical thresholds for each element monitored.
Setup alerts in the monitoring program to email me warning or critical events.
Setup my phone to play a unique sound if a critical alert is received.
Setup a web page to display the most recent solar system stats that are of interest to me.
I spent a substantial amount of time learning new things and getting all that initial data collection and monitoring setup. I expect it will be a good foundation to build the rest of my monitoring and automation projects on top of.
Within a day or two of completing the data collection, monitoring, and alerting setup, I was treated to an alarm one morning (I was already awake though), notifying my batteries were too cold to take a charge and the sun would be coming up soon. I have lithium ion batteries and you can damage them if you try to charge them when they are below 32 F. I had been monitoring the weather forecast and the trending temperature in the shed over night given the cold weather we’ve been having, so I was somewhat prepared for the alert letting me know the battery temperature was down to 33. I went out and turned on our little electric space heater in the shed. It brought the battery temperature up to 35 before the sun came up and started charging the batteries (and also warming the shed and batteries). I think the outdoor temperatures that night had gotten down to the upper teens.
I was also thinking about setting up an alarm such that if the batteries were only charged to a certain voltage by 3 PM an alarm would go off telling me to go start the generator as there would not be enough power stored to make it through the night otherwise. I can’t remember if I actually wrote that one. Guess I will find out. It is still raining and batteries are only up to 43V and it is 2:45 PM now. At this point, I have no hope of the skies clearing for a late afternoon charge cycle.
I’m anxious to get the water/electric trench filled into so we can spread the gravel and move the RV’s into their long term positions. As you may recall we were sorting the dirt by hoe and hand pulling out larger rocks so that should I ever need to dig the trench backup (by hand) again in the future, I would not be fighting rocks as I dig. As you might imagine, that is a painstakingly slow process and the trench was not getting filled fast enough for my liking. So I sacrificed a nice day and instead of filling the trench by hand, I build a dirt/rock screen with materials I had laying around. This was a much larger screen than what I had previously build to screen dirt from rock for filling in the ground rod trenches. This one is built for me to use the tractor with. It is neither ideal nor durable. I’m hoping it lasts long enough for filling this trench. That said, I tested it out for an hour or so after I completed building it, and got as much dirt and rock separated and trench filled in that hour as I would have gotten done in a day doing it by hand. I would call that time well invested.
My low grade yet functional dirt screen. It is a 6′ x 6′ wood frame covered in 1″ chicken wired secured every 5″ around the perimeter with fender washers and wood screws and 2 lengths of 1/2″ rebar as close to the top of the wood frame as I could manage to install them to provide support for the chicken wire. I scoop up dirt with the back hoe, bring it up and over the top of the screen and dump it. The dirt falls into the trench and the rocks roll down the screen. I’ve had a couple of mishaps where I’ve put the fingers of the backhoe bucket through the screen as I’ve misjudged the distance I had it from the screen. I try to dump the bucket over the rebar as much as I can.
I’ve completely filled the trench from the west most water spigot (to which the white hose is connected) to the east most water spigot which is still wrapped in the form I used to pour it. The trench is filled to what I am calling “warning tape” level from the eastern spigot to the northeast corner of the trench. You can see the piles of rock to the left that the screen filtered out. Rachel helped me and I would estimate that we added on average of 10 inches of packed dirt into the trench in 6 hours spread over a couple of days using the screen.
Next I need to lay down the warning tape then top off the trench. I’m thinking probably another 15 – 20 hours to get this section and the section that heads south crossing the drive to RV parking area filled into grade level. But first…. I need to do some maintenance on the tractor. Yep. I broke it again.
It appears to me that I blew out the bearing seals at that top pivot point. I plan to call the tractor dealer Monday to figure out what parts I need to order. Hoping I can fix it or have a local mechanic fix it and not have to haul it into Tuscon for repair.
I also spotted a grease zerk that sheared off so I ordered an extraction tool from Amazon to get what is left of it out so I can install a replacement. It is also due to be greased and have bolts tightened. Hoping the zerk replacement goes well so I can grease it up and at least use the bucket to move rocks out of the way and move dirt from elsewhere on the property to the trench area so I can prepare for topping off the trench. Removing the rocks has left me short of material to refill the trench to grade level. An afternoon of me greasing the tractor is usually a curse-fest for me as inevitably something goes wrong and I end up squirting grease where it doesn’t belong and I end up getting it on my clothes. I look forward to the day when I have the process down and don’t have any issues.
One Sunday morning I was watching youtube videos and by chance learned about an earthbag dome building workshop a few minutes east of Bisbee that started that day and was scheduled to go for two weeks. I had other commitments that day but the next day was MLK day and it was a company holiday, so I decided to go lend a hand and get some hands on experience. It was a good learning experience. I also returned to work some more the following Sunday as I was available then as well. I was available Saturday but they took Saturday off.
If memory serves correctly, on MLK day the bag marked MLK is as far as we got that day. This picture was taken the end of the work day the following Sunday. We went back the following Sunday for a potluck and the dome was completed to the top and there was a scratch coat of plaster applied to the outside.
I took a couple days vacation and joined Cheryl for a trip to Tuscon.
We enjoyed trying new to us vegan restaurants.
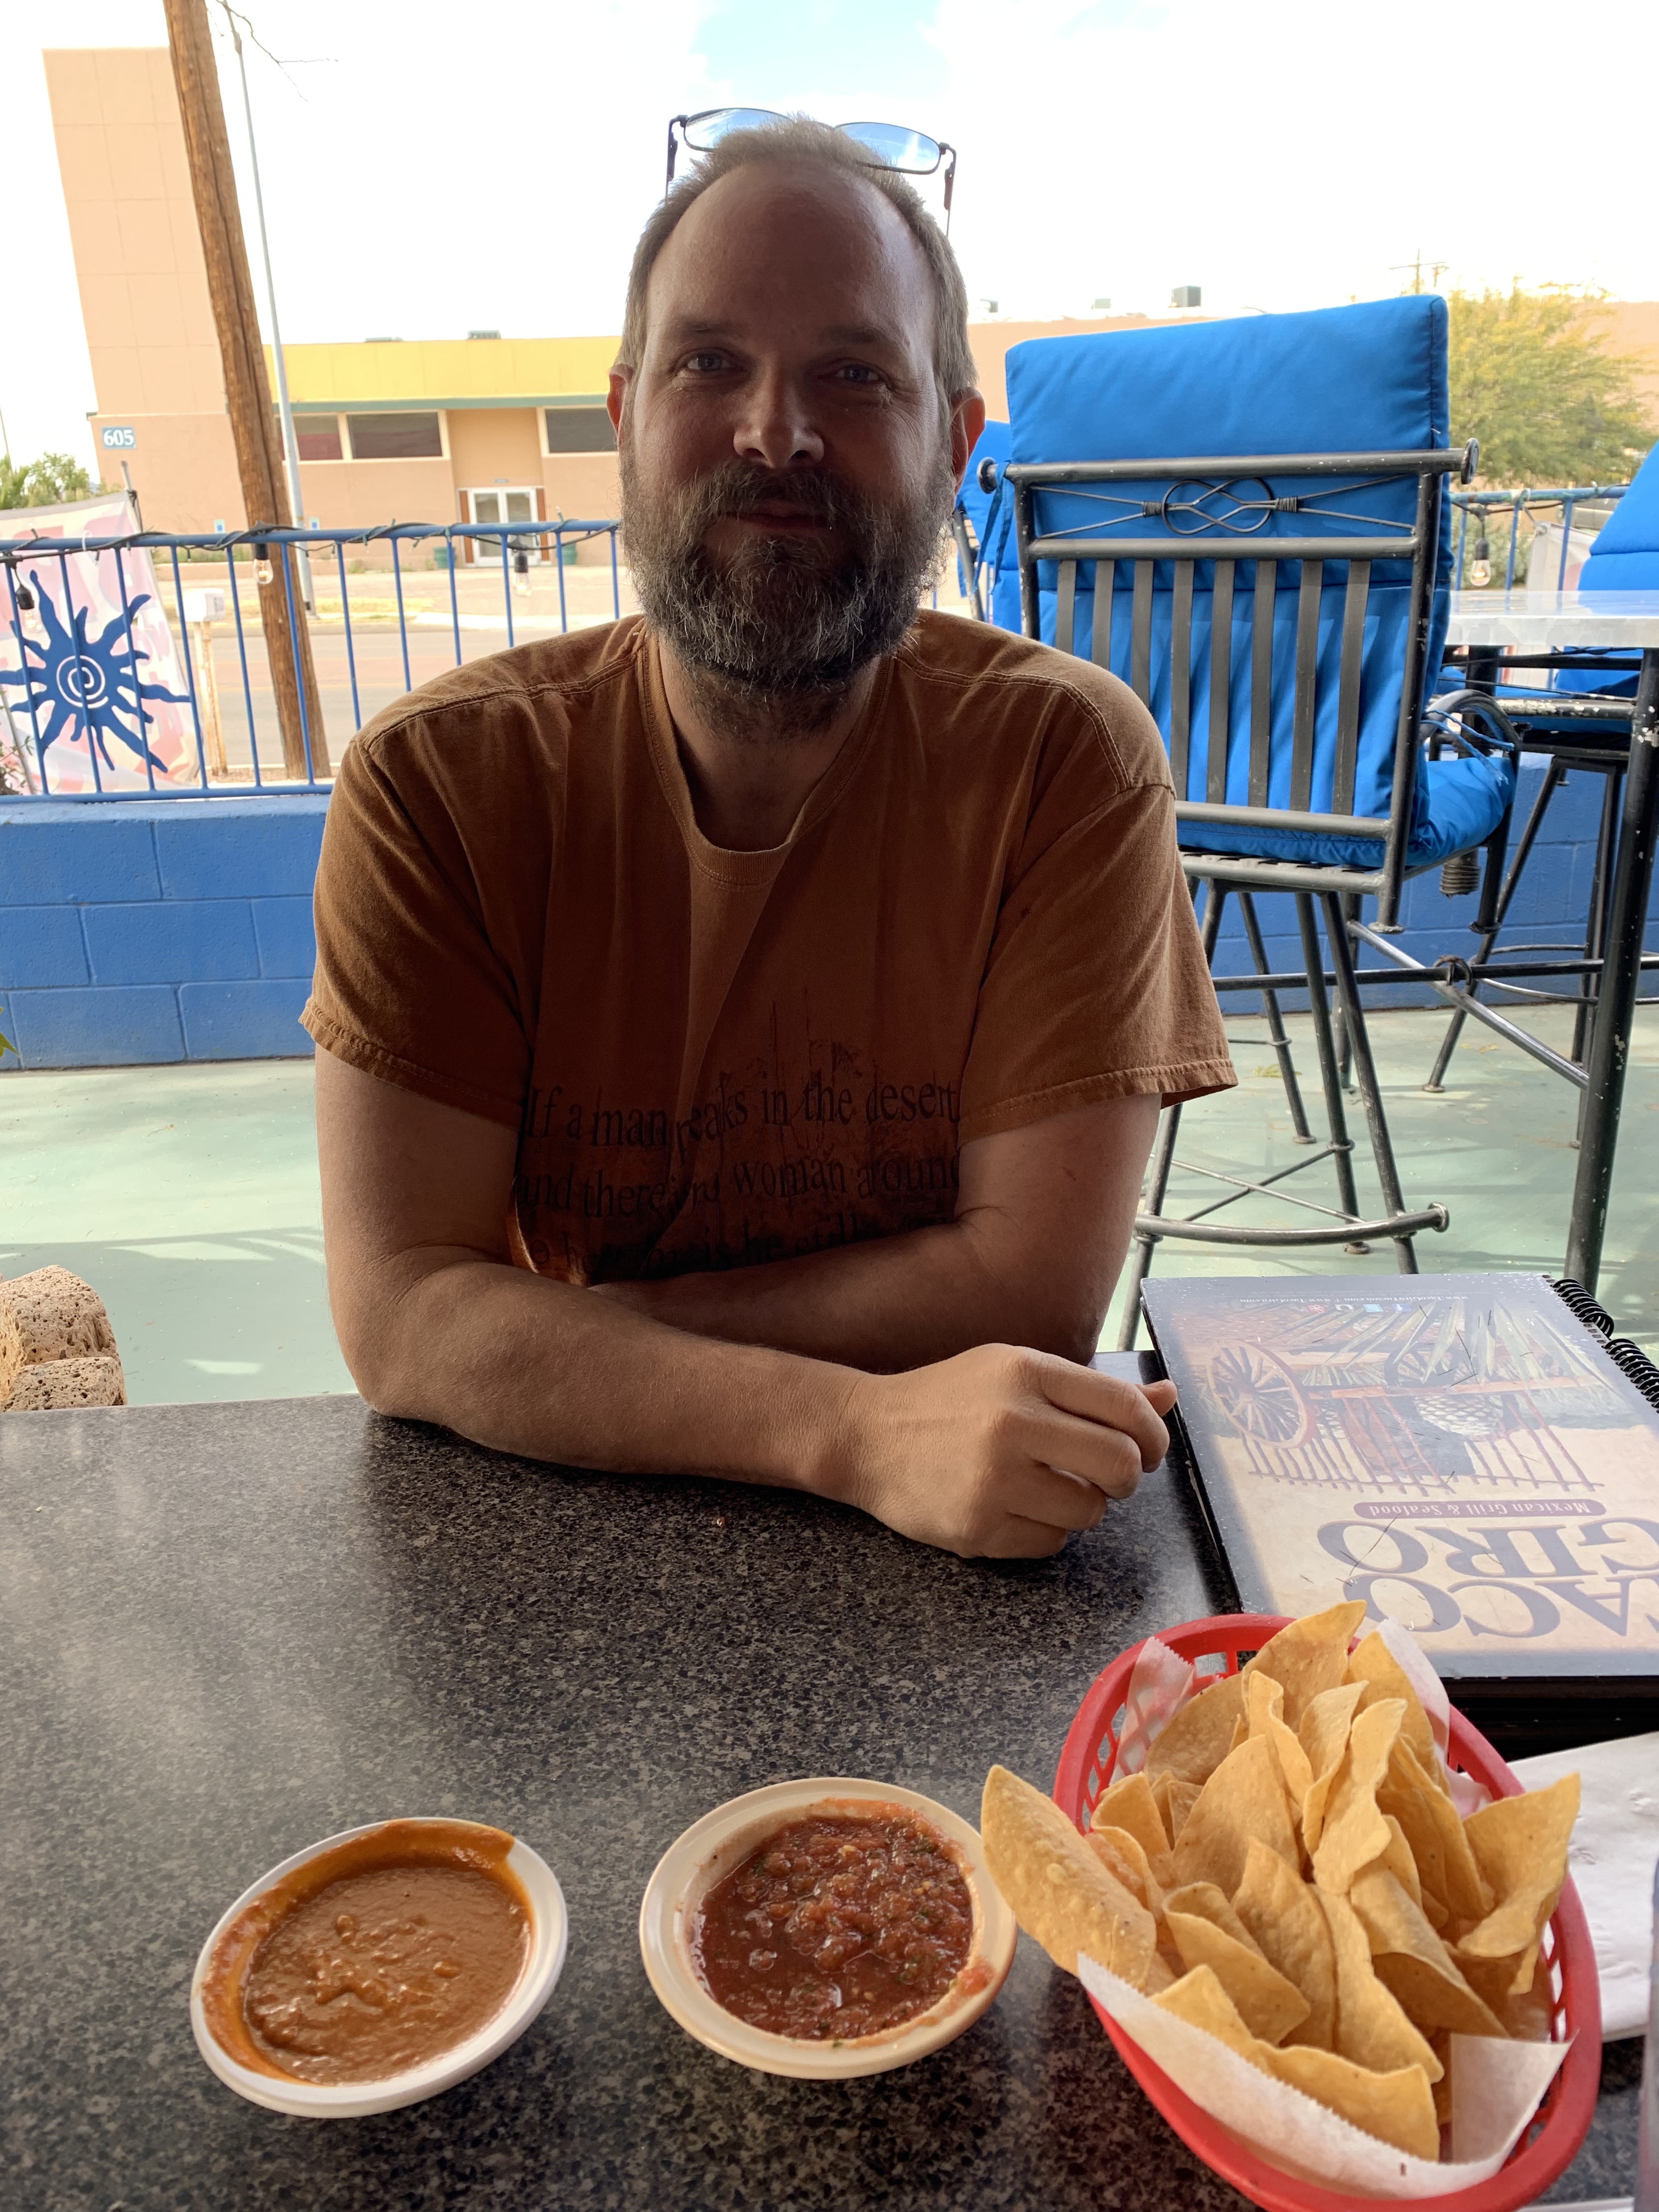
So, funny story here. We were going to a vegan friendly mexican restaurant. I turned a bit early thanks to GPS so I went around the block. As we came back to the street we turned off of early we saw parking for a nice mexican restaurant. As we sat down outside Cheryl notified me that we were at the wrong restaurant. Where we wanted to be was next door. Just as we discussed getting up to leave, the waitress came out with chips and salsa. Well… I kinda felt morally obligated to order something at that point, so we ordered guacamole made table side. It was delicious. I paid the bill and we got up and walked over to the restaurant next door (Tanias 33) that we originally wanted to go to. It was a total hole in the wall kinda place. But food was very vegan friendly and very good. I’m glad we got up and moved from the “nice” place which other than the guacamole really didn’t have anything we would want to eat. Ok, let me be honest. There’s wanting to eat something. Then there is choosing to eat something healthy. Until you have been eating healthy for a very long time, they are not the same. But it does eventually happen as long as you don’t over stimulate your taste buds with high fat, high sugar, high salt, processed foods.
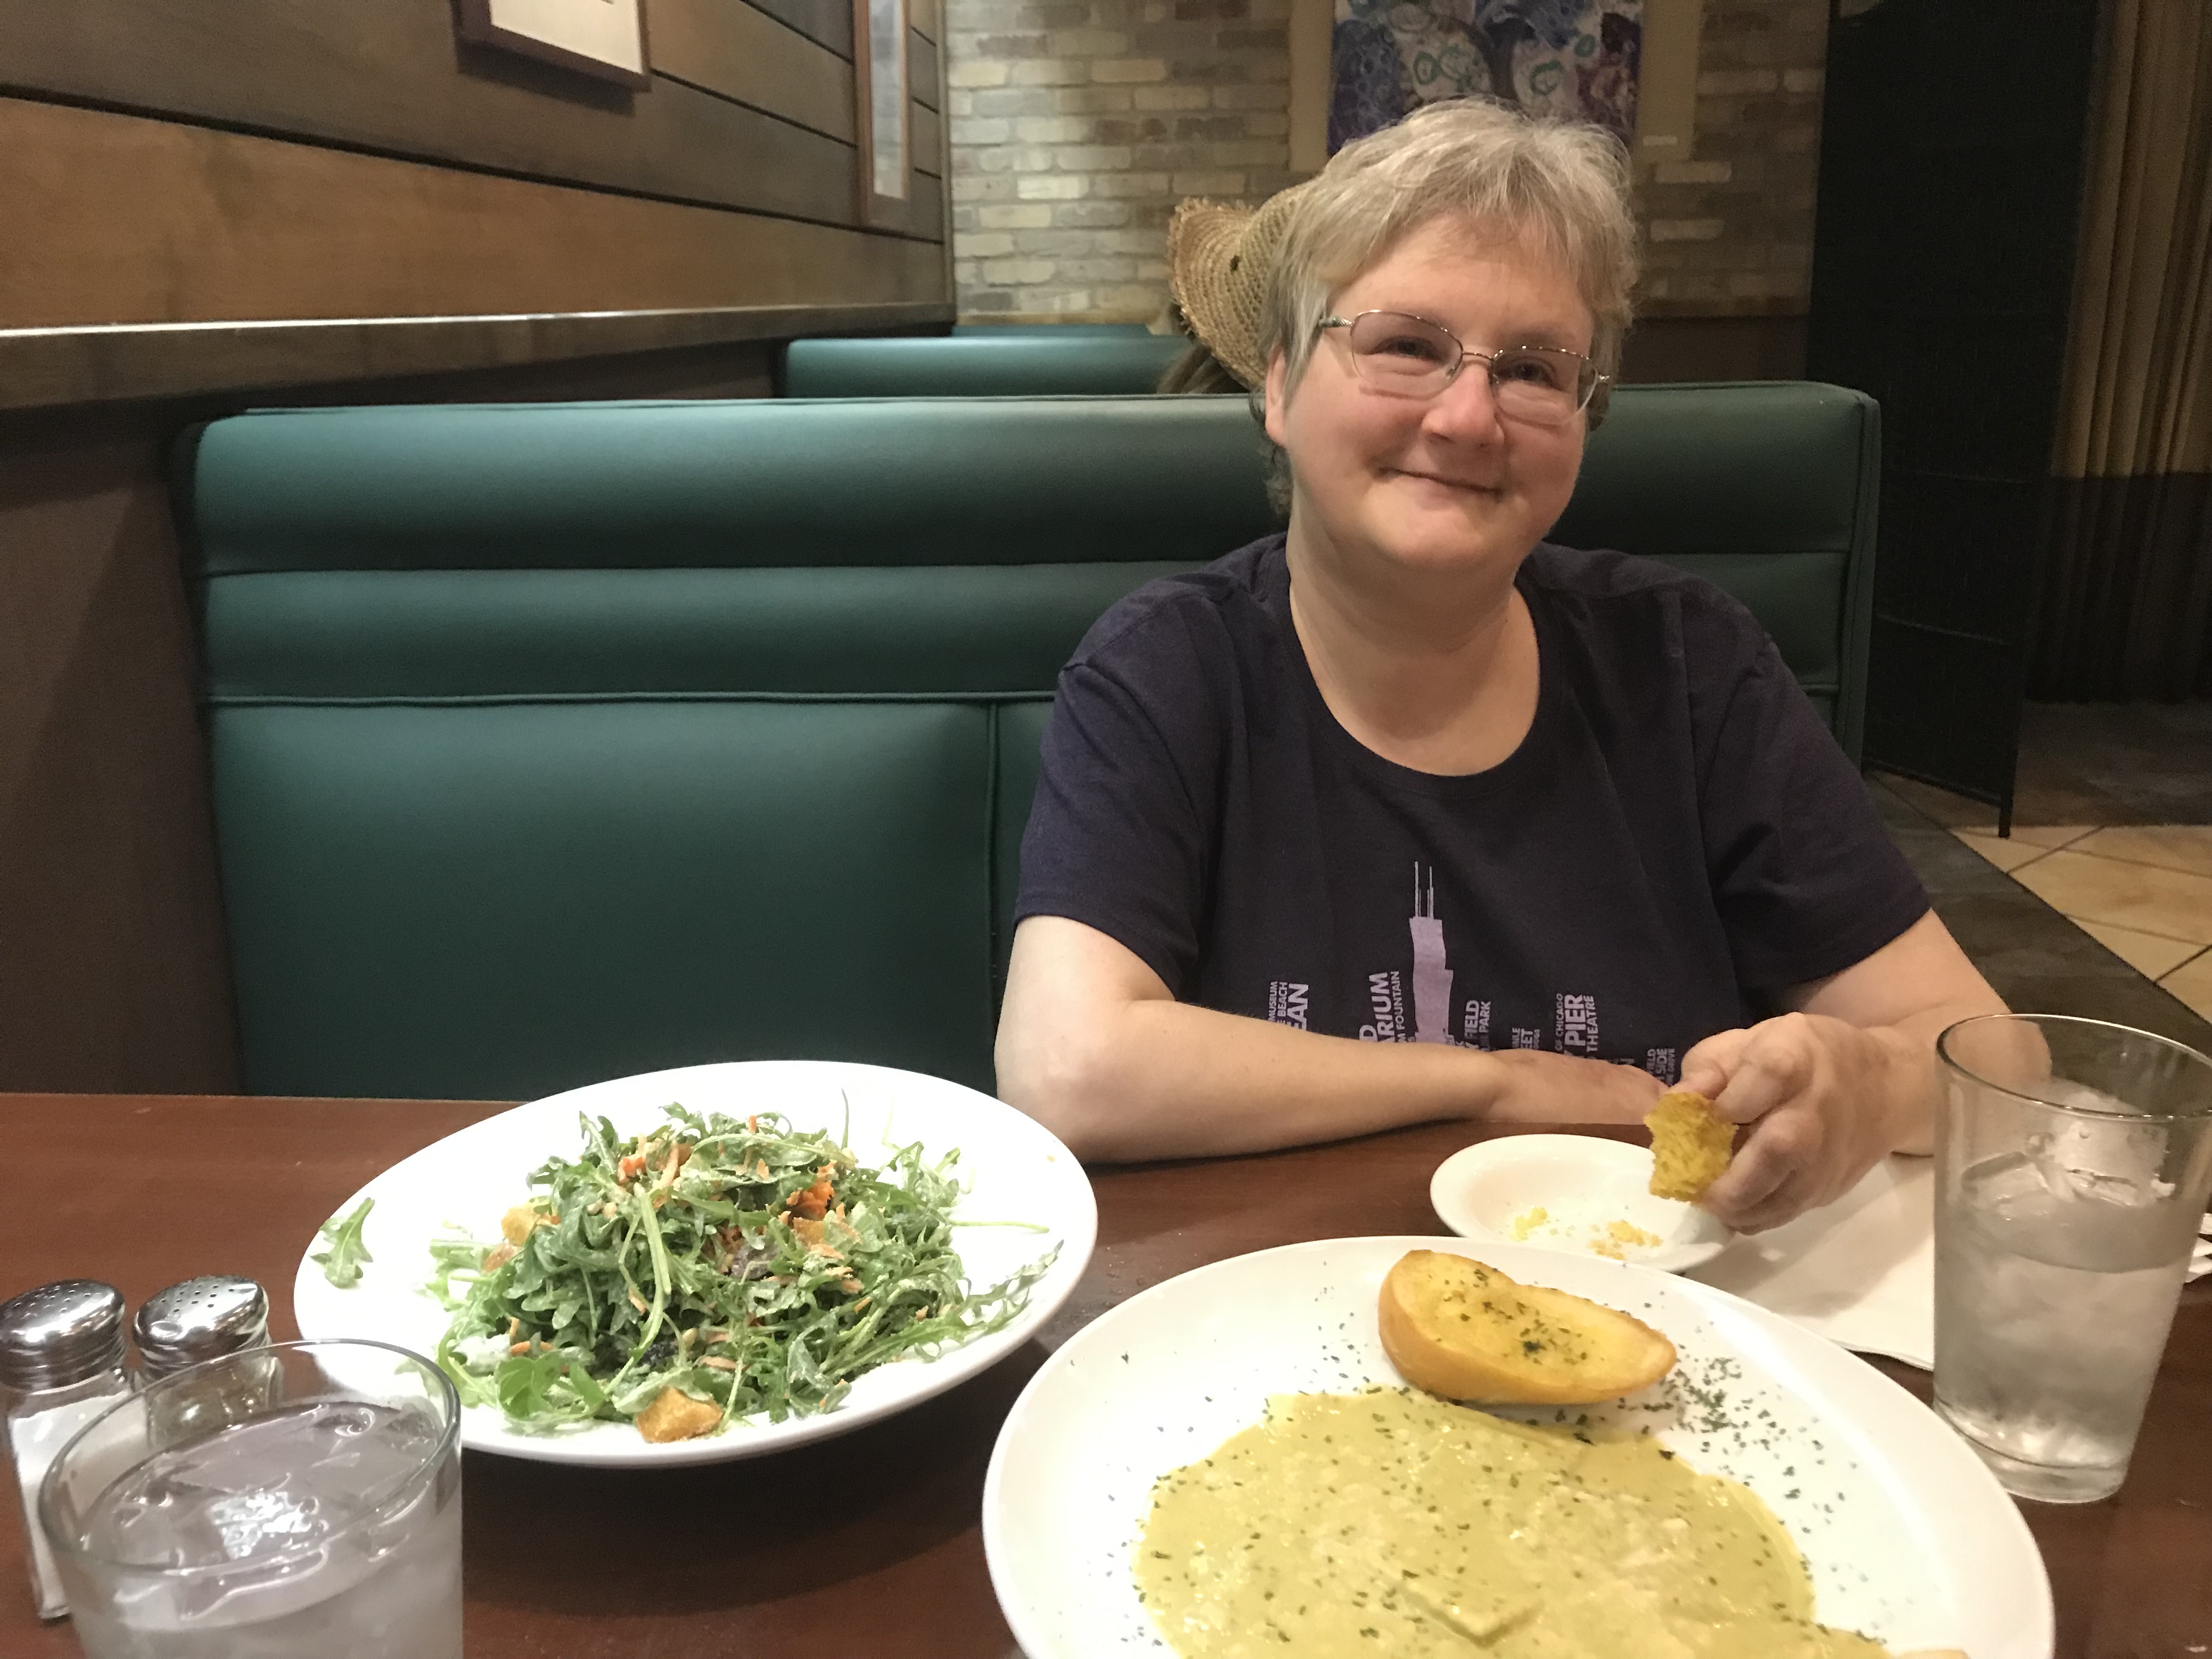
Cheryl found Lovin Spoonfuls. YUM! We shared vegan kale ceasar salad and vegan spinach ravioli with alfredo sauce. I had a vegan chocolate mint shake for desert. Ok, desert certainly was not healthy but YUM and certainly more healthy than it’s standard equivalent which I haven’t had for years.
Sasha after a surgery to fix her eyelids that were bugging her.
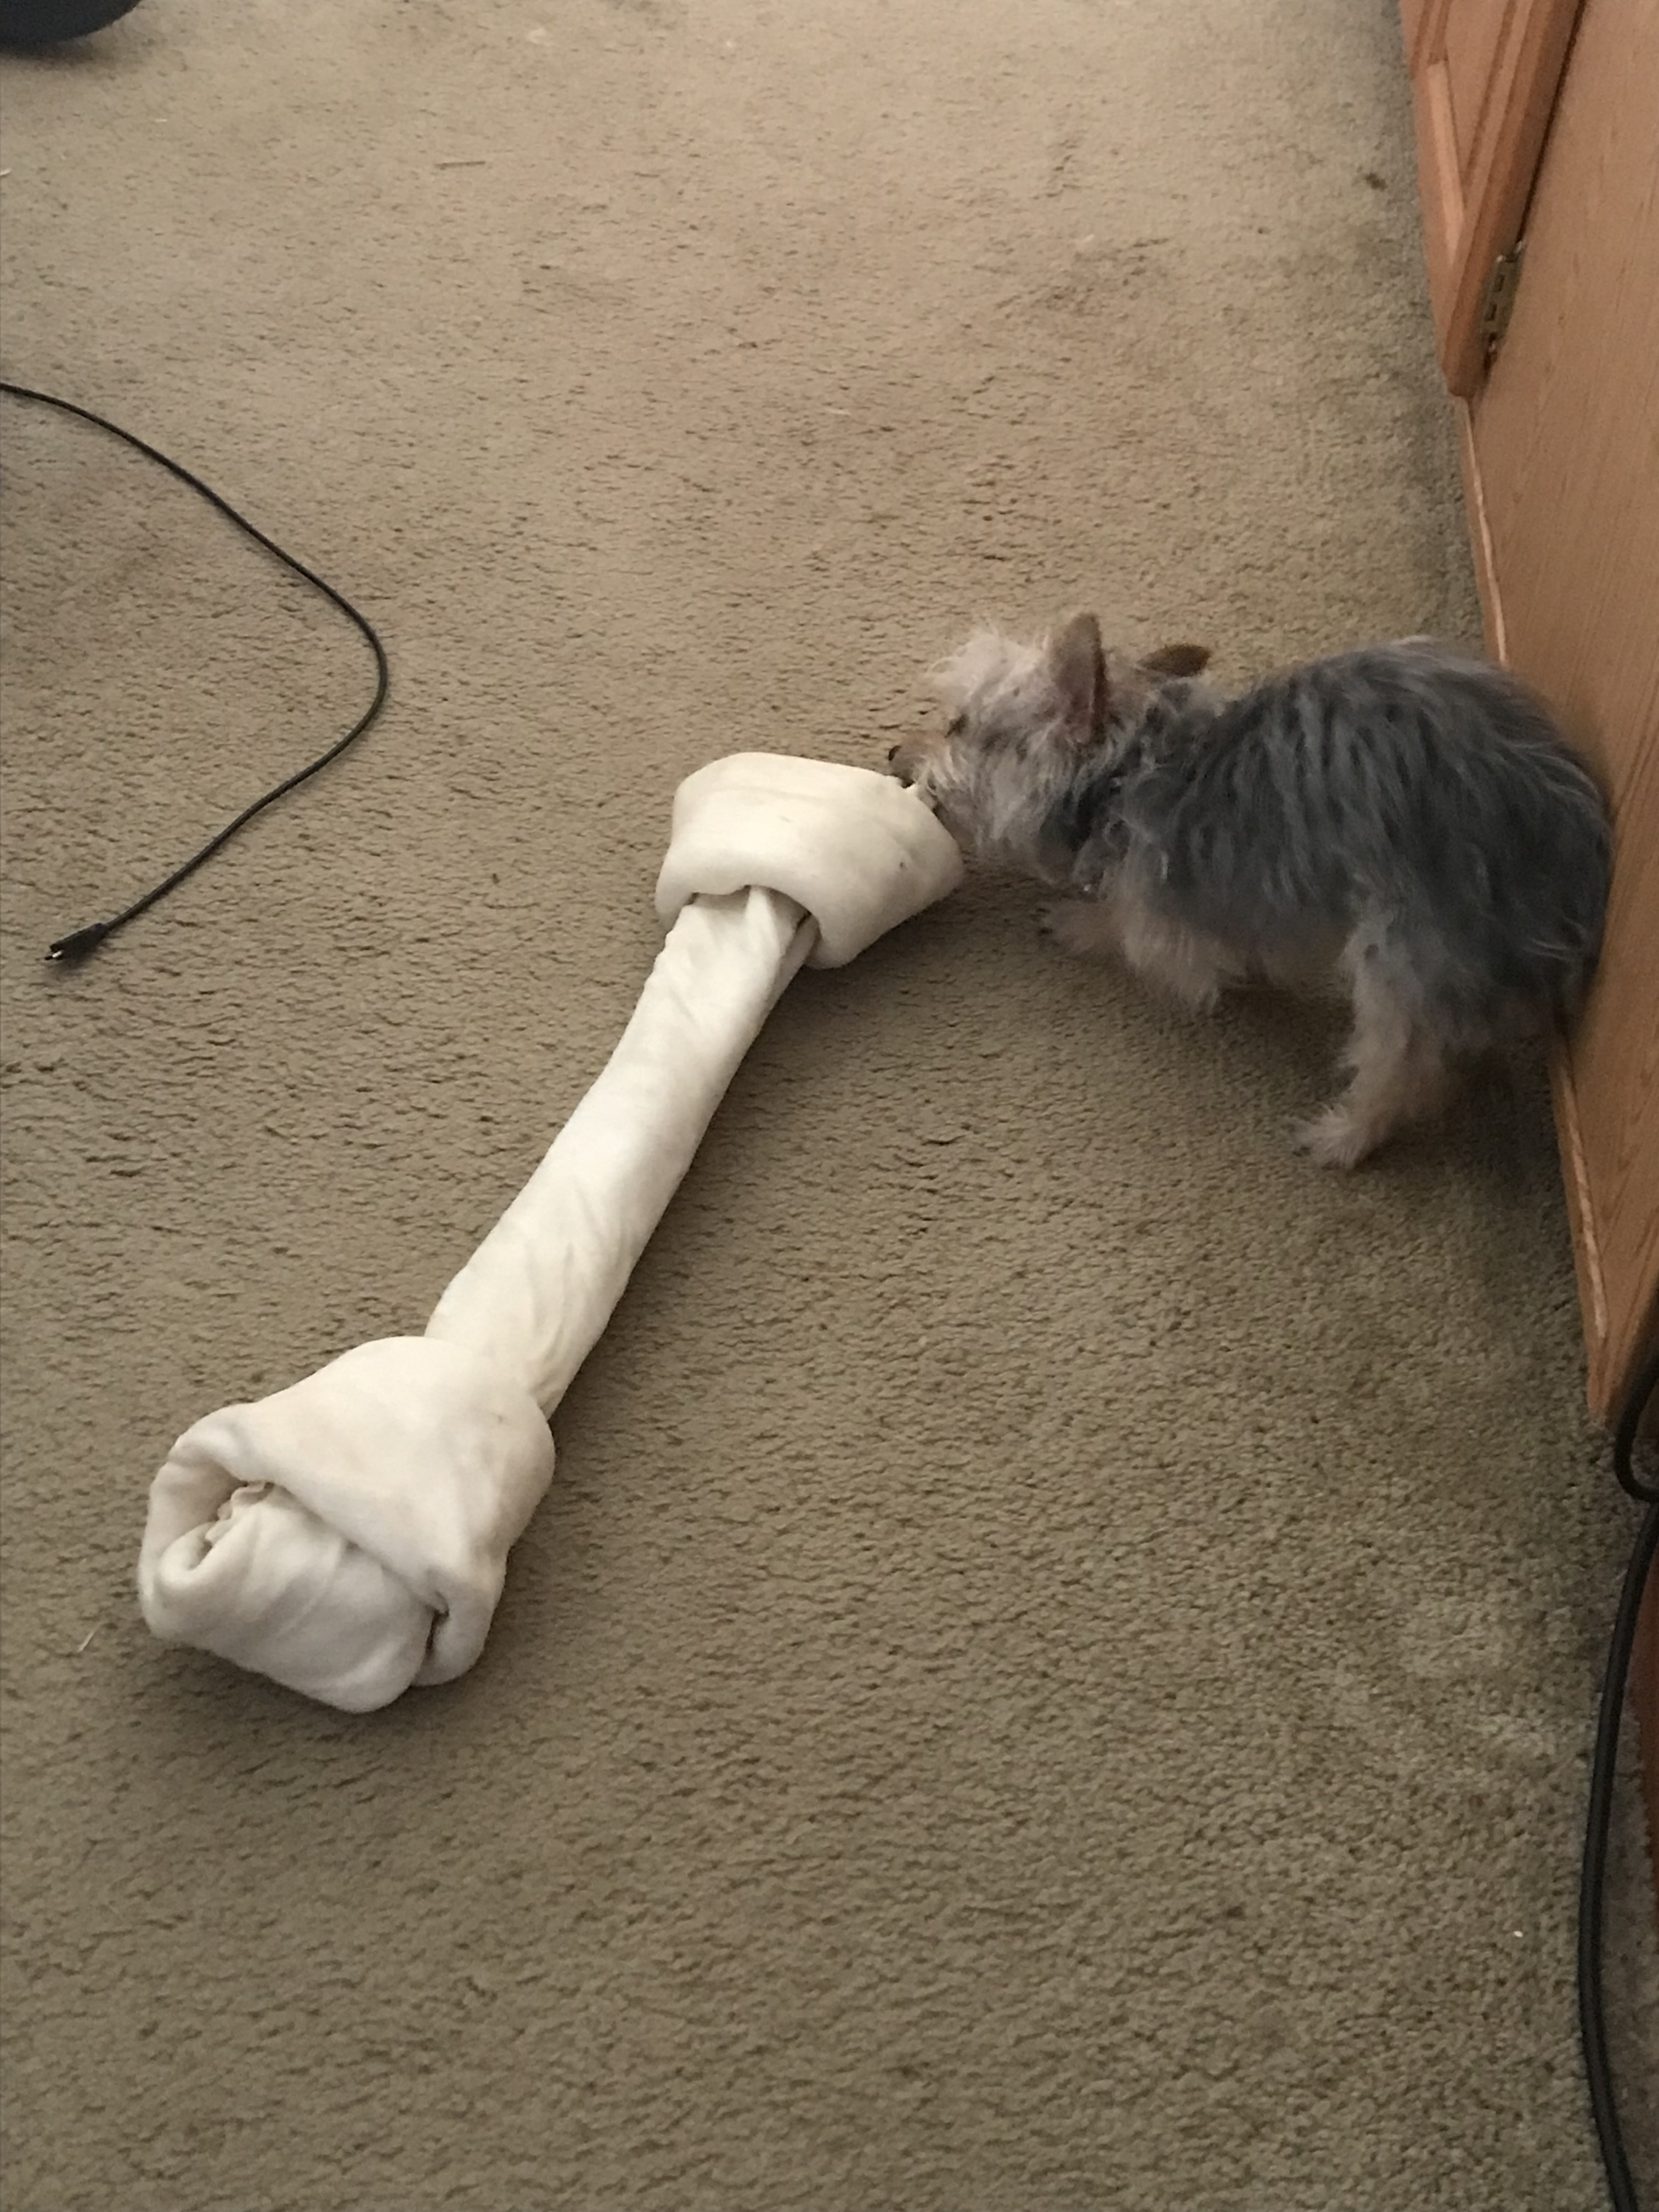
Bear chewing on a rawhide bought for Sasha. What is his is his. What is hers is his.
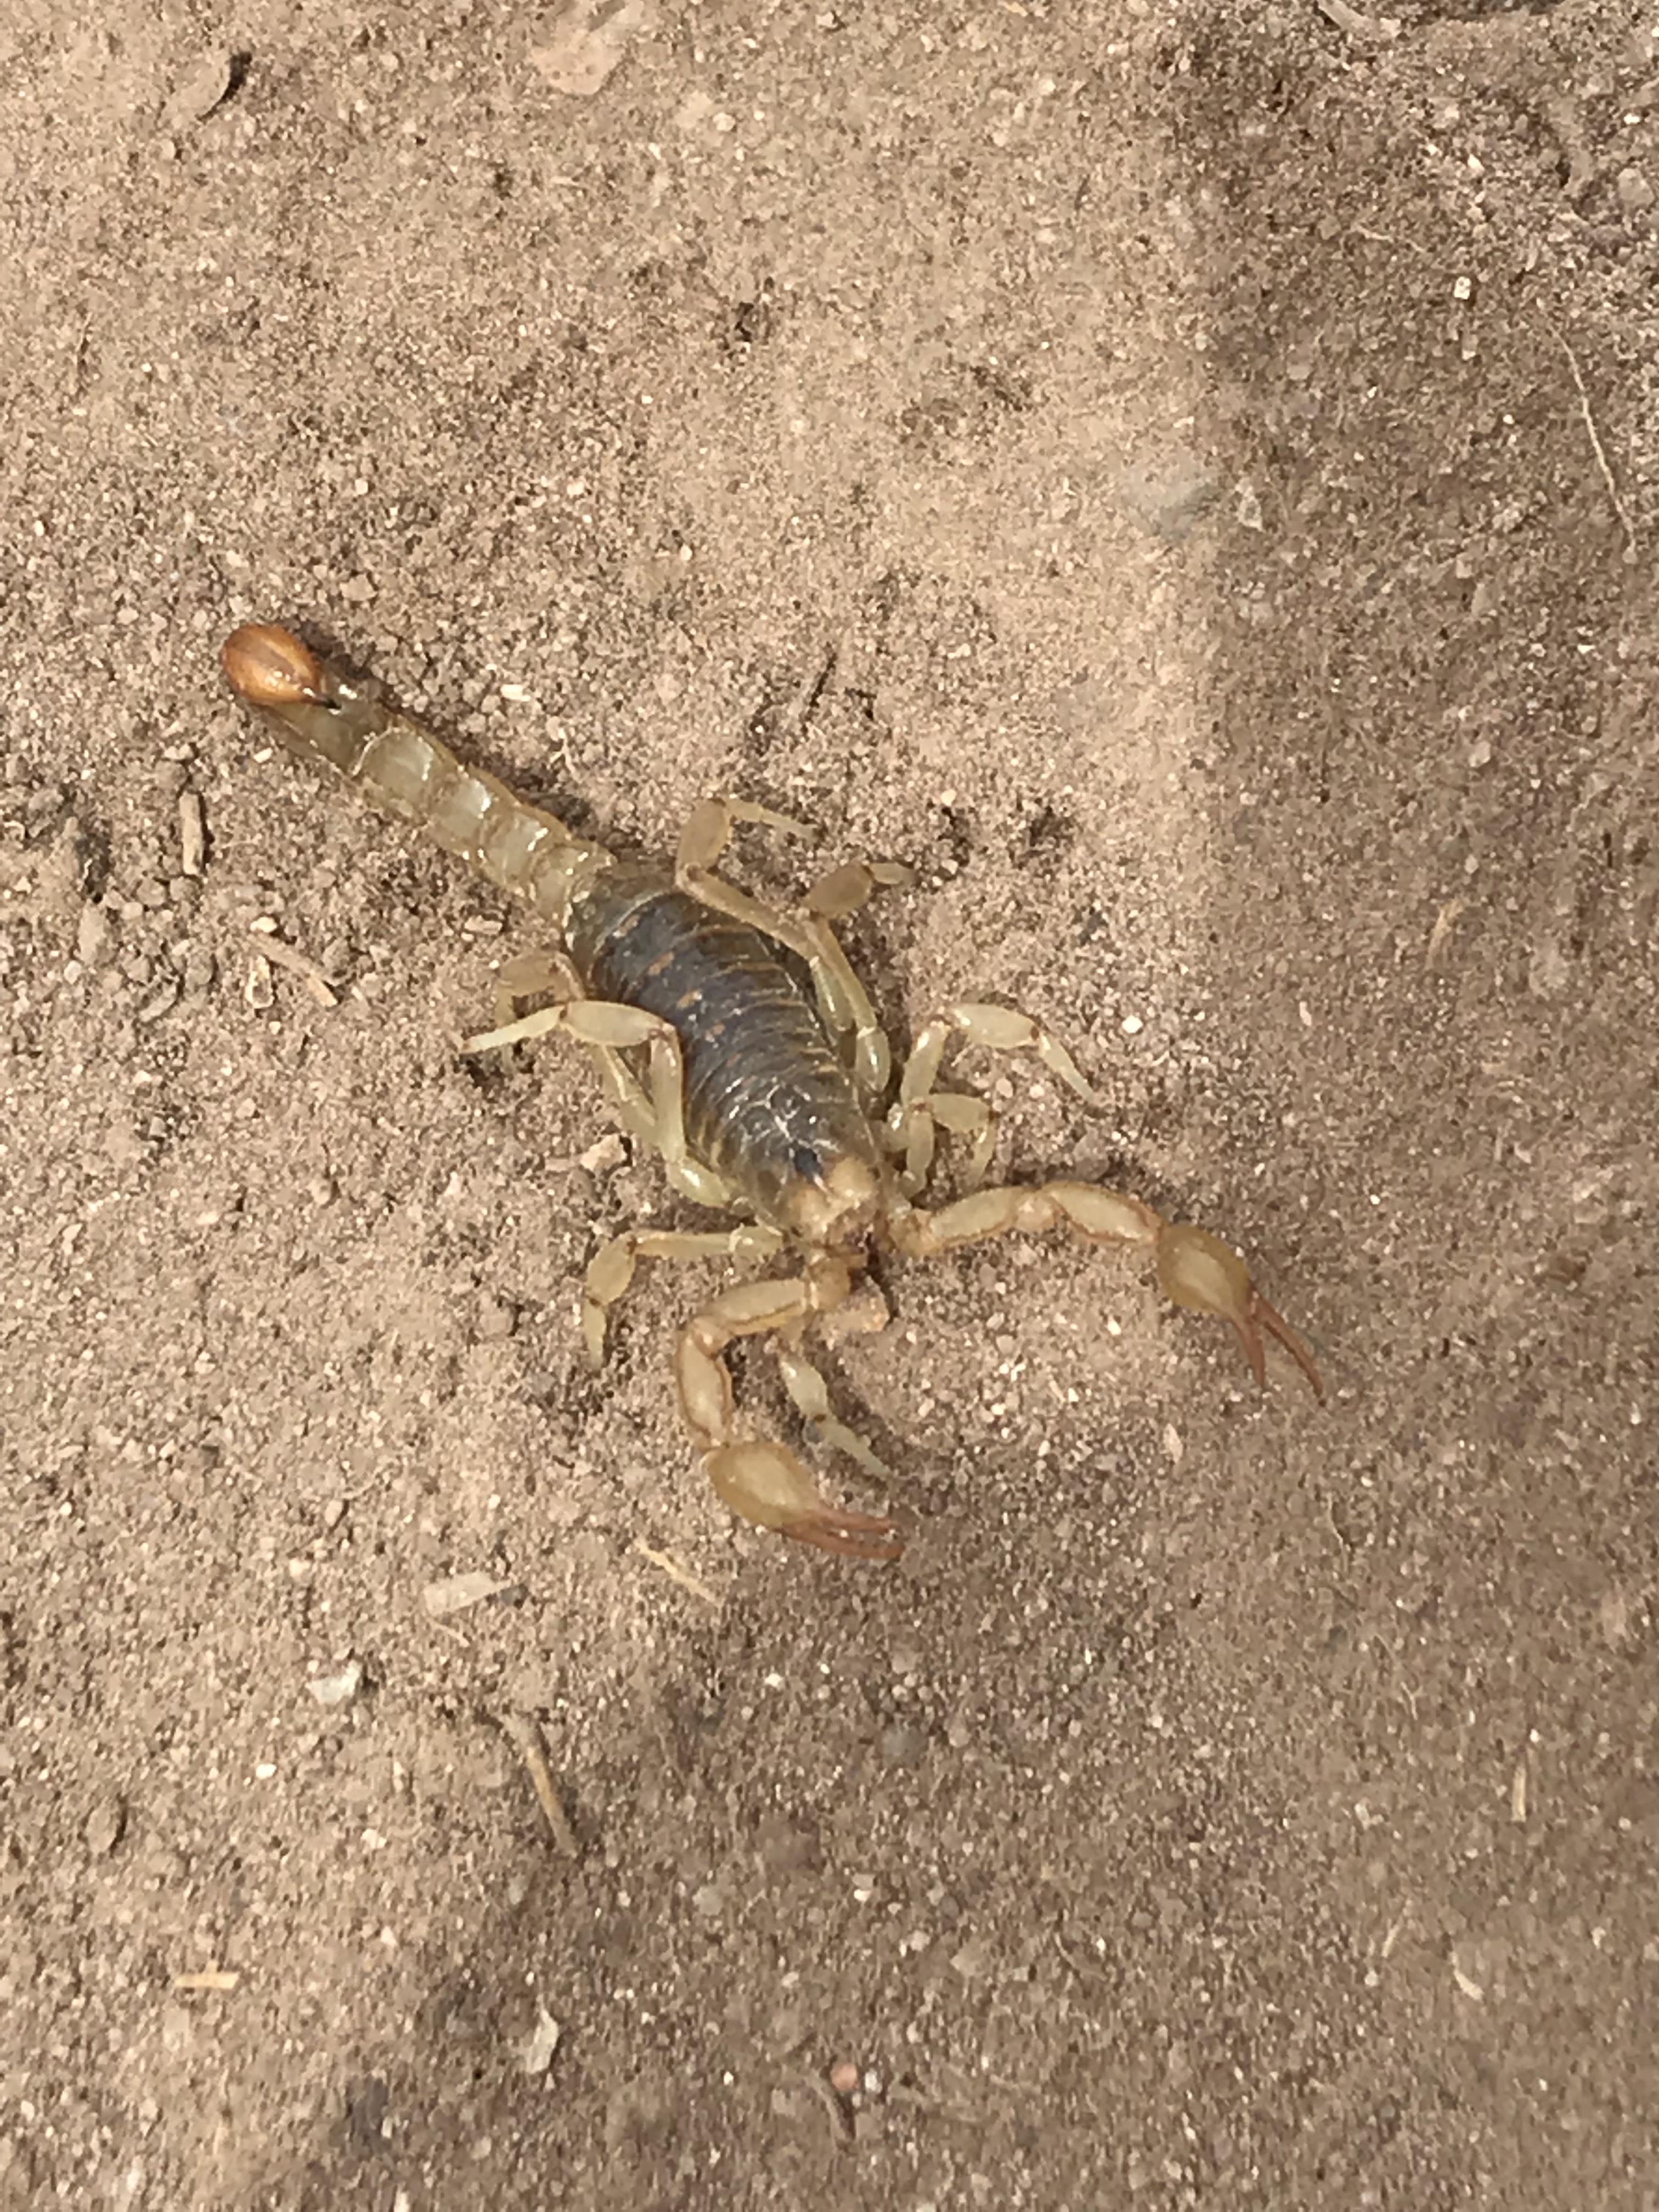
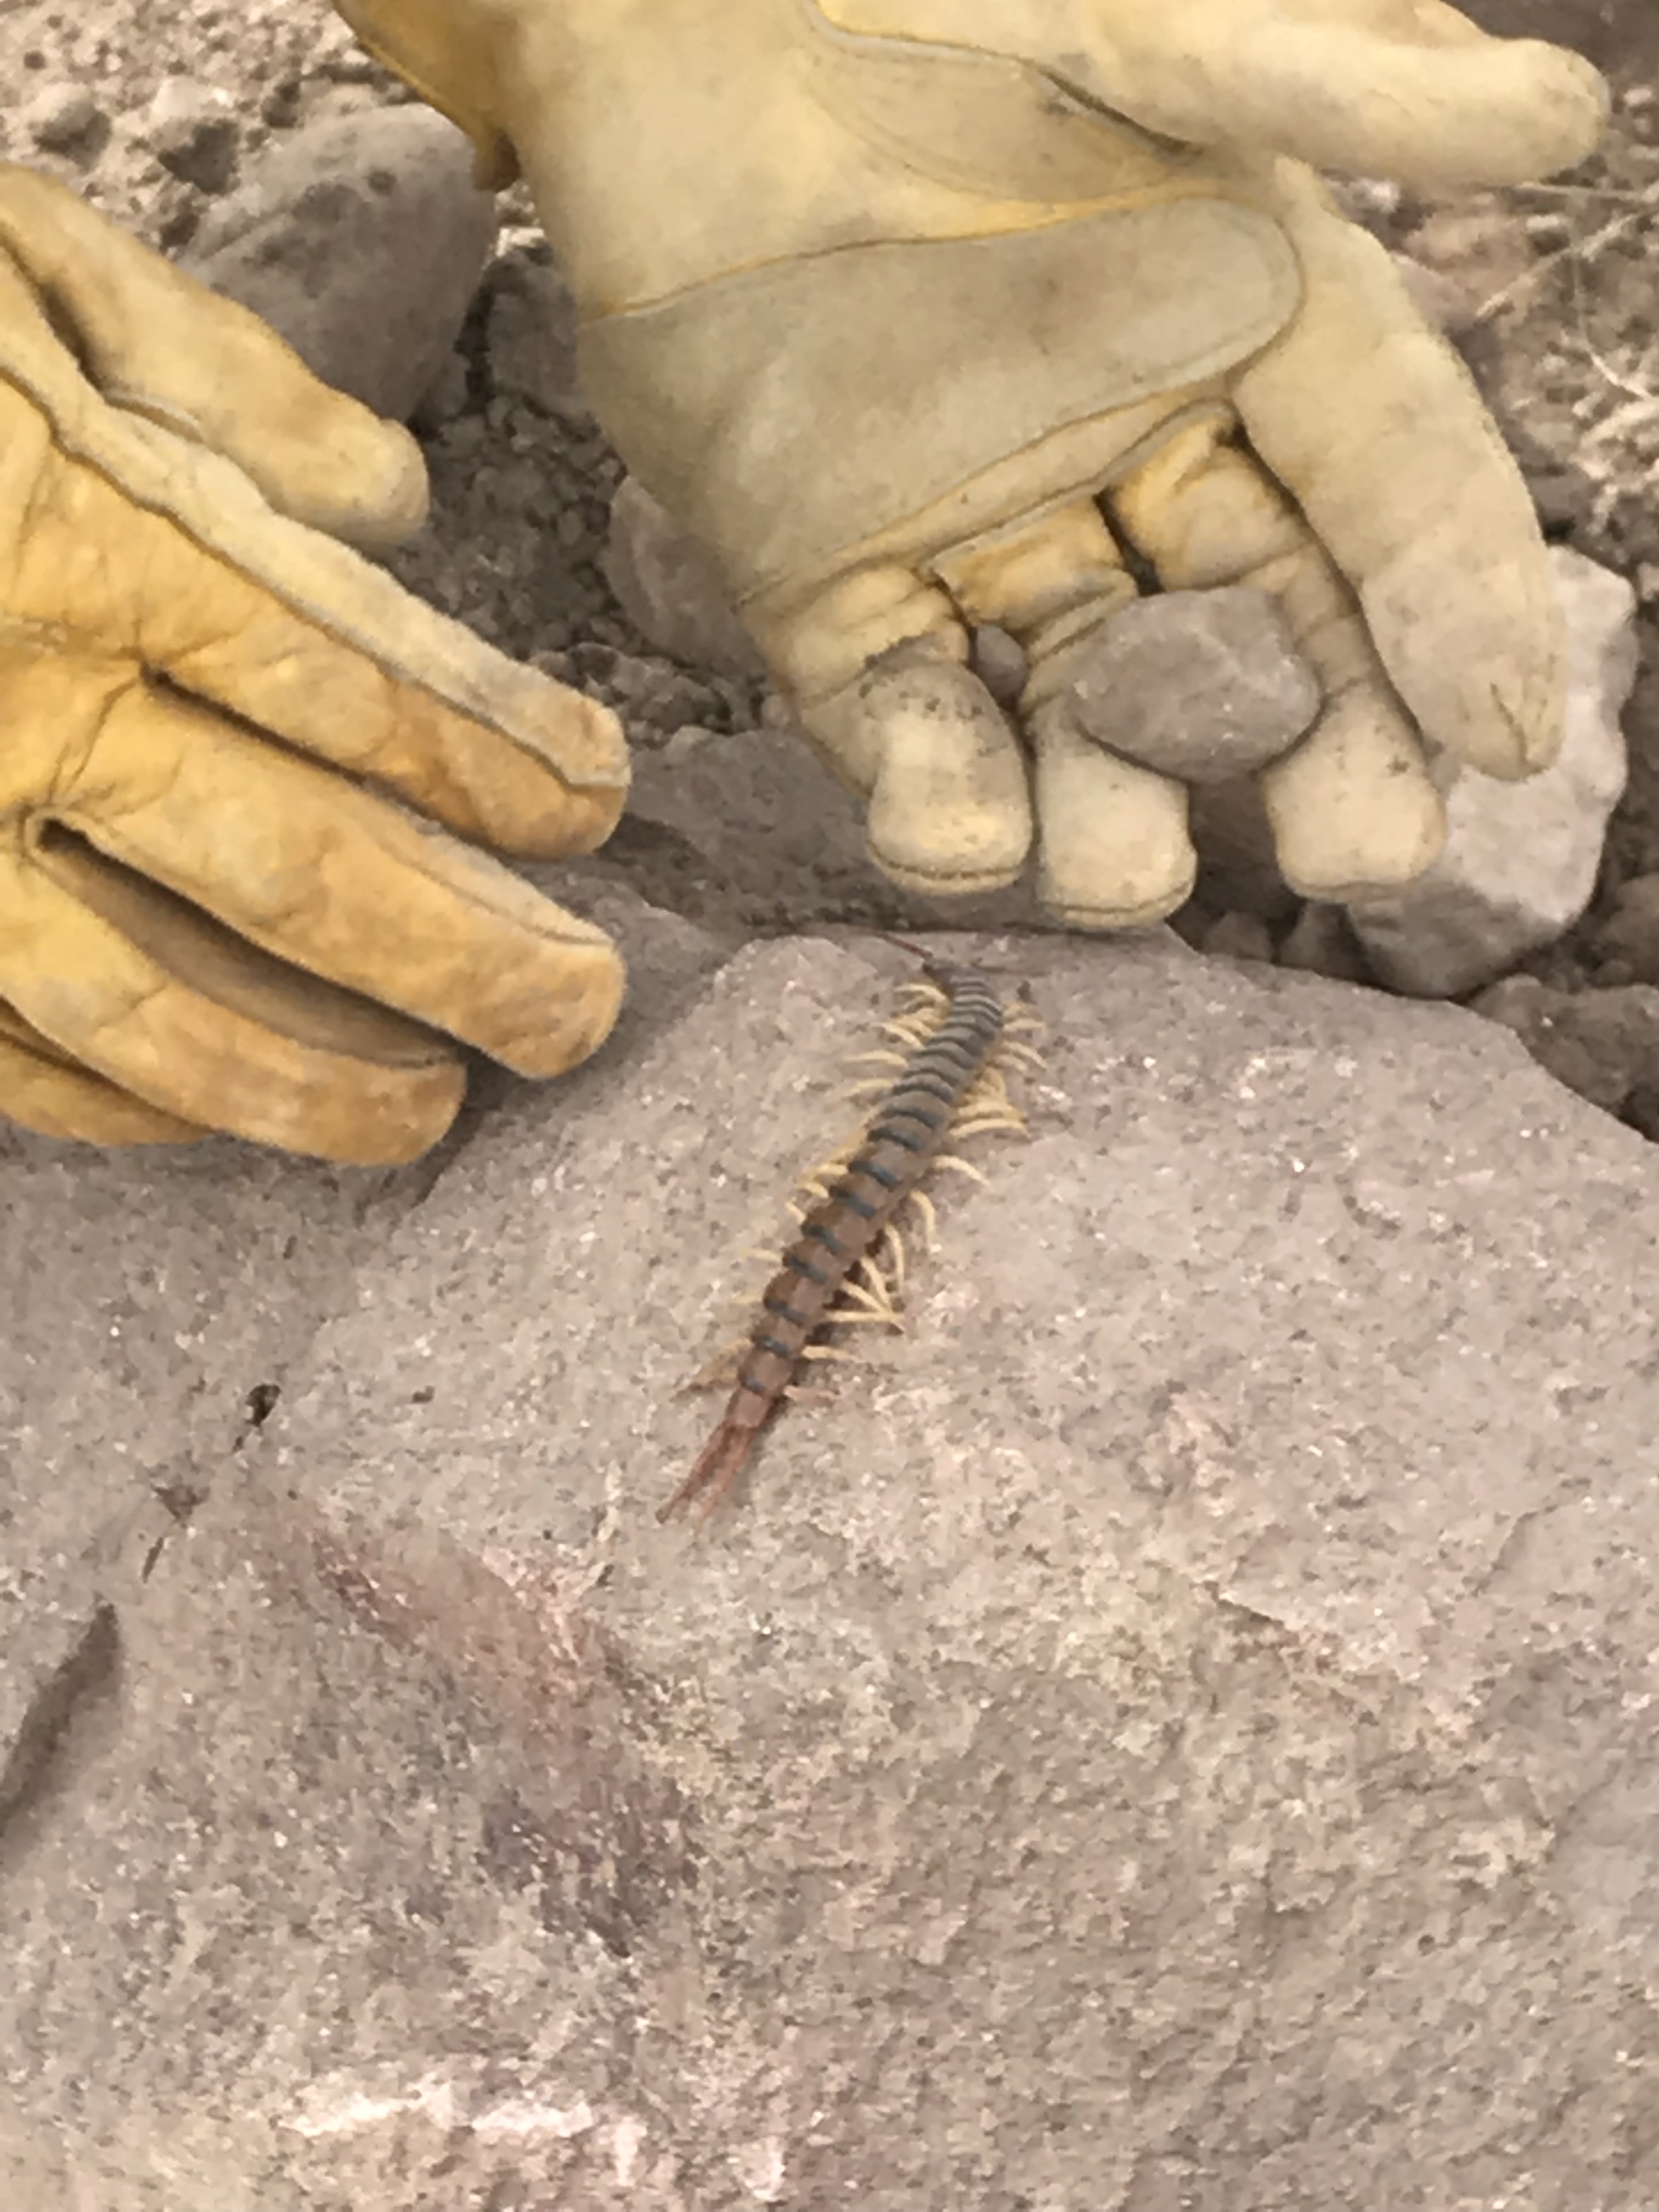
A neighbor that Rachel was less than pleased to meet. In fact, I had to dig him out and relocate him before she would get back to work in the trench.
I had a great business trip to Pennsylvania for a week.
On the way home, between Tuscon and just a mile before the Wilcox exit I always take to top off my fuel tank, I was reminded to look on the bright side and be thankful. Here are just a few things I was thankful for that early evening.
I was thankful it was a beautiful evening in the 60’s with the Sun shining.
I was thankful traffic was light.
I was thankful I was awake, alert, and rested.
I was thankful I had not recently over worked my muscles.
I was thankful I was wearing good walking shoes.
I was thankful the fuel station was within sight of where the truck stalled out.
I was thankful I didn’t get hit walking along side the highway on that beautiful evening.
I was thankful the gas station had a 5 gal diesel can in the back when I couldn’t find one on the shelf.
I was thankful the gas station had automotive work gloves.
I was thankful I was smart enough to NOT fill the fuel can all the way up and only put in the three gallons or so of fuel I would need to then drive the last mile to the gas station.
I was thankful I had two good arms and hands to switch back and forth which was carrying the fuel can back to the truck.
I was thankful I had done this once before so I knew what I was doing this time.
I was thankful I had purchased two new batteries this summer/fall reducing the risk I would run the batteries out of power trying to get the air out of the fuel line before finally getting it started.
I was thankful that I had a crescent wrench in the truck to enable me to open and close the priming valve.
I was thankful that when I heard my phone start playing Chopin’s Death March (https://www.youtube.com/watch?v=aC6S_VuRNGk) as I was consciously trying to remain positive while trying to start a truck that didn’t want to start, I doubled down on my positive thoughts and didn’t take it as a bad omen. I have to say, it was ironic timing for that song to start playing.
I was thankful when the truck started a couple minutes after that
I was thankful I got the truck started while there was still daylight left (not much though).
I was thankful I had bought enough fuel to make it the rest of the way to the gas station.
I was thankful to be back on then road.
I was thankful to make it home without any further unplanned exercise opportunities.
And with that, I bid you farewell till next time. I’ll try not to make it so long between posts. I know I keep saying that only to make it even longer between posts. I’ll try to do better.
Welcome to the food and health section of my blog.
For whatever reason, this weekend I have felt compelled to sit down and start writing about food, health, my limited research on the research on the subject, my personal experiences, and my opinions.
While I hope to not alienate anyone, this subject can be like a religion in some aspects to some people. It kinda is to me. The likelihood that others disagree with or don’t like what I write because it does not align with their views is likely.
My goals of these blog entries will be to:
Share my personal experiences
Point you to other resources that you can further explore should you chose to do so.
Call out issues with government and commercial interests where I see them not being in our best interest.
Get you to question what you have been taught all your life and think for yourself a bit.
Hopefully motivate you to take control of your own health rather than depend on others to do it for you.
To that end, I will attempt to strike a delicate balance of trying to motivate without being preachy. I warn you the probability of failure on this point is high, but I will try to keep it in mind and will look to you to provide feedback and reel me back in if I’m overtly preachy.
For those of you who have subscribed to my blog and are interested in other aspects of my blog pages but have no interest in reading my food and health related blog entries, I will commit to prefixing these blog entries with Food and Health so you can easily identify them and ignore them should you chose to do so. Hopefully that will not be the case.
Diagnosed with hypothyroidism, fatty liver disease, high cholesterol, depression
I was a non-compliant patient and did not take my thyroid medication or my high cholesterol medication.
Easily winded walking up a set of stairs
Drinking 2 liters of Diet Mountain Dew a day to keep me caffeinated so I could function.
Eating from the three food groups: Meat, dairy, highly processed packaged foods.
I rarely at salads but when I did, I buried them in cheese and dressing with a few token vegetables on a bed of lettuce. I’d eat a baked potato filled with butter and sour cream, corn on the cob slathered in salt and butter, french fries and onion rings. That was as minimally processed as the food I ate got and the extent of the vegetables that I would eat.
One night laying on the couch with insomnia watching TV, it happened. A Montel Williams infomercial for some blender was on. They were promoting the blender to make smoothies and all the associated health benefits came on. I watched it rather than flipping the channel. It make me reflect on my health and the health of those around me. It occurred to me that I might be well on my way to a heart attack, with 5 preteen or young teenage kids to still finish raising. Even if I survived through that, my prospects for an active and enjoyable life in retirement were pretty dim in my view. Looking at my parents worsening health issues and lack of activity options due to health issues, I decided that is not what I wanted. I needed to change. That very night, I decided I had to change my eating habits if I wanted to enjoy my golden years and I needed to change immediately. Thus began the research.
That infomercial sold me on the merits of using a blender to blend greens and vegetables with fruit to make them palatable. So I started searching reviews on that blender. From there I spent days reading, watching youtube (which before that I had never really watched), and generally learning. I learned about high power blenders such as the vitamix, green smoothies, and finally the raw vegan diet and living foods diet (basically a raw vegan food diet with an emphasis on including cultured plant foods). Of course there were a number of other diet variations I could have investigated, but these were the ones that caught my eye as being the ultimate/best possible diet and if I was going to make a change and learn to like new foods, I may as well focus on adopting the ultimate/best possible diet. So I chose a mix of raw vegan and living foods diet to follow.
Knowing myself the way I do, I knew I had to go all the way or not bother. I couldn’t make a slow transition and expect to complete the transition. It is just how I operate. I also knew I seriously disliked the taste of nearly every vegetable and green and my exposure to various fruits and berries was fairly limited so this was going to be an uphill battle for me. I would have to start with smoothies as there was no way I was going to eat most veggies and greens in there natural state. I wanted to blend them with fruit that I liked to get them down. Before I made the transition, I would have to take a couple of weeks to buy a vitamix blender off ebay, find a hand full of green smoothie recipes on the internet and give them a try to build up a starting menu of things I could/would eat. After a couple weeks and a few pitchers of smoothies being dumped in the yard for the critters to eat as I wasn’t going to, I was finally ready to make the change. I picked a day, did the shopping to make sure I had everything I needed to make the smoothie recipes I had selected to start with, and so began my journey to regain my health.