Nov 5 – Nov 26
First, a couple of much delayed comments.
- Thanks to those of you who got out and voted.
- Hoping everyone had a good Thanksgiving.
Now that I have internet, land based phone services, fully functional solar power, and pressurized water from a 5k gallon storage tank, I think it is safe to retire the “Setting up Infrastructure” chapter of the blog and move on. The only component of my long term infrastructure still missing as I see it is the rain collection and water filtration systems. Given I can have water delivered for a nominal price and can fill drinking water jugs at friends, the rain collection and water filtration systems are simply going to have to wait a while.
I’ve recently contemplated all projects I have envisioned and how to prioritize them. Sadly none of them have anything to do with starting the construction on the house yet. As we are entering winter and it does get below freezing at night here a few times a week, priority one is to protect all the water lines I just put in from freezing. That project category in and of itself has multiple projects.
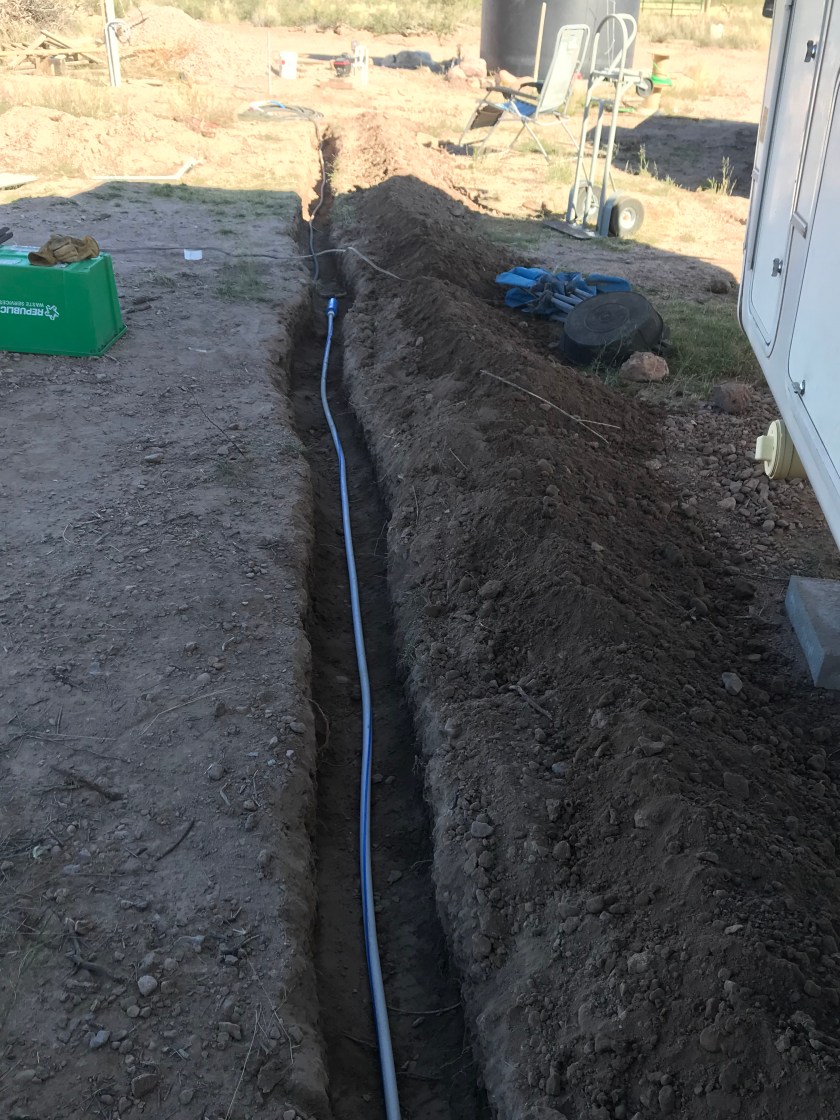
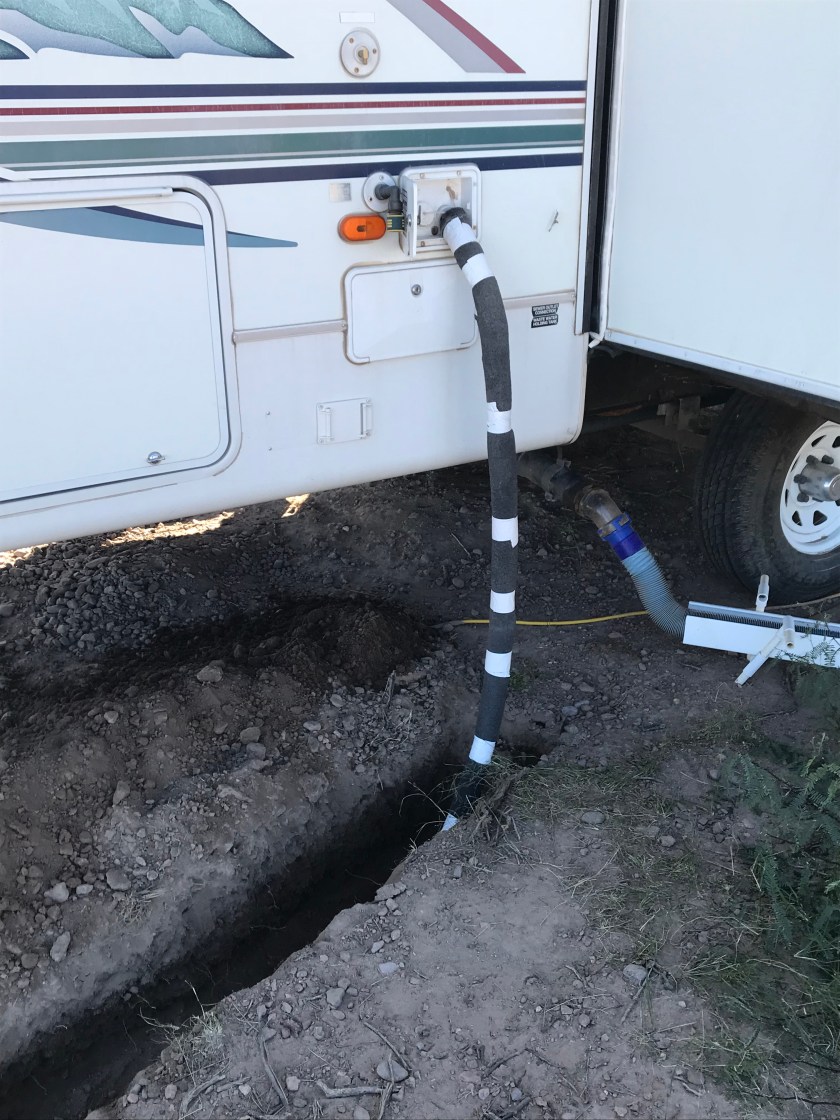
Protecting from the cold project 1: Protect the water hose to the 5th wheel.
Bury the hose from the spigot to the 5th wheel and insulate the hose that runs from the ground to the 5th wheels water inlet.
Protecting from the cold project 2: Protect the water pump and associated plumbing
Although the water pump and associated plumbing sits at a location that will be within the future utility building, there is the immediate need to put some temporary protections around it to prevent it from freezing and yet still provide access to the pump, shutoff valves, and electrical outlet.
Protecting from the cold project 3: Filling the trench that was dug for the water lines back to grade level.
I could easily use the tractor to push the dirt back into the trench and be done. Since when have I done anything the easy way? My thoughts are if I need to dig in this area, I will need to do so by hand. I really have no desire to be digging out big rocks by hand. My solution then is to fill the trench in by hand separating out the large rocks. On the plus side, I get to work on two projects simultaneously as I both get to fill in the trench with dirt and small rocks while I fill the fence line with larger rocks so Sasha doesn’t crawl under the fence.
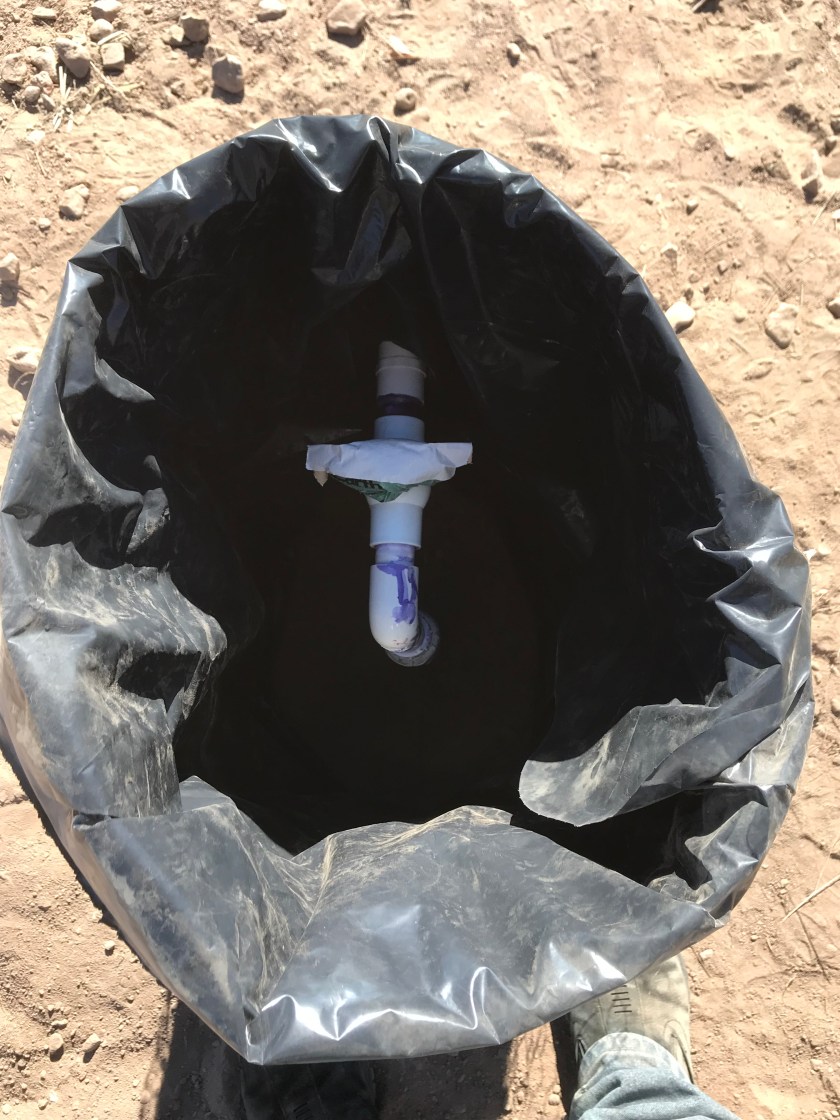
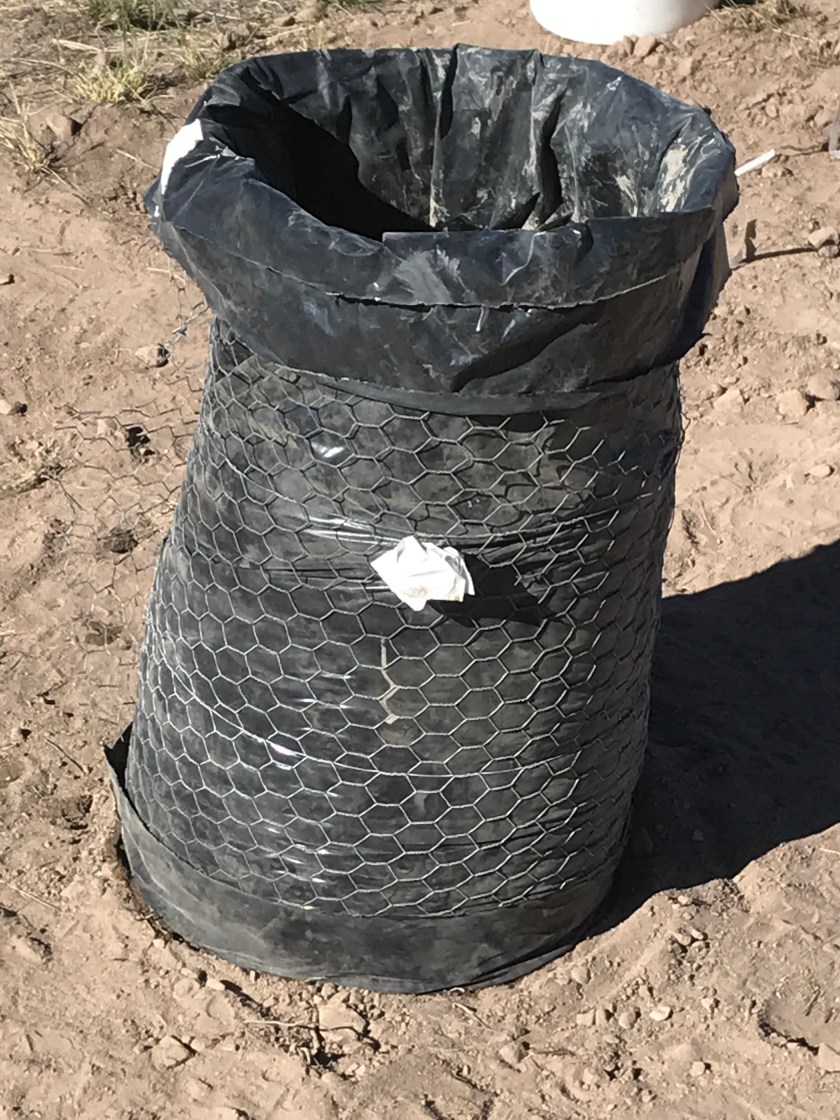
Protecting from the cold project 4: Protect the water spigots from the cold.
There are currently 2 water spigots exposed to the air over by the RV carport and 1 by the future utility building that will be for the garden area and is currently being used to supply the 5th wheel in its current (temporary) location with water. The desire is to put a few inches of heat absorbing material around the plumbing for these spigots to delay the freezing temperatures from reaching them and then subsequently freezing the water in them for a reasonable period of time. I chose to specifically use heat absorbing material rather than insulating material as the material will act as insulation and in the future I can circle back around and build something to further encase them allowing me to pump in heat during the day for the material to absorb further reducing the risk of them freezing during extended cold snaps. Given the changing climate it is anybody’s guess what the future holds.
Protecting from the cold project 5: Protect the water tank’s plumbing
As the exposed plumbing for the water tank is 2″, the risk of it freezing is less than that of the rest of the plumbing so it is last on the list. There are stories of illegals puncturing plastic tanks such as mine with a knife so they can get water from it. My plan to protect from this happening is two fold. 1. Have a readily accessible water source available so they are not inclined to damage the tank for access to water. 2. Wrap the tank in something between stucco and ferro cement. Ferro cement is essentially multiple layers of wire embedded in an inch or two of concrete. As the tank is close to 13′ tall, I don’t think I will cover the full tank initially. I think that the lower 7-8′ would be enough. I can always circle back around and finish it later after I complete more pressing priority projects.
Protecting from the cold project 6: Relocate the RV’s to their long term locations and install foamboard insulation around their base.
At this point, I see this more as a nice to have than a required project for this year. We will see what month it is when I complete the other projects to determine if this one will be tackled this year or next fall.
Once I’ve completed the cold protection projects the fire protection projects are next. I’ll dive into the fire protection projects in detail when the time comes. I’m really hoping to have most of the cold protection projects wrapped up or nearly wrapped up by the end of December.
So, where am I at on my cold protection projects? Let’s review.
Cold protection project 1 complete.

Cold protection project 2 complete.


Cold protection project 3 of back filling the trench is well under way. I would estimate a minimum of 6″ of dirt covering the water pipe the entire length of the trench. Multiple key areas have been filled to grade. Many other areas have been filled to the level of where I plan to install the buried utility marker tape. Rachel seems to enjoy working in the dirt – separating the rock from the dirt, filling the trench with the dirt and the fence line with the rock. We have gotten to a stage in the trench filling that I am minimally worried about the pipes freezing so I will be moving onto the remaining cold protection projects and let Rachel work on filling the trench over the course of the winter. All that said I would estimate this project to be about 60% complete.


Cold protection project 4 of protecting the spigots is 33% complete. In the mean time, temporary measures protect the other 2 spigots from freezing). If things go according to plan, the remaining two spigots will be complete next weekend (not counting time for the concrete to cure).
That leaves protecting the tank pluming (along with protecting the tank itself) and relocating the trailers. I’m really hopeful that I will be able to do the tank project in a weekend. That will leave me a couple of weeks in December to circle back and finish filling in the trench presuming Rachel hasn’t finished it before then.

That brings you up to date.
Stay safe in the winter weather.
Good night all.
Cary

1. You’re Welcome. 🙂 2. I hope you and et.al had a nice Thanksgiving as well. Wow, it would not have occurred to me that your water tank would be in danger (but with your explanation – it makes sense). I have this vision that when they poke a hole in it to get water – water comes flooding out and the tank implodes. 😛
LikeLike
Just curious – did you grease the plastic before you poured the cement in it?
LikeLike